
As I stood in my kitchen, surrounded by the faint aroma of sweetened condensed milk, I couldn’t help but feel a wave of excitement wash over me. This isn’t just any dessert; it’s a 3-Ingredient Greek Yogurt Cheesecake that requires zero baking and minimal effort! With only three wholesome ingredients, you can whip up this creamy delight that’s both healthier and satisfying than traditional cheesecakes. Trust me—it’s perfect for when you’re craving something sweet but don’t want to spend hours slaving over the oven. Plus, it’s freezer-friendly, so you can make it in advance and have a delicious treat waiting for you anytime. Are you ready to create a dessert that’s just as easy as it is indulgent? Let’s dive into this simple yet impressive recipe!

Why Is This Cheesecake So Special?
Simplicity reigns supreme: With only three ingredients, this recipe is perfect for busy individuals seeking a quick solution for dessert.
No Baking Required: Forget about preheating the oven; this cheesecake sets in the fridge, making it ideal for hot summer days.
Delightfully Light: Using Greek yogurt creates a creamy texture that satisfies your sweet tooth without the guilt, making it a great alternative to traditional cheesecake.
Versatility shines: Customize your cheesecake with flavored yogurts or a splash of lemon juice for a fun twist that matches your mood.
Crowd-Pleaser: Impress guests at your next gathering with this show-stopping dessert; they won’t believe it’s so easy to make!
Check out our delicious Apple Crumble Cheesecake for another delightful treat that’s quick to prepare.
Greek Yogurt Cheesecake Ingredients
• Get ready for a deliciously creamy treat!
For the Crust
- Golden Oreo Cookies – Crush these cookies for a perfectly sweet and crumbly crust without needing any butter.
For the Filling
- Greek Yogurt – Opt for full-fat and plain yogurt for a creamy texture that makes this cheesecake healthier and more satisfying.
- Sweetened Condensed Milk – This key ingredient adds the necessary sweetness and helps achieve the smooth consistency of the Greek Yogurt Cheesecake.
Feel free to get creative with variations, but stick to these essentials for the best results!
Step‑by‑Step Instructions for Greek Yogurt Cheesecake
Step 1: Prepare the Crust
Begin by crushing 28 Golden Oreo cookies into fine crumbs using a food processor. This should take about 1-2 minutes. Once crushed, pour the cookie crumbs into a 9-inch round pie dish. Using the back of a spoon, firmly press the crumbs into the bottom and slightly up the sides of the dish to form a crust. Aim for an even layer to ensure stability in your Greek Yogurt Cheesecake.
Step 2: Mix the Filling
In a microwave-safe bowl, combine 4 cups of full-fat plain Greek yogurt with one 14 oz can of sweetened condensed milk. Use a whisk to thoroughly blend the two ingredients until smooth—aim for a uniform consistency. Next, microwave the mixture on high for 3 minutes. After the timer goes off, carefully remove the bowl and stir well to combine; then microwave again for an additional 3 minutes, followed by another thorough stir to integrate the ingredients.
Step 3: Assemble the Cheesecake
Take your delicious filling from the microwave and pour it over the prepared Oreo crust. Use a spoon or spatula to smooth the top, ensuring an even surface. Cover the dish with plastic wrap, and place it in the fridge to chill for at least 6 hours or preferably overnight. This chilling time is essential for your Greek Yogurt Cheesecake to set properly.
Step 4: Finish with a Decorative Touch
Once your cheesecake is fully set, you have the option to elevate its appearance! Crush 4 additional Golden Oreos and sprinkle the crumbs evenly over the top of the cheesecake. This adds a nice crunch and visual appeal. Slice your beautifully set Greek Yogurt Cheesecake into portions and serve it chilled for the best flavor and texture.

Make Ahead Options
These Greek Yogurt Cheesecakes are a dream come true for busy home cooks looking to save time! You can easily prepare the crust by crushing 28 Golden Oreo cookies up to 24 hours ahead and store it covered at room temperature to maintain its crunch. The filling can also be mixed up to 3 days in advance; simply combine 4 cups of Greek yogurt and one 14 oz can of sweetened condensed milk as directed and refrigerate it in an airtight container. When you’re ready to serve, just pour the filling over the crust, chill overnight to set, and optionally sprinkle crushed Oreos on top before cutting into slices. With these make-ahead steps, you’ll impress friends and family with minimal effort!
Expert Tips for Greek Yogurt Cheesecake
• Stir Carefully: Ensure you stir the filling well before heating to prevent any separation, which is key for a smooth Greek Yogurt Cheesecake.
• Crust Consistency: Avoid adding butter to the crust; the moisture from the Golden Oreos is sufficient to bind the crumbs without making it soggy.
• Use the Right Dish: Opt for a deep pie dish to accommodate the filling’s thickness; this helps avoid overflow during the setting process.
• Chill Properly: Allow the cheesecake to chill overnight for the best texture. If you’re in a hurry, a minimum of 6 hours works, but patience is key!
• Freezing Tips: If you want to store the Greek Yogurt Cheesecake for later, wrap it securely in plastic wrap and foil to prevent freezer burn—this dessert keeps well for up to 3 months!
What to Serve with 3-Ingredient Greek Yogurt Cheesecake
Treat your taste buds to an enticing selection of accompaniments that complement the creamy sweetness of this indulgent dessert.
-
Fresh Berries: A medley of strawberries, blueberries, and raspberries adds a vibrant burst of flavor and a refreshing contrast to the rich cheesecake.
-
Mint Sprigs: Garnishing with fresh mint not only enhances presentation but also lends a delightful aromatic finish to each slice.
-
Chocolate Drizzle: A warm, velvety chocolate drizzle elevates this lighter cheesecake to new levels of decadence, making it irresistibly indulgent.
-
Lemon Zest: A sprinkle of zest brightens the flavors, balancing the sweetness with a touch of citrus that invigorates each bite.
-
Whipped Cream: Light, fluffy dollops of whipped cream offer a creamy contrast, perfect for those who crave an extra layer of indulgence with their dessert.
-
Coffee Pairing: Serve with a cup of freshly brewed coffee for a delightful after-dinner treat that perfectly complements the cheesecake’s smoothness.
Elevate your dessert experience by creating a little “cheesecake bar” where guests can mix and match toppings, enhancing the fun and flavor factors!
How to Store and Freeze Greek Yogurt Cheesecake
Fridge: Store your Greek Yogurt Cheesecake in the refrigerator for up to 5 days. Cover it with plastic wrap to retain moisture and freshness.
Freezer: For longer storage, freeze the cheesecake for up to 3 months. Wrap securely in plastic wrap and then in foil to prevent freezer burn.
Thawing: When ready to enjoy, transfer the cheesecake to the fridge and let it thaw overnight for the best texture.
Reheating: This cheesecake is best served chilled, so there’s no need for reheating; simply slice and serve directly from the fridge!
Greek Yogurt Cheesecake Variations
Feel free to unleash your creativity and customize this dessert to suit your taste buds!
- Flavored Yogurt: Use vanilla or lemon Greek yogurt for a delightful twist that brightens up the cheesecake’s flavor. The dessert can transform with just minor adjustments, making it your own signature treat!
- Citrus Zing: Add a tablespoon of lemon juice or zest into the filling for a refreshing citrusy kick. It pairs beautifully with the sweetness of the condensed milk and elevates the flavors.
- Nutty Addition: Stir in a handful of crushed nuts like pecans or walnuts to the crust for an added crunch. This little texture boost can create a delicious contrast with the creamy filling.
- Fruit Topping: Top your cheesecake with fresh berries or bananas for a fruity pop of color and taste. Try serving it with a drizzle of chocolate or caramel sauce for an indulgent twist!
- Chocolate Delight: Mix in some cocoa powder or melted chocolate to the filling for a chocolatey version. You won’t believe how well chocolate complements the Greek yogurt.
- Spice it Up: For a warm aroma, consider adding a dash of cinnamon or nutmeg to the filling. This subtle spice can give your cheesecake a cozy feel just perfect for chilly evenings!
- Minty Fresh: Stir in a few drops of peppermint extract for a cool and refreshing take. Pair this with crushed chocolate cookies in the crust for a delightful chocolate-mint combination.
- Savory Spin: For adventurous palates, consider adding a pinch of salt or using a savory yogurt variant to create the ultimate savory cheesecake experience. It’s unexpected and will intrigue your guests!
For more no-bake treats, explore our delectable Apple Cider Cheesecake or whip up some Fried Strawberry Cheesecake for something extra special!

Greek Yogurt Cheesecake Recipe FAQs
How do I choose ripe ingredients for my Greek Yogurt Cheesecake?
Absolutely! For this recipe, opt for full-fat plain Greek yogurt as it provides a rich flavor and creamy texture. When selecting Golden Oreo cookies, check for freshness—look for packages without any dark spots or damage to ensure optimal taste.
What’s the best way to store Greek Yogurt Cheesecake?
Very good question! Store your cheesecake covered with plastic wrap in the fridge for up to 5 days. This helps retain its moisture and freshness. If you need longer storage, consider freezing it.
Can I freeze my Greek Yogurt Cheesecake?
Yes, you can freeze it! To freeze, wrap the Greek Yogurt Cheesecake securely in plastic wrap followed by aluminum foil to prevent freezer burn. It can be stored for up to 3 months. When you’re ready to enjoy, place it in the fridge overnight to thaw gently.
I’m having trouble with the filling consistency; what should I do?
No worries! If you find that your filling is separating, make sure you’re stirring thoroughly before microwaving. Heat it in short intervals of 3 minutes, stirring well in between to promote an even texture. If it happens again, you can always blend the mixture with a hand mixer for a smoother result.
Are there any dietary considerations for my guests?
Of course! This Greek Yogurt Cheesecake is vegetarian-friendly. However, always check for allergies related to dairy and gluten, especially since the crust uses Golden Oreos. You can also easily customize the cheesecake using gluten-free cookies or alternative sweeteners if needed.
How long does this cheesecake need to set?
Great question! For the best results, refrigerate your cheesecake for at least 6 hours, but overnight is preferable to ensure it’s completely set and achieves that luscious creamy texture you’re looking for. Enjoy!
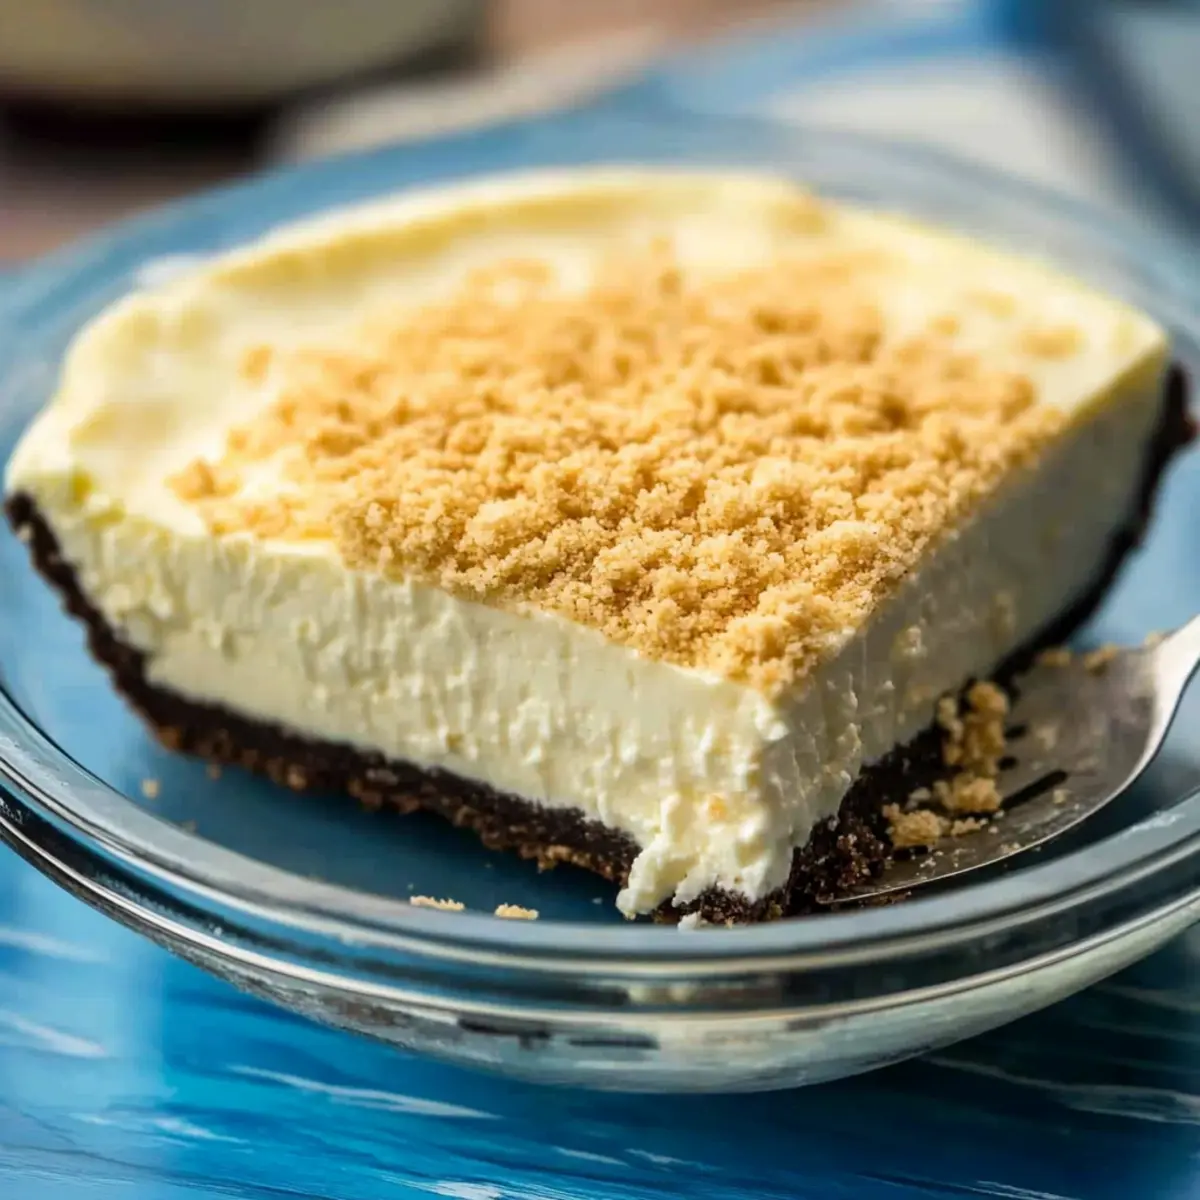
Creamy Greek Yogurt Cheesecake: Simply Irresistible and Guilt-Free
Ingredients
Equipment
Method
- Begin by crushing 28 Golden Oreo cookies into fine crumbs using a food processor. Pour the cookie crumbs into a 9-inch round pie dish and firmly press them to form a crust.
- In a microwave-safe bowl, combine 4 cups of full-fat plain Greek yogurt with one 14 oz can of sweetened condensed milk. Whisk until smooth and microwave for 3 minutes, followed by stirring and microwaving for another 3 minutes.
- Pour the filling over the prepared crust and smooth the top. Cover with plastic wrap and chill in the fridge for at least 6 hours or overnight.
- Once set, crush 4 additional Golden Oreos and sprinkle on top. Slice and serve chilled.
Leave a Reply