
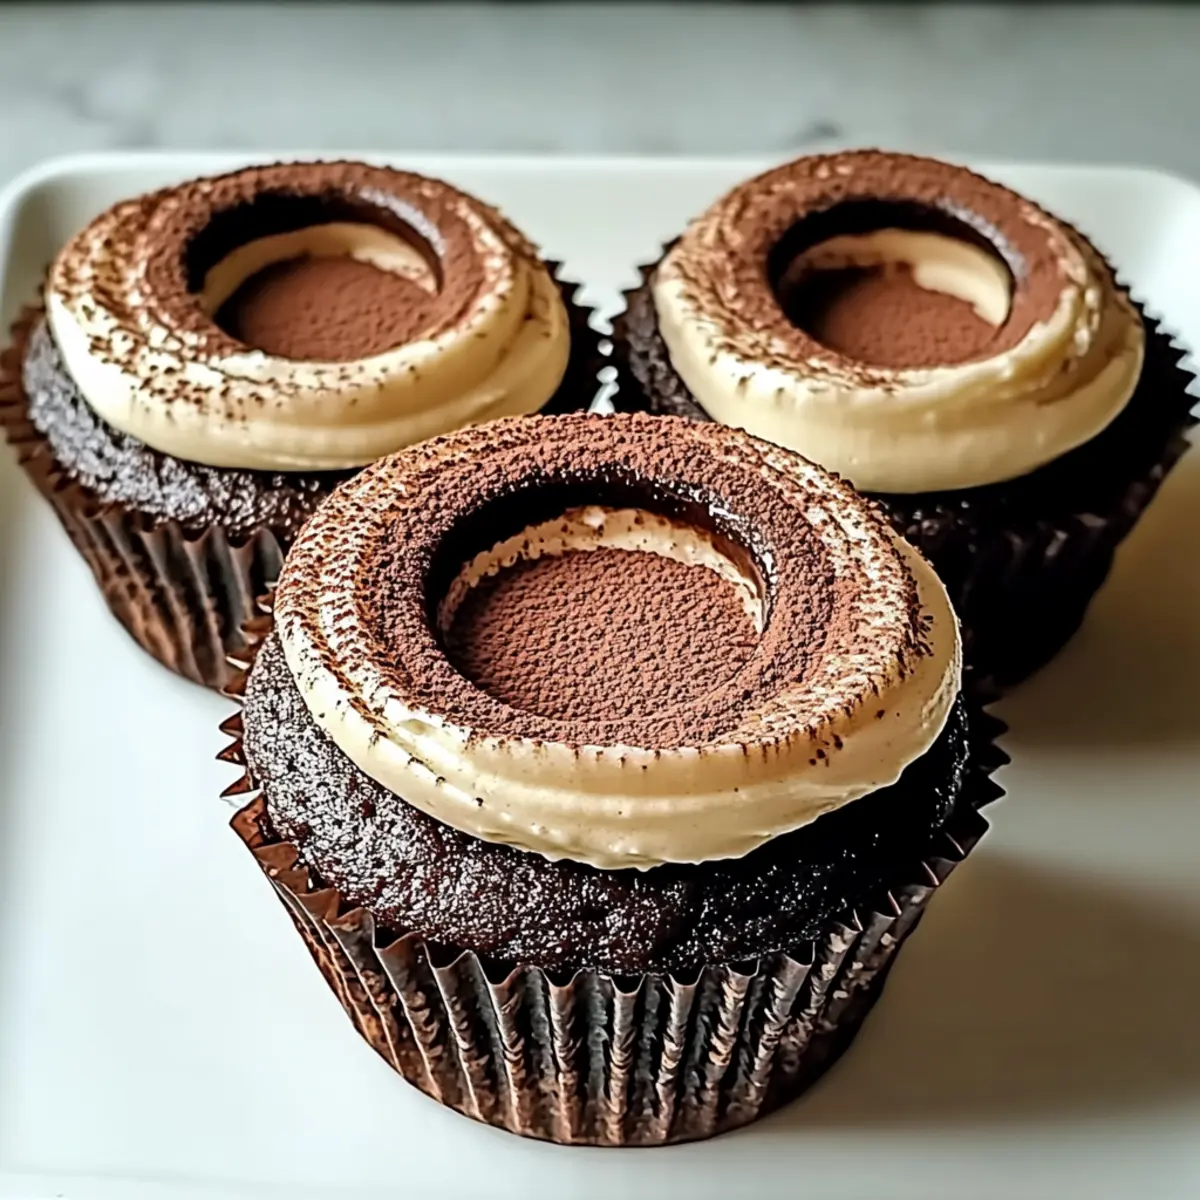
I caught a glimpse of someone’s dessert table, and my mouth watered at the sight of Chocolate Tiramisu Cupcakes nestled amongst an array of treats. The moment I dove into one, I was transported to a cozy café in Italy—rich coffee, creamy mascarpone, and a delightful chocolate hue enveloped my senses. These cupcakes aren’t just a visual feast; they come together in a breeze, making them perfect for a last-minute gathering or a sweet pick-me-up on a weekday. With the option to easily swap in gluten-free ingredients, everyone can savor their luscious, nostalgic flavors. So why not unleash your inner baker and try making these irresistible Chocolate Tiramisu Cupcakes? You may just find yourself whispering sweet nothings to each delightful bite—what twist will you add to make them your own?
Why are these cupcakes so irresistible?
Irresistible flavor: These Chocolate Tiramisu Cupcakes blend rich cocoa with creamy mascarpone, creating a coffee-infused delight that’s impossible to resist.
Quick and easy: With a preparation time of under 30 minutes, you’ll be enjoying these decadent treats in no time!
Customizable options: Swap in gluten-free ingredients or experiment with various fillings for a unique twist every time.
Crowd-pleaser appeal: Perfect for gatherings, they combine the charm of cupcakes with the indulgence of classic tiramisu, leaving everyone wanting more.
Perfect pairing: Serve alongside a scoop of vanilla ice cream or some fresh berries for an elevated dessert experience. Don’t forget to check out how to make Espresso Cupcakes Espresso for another delightful treat!
Chocolate Tiramisu Cupcakes Ingredients
• Here’s what you need to create these irresistible Chocolate Tiramisu Cupcakes!
For the Cupcakes
- All-Purpose Flour – A crucial ingredient for structure; swap with gluten-free all-purpose blend for a gluten-free version.
- Cocoa Powder – Delivers that rich chocolate flavor; use dark cocoa for an extra deep taste.
- Baking Powder – Leavens the cupcakes, ensuring they come out light and fluffy; check for freshness before using.
- Granulated Sugar – Sweetens the batter and balances flavors; coconut sugar makes for a lovely alternative.
- Eggs – Binds the ingredients together and adds moisture; flax eggs can be used to keep it plant-based.
- Milk – Brings moisture and richness; almond milk serves as an excellent dairy-free option.
- Vegetable Oil – Adds tenderness to the cupcakes; melted butter is a delicious alternative.
- Espresso – Infuses the signature coffee flavor that pairs beautifully with chocolate; instant coffee can be used as a quick substitute.
For the Filling
- Mascarpone Cheese – Provides that creamy, dreamy filling reminiscent of traditional tiramisu layers; ricotta can be used for a different texture.
- Espresso (for filling) – Enhances the coffee flavor in the filling for an authentic tiramisu experience.
For Dusting
- Cocoa Powder – A finishing touch that enhances presentation and adds a little extra flavor; definitely a key element for these Chocolate Tiramisu Cupcakes!
Step‑by‑Step Instructions for Chocolate Tiramisu Cupcakes
Step 1: Preheat Oven & Prepare Liners
Start by preheating your oven to 350°F (175°C). While it’s warming up, line a muffin tin with colorful cupcake liners to make your Chocolate Tiramisu Cupcakes visually appealing. This preparation will ensure that your cupcakes bake evenly and are easy to remove after they cool.
Step 2: Mix Dry Ingredients
In a large mixing bowl, whisk together the all-purpose flour, cocoa powder, baking powder, and granulated sugar until they are well combined. Look for a uniform color and consistency without clumps—this is crucial to enhance the chocolate flavor in your cupcakes. Set the bowl aside as you prepare the wet ingredients.
Step 3: Combine Wet Ingredients
In a separate bowl, whisk the eggs, milk, and vegetable oil until smooth and fully blended. The mixture should be light in color and creamy. This step is key for incorporating moisture into the Chocolate Tiramisu Cupcakes, creating a rich texture.
Step 4: Combine Mixtures
Gradually pour the wet ingredients into the dry ingredients, using a spatula to fold them together gently. Be careful not to overmix; a few lumps are okay. The goal is to combine them until just incorporated, allowing the cupcakes to remain fluffy and light when baked.
Step 5: Bake the Cupcakes
Spoon the batter into the prepared cupcake liners, filling each about two-thirds full to allow room for rising. Place the muffin tin in the preheated oven and bake for 18-20 minutes. To check for doneness, insert a toothpick into the center of a cupcake; it should come out clean or with just a few moist crumbs.
Step 6: Prepare Filling
While the cupcakes are baking, whip together the mascarpone cheese and espresso in a bowl using an electric mixer until light and fluffy. This creamy filling will offer that classic tiramisu taste and should be smooth with a slightly glossy texture. Set aside the mixture in the refrigerator to keep it cool.
Step 7: Assemble Cupcakes
Once the cupcakes are completely cooled, carefully cut off the tops and scoop out a small amount of cake from the center. Be gentle to maintain the shape. Fill each cupcake with the espresso mascarpone mixture, then replace the tops to create a delightful hidden surprise inside each Chocolate Tiramisu Cupcake.
Step 8: Dust & Serve
Before serving, dust the tops of the cupcakes generously with cocoa powder for a rich, elegant finish. This final touch adds both flavor and aesthetic appeal, making your delicious Chocolate Tiramisu Cupcakes irresistible to all. Serve them at your gathering or enjoy them as a personal treat!
Expert Tips for Chocolate Tiramisu Cupcakes
- Accurate Measurements: Ensure you measure flour and liquids accurately to avoid dryness in your cupcakes; a kitchen scale can help with this.
- Gentle Mixing: Avoid overmixing the batter to keep your Chocolate Tiramisu Cupcakes light and airy. A few lumps are perfectly fine!
- Cool Before Filling: Let your cupcakes cool completely before cutting and filling to maintain their ideal texture and prevent melting the filling.
- Store Properly: Keep cupcakes in an airtight container for freshness; they can also be made a day in advance, making them perfect for busy days.
- Filling Variations: Feel free to experiment with flavored liqueurs in the filling for a unique twist that’ll enhance the coffee and chocolate experience.
Chocolate Tiramisu Cupcakes Variations
Feel free to let your imagination roam as you personalize these delightful cupcakes with a variety of twists that tantalize the senses.
- Dairy-Free: Use almond or coconut milk instead of regular milk and swap mascarpone for coconut whipped cream for a creamy vegan filling.
- Gluten-Free: Substitute all-purpose flour with a gluten-free blend for a delectable treat that everyone can enjoy.
- Mini Cupcakes: Adjust baking time and create mini versions for delightful bite-sized indulgences that are perfect for parties.
- Extra Chocolate: Fold in chocolate chips or chunks into the batter for added flavor and a divine chocolate explosion.
- Nutty Delight: Add crushed hazelnuts or almonds to the batter or sprinkle on top for a lovely textural contrast.
- Flavored Fillings: Try infusing the espresso filling with flavored liqueurs like amaretto or hazelnut for an exciting twist that elevates the classic dessert.
- Fresh Berries: Top with fresh raspberries or strawberries for a bright and fruity flavor that balances the rich chocolate.
- Mocha Variation: Mix a bit of instant coffee granules into your batter to intensify the coffee flavor for true mocha lovers!
And if you’re curious for more heavenly recipes, have a look at our scrumptious Tiramisu Sandwich Cookies or treat yourself to some easy Chocolate Chip Cookies—you won’t be disappointed!
Storage Tips for Chocolate Tiramisu Cupcakes
- Room Temperature: Keep cupcakes covered at room temperature for up to 1 day; this keeps them moist and ready to enjoy.
- Fridge: Store in an airtight container in the fridge for up to 3 days; this helps maintain their freshness while allowing flavors to meld beautifully.
- Freezer: For longer-term storage, individually wrap cupcakes in plastic wrap and freeze for up to 2 months; allow thawing at room temperature before filling.
- Reheating: Reheat filled cupcakes gently in the microwave for about 10-15 seconds if desired; this warms the decadent chocolate and cream filling, enhancing your treat!
What to Serve with Chocolate Tiramisu Cupcakes
Indulging in these delightful Chocolate Tiramisu Cupcakes is a treat, and pairing them with the right accompaniments enhances the experience even further.
-
Rich Vanilla Ice Cream: Creamy and cold, it complements the cupcakes’ rich flavors while providing a pleasing contrast in temperature. Scoop it on the side or even atop each cupcake for a luxurious treat.
-
Fresh Berries: Bright and juicy, strawberries or raspberries add a tangy freshness and vibrant color, balancing the sweetness of the cupcakes beautifully. Their natural acidity enhances the chocolate and coffee notes harmoniously.
-
Espresso Shots: A bold coffee boost wakes up the taste buds and mirrors the espresso flavor in the cupcakes. The robust bitterness of a strong espresso creates a delightful contrast and rounds out your dessert experience.
-
Whipped Cream: Light, fluffy whipped cream is the perfect topping for these cupcakes. Not only does it add a lovely texture, but its subtle sweetness and airy quality complement the rich mascarpone filling wonderfully.
-
Chocolate Shavings: For a touch of elegance, sprinkle chocolate shavings on top. They add texture and a decadent chocolate flavor that perfectly supports the cupcake’s chocolate base.
-
Mint Sprigs: A refreshing mint leaf not only adds a bright pop of color but also offers a fresh, aromatic touch that enhances the sophisticated flavor profile of the cupcake.
-
Hazelnut Praline: Crunchy and sweet, this delightful accompaniment adds depth and texture. Crumbled hazelnut praline on top of the whipped cream brings an added layer of flavor that makes each bite more exciting.
-
Coconut Flakes: Toasted coconut adds a subtle sweetness and chewy texture, creating a tropical twist that pairs surprisingly well with the rich flavors of the tiramisu cupcakes.
-
Sweet Dessert Wine: A light, sweet dessert wine like Moscato can elevate your dessert experience. Its fruity notes resonate with the chocolate and coffee, adding a sophisticated finish to your meal.
Make Ahead Options
These Chocolate Tiramisu Cupcakes are a lifesaver for busy home cooks! You can prepare the cupcake batter up to 24 hours in advance—just mix and refrigerate it in an airtight container to keep it fresh. The cupcakes can be baked and stored in an airtight container at room temperature for up to 3 days. For optimal taste, wait to fill them with the espresso mascarpone mixture until just before serving, ensuring they remain light and delicious. If you need to, you can also freeze baked cupcakes for up to two months; just thaw completely before filling. With these make-ahead options, you’ll have a delightful treat ready to impress with minimal last-minute effort!

Chocolate Tiramisu Cupcakes Recipe FAQs
How do I know if my ingredients are ripe or fresh?
Absolutely! For the best flavor and texture in your Chocolate Tiramisu Cupcakes, use fresh ingredients. Check your eggs for freshness by placing them in water; fresh eggs sink to the bottom, while older ones float. For milk, ensure it’s within the use-by date, and give a sniff test to detect spoilage. Additionally, look for baking powder that’s still active—give it a test by adding a teaspoon to hot water; if it bubbles vigorously, it’s good to go.
What’s the best way to store these cupcakes, and how long do they last?
Very good question! Chocolate Tiramisu Cupcakes are best enjoyed fresh, but they can be stored in an airtight container. If left at room temperature, they can stay fresh for about 1 day. In the fridge, they last up to 3 days, but be sure to seal them well to prevent drying out. If you have leftovers, wrapping them individually in plastic wrap before placing them in the fridge is a great way to keep them moist.
Can I freeze Chocolate Tiramisu Cupcakes?
Absolutely! Freezing is a great way to keep these cupcakes for a rainy day. To do so, allow them to cool completely after baking, then wrap each cupcake in plastic wrap and place them in a freezer-safe container or zip-top bag. They can be frozen for up to 2 months. When you’re ready to enjoy one, simply thaw it at room temperature for a couple of hours before filling and serving.
What should I do if my cupcakes come out too dry?
If your Chocolate Tiramisu Cupcakes turn out a bit dry, don’t fret! This can happen if the flour is over-measured or if they were overbaked. To remedy this in the future, make sure to lightly spoon the flour into your measuring cup instead of scooping it directly, which can pack it in too tightly. Additionally, consider reducing your baking time by a minute or two during your next bake and always check for doneness a little earlier.
Are there any dietary considerations with these ingredients?
When making your Chocolate Tiramisu Cupcakes, it’s important to consider dietary restrictions. For gluten-free options, substitute regular flour with a gluten-free all-purpose blend. If you’re catering to vegans, you can replace eggs with flax eggs (1 tablespoon flaxseed meal + 2.5 tablespoons water for each egg) and use dairy-free milk like almond milk. Always check your individual ingredients for allergens and maintain a safe preparation environment if food allergies are a concern.
Irresistibly Creamy Chocolate Tiramisu Cupcakes to Delight You
Ingredients
Equipment
Method
- Preheat your oven to 350°F (175°C) and line a muffin tin with colorful cupcake liners.
- In a large bowl, whisk together the flour, cocoa powder, baking powder, and sugar until well combined.
- In a separate bowl, whisk the eggs, milk, and vegetable oil until smooth and blended.
- Gradually pour wet ingredients into dry ingredients and fold gently until just combined.
- Fill cupcake liners two-thirds full and bake for 18-20 minutes. Check with a toothpick.
- While baking, whip mascarpone cheese and espresso until light and fluffy; refrigerate.
- Once cooled, cut off tops and scoop out a small amount of cake from the center, then fill with mascarpone mixture.
- Dust the tops with cocoa powder before serving.
Leave a Reply