
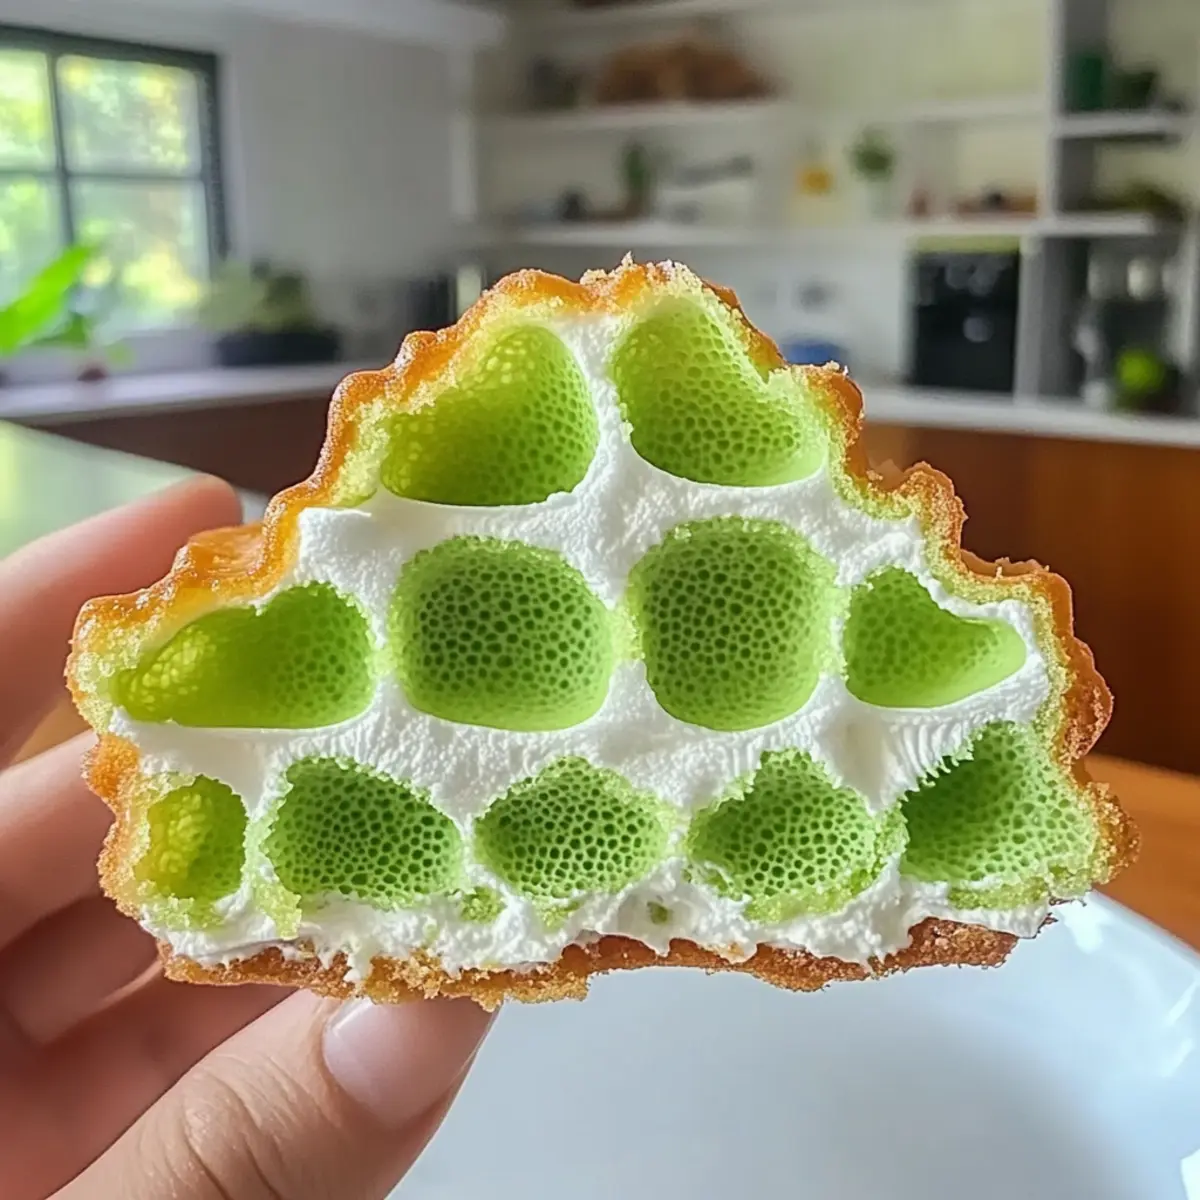
As I stood in my kitchen, the aroma of pandan and coconut wafting through the air, I felt an undeniable glow of excitement. It was time to create my Easy Banh Bo Nuong, a delightful Vietnamese Honeycomb Cake that’s both gluten-free and dairy-free. This enchanting dessert not only looks stunning with its unique honeycomb pattern but also offers a wonderfully light texture that melts in your mouth. With minimal prep time and an effortless baking process, it’s perfect for impressing guests or enjoying as a sweet treat at home. Plus, its vibrant flavors make it a fantastic addition to any occasion! Ready to dive into this culinary adventure? Let’s get started and unlock the magic of Vietnamese cuisine together!
Why is Vietnamese Honeycomb Cake a must-try?
Unique and Flavorful: The combination of pandan and coconut creates a delightful experience that’s hard to resist.
Gluten-Free Goodness: Perfect for those avoiding gluten, this cake ensures everyone can indulge without worry.
Quick Preparation: With minimal prep time, you can whip this up even on busy days.
A Showstopper: Its stunning honeycomb design will wow your guests at any gathering. Pair it with fresh mango slices or a dollop of yogurt for a refreshing twist, just like with a delicious Carrot Cream Cake.
Adaptable for Versatility: Feel free to experiment with flavors by adding almond milk or even spices like ginger for a unique twist.
This Easy Banh Bo Nuong is not just a dessert; it’s a delightful treat that leaves a lasting impression!
Vietnamese Honeycomb Cake Ingredients
For the Cake
• Coconut Milk – Provides richness and moisture; use full-fat for the best results.
• Pandan Leaves – Contributes a unique flavor and vibrant color; can replace with 1 tsp of pandan extract if needed.
• Eggs – Offer structure and leavening; large eggs work best for optimal results.
• Granulated Sugar – Sweetens the cake; adjust based on your sweetness preference.
• Pandan Extract – Enhances the pandan flavor; use 0.5 tsp or double if using extract instead of leaves.
• Vanilla Extract – Adds depth to flavor, enriching the overall taste.
• Tapioca Starch – Essential for that signature light and airy texture; no substitutes recommended.
• Single Acting Baking Powder – Acts as a leavening agent; ensures the cake rises properly.
• Salt – Balances sweetness perfectly.
Ready to indulge in this delightful Vietnamese Honeycomb Cake? Let’s gather those ingredients and get baking!
Step‑by‑Step Instructions for Vietnamese Honeycomb Cake
Step 1: Preheat Oven and Prepare Pan
Begin by preheating your oven to 350°F (177°C). While the oven heats, place your bundt pan inside for about 10 minutes to ensure it’s warm, which helps release the cake easily after baking. The pan should feel warm to the touch, signaling that it’s ready for the batter.
Step 2: Prepare Coconut Mixture
In a blender, combine 14 oz of full-fat coconut milk with 10 pandan leaves. Blend until smooth, then strain the mixture through a fine sieve to remove any flecks and achieve a silky texture. This flavorful coconut blend will serve as the base, adding moisture and richness to your Vietnamese Honeycomb Cake.
Step 3: Combine Wet Ingredients
In a large mixing bowl, gently whisk the strained coconut mixture with 5 large eggs and 1 1/3 cups granulated sugar. It’s essential to whisk slowly to minimize incorporating air bubbles. The mixture should be well-combined, creamy, and smooth—this step forms the light foundation of your cake.
Step 4: Add Flavorings
Stir in 0.5 tsp pandan extract and 1 tsp vanilla extract into your wet ingredient mixture. This addition deepens the cake’s aromatic profile, enhancing the distinctive pandan flavor. Make sure to mix gently, allowing the flavors to meld together without creating excess foam.
Step 5: Mix Dry Ingredients
In a separate bowl, sift together 1 cup tapioca starch, 16g single acting baking powder, and a pinch of salt. Carefully fold this dry mixture into the wet ingredients until just combined. Avoid over-mixing; you want to maintain the batter’s lightness for that trademark airy texture of the Vietnamese Honeycomb Cake.
Step 6: Bake the Cake
Pour the cake batter into the prepared bundt pan, ensuring an even distribution. Place it in the preheated oven and bake for 50-55 minutes, or until a toothpick inserted into the center comes out clean. The top should be lightly golden and spring back when gently touched, indicating it’s ready to cool.
Step 7: Cool and Invert
Once baked, remove the bundt pan from the oven and allow the cake to cool in the pan for about 60 minutes. This cooling process is crucial for setting the cake’s structure. After cooling, carefully invert the pan onto a wire rack, allowing the delightful honeycomb pattern to be revealed underneath.
Expert Tips for the Best Vietnamese Honeycomb Cake
• Preheat the Pan: Always warm the bundt pan before adding batter to ensure smoother release and better texture for your Vietnamese Honeycomb Cake.
• Strain for Smoothness: Straining the batter not only eliminates lumps but also results in a silkier, more refined cake, enhancing its overall texture.
• Cooling Time Matters: Allow the cake to cool adequately in the pan; this helps maintain its shape and prevents it from breaking during inversion.
• Check Baking Powder Freshness: Always test your baking powder for freshness; stale baking powder can lead to a dense cake that doesn’t rise properly.
• Sugar Adjustments: Feel free to adjust the sugar based on your taste preferences, but remember that traditional recipes may be less sweet, allowing the pandan and coconut flavors to shine.
Make Ahead Options
These Easy Banh Bo Nuong (Vietnamese Honeycomb Cake) are perfect for meal prep, allowing you to enjoy delightful homemade treats even on the busiest days! You can prepare the batter up to 24 hours in advance; simply mix the ingredients as directed, then refrigerate in an airtight container to maintain its freshness and prevent the batter from thickening. On baking day, allow the batter to come to room temperature for about 30 minutes prior to pouring it into the bundt pan and baking. This ensures a beautifully tall and airy cake, just as delicious as when made fresh. With these make ahead options, you can impress your family and guests with minimal hassle!
How to Store and Freeze Vietnamese Honeycomb Cake
Room Temperature: Keep the cake in an airtight container at room temperature for up to 3 days to enjoy its light texture.
Fridge: If you choose to refrigerate, the Vietnamese Honeycomb Cake stays fresh for up to a week in an airtight container, maintaining its flavor and moisture.
Freezer: To freeze, wrap the cooled cake tightly in plastic wrap and then in aluminum foil for up to 2 months. Thaw in the fridge overnight before serving for the best texture.
Reheating: For a warm treat, gently warm slices in the microwave for about 10-15 seconds, or until just heated through; enjoy that delightful softness again!
Vietnamese Honeycomb Cake Variations
Feel free to explore delightful twists and turns on this classic dessert!
-
Brown Sugar: Replace granulated sugar with brown sugar for a deeper caramel flavor that adds richness to each bite.
The warmth of molasses in brown sugar enhances the cake’s overall flavor profile, making every slice even more enticing. -
Nutty Almond Milk: Swap coconut milk for almond milk to create a nutty undertone that adds a new layer of flavor.
This substitution invites a pleasant nutty aroma that pairs beautifully with the pandan. -
Citrusy Kick: Add a splash of orange or almond extract for an additional layer of complexity.
The citrus not only brightens the cake but also enhances the aromatic notes of pandan. -
Mini Cakes: Delight in bite-sized versions by baking the batter in muffin tins, creating charming little cakes.
These mini honeycomb cakes are perfect for parties or as a sweet treat to share! -
Spicy Heat: Introduce a hint of heat by mixing in ginger or cayenne pepper.
This unexpected twist adds a delightful kick, appealing to those who enjoy a spicy contrast with sweetness.
As you experiment with these variations, consider enjoying this cake with some fresh mango slices or alongside a light yogurt, creating an unforgettable dessert experience reminiscent of a delicious Bee Sting Cake.
What to Serve with Easy Banh Bo Nuong
Enhance your culinary experience by pairing this delightful dessert with complementary flavors and textures that elevate every bite.
-
Fresh Mango Slices: The sweet, juicy mango adds a tropical brightness, perfectly balancing the light sweetness of the honeycomb cake.
-
Coconut Ice Cream: Creamy and cool, coconut ice cream mirrors the flavors of the cake while introducing a delightful, refreshing chill.
-
Dollop of Yogurt: A smooth, tangy yogurt provides a lovely contrast, cutting through the sweetness and adding a creamy texture to each bite.
-
Flavored Teas: A warm cup of jasmine or green tea complements the aromatic notes of pandan, enhancing the overall experience. Its delicate flavors mingle beautifully with the cake.
-
Passion Fruit Sauce: Drizzling a tart passion fruit sauce over the honeycomb cake introduces an exciting zing, brightening up the dish with its bold acidity.
-
Chopped Nuts: Toasted sesame or crushed peanuts add a satisfying crunch and a nutty depth, enriching the dessert’s overall flavor profile.
-
Sweetened Condensed Milk: A drizzle of this luscious treat elevates the cake even further, introducing a velvety sweetness that feels indulgent yet balanced.
-
Fruit Salad: A medley of fresh fruits adds a burst of color and flavor, making for a light, refreshing side that contrasts the cake’s sweetness beautifully.
-
Lime Zest Garnish: A sprinkle of zesty lime just before serving brings a bright, citrusy pop that invigorates the dish, creating a memorable finish.
Easy Gluten-Free Vietnamese Honeycomb Cake Recipe FAQs
What type of coconut milk should I use for the Vietnamese Honeycomb Cake?
I recommend using full-fat coconut milk for the best richness and moisture in your Easy Banh Bo Nuong. The creaminess of full-fat coconut milk elevates the cake, making it fluffier and more indulgent. Look for cans labeled ‘full-fat’ to avoid any surprises!
How should I store the Vietnamese Honeycomb Cake?
Store the cake in an airtight container at room temperature for up to 3 days. If you prefer, you can refrigerate it for up to a week, which helps maintain its flavor and moisture. Just make sure it’s well-sealed to prevent drying out!
Can I freeze the Vietnamese Honeycomb Cake?
Absolutely! To freeze, wrap the cooled cake tightly in plastic wrap and then in aluminum foil. It will stay good in the freezer for up to 2 months. When you’re ready to enjoy it, simply thaw it in the fridge overnight and gently warm it in the microwave for about 10-15 seconds to revive that delightful softness.
What should I do if my cake doesn’t rise properly?
The key to a fluffy Banh Bo Nuong is ensuring your baking powder is fresh. If the cake doesn’t rise, it may be that the baking powder has lost its potency. To test, add a teaspoon of baking powder to a small bowl of warm water; if it bubbles vigorously, it’s still active! Also, be careful not to over-mix the batter, as this can create a dense texture.
Is Vietnamese Honeycomb Cake suitable for people with allergies?
This delightful cake is gluten-free and dairy-free, making it suitable for those with those dietary restrictions. However, it does contain eggs, so if you’re allergic, I suggest trying an egg substitute, such as flaxseed meal mixed with water or a commercial egg replacer, to maintain the cake’s texture.
How can I tell if my pandan leaves are fresh?
Fresh pandan leaves should be vibrant green and have a fragrant aroma. If you notice dark spots all over or an unpleasant smell, it’s best to avoid them. Fresh leaves will enhance the flavor of your Vietnamese Honeycomb Cake and make it absolutely delightful!
Delightful Vietnamese Honeycomb Cake: Gluten-Free Bliss
Ingredients
Equipment
Method
- Preheat your oven to 350°F (177°C) and warm the bundt pan for about 10 minutes.
- Blend the coconut milk with pandan leaves, strain for a silky texture.
- Whisk the strained coconut mixture with eggs and sugar until smooth.
- Stir in pandan and vanilla extracts to the wet mixture.
- Sift together tapioca starch, baking powder, and salt; fold into the wet ingredients.
- Pour the batter into the bundt pan and bake for 50-55 minutes until golden.
- Cool in the pan for 60 minutes before inverting onto a wire rack.
Leave a Reply