
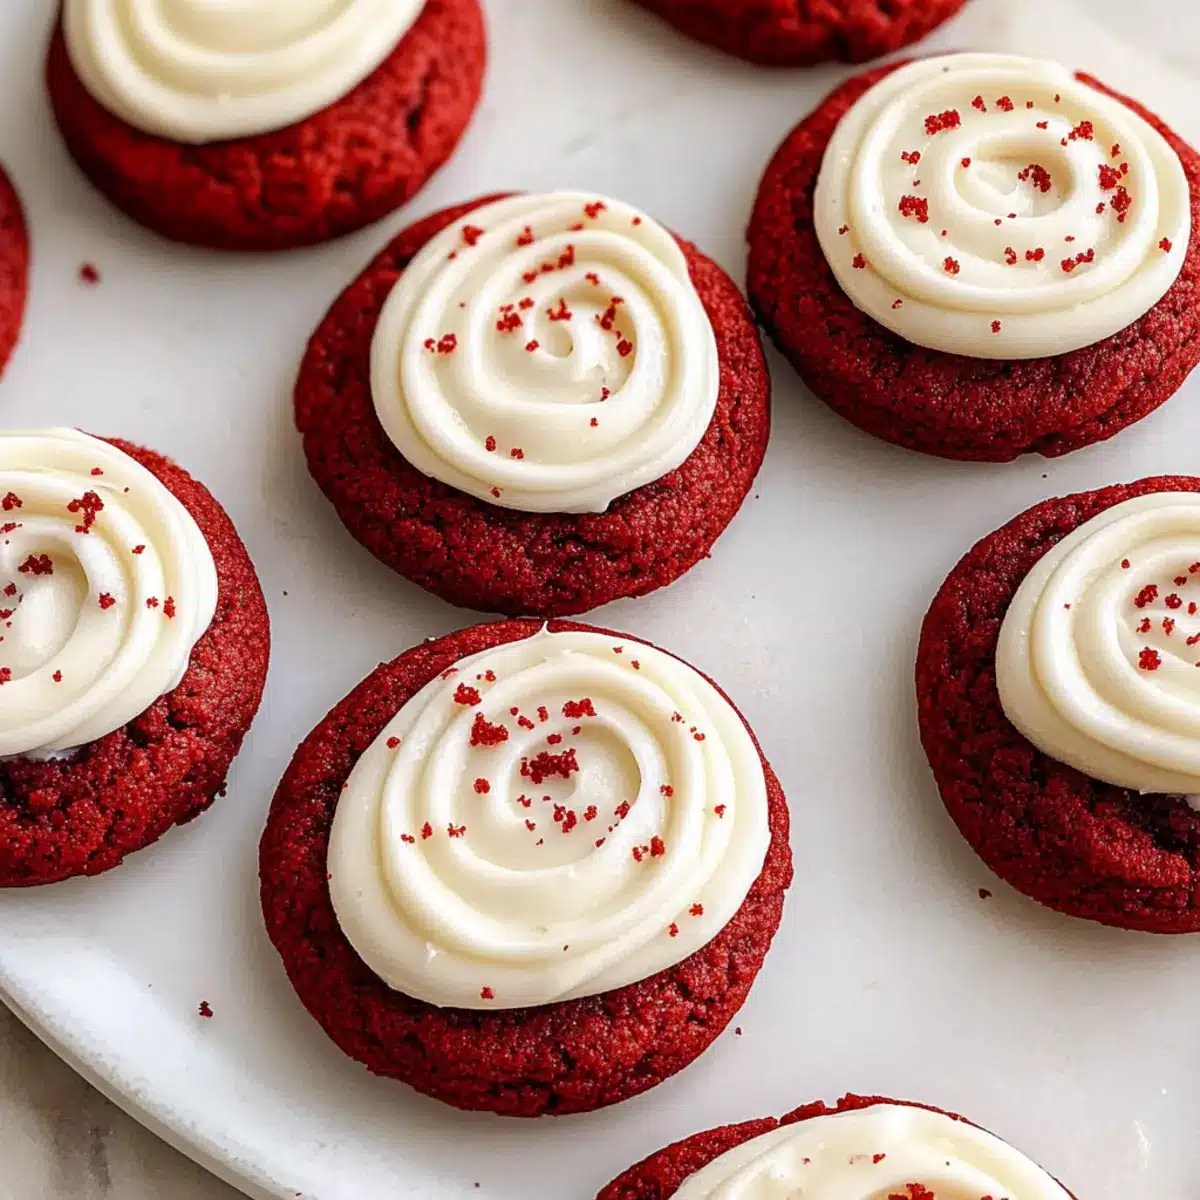
As I rummaged through my pantry for a festive treat, I stumbled upon a vibrant bottle of red gel food coloring, instantly sparking a memory of plush red velvet cake. This moment inspired me to whip up a batch of Red Velvet Cookies with Cream Cheese Frosting that would steal the show at any gathering. Not only are these cookies a delightful blend of chewy textures and velvety richness, but they’re also surprisingly simple to make, proving that impressive treats don’t have to require hours in the kitchen. With their striking color and creamy frosting, they’re perfect for celebrations or just because you deserve a sweet reward. Curious to see how easy it can be to create this crowd-pleaser? Let’s dive into the delicious details!

Why Are These Cookies a Must-Try?
Irresistible Flavor: The combination of rich buttery cookies and creamy cream cheese frosting creates an unforgettable treat that will have everyone asking for seconds.
Festive Appeal: With their stunning red hue, these cookies are the ultimate showstopper for celebrations or holiday gatherings. Imagine serving them alongside Pistachio Cream Cookies for a colorful dessert table!
Simple Preparation: Don’t worry about complicated techniques; these cookies are straightforward, making them perfect for beginner bakers and experienced chefs alike.
Versatile Enjoyment: Want to elevate these cookies? Consider adding white chocolate chips or chopped nuts for a delightful twist.
Make-Ahead Magic: Preparing the dough in advance means you can bake them fresh at a moment’s notice—ideal for unexpected guests or last-minute parties.
With such an appealing mix of flavor and ease, it’s hard to resist making a batch (or two!).
Red Velvet Cookies Ingredients
For the Cookie Dough
• Butter – Provides richness and moisture; substitute coconut oil for a dairy-free option.
• Granulated Sugar – Adds sweetness and tenderness; can reduce slightly for less sweetness.
• Brown Sugar – Enhances flavor and moisture; light or dark varieties both work well.
• Red Gel Food Coloring – Gives the classic red hue without affecting the taste; vegan options are available.
• Egg – Acts as a binder, creating a chewy texture; use a flax egg for a vegan substitute.
• Vanilla Extract – Adds depth to the flavor; opt for vanilla bean paste for a more robust taste.
• All-Purpose Flour – Provides structure; gluten-free flour can be substituted if necessary.
• Dutch Process Cocoa Powder – Adds a subtle chocolate note; regular cocoa can be used but may change the cookie’s color.
• Baking Powder & Baking Soda – Helps the cookies rise and achieve the right texture; ensure they’re fresh for best results.
• Salt – Balances sweetness and enhances flavors.
For the Cream Cheese Frosting
• Cream Cheese – Essential for the frosting, providing a creamy texture; Neufchâtel cheese can be a lighter alternative.
• Powdered Sugar – Sweetens and thickens the frosting; sifting is recommended for a smooth texture.
• Vanilla Bean Paste – Enhances frosting flavor; vanilla extract can be a substitute as well.
Combine these ingredients for an unforgettable batch of Red Velvet Cookies with Cream Cheese Frosting that will steal the spotlight!
Step‑by‑Step Instructions for Red Velvet Cookies with Cream Cheese Frosting
Step 1: Melt Butter
Start by placing the butter in a microwave-safe bowl and melting it for about 30 seconds until fully liquefied. Once melted, allow the butter to cool in the fridge for approximately 20 minutes until it reaches room temperature, which is essential for proper mixing.
Step 2: Combine Wet Ingredients
In a large mixing bowl, whisk together the cooled melted butter, granulated sugar, brown sugar, and red gel food coloring until the mixture is well combined and smooth. You should see a vibrant red hue forming as you blend these ingredients together, creating a rich base for your Red Velvet Cookies.
Step 3: Add Egg and Vanilla
Crack in an egg and pour in the vanilla extract to the wet mixture, then mix well until everything is fully integrated. The mixture should be glossy and slightly thickened, indicating that the egg has been thoroughly combined, contributing to the chewy texture of the cookies.
Step 4: Prepare Dry Ingredients
In a separate bowl, sift together the all-purpose flour, cocoa powder, baking powder, baking soda, and salt. Ensure there are no lumps, and whisk until these dry ingredients are evenly mixed. This step is crucial to achieving the right texture in your Red Velvet Cookies.
Step 5: Mix Together
Gradually fold the dry ingredients into the wet mixture using a spatula, just until combined. Be careful not to overmix, as you want the dough to stay soft and light, leading to a tender cookie texture once baked. The dough should be slightly sticky and vibrant red.
Step 6: Shape Cookies
Scoop out portions of the dough and roll them into balls about 1.5 inches in diameter. Place the cookie dough balls on a parchment-lined baking sheet, spacing them at least 2 inches apart. Refrigerate the dough for at least 1 hour to solidify, enhancing the cookies’ structure during baking.
Step 7: Preheat Oven
While the dough is chilling, preheat your oven to 180ºC (355ºF). This ensures that your oven reaches the perfect temperature for baking the Red Velvet Cookies, allowing them to rise and develop a lovely golden-brown color on the edges.
Step 8: Bake Cookies
Once the dough has chilled, place the cookie balls on the preheated baking sheet and bake for 10 to 11 minutes. Keep an eye on them; they should be soft in the center and lightly set at the edges when they come out of the oven. Allow them to cool slightly before transferring to a wire rack.
Step 9: Make Frosting
To prepare the cream cheese frosting, beat the softened cream cheese and butter together in a bowl using an electric mixer until fluffy. Add the vanilla bean paste and gradually mix in the sifted powdered sugar, continuing until the frosting is smooth and creamy.
Step 10: Decorate
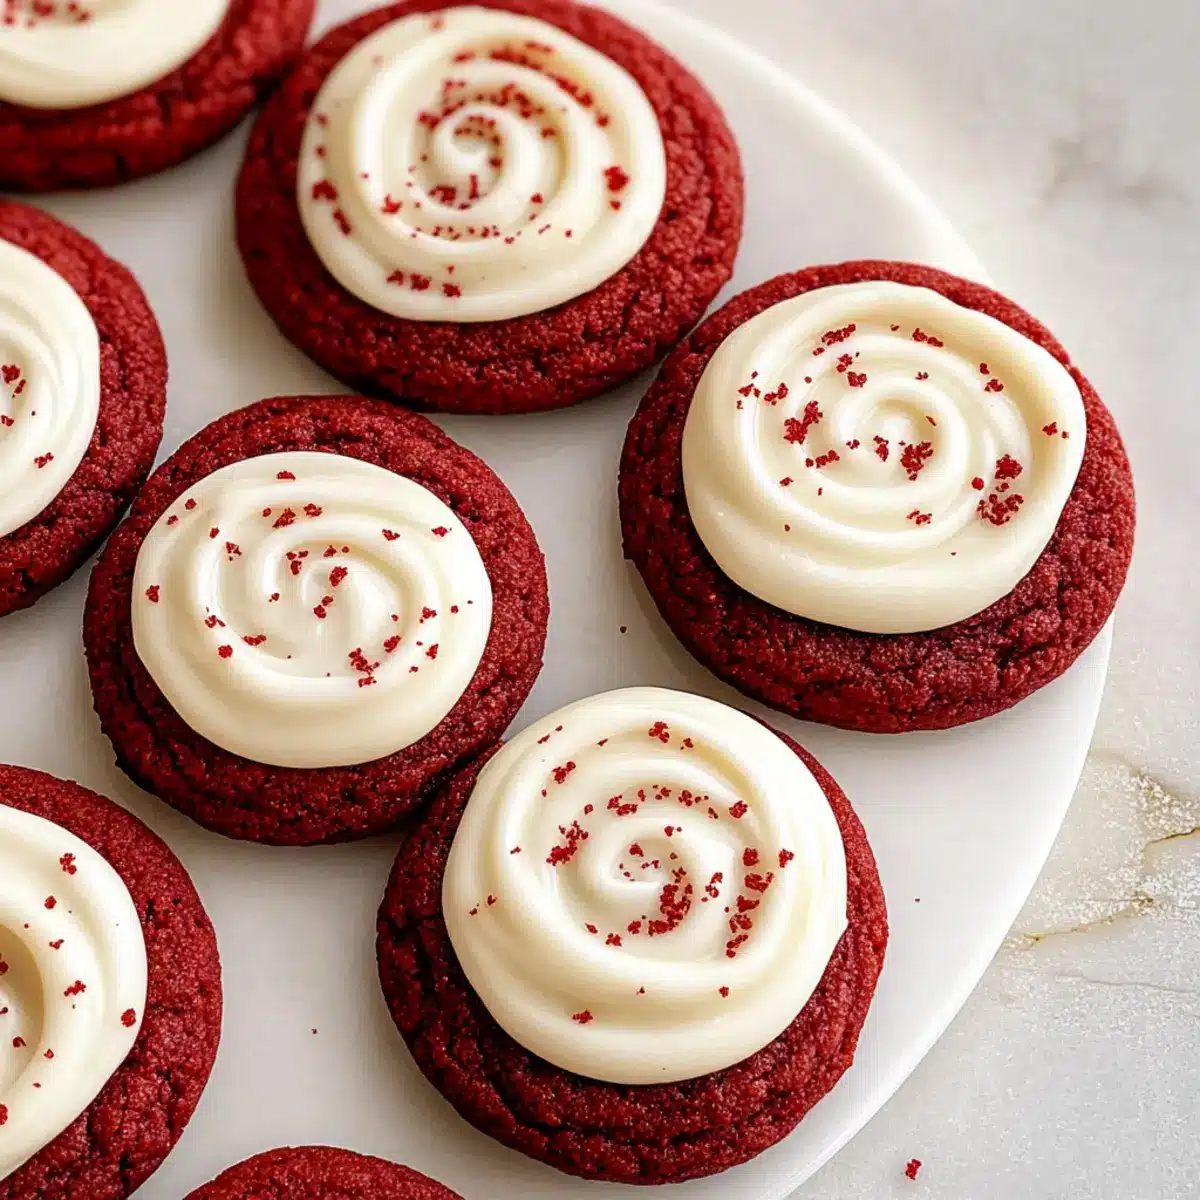
Once the cookies are completely cooled, pipe the cream cheese frosting onto each cookie in beautiful swirls. Feel free to be creative with your piping technique; this frosting adds a delightful touch to your Red Velvet Cookies, making them not just tasty but visually appealing as well.

How to Store and Freeze Red Velvet Cookies
Fridge: Store your Red Velvet Cookies in an airtight container for up to 2 days to maintain freshness and softness.
Freezer: For longer storage, freeze the unfrosted cookies in a single layer on a baking sheet, then transfer them to a freezer bag for up to 30 days.
Reheating: To enjoy cookies straight from the freezer, allow them to thaw at room temperature and warm them in the microwave for about 10-15 seconds before serving.
Frosting Storage: If you have leftover cream cheese frosting, store it in the fridge in an airtight container for up to 1 week. Simply re-whip before using again.
Red Velvet Cookies with Cream Cheese Frosting Variations
Feel free to let your creativity flow and customize these delightful cookies to suit your taste buds!
-
Dairy-Free: Substitute the butter with coconut oil and use dairy-free cream cheese for frosting to make them suitable for a dairy-free diet. They’ll still be just as delicious!
-
Gluten-Free: Swap all-purpose flour with a gluten-free blend that measures 1:1. Enjoy the delightful texture without the gluten!
-
Nutty Addition: Add 1/2 cup chopped walnuts or pecans to the dough for a wonderful crunch and nutty flavor that beautifully complements the cookies.
-
Spiced Delight: Mix in 1 teaspoon cinnamon or a pinch of nutmeg into the dry ingredients for a warm, aromatic twist that evokes cozy memories with each bite.
-
White Chocolate Bliss: Fold in 1 cup white chocolate chips for a creamy sweetness that pairs nicely with the red velvet base. The extra layer of flavor is absolutely dreamy!
-
Festive Sprinkles: Top the frosted cookies with edible glitter or red sugar for an extra festive touch, making them perfect for any celebration or holiday gathering. These extra pops of color are simply irresistible!
-
Chill Before Baking: Make the dough ahead of time and chill it overnight for enhanced flavor. Letting the dough sit allows the ingredients to meld beautifully.
By exploring these variations, you can create your personalized version of Red Velvet Cookies with Cream Cheese Frosting—now that’s a treat worth sharing! You might also enjoy them alongside some delicious Cupcakes Espresso Frosting or a charming platter featuring the delightful Red Lobsters Cheese for an impressive dessert experience.
What to Serve with Red Velvet Cookies with Cream Cheese Frosting
Pair these delightful cookies with complementary sides that enhance their rich flavors and festive presentation.
-
Creamy Mashed Potatoes: Their smooth, buttery texture creates a delightful contrast to the chewy cookies, making for a comforting meal combination.
-
Fresh Fruit Salad: Bright, juicy fruits like strawberries and oranges provide a refreshing balance to the sweetness of the cookies, lifting your palate in between bites.
-
Decadent Hot Chocolate: Cozy up your dessert experience with a rich cup of hot chocolate, its chocolatey flavor enhancing every bite of the sweet cookies.
-
Vanilla Ice Cream: The cool creaminess of vanilla ice cream pairs perfectly with warm cookies, creating a delightful melting experience that brings out the cookie’s richness.
-
Pecan Pie Bars: Enhance your dessert platter with pecan pie bars; their nutty flavor contrasts wonderfully with the sweetness of the cookies and offers varied textures.
-
Iced Coffee: Serve a chilled glass of iced coffee; its bitter notes perfectly balance the sweetness of the Red Velvet Cookies, making it a delightful afternoon treat.
-
Cheesecake Bites: These mini desserts echo the cream cheese frosting, extending the creamy experience while introducing unique flavors in small, satisfying bites.
With such a variety of choices, you can create a delightful spread that highlights the decadent charm of your Red Velvet Cookies with Cream Cheese Frosting!
Expert Tips for Red Velvet Cookies
-
Butter Temperature: Always use room temperature butter for mixing. Cold butter can lead to dense cookies, while properly softened butter creates a tender texture.
-
Avoid Overbaking: Red Velvet Cookies should remain soft in the center when removed from the oven. They will continue to firm up while cooling, ensuring a chewy bite.
-
Use Fresh Baking Powder: Ensure your baking powder and baking soda are fresh for optimal rising. Old leavening agents can lead to flat cookies.
-
Chill the Dough: Don’t skip refrigerating the dough for an hour. This solidifies the fat, leading to cookies that maintain their shape and texture during baking.
-
Piping Perfection: For easy frosting, use a stand mixer to achieve a light and fluffy cream cheese mixture. Add a splash of milk if needed for consistency.
-
Decorate Festively: Sprinkle additional red sugar or colorful sprinkles on top before the frosting sets for an extra festive touch, making your Red Velvet Cookies eye-catching and celebratory!
Make Ahead Options
These Red Velvet Cookies with Cream Cheese Frosting are a delightful treat that can be prepped in advance for even easier baking! You can prepare the cookie dough and refrigerate it for up to 24 hours before baking. Simply scoop and roll the dough into balls, then chill them on a parchment-lined baking sheet. To ensure freshness, store the dough in an airtight container if refrigerating longer. The cream cheese frosting can also be made ahead and stored in the refrigerator for up to 3 days; just give it a quick stir to restore its creamy texture before frosting. When you’re ready to bake, pull the cookie dough from the fridge, preheat your oven, and enjoy freshly baked cookies that taste just as delicious!
Red Velvet Cookies with Cream Cheese Frosting Recipe FAQs
What is the best way to select ripe ingredients for these cookies?
Absolutely! When choosing your ingredients, especially the butter, make sure it’s fresh and unsalted for the best results. The red gel food coloring should be vibrant; avoid bottles with sediment at the bottom. For your egg, check for cracks and choose large, fresh eggs for the best binding and texture.
How should I store leftover Red Velvet Cookies?
Very simple! Place your Red Velvet Cookies in an airtight container at room temperature for up to 2 days. If you want to extend their life, refrigerate them for freshness, but be aware they may lose some of their soft texture.
Can I freeze the cookie dough or the baked cookies?
Of course! To freeze the unfrosted cookie dough, scoop it into balls and place them on a parchment-lined baking sheet. Freeze for about 1-2 hours until solid, then transfer to a freezer bag and freeze for up to 30 days. When ready to bake, no need to thaw—just add a couple of extra minutes to the baking time! For baked cookies, freeze them in a single layer on a tray, then pack them in a bag or container once they’ve hardened; they can last for up to 3 months.
What if my cookies come out too hard or dry?
No worries! If your cookies turn out harder than expected, it could be due to overbaking or using too much flour. Be sure to measure flour correctly—spooning it into the measuring cup without packing it down is best. If you find they’ve been overbaked, next time reduce the oven time by a minute or two. You want them soft in the center and slightly set around the edges for that perfect chewy bite.
Are these Red Velvet Cookies suitable for people with allergies?
Great question! For those with gluten sensitivities, you can substitute all-purpose flour with a gluten-free blend. For dairy allergies, coconut oil can replace butter, and using a flax egg (1 tablespoon ground flaxseed + 2.5 tablespoons water, mixed and rested) instead of a whole egg works well. Always check labels for food coloring and frosting ingredients to ensure they’re safe for your dietary needs.
Delightful Red Velvet Cookies with Cream Cheese Frosting Recipe
Ingredients
Equipment
Method
- Melt butter in a microwave-safe bowl for about 30 seconds until liquefied. Cool in fridge for 20 minutes.
- In a large bowl, whisk together cooled butter, granulated sugar, brown sugar, and red gel food coloring until smooth.
- Add the egg and vanilla extract, mixing well until fully integrated.
- In another bowl, sift together flour, cocoa powder, baking powder, baking soda, and salt.
- Gradually fold dry ingredients into the wet mixture until just combined.
- Scoop dough into 1.5 inch balls and place on a parchment-lined baking sheet. Refrigerate for 1 hour.
- Preheat the oven to 180ºC (355ºF) while dough is chilling.
- Bake cookie balls for 10-11 minutes, keeping them soft in the center.
- To prepare frosting, beat cream cheese and butter together until fluffy. Gradually mix in powdered sugar and vanilla.
- Once cookies cool, pipe cream cheese frosting onto each in swirls.
Leave a Reply