
You won’t believe how quick and fun it is to transform everyday ingredients into something spectacular. This Oreo Sushi recipe is a playful twist on your favorite cookies, crafted into no-bake sushi rolls that are perfect for parties or a unique after-school treat. With just crushed Oreos and a creamy filling, you can whip up this easy dessert in no time, making it a crowd-pleaser even those who shy away from the kitchen will succeed at. Not only is it a delightful way to indulge your sweet tooth, but it also allows for endless customization with different Oreo flavors. So, are you ready to roll and impress your friends with a fun dessert that gives sushi a sweet makeover?
Why You’ll Love This Oreo Sushi Recipe
Simplicity at Its Best: This no-bake dessert requires minimal effort, making it perfect for all skill levels!
Endless Customization: Use various Oreo flavors to create unique combinations that cater to every taste preference.
Impressive Presentation: The sushi roll format turns a simple treat into a stunning platter centerpiece, ideal for parties.
Quick to Make: With just a few ingredients and under 30 minutes, you can whip these up and wow your guests!
Crowd-Pleaser: Kids and adults alike can’t resist these sweet, creamy bites—especially when you serve them on a stylish platter!
Try pairing it with these delicious Peach Pie Cruffins for an unforgettable dessert spread, or complement it with our Steak Pasta Ready for an amazing dinner!
Oreo Sushi Recipe Ingredients
For the Sushi Rolls
• Oreo Cookies – The foundation of this fun dessert; feel free to mix and match flavors like mint or peanut butter for extra creativity.
• Milk – This binds the crushed cookies into a soft dough and can be adjusted for the perfect consistency.
For the Cream Filling
• Reserved Oreo Cream – Use the filling from the separated Oreo cookies to add delicious creaminess to the rolls.
• Additional Milk – A bit more milk will help achieve a smooth, spreadable filling; adjust to taste for optimal texture.
Get ready to create something special with this Oreo Sushi recipe that your friends and family will absolutely adore!
Step‑by‑Step Instructions for Oreo Sushi Recipe
Step 1: Prepare Ingredients
Start by separating your Oreo cookies, carefully removing the cream filling from half and setting it aside in a bowl. It’s important to keep the cookies and cream filling separated to create the layered effect in your Oreo Sushi. This initial prep will help streamline your next steps, ensuring everything is ready for this fun no-bake dessert.
Step 2: Crush Cookies
In a food processor, add the Oreo cookies and blitz them until they turn into fine crumbs, which should only take about 30 seconds. If you don’t have a food processor, place the cookies in a zip-top bag and crush them with a rolling pin until they are finely ground. This will provide the perfect base for your sushi rolls, giving it a smooth texture.
Step 3: Create Dough
Transfer the crushed Oreos into a mixing bowl and add most of the milk, mixing until a cohesive dough begins to form. You may need around 3-5 tablespoons of milk, adjusting as necessary to achieve a pliable consistency. Once the dough is smooth and holds together without crumbling, it’s ready for the next step in crafting your delicious Oreo Sushi.
Step 4: Shape Dough
Lay a large piece of plastic wrap on your countertop and place the dough in the center. Using your hands, gently pat the dough into a rectangle shape, aiming for a thickness of about 1/4 inch. Make sure the dough is even to ensure uniform sushi rolls later. This visual cue will help you gauge the right size for your creations.
Step 5: Mix Filling
In a clean bowl, combine the reserved Oreo cream with a bit of remaining milk, mixing until it’s smooth and spreadable. This creamy filling will be the star of your Oreo Sushi, adding a luscious layer to your dessert. If it’s too thick, gradually add more milk until you reach the desired texture that will easily spread over your dough.
Step 6: Roll and Slice
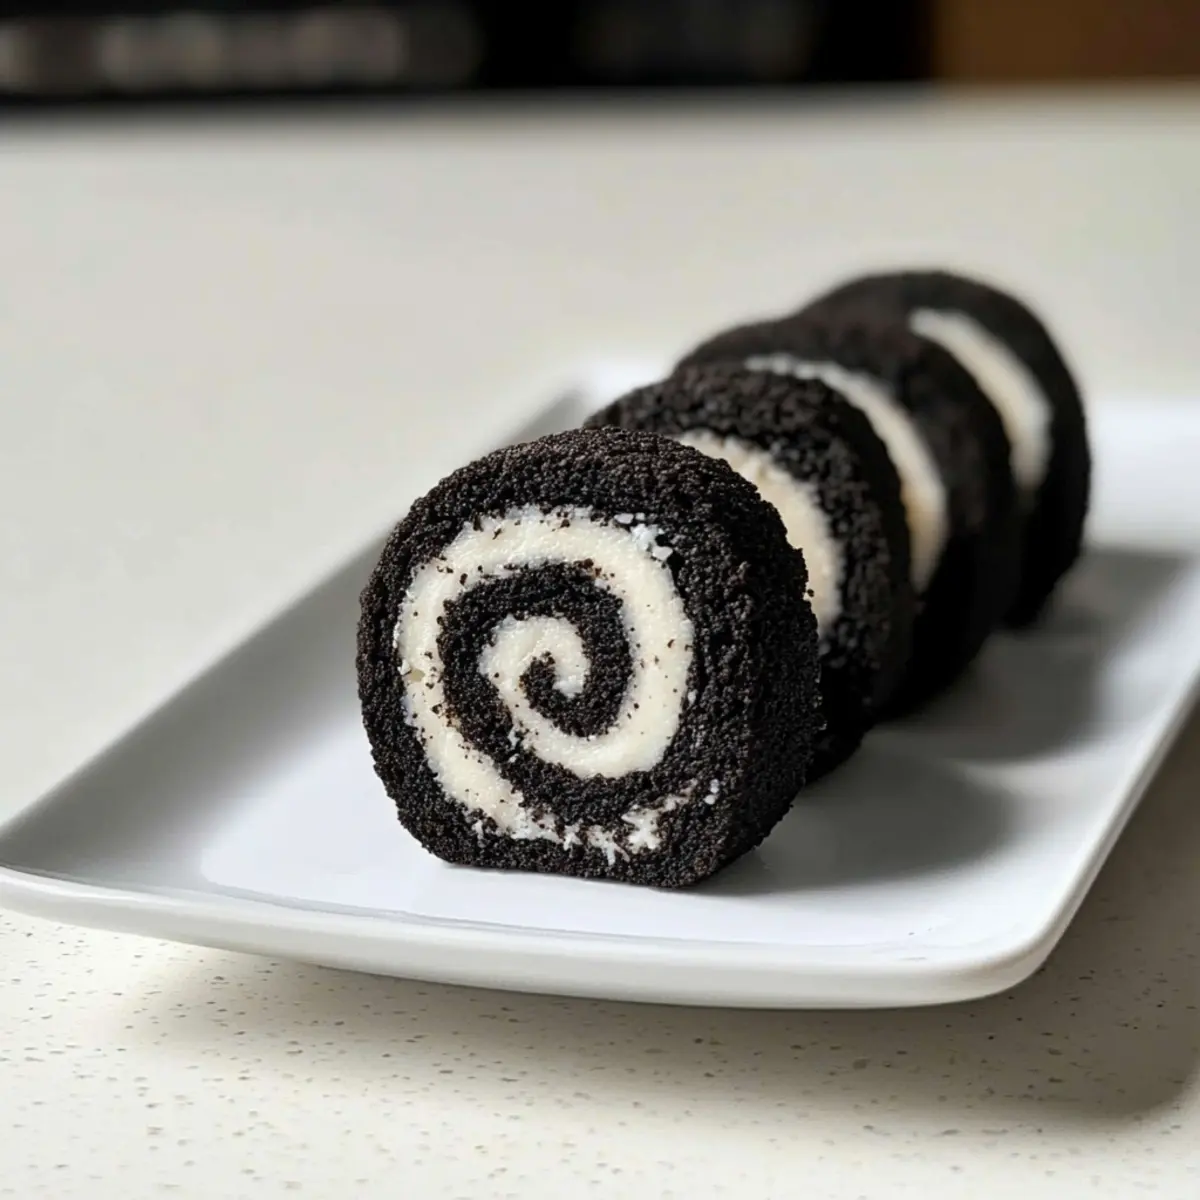
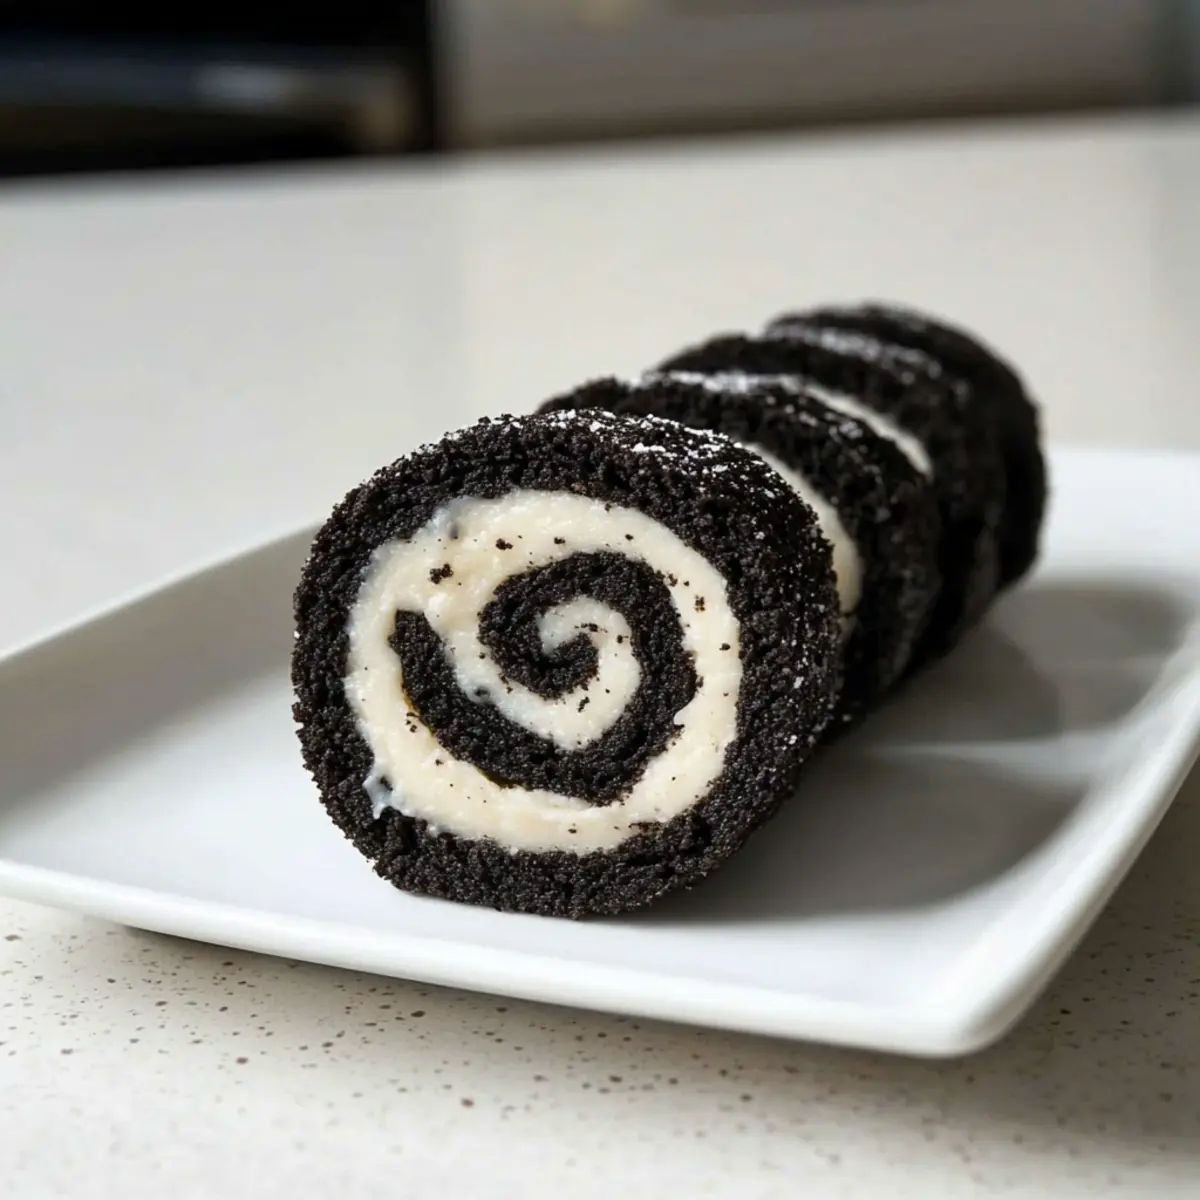
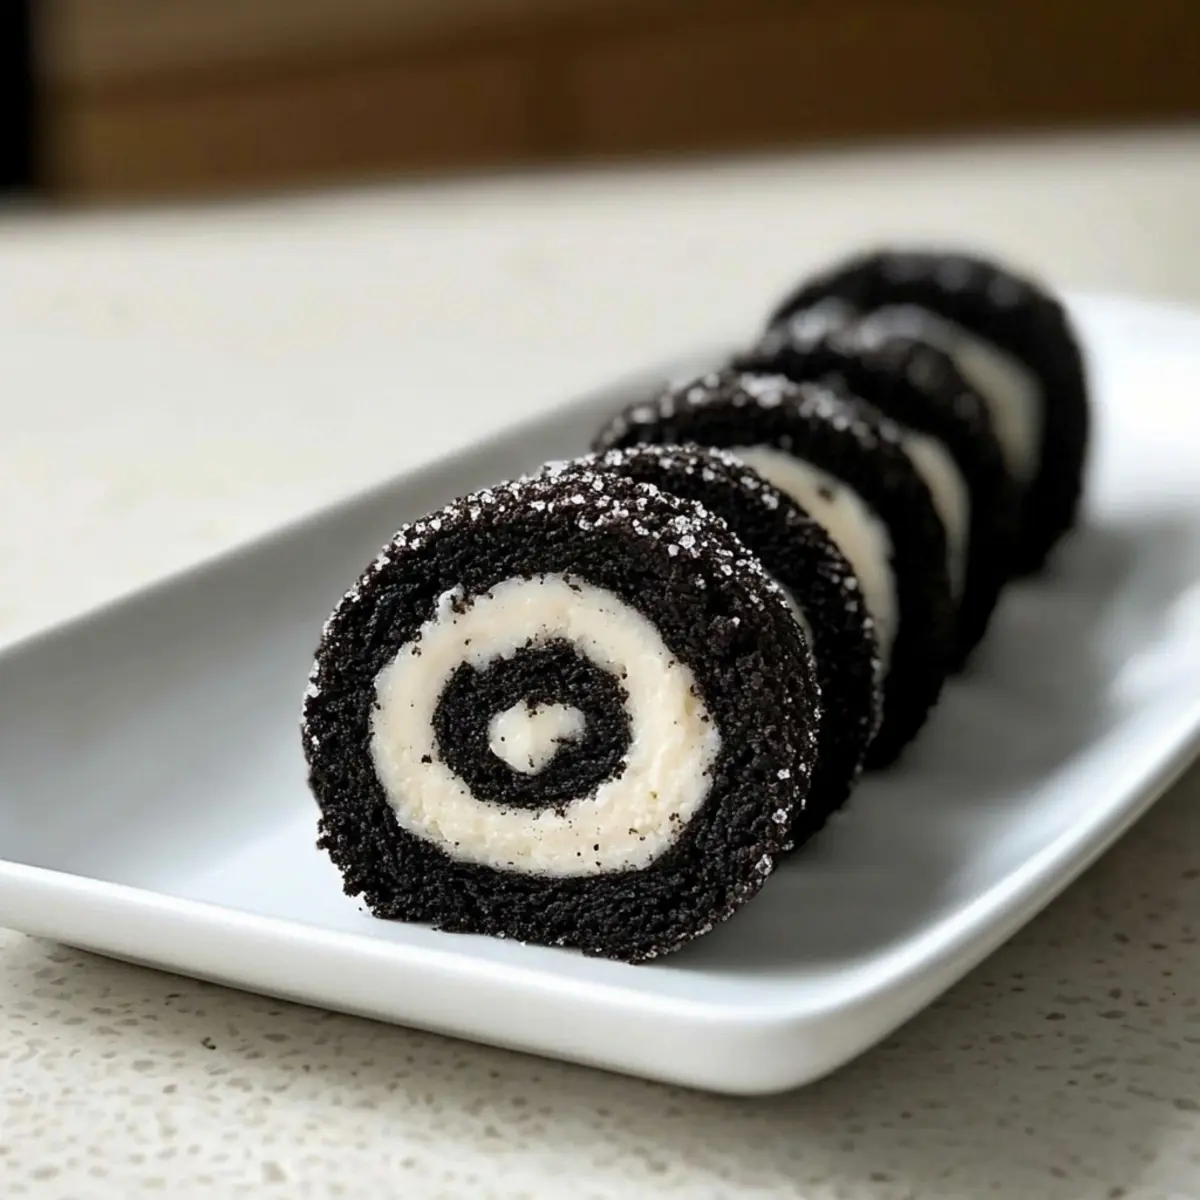
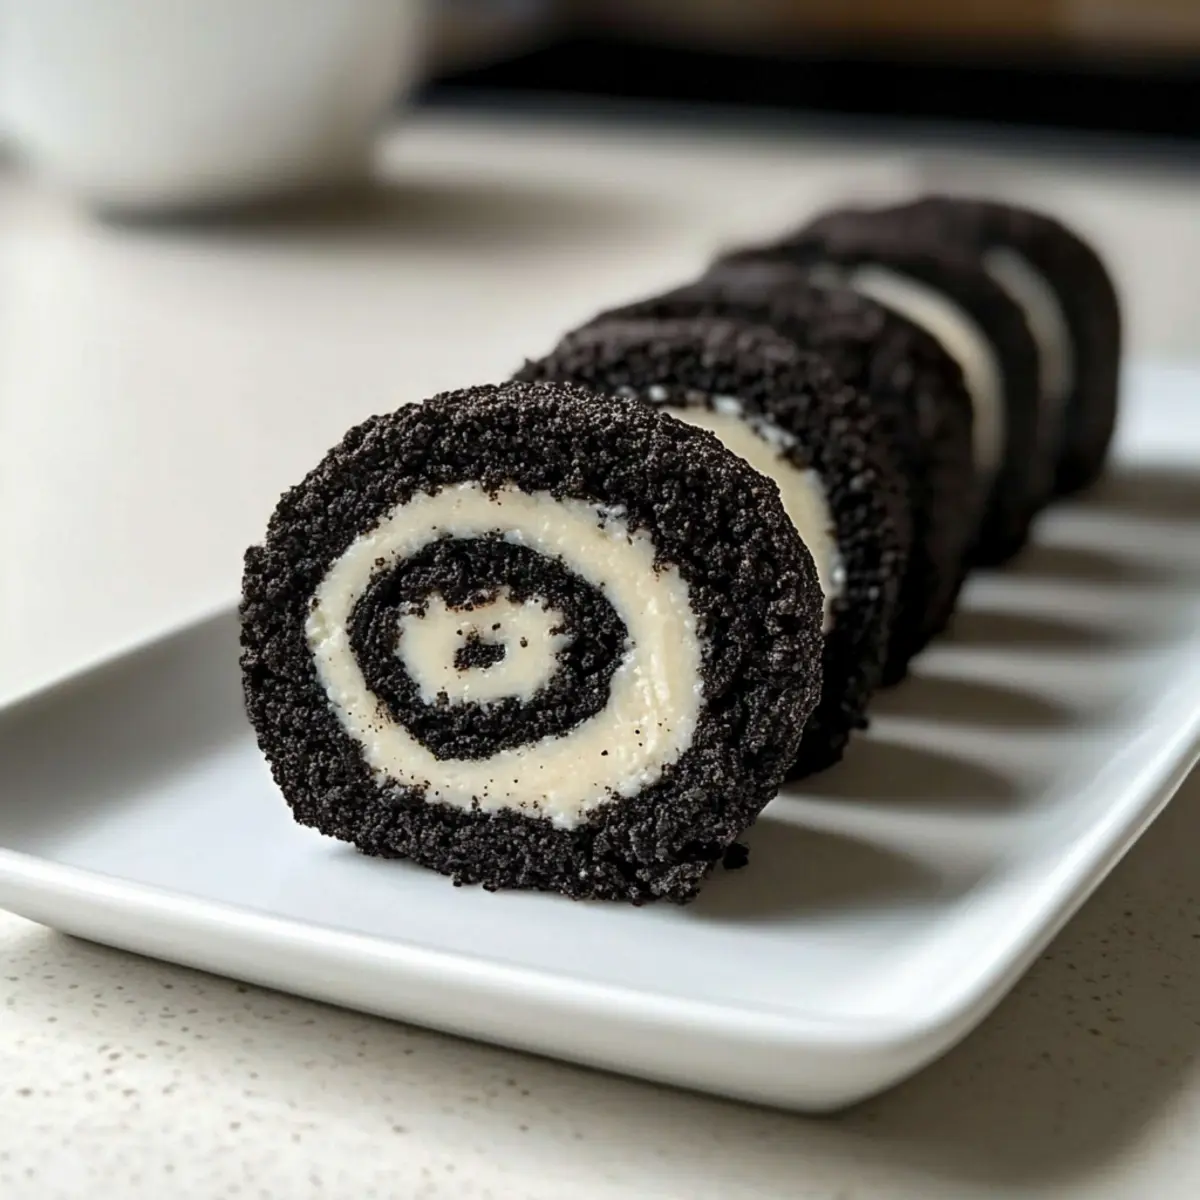
Spread the creamy filling evenly over the shaped Oreo dough, covering the entire surface. Carefully, using the plastic wrap as a guide, roll the dough tightly into a log shape. Once rolled, chill in the refrigerator for at least 15 minutes for the filling to set, making it easier to slice into bite-sized pieces that look like sushi rolls.
Step 7: Serve and Enjoy
After chilling, unwrap the roll and slice it into bite-sized pieces, about 1 inch thick, showcasing the delightful layers of cream and cookie. Arrange your Oreo Sushi on a platter for an impressive presentation. These fun bites are perfect for gatherings or a unique treat at home, instantly turning an everyday snack into a standout dessert!
Make Ahead Options
These Oreo Sushi can be made ahead, making them a fantastic choice for busy cooks looking to save time! You can prepare the rolled sushi and refrigerate it for up to 3 days before serving. Simply follow the recipe through the rolling step, then wrap tightly in plastic wrap to prevent drying out. When you’re ready to serve, unwrap and slice into bite-sized pieces. If you want the best texture, allow them to chill for about 15 minutes after slicing, which helps maintain their cohesion and give a fresher bite. This way, you can impress your guests with delightful, homemade Oreo Sushi with just a little advance planning!
What to Serve with Oreo Sushi
Create the perfect dessert experience to delight your guests and experience vivid flavors with every bite.
-
Fresh Berries: A medley of strawberries, blueberries, and raspberries adds a refreshing contrast to the sweet creaminess of the Oreo Sushi. Their tartness complements the dessert beautifully.
-
Matcha Green Tea: The earthy and slightly bitter notes of matcha provide a soothing balance to the sweet flavors of the Oreo Sushi. It’s a delightful way to cleanse the palate.
-
Chocolate Sauce: Drizzle rich chocolate sauce over the sushi for a decadent touch. It enhances the overall dessert experience and adds an indulgent layer.
-
Vanilla Ice Cream: A scoop of creamy vanilla ice cream pairs perfectly with the Oreo flavors, creating a comforting combination that feels rich and satisfying.
-
Mint Sprig Garnish: Fresh mint not only elevates the visual appeal of your platter but also adds a burst of fresh flavor that brightens the overall dessert.
-
Coffee or Espresso: The deep, bold flavors of coffee contrast wonderfully with the sweetness of the Oreo Sushi. A cup of coffee offers a cozy finish to your dessert.
-
Banana Slices: Adding banana slices can introduce a creamy texture and subtle sweetness, while also providing a fresh element that enhances each bite.
-
Almond Milkshake: Blend up a nutty almond milkshake for a complementary drink that ties in with the flavors of the dessert while offering a delightful creamy experience.
Expert Tips for Oreo Sushi Recipe
-
Crush Completely: Ensure cookies are crushed finely to create a cohesive dough that holds together well during rolling.
-
Moisture Balance: If the dough feels too dry, add milk gradually. A soggy dough can lead to messy rolls, so avoid overdoing it!
-
Chill for Success: Chilling the rolled sushi before slicing not only shapes it better but also enhances the flavor as it sets.
-
Layering Cream: Spread the filling evenly across the dough to enjoy a delightful creamy bite in every piece of your Oreo Sushi.
-
Flavor Combinations: Feel free to experiment with different Oreo flavors. This can open new avenues of taste and fun for your dessert!
How to Store and Freeze Oreo Sushi
Fridge: Store uneaten Oreo Sushi in an airtight container in the refrigerator for up to 3 days. This keeps the sushi fresh and the filling creamy.
Freezer: For longer storage, wrap individual sushi rolls in plastic wrap and place them in a freezer-safe bag. They can be frozen for up to 1 month; allow them to thaw in the fridge before serving.
Reheating: There’s no need to reheat Oreo Sushi; it’s best enjoyed chilled. Just slice and serve straight from the fridge for the freshest taste.
Make-Ahead Tip: Prepare the sushi rolls a few hours in advance, allowing them to chill before serving. This helps enhance the flavor and makes slicing easier.
Oreo Sushi Recipe Variations
Feel free to let your creativity shine by customizing this delightful dessert in a way that excites your taste buds!
-
Different Oreo Flavors: Switch up the original Oreos with exciting flavors like mint, peanut butter, or birthday cake for a unique twist in each bite!
-
Vegan-Friendly: Substitute regular milk with almond or oat milk to make this dessert suitable for vegan diets while maintaining creaminess.
-
Nutty Crunch: Add crushed nuts, such as almonds or walnuts, to the filling for an extra layer of texture and flavor.
-
Chocolate Drizzle: After slicing, drizzle melted chocolate on top of the sushi rolls for a beautiful presentation and an indulgent touch.
-
Fruit Fusion: Incorporate finely chopped fruits like strawberries or bananas into the cream filling for a refreshing fruity flavor that balances the sweetness.
-
Spicy Kick: For an adventurous twist, add a dash of cayenne pepper or chili powder to the filling to give your dessert an unexpected heat.
Don’t forget to pair your Oreo Sushi with a side of our irresistible Fil Mac Cheese for a balanced and memorable meal! Enjoy your creativity in the kitchen!
Oreo Sushi Recipe FAQs
What type of Oreo cookies should I use for this recipe?
Absolutely! While classic Oreo cookies work perfectly, feel free to experiment with different flavors like mint or birthday cake. Each flavor adds a unique twist to your Oreo Sushi, allowing you to customize your dessert to suit any occasion or personal preference!
How long can I store Oreo Sushi in the fridge?
You can store your uneaten Oreo Sushi in an airtight container in the refrigerator for up to 3 days. Keeping it well-sealed helps maintain the sushi’s freshness and ensures that the creamy filling stays luscious. Just remember to enjoy it before it’s gone!
Can I freeze Oreo Sushi, and how should I do it?
Very! To freeze Oreo Sushi, wrap individual rolls tightly in plastic wrap and place them in a freezer-safe bag. This method helps preserve the flavor and texture. You can store them in the freezer for up to 1 month. When you’re ready to eat, simply thaw them in the fridge for a few hours before serving!
Is there a way to prevent the dough from being too dry?
Yes, if you find that your dough is too dry, gradually add more milk, about 1 tablespoon at a time, until you reach the desired consistency. The dough should be pliable and hold together well without crumbling. Remember, too much moisture can make the rolling process messy, so be cautious with additions!
Can my pets eat Oreo Sushi?
While it’s tempting to share, Oreo Sushi isn’t suitable for pets. The sugar and chocolate present in Oreo cookies can be harmful to animals. Ensure that your furry friends stick to their treats, and let them enjoy the yummy aroma of your baking instead!
What if I don’t have cream filling from Oreos?
If you don’t have the cream filling available, you can make a quick substitute by mixing cream cheese with a bit of powdered sugar and milk until smooth. This alternative provides a creamy, delicious filling while still keeping your Oreo Sushi delightful!
Oreo Sushi Recipe – A Fun No-Bake Dessert Adventure!
Ingredients
Equipment
Method
- Start by separating your Oreo cookies, carefully removing the cream filling from half and setting it aside in a bowl.
- In a food processor, add the Oreo cookies and blitz them until they turn into fine crumbs.
- Transfer the crushed Oreos into a mixing bowl and add most of the milk, mixing until a cohesive dough begins to form.
- Lay a large piece of plastic wrap on your countertop and place the dough in the center, patting it into a rectangle shape.
- In a clean bowl, combine the reserved Oreo cream with a bit of remaining milk until smooth and spreadable.
- Spread the creamy filling evenly over the shaped Oreo dough, then roll tightly into a log shape and chill for at least 15 minutes.
- Unwrap the roll and slice into bite-sized pieces, about 1 inch thick; arrange on a platter for serving.
Leave a Reply