
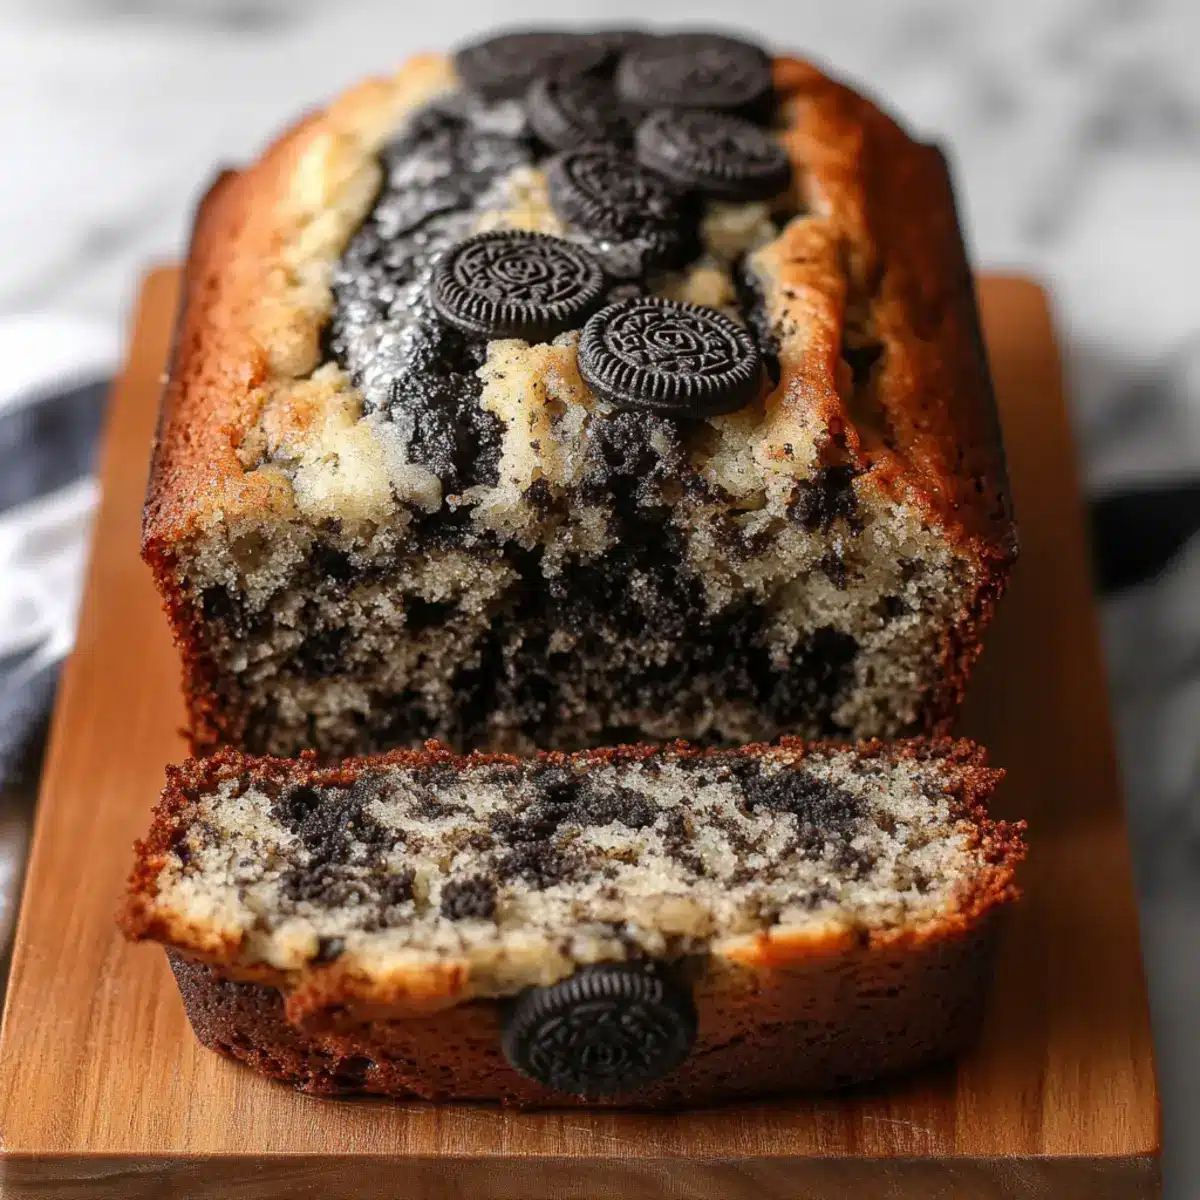
The aroma of freshly baked goods can transform any day, and my kitchen has never smelled better than when I whipped up this Oreo Banana Bread. Combining the comforting sweetness of ripe bananas with the irresistible crunch of Oreo cookies, this delightful quick bread is perfect for breakfast or as a satisfying snack. What I love most about this easy-to-make recipe is how it appeals to everyone—from kids to adults—making it a true crowd-pleaser. Plus, you can customize it by mixing in different Oreo flavors for a surprising twist! Are you ready to bring a touch of fun to your baking routine? Let’s dive into this deliciously simple recipe!
Why Is Oreo Banana Bread So Irresistible?
Decadent, Sweet Flavor: This recipe combines ripe bananas and crunchy Oreos, creating a mouthwatering blend that satisfies any sweet tooth.
Quick and Easy: No fuss! You’ll find that this bread requires only simple ingredients and minimal time, making it perfect for a last-minute treat.
Customizable Delight: Get creative! Swap in different Oreo flavors or add a swirl of cream cheese for a decadent surprise.
Popular Appeal: Everyone loves it! Kids and adults alike will rave about this fun twist on a traditional favorite.
Perfect Texture: Moist crumb with delightful chunks of Oreo ensures every bite is a treat.
For variations, consider making mini loaves or muffins, or if you’re in the mood for more delightful quick breads, check out my recipes for Pumpkin Bread Moist or Apple Bread Deliciously.
Oreo Banana Bread Ingredients
For the Batter
• Ripe Bananas – Provide natural sweetness and moisture; use fully brown ones for a richer flavor.
• Melted Butter – Adds richness; swap for dairy-free butter if needed.
• Granulated Sugar – Sweetens the bread; coconut sugar is a great healthier substitute.
• Egg – Binds ingredients together; a flax egg works well for a vegan option.
• Vanilla Extract – Enhances the flavor profile beautifully.
• Baking Soda – Helps the bread rise for a light texture.
• Salt – Balances sweetness and enhances overall flavor.
• All-Purpose Flour – Provides structure; whole wheat flour can be a healthier alternative.
• Oreo Cookies – Adds a delightful chocolatey crunch; mix into the batter and save some for topping.
Optional Toppings
• Chopped Additional Oreos – For an extra crunchy topping, sprinkle more on top just before baking.
• Cream Cheese – Swirl into the batter for a rich, tangy addition that pairs perfectly with bananas.
Step‑by‑Step Instructions for Oreo Banana Bread
Step 1: Preheat the Oven
Begin by preheating your oven to 350°F (175°C). While the oven warms up, prepare a 9×5 inch loaf pan by greasing it lightly or lining it with parchment paper for easy removal later. This ensures your Oreo Banana Bread has a perfect, non-stick base to rise and bake beautifully.
Step 2: Mash the Bananas
In a large mixing bowl, take your ripe bananas and use a fork to mash them until they form a smooth puree with some small chunks visible for texture. Aim for about 1 to 1½ cups of mashed bananas, ensuring you use those perfect ones with plenty of brown spots, which will give your bread delicious natural sweetness.
Step 3: Mix in the Butter
Once your bananas are mashed, add in the melted butter and stir until thoroughly combined. You want the mixture to be glossy and smooth, which should take about 30 seconds of gentle mixing. This step enhances the richness of the Oreo Banana Bread, so make sure to incorporate the butter well.
Step 4: Add Sugar and Egg
Next, mix in the granulated sugar, beaten egg, and vanilla extract. Stir these ingredients together until the batter is smooth and well blended. You’ll notice the mixture transforming into a creamy texture, which beautifully combines the sweetness of sugar with the richness from the egg, making your batter a real treat.
Step 5: Incorporate Baking Soda and Salt
Sprinkle in the baking soda and salt, mixing well until both are fully incorporated. You’ll want to ensure that no lumps of baking soda remain, as this important leavening agent helps the bread rise beautifully in the oven, creating the ideal light texture in your final Oreo Banana Bread.
Step 6: Add Flour Gradually
Gradually incorporate the all-purpose flour into the mixture, gently folding it in without overmixing. Mix until the flour is just combined with the wet ingredients; a few small flour streaks are okay. Overmixing can lead to a denser loaf, so be kind to your batter—this step is crucial for that moist texture!
Step 7: Fold in the Oreos
Now, carefully fold in 10 crushed Oreo cookies. This step is essential as it creates that iconic Oreo crunch within the soft bread. Make sure to keep some chunks intact for a delightful surprise in every bite of Oreo Banana Bread. Set aside a few crushed Oreos for the topping.
Step 8: Pour into the Pan
Pour the batter into your prepared loaf pan, smoothing out the top with a spatula to create an even surface. Before baking, sprinkle the remaining crushed Oreos generously over the top of the batter. This will add a beautiful, crunchy finish as your bread bakes into a gloriously golden loaf.
Step 9: Bake to Perfection
Place the loaf pan in the oven and bake for 50–60 minutes. You’ll know it’s done when the top is golden brown and a toothpick inserted in the center comes out clean or with a few moist crumbs. The aroma wafting through your kitchen will be irresistible and a sure sign of good things to come!
Step 10: Cool and Serve
Once baked, allow the Oreo Banana Bread to cool in the pan for about 10 minutes. Then, carefully transfer it to a wire rack to cool completely. This cooling step helps firm up the loaf, making it easier to slice. Enjoy each bite of your scrumptious creation as a delightful treat!
Expert Tips for Oreo Banana Bread
-
Use Overripe Bananas: Opt for bananas with lots of brown spots; they will provide the best sweetness and moisture for your Oreo Banana Bread.
-
Avoid Overmixing: When adding flour, mix just until combined. Overmixing can result in a dense loaf rather than the light and airy texture we desire.
-
Customize with Flavors: Feel free to experiment with different Oreo varieties like mint or peanut butter for a fun twist on this classic recipe.
-
Don’t Skip Toppings: Always reserve some crushed Oreos for the top; this adds a lovely crunch and visual appeal to your finished bread.
-
Check for Doneness: Insert a toothpick into the center around the 50-minute mark. If it comes out clean or with few moist crumbs, your Oreo Banana Bread is ready to be enjoyed!
Oreo Banana Bread Variations & Substitutions
Feel free to unleash your creativity and customize this delightful bread to suit your tastes and dietary needs!
- Whole Wheat Flour: Substitute half of the all-purpose flour with whole wheat for a healthier option, giving your loaf a nutty flavor.
- Dairy-Free: Use coconut oil or dairy-free butter instead of regular butter for a vegan-friendly version. The richness remains, but it’s suitable for lactose-free diets!
- Sweetener Swap: Replace granulated sugar with coconut sugar for a lower glycemic option, enhancing the flavor profile with a rich caramel taste.
- Flavorful Oreos: Experiment with different Oreo varieties, like mint or peanut butter, to surprise your palate with unexpected taste combinations. Each bite will be a delightful adventure!
- Nutty Crunch: Add a handful of chopped nuts, such as walnuts or pecans, for extra texture and healthy fats. They create a lovely contrast with the softness of the bread.
- Mini Muffins: Transform the recipe into mini muffins for bite-sized treats, perfect for brunch or snacking. Just adjust the baking time to about 15-20 minutes!
- Cream Cheese Delight: Swirl in softened cream cheese before baking for a rich, tangy flavor that pairs beautifully with the sweetness of the bananas and Oreos.
- Spicy Kick: Add a sprinkle of cinnamon or a pinch of chili powder for warmth and spice. It might just become your new secret ingredient for this family favorite!
For more delicious inspiration, check out my Pumpkin Bread Moist or try the comforting flavors in my Apple Bread Deliciously. Enjoy your baking adventure!
What to Serve with Oreo Banana Bread?
Elevate your baking experience by adding scrumptious sides that perfectly complement this sweet, indulgent quick bread.
-
Creamy Mashed Potatoes: The buttery richness of mashed potatoes offers a contrast to the sweet banana bread, making for an interesting pairing that surprises your taste buds.
-
Fresh Fruit Salad: Bright, zesty fruits like berries and citrus provide a refreshing balance to the dense sweetness of Oreo Banana Bread, creating a light and vibrant meal.
-
Vanilla Ice Cream: Serve a warm slice with a scoop of vanilla ice cream for the ultimate indulgence—melted ice cream brings out the rich flavors of the Oreo cookies beautifully.
-
Coffee or Espresso: Pairing your banana bread with a rich cup of coffee or a shot of espresso enhances the sweet chocolatey notes, making it an ideal afternoon treat.
-
Whipped Cream Topping: A dollop of fluffy whipped cream adds a light, airy texture that enhances each bite, transforming your dessert into a heavenly indulgence.
-
Chocolate Drizzle: Drizzle melted chocolate over the top for an extra layer of sweetness that amplifies the Oreo flavor, creating a dessert experience that’s divine.
-
Peanut Butter Spread: A rich layer of creamy or crunchy peanut butter adds a delicious nutty flavor that complements the sweetness of the bread, perfect for breakfast or a snack.
-
Coconut Milk Smoothie: A refreshing and creamy coconut milk smoothie serves as a tropical contrast to the rich bread, making it a great pairing for any time of the day.
How to Store and Freeze Oreo Banana Bread
Room Temperature: Store your Oreo Banana Bread in an airtight container at room temperature for up to 3 days to maintain its moist texture.
Fridge: If you’d like it to last longer, refrigerate it for up to a week in an airtight container. This helps keep it fresh but may slightly alter the texture.
Freezer: For longer storage, freeze individual slices wrapped tightly in plastic wrap, then place in a freezer bag. It will stay good for up to 2 months.
Reheating: To enjoy your frozen slices, thaw in the refrigerator overnight or warm them directly in the microwave for 10-15 seconds, making each bite of Oreo Banana Bread just as delightful as when it was freshly baked.
Make Ahead Options
These Oreo Banana Bread delights are perfect for busy home cooks who want to save time! You can mash the ripe bananas and mix in the melted butter, sugar, egg, and vanilla up to 24 hours in advance; just cover the mixture tightly and refrigerate to keep everything fresh. You can also portion and crush the Oreos ahead of time, keeping them in an airtight container. When you’re ready to bake, simply add the baking soda, salt, and flour to the refrigerated banana mixture and fold in the crushed Oreos. This way, your oven will be filled with the rich aroma of freshly baked Oreo Banana Bread, bringing smiles to your family’s faces with minimal effort!
Oreo Banana Bread Recipe FAQs
How do I know if my bananas are ripe enough for this recipe?
Absolutely! For the best flavor and moisture in your Oreo Banana Bread, choose bananas with plenty of brown spots. These overripe bananas will provide natural sweetness and the perfect texture. If your bananas are too green, they won’t be sweet or soft enough for this delightful recipe.
What is the best way to store Oreo Banana Bread?
You can keep your Oreo Banana Bread in an airtight container at room temperature for up to 3 days. If you’re looking to store it longer, refrigerating it will extend its freshness to about a week. Just remember, refrigeration may slightly change the texture, making it a bit denser.
Can I freeze Oreo Banana Bread, and how should I do it?
Very! Freezing is a great way to enjoy your Oreo Banana Bread later. Wrap individual slices tightly in plastic wrap, then place them in a freezer bag. This will keep them fresh for up to 2 months. When you’re ready to enjoy, simply thaw in the refrigerator overnight or warm them in the microwave for 10-15 seconds.
What should I do if my batter seems too runny?
If you notice your batter is too runny, it might be due to the bananas being overly mashed or the flour being insufficiently incorporated. To correct this, add a little more flour, about 2 tablespoons at a time, until you achieve a thick yet pourable consistency. Remember, avoid overmixing to retain that moist, airy texture!
Are there any dietary considerations for making this recipe?
Absolutely! If you’re making Oreo Banana Bread for someone with dietary restrictions, you can substitute the egg with a flax egg by mixing 1 tablespoon of ground flaxseed with 2.5 tablespoons of water—let it sit until it becomes gel-like. If you need a dairy-free version, simply use a vegan butter alternative. Always check the Oreo varieties used, as some may contain allergens.
Decadent Oreo Banana Bread: A Fun Twist on a Classic
Ingredients
Equipment
Method
- Preheat your oven to 350°F (175°C) and prepare a 9x5 inch loaf pan by greasing or lining it.
- Mash ripe bananas in a mixing bowl until smooth with some small chunks visible.
- Mix in melted butter until glossy and smooth, about 30 seconds of gentle mixing.
- Add granulated sugar, beaten egg, and vanilla extract; stir until smooth and creamy.
- Sprinkle in baking soda and salt; mix until fully incorporated without lumps.
- Gradually incorporate all-purpose flour, folding gently without overmixing.
- Fold in 10 crushed Oreo cookies, keeping some chunks intact for texture.
- Pour the batter into the prepared pan and smooth the top. Sprinkle remaining crushed Oreos on top.
- Bake for 50-60 minutes, until a toothpick inserted comes out clean.
- Let cool in the pan for 10 minutes before transferring to a wire rack to cool completely.
Leave a Reply