
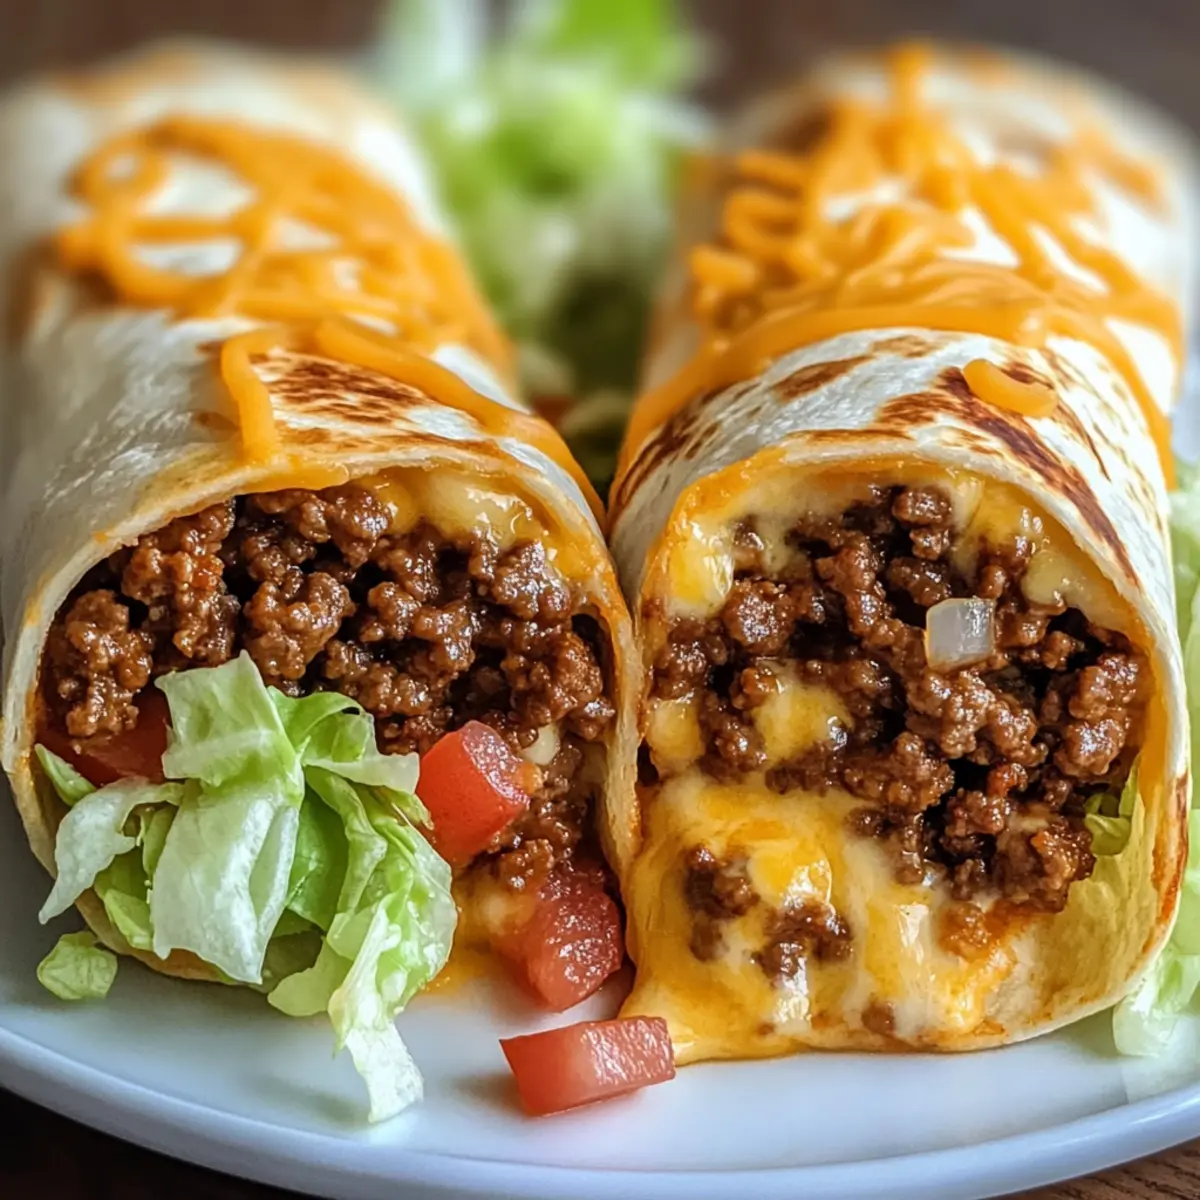
A warm evening breeze wafted through the kitchen as I rummaged through the cupboards, craving something comforting yet easy to whip up. That’s when I decided on these delightful Gluten-Free Nacho Cheese Beef Wraps. This recipe is packed with seasoned ground beef and lusciously melted nacho cheese, making it a perfect choice for busy weeknights or casual gatherings with friends. Not only are they a quick dinner solution, but they also cater to gluten-free diets without skimping on flavor. The combination of crispy tortillas and savory filling will have everyone reaching for seconds. Curious to find out how easily you can bring this crispy bliss to your table? Let’s dive in!
Why Choose Nacho Cheese Beef Wraps?
Quick and Easy: These wraps are a breeze to make, perfect for busy evenings when you want a satisfying meal without spending hours in the kitchen.
Gluten-Free Goodness: With gluten-free tortillas, you can indulge without worries, making these wraps suitable for everyone at the table.
Flavor Explosion: The rich, savory beef paired with melty nacho cheese creates a delightful harmony that will have your taste buds dancing.
Crowd-Pleasing: They’re a fantastic option for gatherings or family nights—easy to customize with toppings like fresh veggies or guacamole, ensuring everyone gets the flavors they love.
Versatile Variations: Want to switch things up? Consider adding beans for extra protein or swapping in chicken for a different twist, just like my Philly Cheesesteak Mac for a delightful alternative.
Get ready to enjoy a delicious, fun, and comforting meal at home!
Nacho Cheese Beef Wrap Ingredients
• Dive into the flavors that make these wraps irresistible!
For the Filling
- Ground Beef – A hearty main protein that brings flavor and texture; feel free to swap it for turkey if you’re craving a lighter option.
- Nacho Cheese Sauce – This creamy addition infuses richness into every bite; use shredded cheese instead for a gooey homemade alternative.
- Spices (e.g., chili powder, cumin) – These seasonings elevate the beef’s taste; adjust to your liking or grab some pre-mixed taco seasoning for convenience.
For the Wrap
- Gluten-Free Tortillas – The perfect vessel for all those delicious fillings; ensure they’re gluten-free to cater to dietary preferences.
Toppings
- Lettuce, Tomatoes, Jalapeños – Fresh veggies that add crunch and brightness; customize based on what you love or omit entirely for a simpler experience.
With these simple ingredients, your Nacho Cheese Beef Wrap is just a beat away from becoming a family favorite!
Step‑by‑Step Instructions for Nacho Cheese Beef Wrap
Step 1: Prepare Ingredients
Start by gathering all your ingredients: ground beef, nacho cheese sauce, gluten-free tortillas, and any desired toppings like lettuce, tomatoes, and jalapeños. This ensures a smooth cooking process. Have your skillet ready on the stove, preheating over medium heat, and your utensils within reach for easy access as you cook.
Step 2: Cook Beef
In the preheated skillet, add the ground beef. Cook it for about 6–8 minutes, stirring occasionally, until it’s beautifully browned and cooked through. Make sure to break it apart with a spatula for even cooking. Once cooked, season the beef with chili powder and cumin, allowing the spices to infuse the meat with a savory aroma.
Step 3: Add Cheese Sauce
Once your beef is perfectly browned, pour in the nacho cheese sauce, stirring it gently into the meat. Cook for an additional 2–3 minutes over low heat, until the cheese sauce is thoroughly warmed and melded with the beef, creating a creamy and rich filling for your Nacho Cheese Beef Wrap.
Step 4: Assemble Wraps
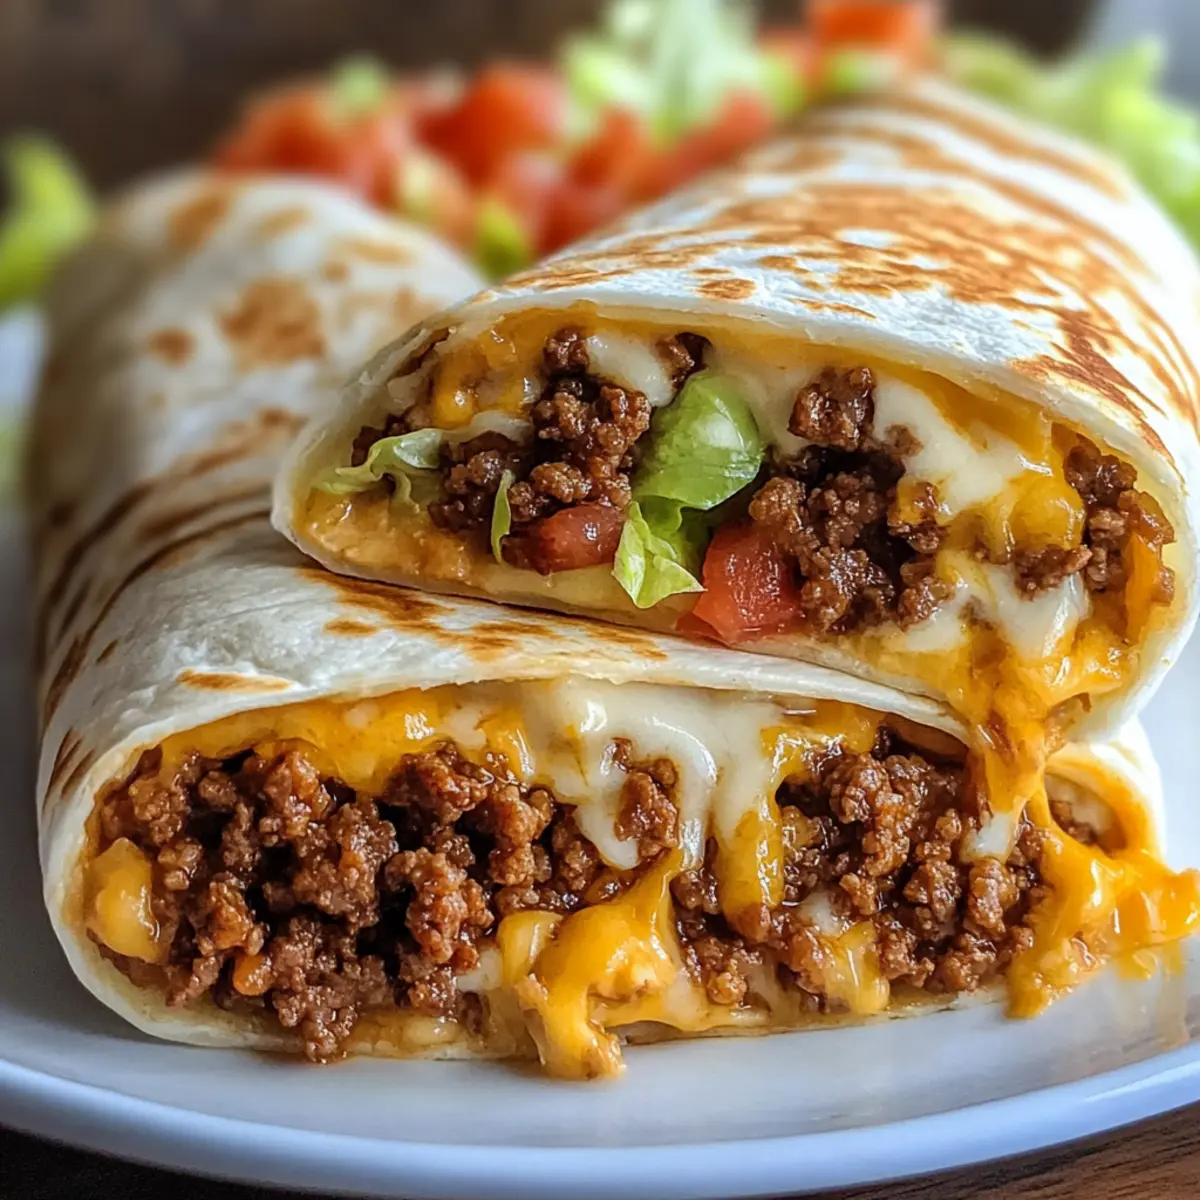
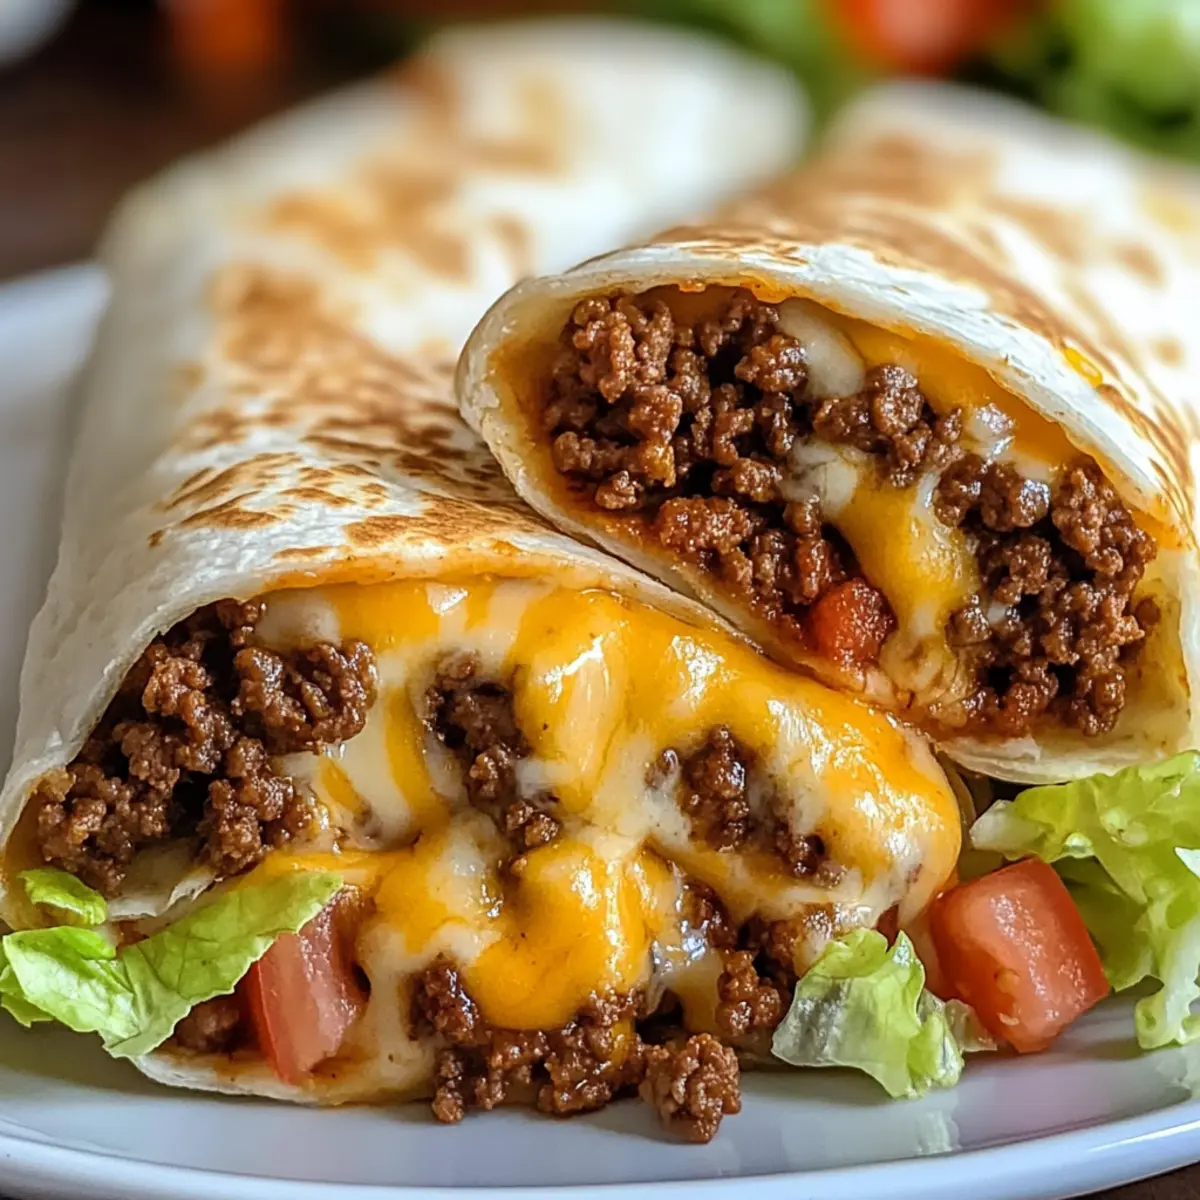
Take one gluten-free tortilla and spoon a generous portion of the beef and cheese mixture onto its center. Top with your choice of fresh toppings, like crisp lettuce and juicy tomatoes. Carefully roll the tortilla tightly around the filling, ensuring none spills out, then lay the wrap seam-side down on your work surface.
Step 5: Grill Wraps
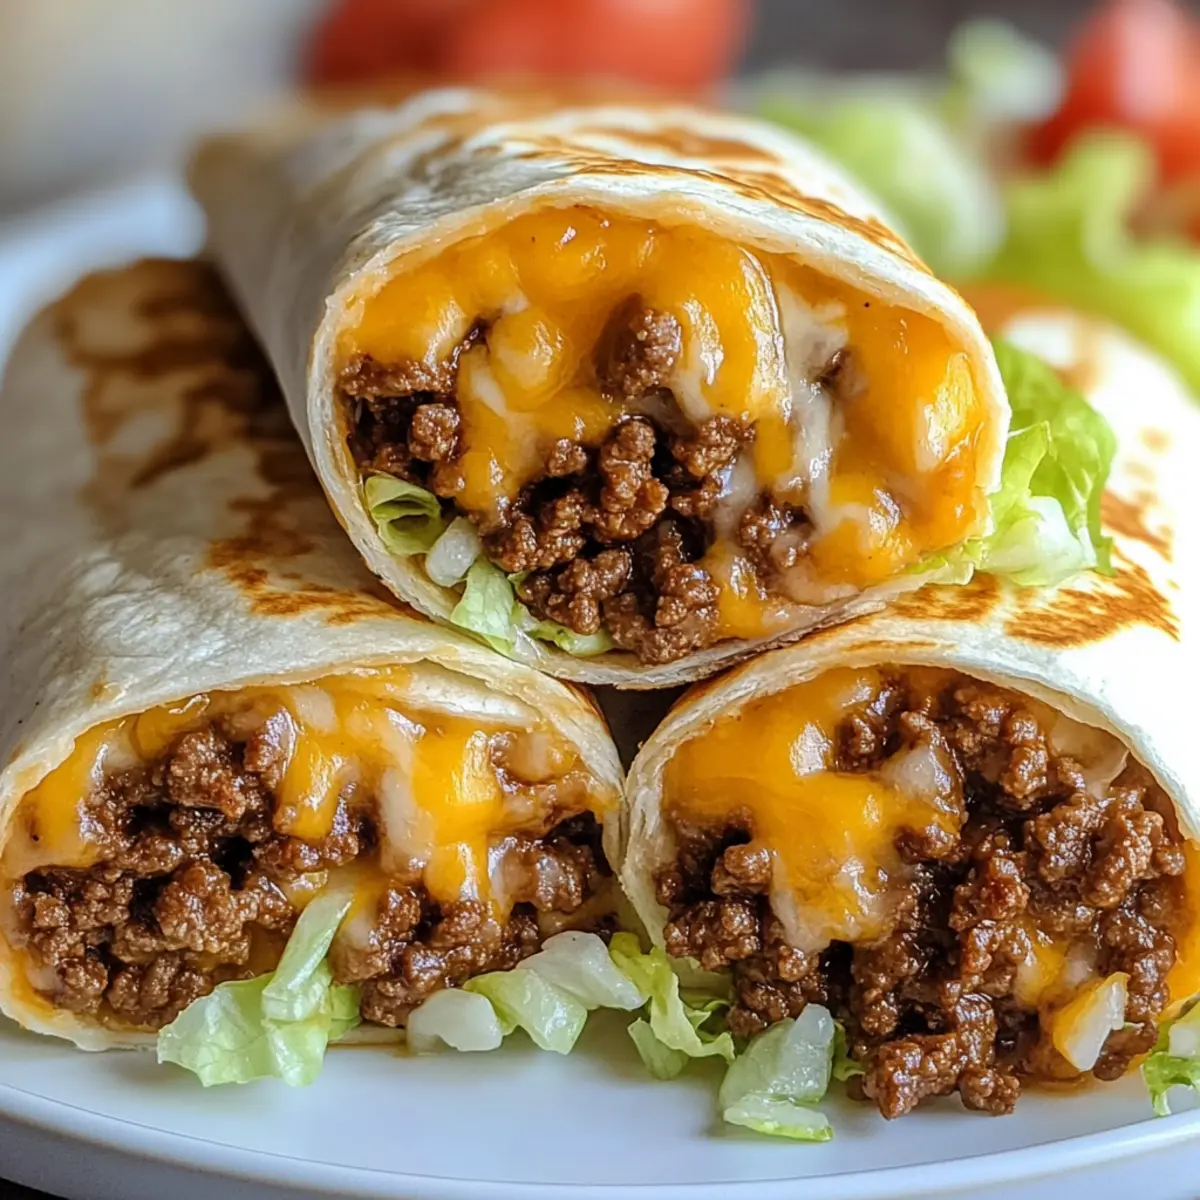
Return the skillet to medium-high heat. Carefully place the rolled wraps seam-side down onto the hot skillet. Grill each side for about 2–3 minutes, or until they turn golden brown and crispy, giving a satisfying crunch when pressed lightly. Watch for a lovely golden color to ensure perfect crispness.
Step 6: Serve
Once grilled to perfection, remove the Nacho Cheese Beef Wraps from the skillet. Slice them in half for easy handling, and serve warm with any additional toppings or sauces you desire. Enjoy these delightful wraps as a comforting meal ideal for family gatherings or a cozy dinner at home!
What to Serve with Nacho Cheese Beef Wraps
The perfect accompaniment can elevate your Nacho Cheese Beef Wraps into a full, satisfying meal that everyone will love.
- Crispy Tortilla Chips: These add an extra crunch to your meal and are perfect for dipping in salsa or guacamole.
- Fresh Garden Salad: A light, refreshing salad with zesty dressing complements the rich flavors of the wraps beautifully.
- Zesty Guacamole: The creaminess of guacamole balances the savory meat and cheese, adding a delightful pop of flavor.
- Salsa Verde: The tangy brightness of salsa verde enhances the flavor profile, bringing a fresh twist to the meal.
- Corn on the Cob: Grilled or boiled, corn adds a sweet crunch that’s a great contrast to the savory wraps.
- Mexican Street Corn Salad: Combining corn with lime, cheese, and spices brings a deliciously creamy element that pairs perfectly.
- Customized Nacho Platter: Load up a platter with toppings like cheese, jalapeños, and olives, allowing everyone to create their own nacho experience.
- Iced Tea or Lemonade: Chill out your meal with refreshing drinks that complement the spices in the wraps with their thirst-quenching qualities.
These servings will turn your meal into a festive occasion, inviting everyone to savor each bite in a burst of flavors!
Storage Tips for Nacho Cheese Beef Wraps
-
Room Temperature: It’s best to enjoy your Nacho Cheese Beef Wraps immediately after grilling. They should not be left out for more than 2 hours to ensure freshness and safety.
-
Fridge: Store assembled wraps in an airtight container in the refrigerator for up to 2 days. This helps preserve the flavors while keeping the tortillas from becoming too soggy.
-
Freezer: For longer storage, freeze individual wraps wrapped tightly in plastic wrap and then foil for up to 1 month. Thaw in the fridge overnight before reheating.
-
Reheating: To reheat, warm the wraps in a skillet over medium heat for about 3-5 minutes on each side until the tortillas are crispy again and the filling is heated through. Enjoy these delicious Nacho Cheese Beef Wraps warm for the best taste!
Expert Tips for Nacho Cheese Beef Wraps
-
Brown the Beef Well: Make sure the ground beef is thoroughly browned to enhance the flavor of your Nacho Cheese Beef Wrap. Undercooking can result in a bland filling.
-
Mind the Filling: Avoid overloading your wraps with the beef and cheese mixture. This prevents spills while grilling and ensures a neat and enjoyable eating experience.
-
Perfect Grilling Technique: Grill your wraps on medium-high heat for a short time to achieve that delightful crispy texture. Cooking too long can make them tough.
-
Customize Toppings: Feel free to get creative with toppings like fresh avocado or salsa. Customizing not only enhances flavor but also adds nutritional value to your meal.
-
Make-Ahead Tips: If planning ahead, assemble the wraps but grill them just before serving to maintain their crispness. Store uncooked wraps in the fridge, covered, for up to 2 days.
Nacho Cheese Beef Wrap Variations
Feel free to mix and match to create your own delicious spin on these wraps!
- Beans Boost: Add black beans or pinto beans to the beef mixture for extra protein and fiber. This not only enhances the filling but also includes more hearty flavors.
- Chicken Swap: Replace ground beef with shredded chicken for a lighter twist. This option offers a different flavor profile while keeping the creation just as comforting.
- Spicy Kick: Toss in some diced jalapeños into the beef for an exciting heat level. If you’re a fan of spice, this will surely awaken your palate!
- Veggie Delight: Replace meat with sautéed vegetables like bell peppers and onions for a vegetarian version. This option provides the same satisfying crunch with a fresh twist.
- Creamy Avocado: Top your finished wraps with slices of creamy avocado or a dollop of guacamole. This addition elevates the richness and brings a refreshing touch.
- Extra Cheese: For true cheese lovers, sprinkle some shredded cheese inside before rolling. As it melts, you’ll experience that ooey-gooey delight with each bite.
- Herbed Bliss: Sprinkle some fresh cilantro or parsley into the meat mixture for a burst of freshness. It adds a beautiful touch and lifts the whole experience to a new level.
- Cheese Sauce Twist: Instead of nacho cheese, try a queso blanco sauce for a different flavor dimension. Perfect for achieving a creamy base that’s equally delightful.
Looking for more creative ideas? Consider trying out my delicious Italian Herbs Cheese for a flavorful infusion or enjoy some savory flavors with Korean Ground Beef. Happy cooking!
Make Ahead Options
These Nacho Cheese Beef Wraps are perfect for meal prep aficionados! You can prepare the beef filling up to 3 days in advance. Simply cook the ground beef with spices and cheese sauce, then let it cool before refrigerating in an airtight container. To maintain the wraps’ quality, assemble them just before serving; this keeps the tortillas from becoming soggy. When you’re ready to enjoy your savory creation, heat the filling gently in a skillet and roll it in fresh gluten-free tortillas, grilling each wrap for about 2-3 minutes until crispy. With these steps, you’ll have a delicious meal ready in no time, making weeknight dinners a breeze!
Nacho Cheese Beef Wrap Recipe FAQs
How do I choose the right ground beef for my Nacho Cheese Beef Wrap?
Absolutely! Look for lean ground beef (80/20 blend) for a great balance of flavor and fat; it keeps the filling juicy without being overly greasy. If you prefer a healthier option, ground turkey works wonders too, providing a leaner alternative without sacrificing taste!
How should I store leftover Nacho Cheese Beef Wraps?
For optimal freshness, store any assembled wraps in an airtight container in the refrigerator for up to 2 days. This ensures the flavors stay intact. Use parchment paper between layers if stacking, to prevent sticking. If you’re not planning to eat them within that timeframe, consider freezing!
Can I freeze my Nacho Cheese Beef Wraps?
Yes! To freeze, wrap each individual wrap tightly in plastic wrap, followed by aluminum foil. This prevents freezer burn and retains flavor. They can be stored in the freezer for up to 1 month. When you’re ready to enjoy, simply thaw in the fridge overnight and reheat in a skillet for optimal crispiness.
What can I do if my beef mixture is too dry?
If you find yourself with a dry beef filling, don’t worry! Simply add a splash of beef broth or water to the skillet while cooking the beef. Continue stirring until it reaches your desired consistency. For extra flavor, consider adding a bit more nacho cheese sauce—it enhances moisture and richness!
Are these Nacho Cheese Beef Wraps suitable for individuals with gluten allergies?
Absolutely! By using gluten-free tortillas, these wraps cater to gluten-free diets without sacrificing flavor. Always check the label of the tortillas you purchase to ensure they meet gluten-free standards, and your meal can be enjoyed by everyone at the table.
How can I ensure my wraps stay crispy after reheating?
To keep your wraps crispy, always reheat them in a skillet over medium heat instead of the microwave. Grill each side for about 3-5 minutes until heated through and crispy again. This method revives that satisfying crunch, just like when they were freshly made!
Nacho Cheese Beef Wrap: Crispy, Cheesy Comfort in Minutes
Ingredients
Equipment
Method
- Gather all your ingredients: ground beef, nacho cheese sauce, gluten-free tortillas, and desired toppings. Preheat your skillet over medium heat.
- In the preheated skillet, add and cook the ground beef for about 6–8 minutes, stirring occasionally until nicely browned. Season with chili powder and cumin.
- Pour in the nacho cheese sauce, stirring gently until warmed, about 2–3 minutes.
- Take a gluten-free tortilla, spoon a portion of the beef and cheese mixture in the center, and add toppings. Roll tightly and place seam-side down.
- Grill wraps in the skillet over medium-high heat for 2–3 minutes on each side until golden brown and crispy.
- Remove from skillet, slice in half, and serve warm with additional toppings or sauces.
Leave a Reply