
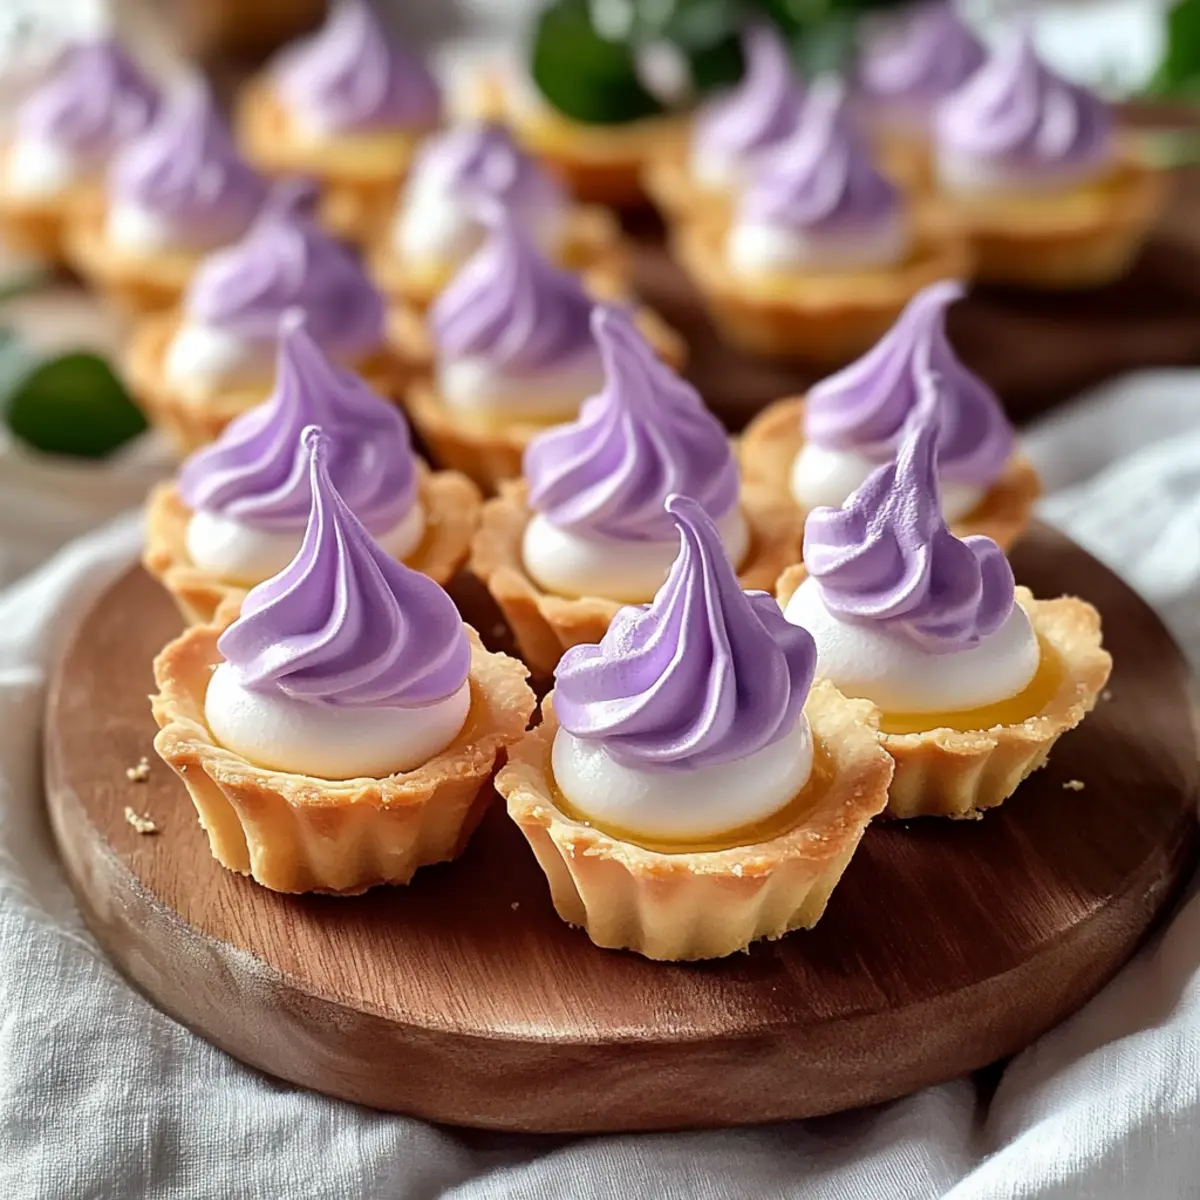
As I stood in my kitchen, the smell of citrus wafting through the air transported me to sun-drenched lemon orchards. Nothing beats the joy of crafting these Mini Lemon Tarts with Lilac Meringue, a dessert that harmoniously combines a buttery flaky crust with tangy lemon curd and a whimsical swirl of lilac meringue. Not only are they visually stunning, but they also make for a delightful crowd-pleaser, effortlessly elevating any gathering or cozy night in. I can’t help but smile knowing that each bite perfectly balances sweet and sour, igniting a spectrum of flavors on my palate. So, are you ready to embark on this culinary adventure and bring a touch of gourmet magic to your home?
Why Will You Adore Mini Lemon Tarts?
Irresistible Flavor: Each mini tart delivers a luscious blend of tangy lemon curd and sweet meringue, creating a dessert that dances on your taste buds.
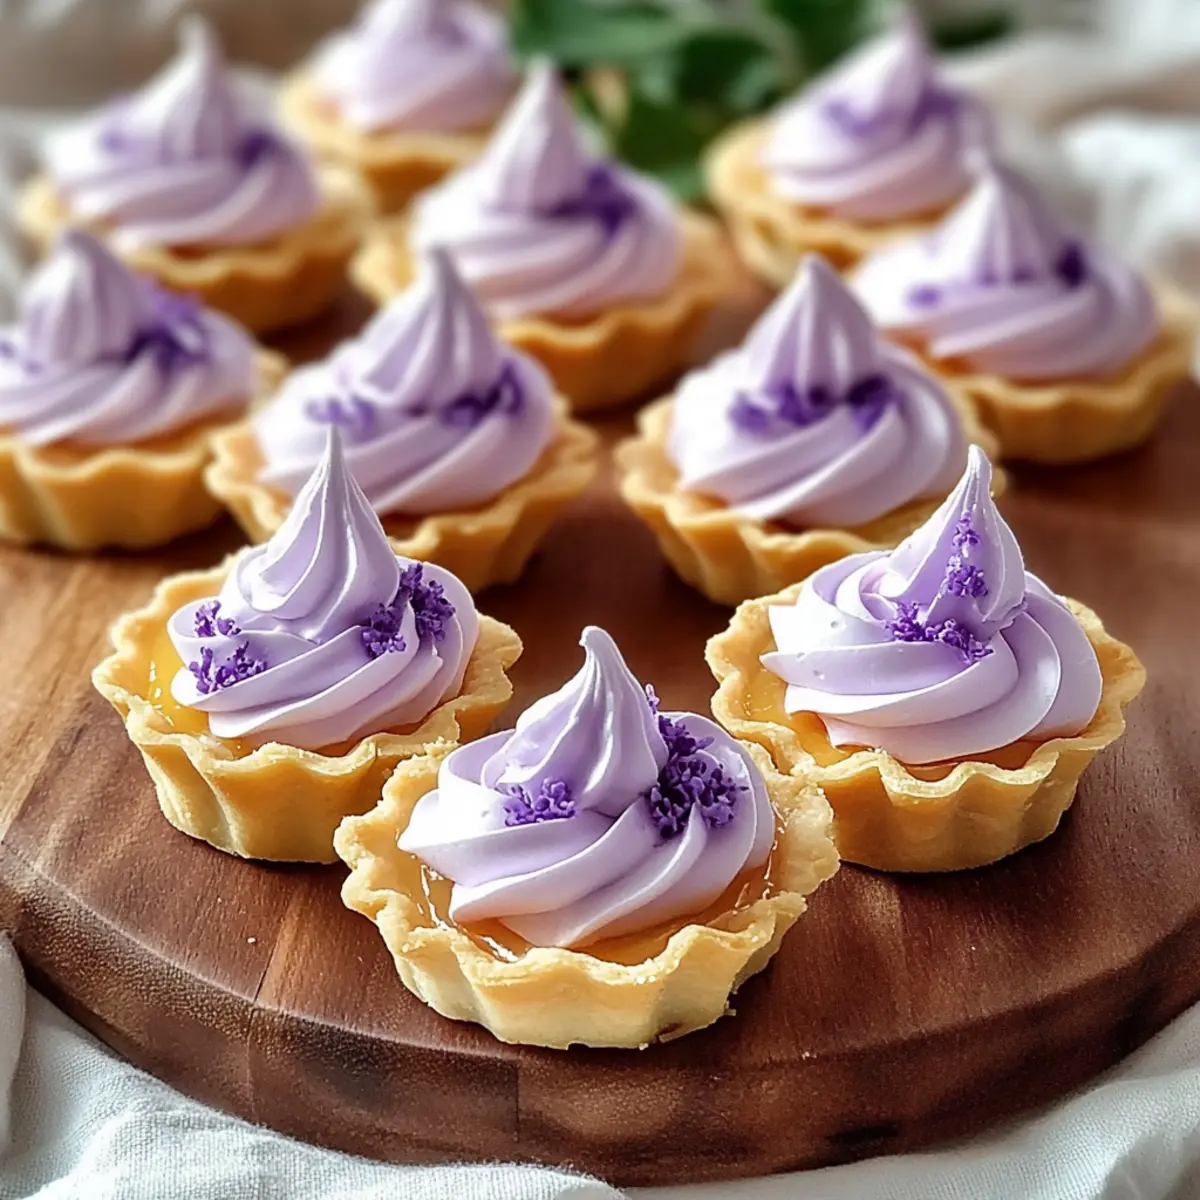
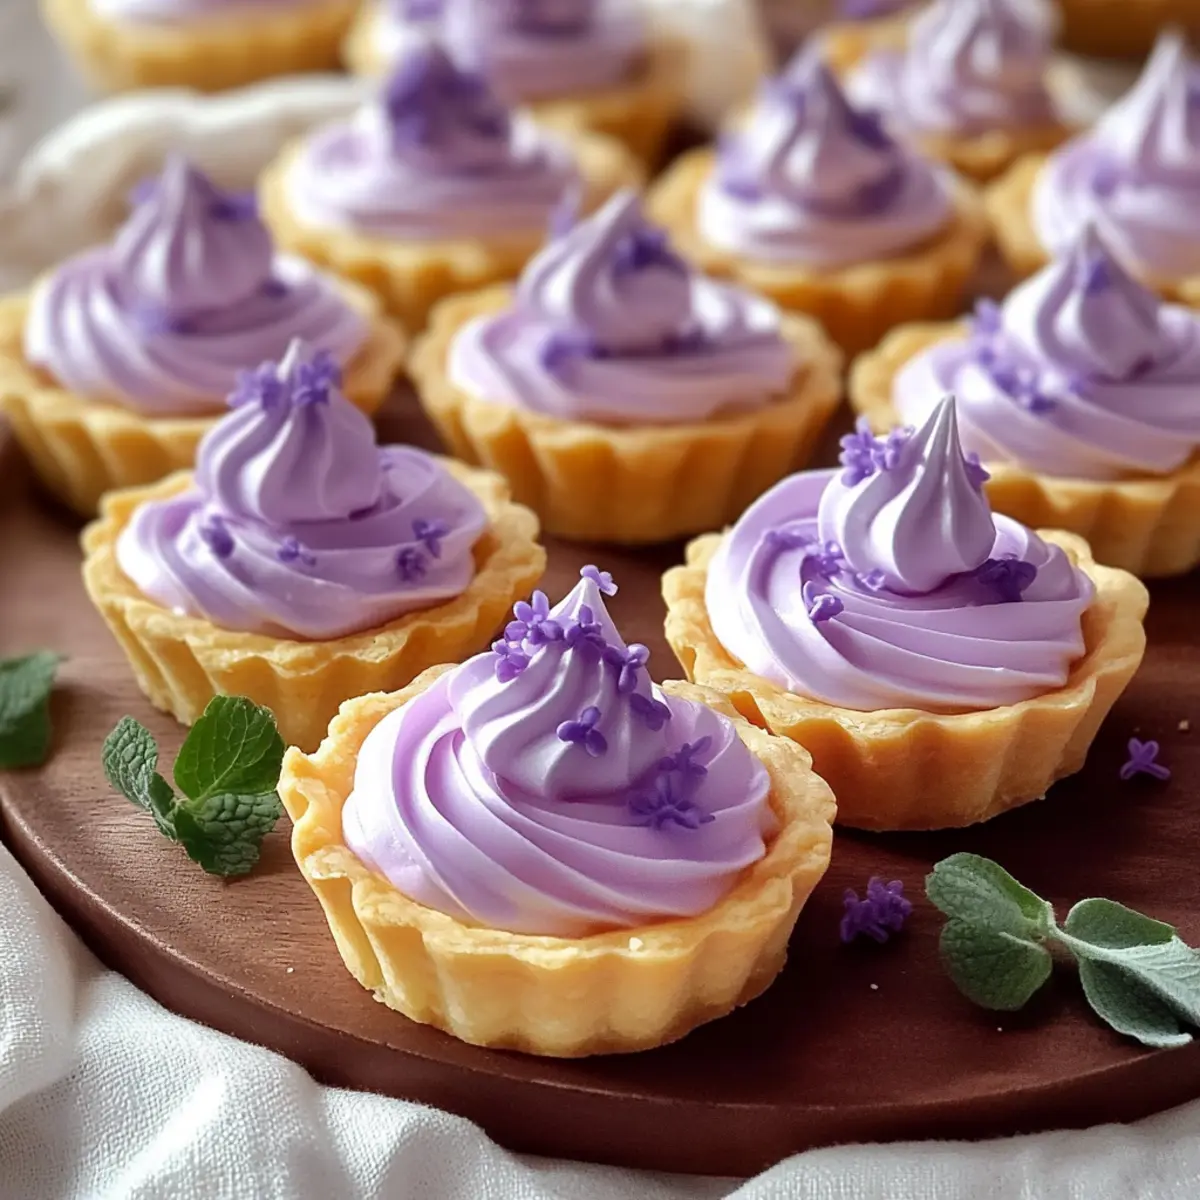
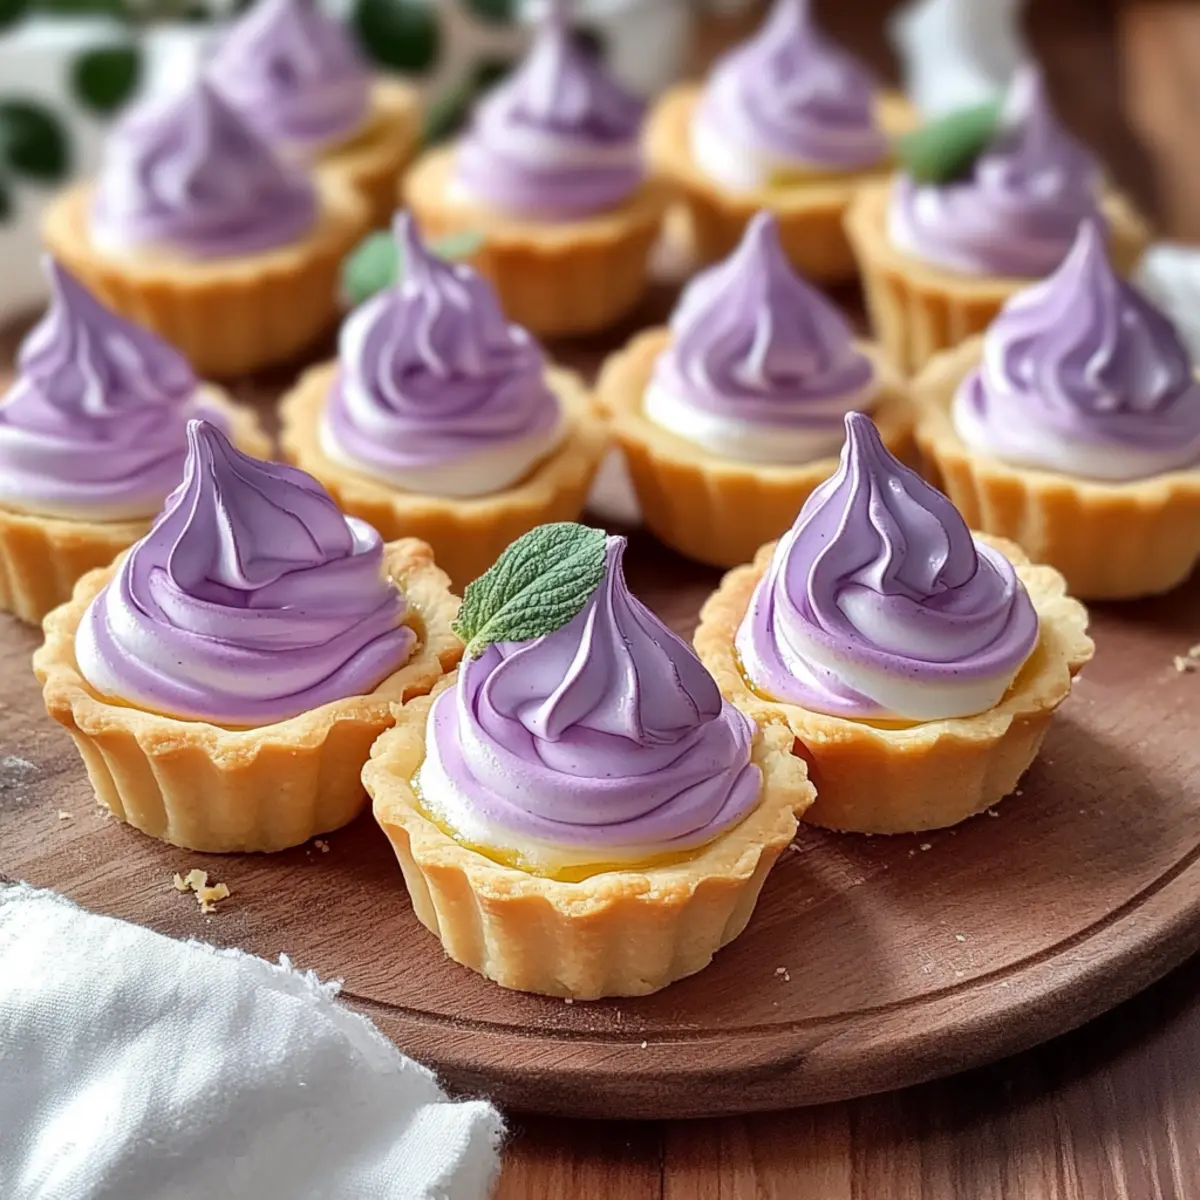
Visual Showstopper: The stunning lilac meringue isn’t just eye-catching; it’s a delightful way to impress guests at any gathering, making your dessert the talk of the table.
Effortless Preparation: Simple steps make creating these gourmet tarts accessible, even for novice bakers. You’ll find the process as enjoyable as the results!
Versatile Treats: Feel free to experiment! Add a twist by infusing the lemon curd with flavors like lavender or ginger to keep things fresh.
Perfect For Any Occasion: Whether it’s a special celebration or a cozy evening at home, serving these mini lemon tarts adds a touch of elegance to any moment. If you’re intrigued by delightful dessert ideas, you might want to check out these delicious alternative recipes, like my Sugar Pop Tart cookies!
Mini Lemon Tart Ingredients
• To create these delicious mini lemon tarts, gather these essential ingredients!
For the Crust
- All-Purpose Flour – Provides structure and texture to the tart crust; substitute with gluten-free flour for a gluten-free option.
- Powdered Sugar – Sweetens the tart crust and contributes to a tender texture.
- Salt – Enhances the flavor in the crust for a delightful balance.
- Chilled Butter – Key for achieving a flaky crust; keep it cold during preparation. Substitute with vegan butter for a dairy-free alternative.
For the Lemon Curd
- Eggs – Essential for thickening the lemon curd and ensuring the stability of the meringue.
- Granulated Sugar – Adds sweetness to both the lemon curd and the meringue, helping achieve stiff peaks.
- Fresh Lemon Juice – Provides the signature tartness and flavor for the curd; fresh lemons are recommended for the best taste.
- Lemon Zest – Enhances the lemon flavor in the curd, giving it an aromatic zest.
- Vanilla Extract – Adds depth and richness to the lemon curd.
For the Meringue
- Egg Whites – The base for the meringue; make sure they are at room temperature for the best volume.
- Granulated Sugar – Sweetens the meringue, aiding in achieving stiff peaks ideal for piping.
- Lilac Food Coloring – Creates the enchanting lilac hue for visual appeal; optional for those preferring natural coloring.
These mini lemon tart ingredients promise an unforgettable dessert experience, blending flavors and aesthetics in each tempting bite!
Step‑by‑Step Instructions for Mini Lemon Tarts
Step 1: Prepare Crust
In a mixing bowl, combine all-purpose flour, powdered sugar, and salt. Cut in chilled butter using a pastry cutter until the mixture resembles coarse crumbs, about 5-7 minutes. Roll out the dough on a floured surface, then cut into circles to fit your tart pans. Place the dough circles into the pans, pressing gently, and chill in the refrigerator for 30 minutes while you preheat your oven.
Step 2: Bake Shells
Preheat your oven to 350°F (175°C). Once the shells are chilled, bake them in the oven for 15-20 minutes or until they turn golden brown. Keep an eye on them as they bake to avoid overbaking. The mini tart shells should look firm and lightly golden—this ensures they’ll hold up beautifully against the creamy filling.
Step 3: Make Lemon Curd
In a medium saucepan, whisk together fresh lemon juice, granulated sugar, eggs, lemon zest, and vanilla extract over medium heat. Cook the mixture while constantly stirring until it thickens, about 8-10 minutes. Once thickened, remove the saucepan from heat and allow the lemon curd to cool slightly before pouring it into the cooled tart shells, filling them generously.
Step 4: Prepare Meringue
In a clean mixing bowl, beat the egg whites using an electric mixer until soft peaks form, approximately 2-3 minutes. Gradually add granulated sugar while continuing to beat until stiff peaks form, around 5-7 minutes. If desired, gently fold in lilac food coloring to achieve a whimsical hue for your meringue, giving it a delightful visual twist.
Step 5: Pipe Meringue
Transfer the fluffy meringue into a piping bag fitted with a star tip. Pipe the meringue onto each tart filled with lemon curd, creating lovely swirls or peaks. Make sure to cover the lemon curd completely to prevent it from weeping, which will enhance the mouthwatering appeal of your mini lemon tarts.
Step 6: Toast Meringue
Using a kitchen torch, carefully toast the tops of the piped meringue until golden brown, about 1-2 minutes, ensuring to move the flame continuously to avoid burning. If you don’t have a torch, place the tarts under a broiler set to low, watching them closely for about 1 minute until they achieve a lovely golden color.
Step 7: Garnish and Serve
Optionally, garnish your mini lemon tarts with fresh mint leaves for a pop of color and flavor. Serve the tarts chilled on a beautiful platter, and enjoy their stunning aesthetics and delightful balance of flavors at your next gathering or cozy night in!
Expert Tips for Mini Lemon Tarts
-
Temperature Matters: Ensure your butter and eggs are at the right temperature before starting. Cold butter creates a flaky crust, while room temperature eggs help the meringue achieve its ideal volume.
-
Watch the Bake: Keep a close eye on the tart shells while baking. Overbaking can lead to a dry crust, while underbaking may cause sogginess when the lemon curd is added.
-
Perfect Meringue: When beating the egg whites for the meringue, ensure no yolk gets in; it can prevent you from achieving stiff peaks. Gradually add sugar to allow it to dissolve properly.
-
Prevent Weeping: Pipe the meringue immediately over the lemon curd to seal it well. This helps prevent weeping, ensuring your mini lemon tart looks as heavenly as it tastes.
-
Experiment with Flavors: Feel free to customize your lemon curd by adding unique flavors like lavender or ginger, elevating your mini lemon tart experience.
Make Ahead Options
These Mini Lemon Tarts with Lilac Meringue are perfect for meal prep, allowing you to enjoy a gourmet dessert without the last-minute rush! You can prepare the tart crusts up to 24 hours in advance; simply bake them and store them in an airtight container at room temperature to maintain their flakiness. The lemon curd can also be made ahead and refrigerated for up to 3 days—just be sure to cover it tightly to keep moisture out. When you’re ready to serve, fill the cooled crusts with the lemon curd and whip up your meringue fresh for that light, airy topping. This way, each tart remains just as delicious and visually stunning as if made the same day!
Mini Lemon Tart Variations
Feel free to let your creativity shine and personalize these mini lemon tarts to your liking!
-
Gluten-Free: Swap all-purpose flour with a gluten-free flour blend to accommodate dietary preferences without sacrificing taste.
-
Vegan Delight: Use vegan butter and aquafaba (chickpea water) in place of eggs for a completely dairy-free and egg-free tart experience. You’d be surprised at how delightful a vegan option can be!
-
Citrus Twist: Experiment with using lime or orange juice instead of lemon juice in the curd. Each brings a unique flavor profile, brightening up your dessert in a new way.
-
Flavored Meringue: Add lavender or mint extract to the meringue for a subtle flavor boost. Just a drop or two can transform the taste, offering a fragrant touch to every bite.
-
Added Texture: Crumble some almond or macadamia nuts on top of the meringue before toasting for a lovely crunch that contrasts with the smooth curd and fluffy meringue.
-
Chocolate Drizzle: Drizzle some melted chocolate over the top of the meringue after toasting. The pairing of lemon and chocolate is deliciously unexpected!
-
Berry Garnish: Top with fresh berries like raspberries or blueberries for added color and a burst of juicy flavor that complements the tartness of lemon.
-
Herbal Infusion: Infuse the lemon curd with fresh herbs, such as basil or thyme, to add a savory note that surprises the palate, making a truly unforgettable dessert.
These variations are sure to have your taste buds dancing! If you enjoy creative takes on desserts, don’t forget to check out my scrumptious Sugar Pop Tart cookies for another delicious adventure in baking!
How to Store and Freeze Mini Lemon Tarts
Fridge: Store your mini lemon tarts in an airtight container in the refrigerator for up to 2 days. This helps maintain the freshness of the buttery crust and tangy lemon curd.
Freezer: If you need to freeze them, freeze the baked shells without filling for up to 1 month. Wrap them tightly in plastic wrap and then place them in a freezer bag to prevent freezer burn.
Reheating: To reheat the tarts, simply let them thaw in the refrigerator overnight, then serve cold or at room temperature. Avoid reheating the meringue, as it may weep when thawed.
Meringue Tip: It’s best to make the meringue fresh before serving, as chilling can cause it to lose its fluffy texture. Enjoy your delightful mini lemon tarts while they’re fresh!
What to Serve with Mini Lemon Tart Bliss
Indulging in mini lemon tarts opens up a world of delightful pairings that will further elevate your dessert experience.
-
Fresh Berries: Juicy raspberries or blueberries add a burst of color and complement the tart lemon flavor, enhancing the overall sweetness.
-
Whipped Cream: A dollop of lightly sweetened whipped cream provides a creamy contrast to the tangy filling, creating a satisfying texture combination.
-
Herbal Tea: A fragrant herbal blend, like chamomile or mint, can bring a calming balance to the zesty flavors of the tarts, perfect for a cozy afternoon.
-
Sparkling Wine: A glass of bubbly prosecco or champagne adds a celebratory flair and complements the bright lemon notes beautifully.
-
Lemon Sorbet: This frozen treat mirrors the tartness of the lemon curd, offering a refreshing palate cleanser that pairs perfectly with the dessert.
-
Chocolate Drizzle: A light drizzle of dark chocolate creates a decadent twist and beautifully contrasts with the layers of flavor in the tart.
-
Coconut Macaroons: Chewy coconut cookies provide a delightful textural contrast and their sweetness pairs harmoniously with the tarts’ tanginess.
-
Pistachio Ice Cream: The creamy, nutty flavor balances out the tart lemon and brings a delightful, rich dimension to each bite.
Choosing any of these enticing options serves to enrich your dining experience, transforming these mini lemon tarts into a memorable finale for any meal!
Mini Lemon Tart with Lilac Meringue Recipe FAQs
What kind of lemons are best for lemon curd?
Absolutely! For the best flavor, I recommend using fresh, juicing lemons like Eureka or Lisbon. Look for lemons that are bright yellow and slightly firm to the touch; avoid any with dark spots or shriveling skin.
How should I store mini lemon tarts?
To keep your mini lemon tarts fresh, store them in an airtight container in the refrigerator for up to 2 days. This will help maintain the crispiness of the crust and the tangy flavor of the lemon curd. However, be aware that the meringue might weep if stored for longer than 48 hours.
Can I freeze mini lemon tarts?
Yes, you can! I recommend freezing the tart shells only, as the lemon curd and meringue don’t thaw well. To freeze, place the baked shells in a single layer on a baking sheet, then wrap them tightly in plastic wrap once frozen. They can be stored for up to 1 month. When you’re ready, just let them thaw in the fridge and fill them with fresh lemon curd and meringue before serving.
Why is my meringue not stiffening?
Very often, this can happen if there’s any fat or yolk in your egg whites or if they’re not at room temperature. Make sure your mixing bowl and utensils are clean, and that you beat the egg whites until they’ve reached soft peaks before gradually adding sugar. This method ensures the sugar dissolves and helps achieve those stiff peaks you want for your meringue.
Are mini lemon tarts safe for pets?
While the mini lemon tarts are a delicious treat for us, they shouldn’t be shared with pets since the lemon can be harsh on their digestive systems. Additionally, the sugar may not sit well with them, and whipped egg whites may cause tummy troubles. Always best to keep these goodies to ourselves!
Mini Lemon Tart Bliss with Fluffy Lilac Meringue Magic
Ingredients
Equipment
Method
- In a mixing bowl, combine flour, powdered sugar, and salt. Cut in chilled butter until the mixture resembles coarse crumbs. Roll out the dough, cut into circles, and place into tart pans. Chill for 30 minutes.
- Preheat your oven to 350°F (175°C). Bake chilled shells for 15-20 minutes until golden brown. Keep an eye to avoid overbaking.
- In a saucepan, whisk lemon juice, granulated sugar, eggs, lemon zest, and vanilla extract over medium heat. Cook until thickened, about 8-10 minutes. Pour into cooled tart shells.
- Beat egg whites until soft peaks form. Gradually add sugar, continue beating until stiff peaks form. Fold in lilac food coloring if desired.
- Pipe meringue onto tarts, covering lemon curd completely.
- Toast meringue using a kitchen torch until golden brown, or under a low broiler for about 1 minute.
- Optionally garnish with fresh mint leaves and serve chilled.
Leave a Reply