
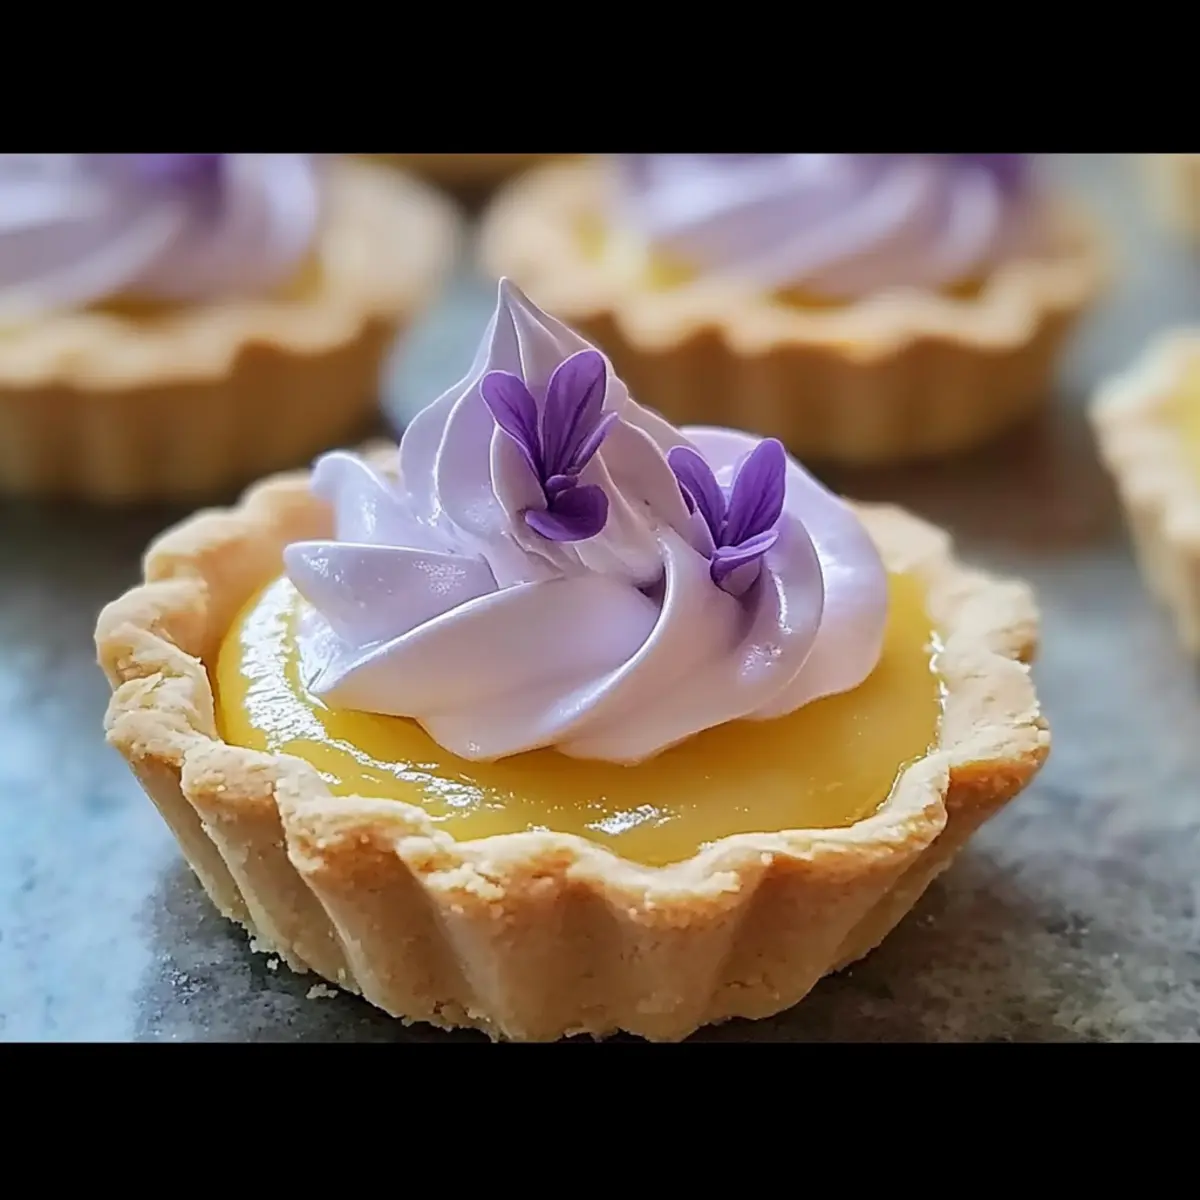
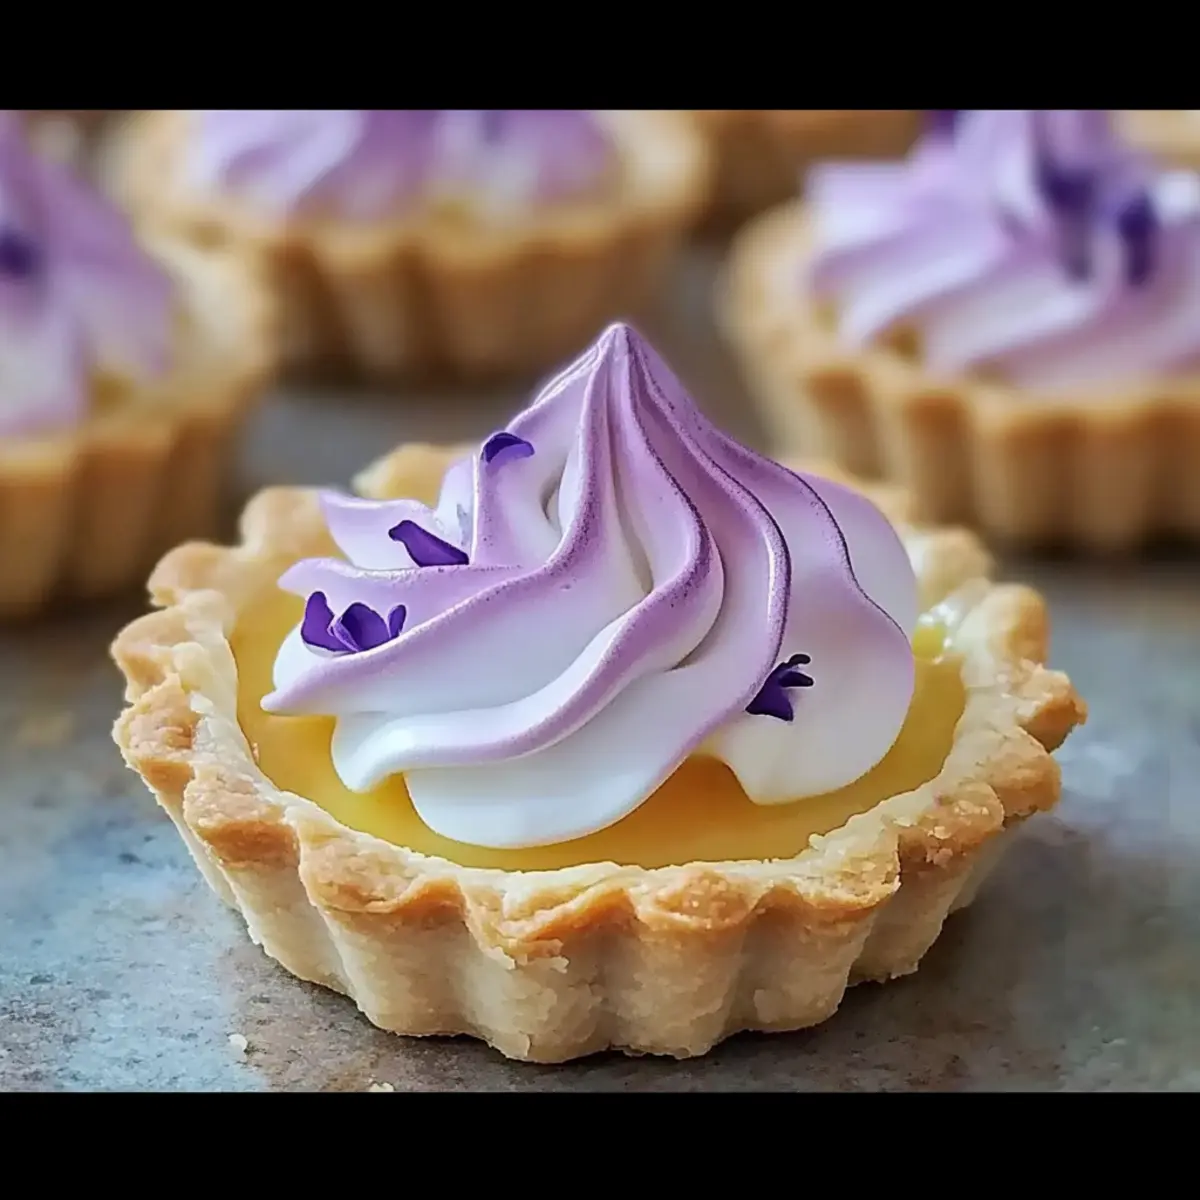
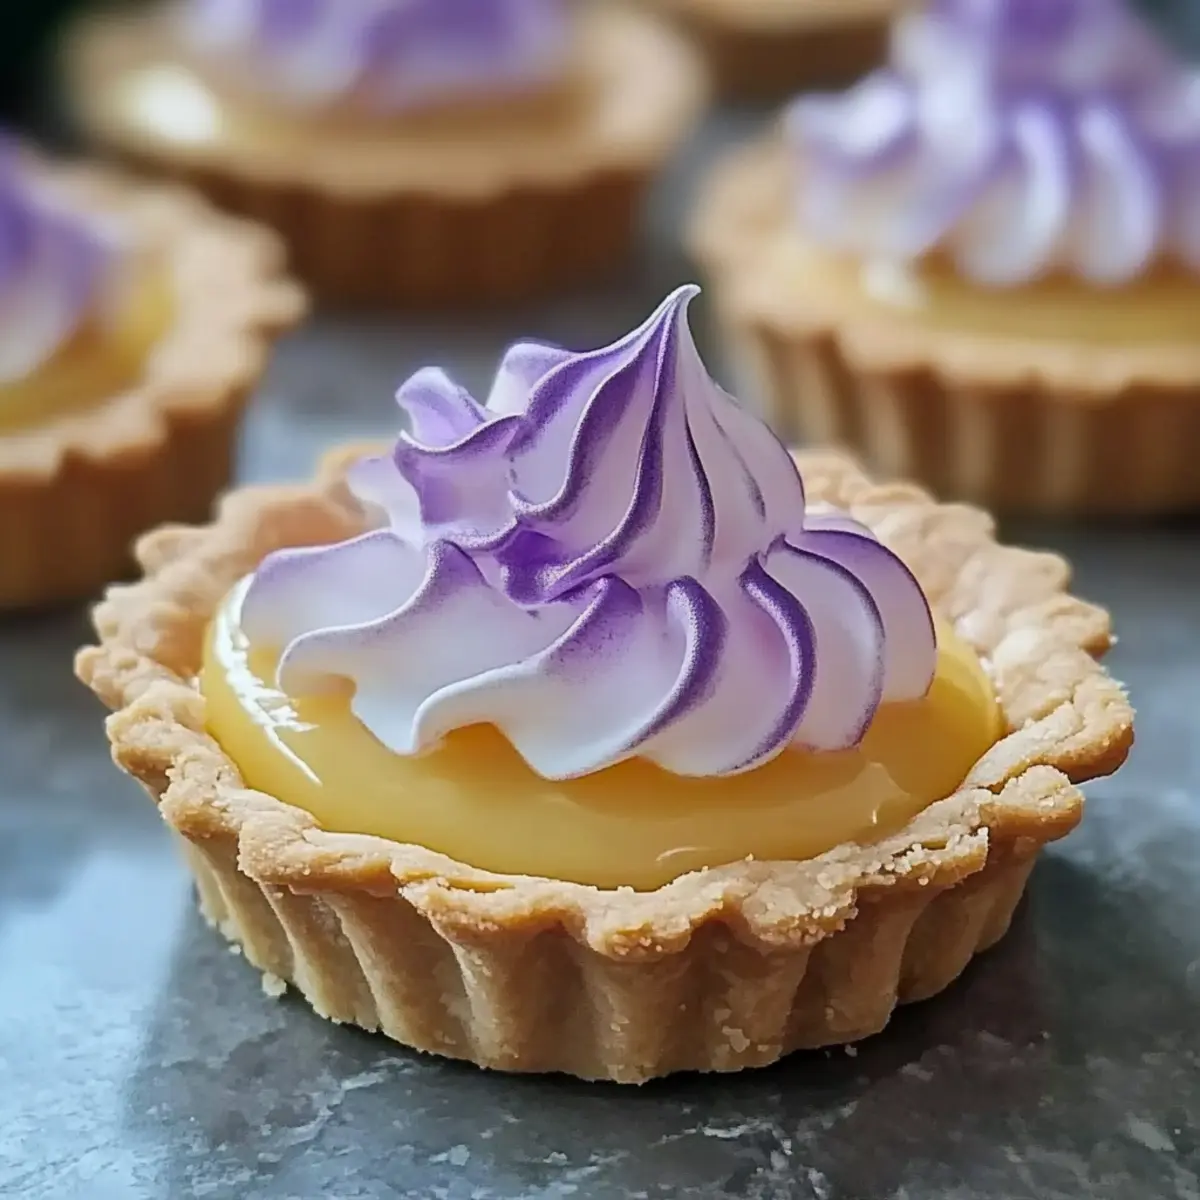
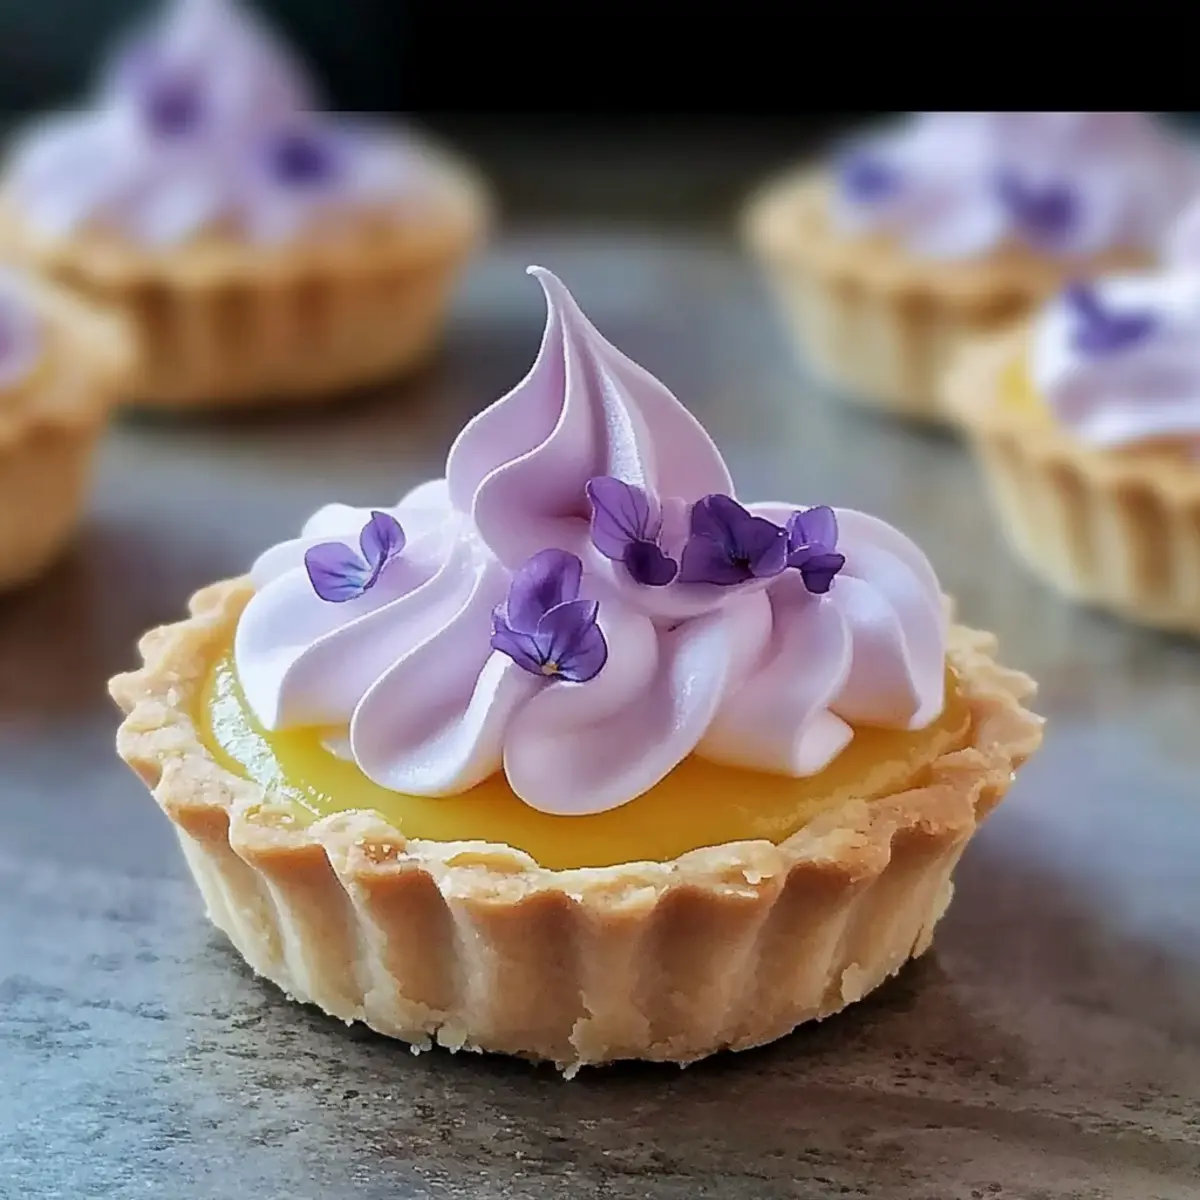
As I stood outside, the scent of lilacs danced through the air, instantly transporting me to spring’s vibrant embrace. That charming aroma inspired my latest endeavor: crafting Mini Lemon Tarts with Lilac Meringue. These delightful desserts blend the tartness of zesty lemon curd with whimsical, floral sweetness, making them perfect for brightening up any gathering or elegant brunch. Not only do they offer a fun twist on traditional pastries, but they’re also a hit with friends and family, effortlessly elevating your dessert table. Plus, with gluten-free options available, there’s no reason to hold back from creating these mini masterpieces. Curious about how to bring a taste of spring to your kitchen? Let’s dive into this delightful recipe together!
Why are Mini Lemon Tarts a Must-Try?
Irresistible Flavors: The tangy lemon curd paired with a light, airy lilac meringue creates a flavor explosion that tantalizes your taste buds.
Perfect for Spring: These mini tarts are ideal for any spring gathering, infusing a touch of whimsy into brunches or garden parties. Imagine pairing them with refreshing lavender lemonade for a delightful afternoon treat!
Versatile Variations: Whether you choose to make Rose Meringue or Lime-Lavender Curd instead, you can easily customize these treats to match your preferences, ensuring there’s a perfect version for everyone.
Gluten-Free Friendly: With easy substitutions, you can whip up a gluten-free version without compromising on taste, so everyone can indulge in this delightful dessert!
Eye-Catching Presentation: Their elegant appearance, topped with vibrant lilac meringue and garnished with edible flowers, promises to impress your guests and elevate your dessert table.
Elevate your dessert game and try these Mini Lemon Tarts with Lilac Meringue for that wow factor, bringing spring’s essence right into your kitchen. Don’t forget to check out our recipe for Garlic Butter Sauce to complement your upcoming meal!
Mini Lemon Tart Ingredients
For the Tart Shells
• All-purpose Flour – Use gluten-free flour if making a gluten-free version.
• Powdered Sugar – Provides sweetness; can be swapped with granulated sugar if desired.
• Cold Butter – Keeps the crust flaky, so ensure it’s well-chilled before use.
• Egg Yolk – Adds richness; a whole egg can be used for a firmer crust.
• Water – Helps bind the dough; adjust as needed for the right consistency.
For the Lemon Curd
• Lemon Juice – Fresh juice is best for vibrant tang in the curd.
• Lemon Zest – Enhances the lemon flavor; make sure to finely grate it.
• Granulated Sugar – Sweetens the curd; you can reduce the amount for less sweetness.
• Eggs – Thickens the curd; large eggs yield the best results.
• Butter (for curd) – Must be unsalted for better flavor control and adds creaminess.
For the Lilac Meringue
• Egg Whites – Ensure they are at room temperature for optimal volume.
• Granulated Sugar (for meringue) – Using superfine sugar helps achieve a smoother texture.
• Cream of Tartar – Stabilizes the meringue and is recommended for best results.
• Vanilla Extract – Adds a lovely flavor; substitute with other extracts for a twist.
• Violet Food Coloring – Provides that enchanting lilac hue; natural colorants can also be used.
Step‑by‑Step Instructions for Mini Lemon Tart with Lilac Meringue
Step 1: Make the Tart Shells
In a food processor, pulse together 1 ½ cups of all-purpose flour and ½ cup of powdered sugar until combined. Add in ½ cup of cold, cubed butter and pulse until the mixture resembles coarse crumbs. Introduce 1 egg yolk and 2-3 tablespoons of cold water, processing just until the dough forms. Chill the dough for 30 minutes, then preheat your oven to 350°F (175°C). Roll out the dough and gently press it into mini tart pans, poking holes with a fork, and bake for 10-12 minutes until golden brown. Allow them to cool completely.
Step 2: Prepare the Lemon Curd
In a medium saucepan, whisk together ½ cup lemon juice, 1 tablespoon lemon zest, ¾ cup granulated sugar, and 3 large eggs. Place the saucepan over medium heat, stirring constantly for about 8-10 minutes until the mixture thickens and coats the back of a spoon. Once thickened, remove it from the heat and whisk in ¼ cup of unsalted butter until smooth. Pour the lemon curd into the cooled tart shells and refrigerate for at least 1 hour to set.
Step 3: Make the Lilac Meringue
In a heatproof bowl, combine 3 egg whites, ¾ cup superfine granulated sugar, and ¼ teaspoon cream of tartar. Place the bowl over a saucepan of simmering water, whisking gently until the mixture is warm and the sugar dissolves, about 3-5 minutes. Remove from heat and beat with an electric mixer on high until stiff peaks form, which should take about 5-7 minutes. Gently fold in 1 teaspoon of vanilla extract and a few drops of violet food coloring until evenly mixed.
Step 4: Toast and Garnish
Using a piping bag fitted with a star tip, pipe the lilac meringue onto the tops of the chilled mini lemon tarts in decorative swirls. Lightly toast the tips of the meringue with a kitchen torch until golden brown, taking care not to burn them. For an elegant touch, garnish with edible lilac petals or dried lavender before serving, showcasing the stunning combination of flavors in Mini Lemon Tart with Lilac Meringue.
Make Ahead Options
These Mini Lemon Tarts with Lilac Meringue are perfect for meal prep and can save you time on busy days! You can prepare the tart shells up to 24 hours in advance; just keep them stored in an airtight container. The lemon curd can also be made up to 3 days ahead—simply refrigerate it until you’re ready to fill the tarts. It’s best to make the lilac meringue just before serving, as it retains its airy texture that way. For optimal quality, assemble the tarts shortly before your event to enjoy the perfectly crisp crust and fluffy topping. This prep approach allows you to delight guests with minimal last-minute effort while still achieving restaurant-quality results at home!
What to Serve with Mini Lemon Tart with Lilac Meringue
Elevate your dessert experience by pairing delightful complements that enhance the vibrant flavors of your mini tarts.
-
Lavender Lemonade: This refreshing drink channeling the flavors of spring perfectly complements the tartness, creating a harmonious balance.
-
Whipped Cream: A dollop of sweetened whipped cream adds a luscious creaminess that beautifully contrasts the light meringue.
-
Fresh Berries: Serve with a mix of vibrant raspberries and blueberries; their juicy sweetness amplifies the tart flavors, adding color and texture.
-
Salad with Citrus Vinaigrette: A light, citrusy salad with mixed greens and a tangy vinaigrette makes for a refreshing prelude to these treats.
-
Elderflower Cordial: This floral beverage captures the essence of spring, enhancing the lilac notes in the meringue and making it feel extra special.
-
Tea Infused with Edible Flowers: Complement the tarts with a delicate floral tea, tying in those beautiful floral notes and providing a soothing finish.
-
Almond Biscotti: These crunchy treats add a delightful texture and a nutty flavor that pairs nicely with the bright tartness of the lemon.
-
Chocolate Drizzled Croissant: For the adventurous, a butter croissant drizzled with dark chocolate offers a cozy, indulgent flair to the dessert experience.
-
Vanilla Ice Cream: A scoop of vanilla ice cream paired with the tarts is a classic duo, offering a creamy counterpoint to the tart flavors.
Each of these pairings adds its own unique element, enhancing your mini lemon tart experience while inviting delightful conversations over dessert.
How to Store and Freeze Mini Lemon Tart
Fridge: Store the assembled mini lemon tarts in an airtight container for up to 2 days. This helps maintain their freshness and prevents the crust from becoming soggy.
Freezer: For longer storage, freeze the tart shells (without filling or meringue) for up to 1 month. Wrap them tightly in plastic wrap and then in aluminum foil to prevent freezer burn.
Reheating: If you’ve frozen the shells, allow them to thaw in the fridge overnight, then re-crisp in a 350°F (175°C) oven for about 5-7 minutes before filling with lemon curd and topping with meringue.
Storage Tip: It’s best to store the components separately and assemble the Mini Lemon Tart with Lilac Meringue just before serving for optimal texture and flavor!
Mini Lemon Tart with Lilac Meringue Variations
Feel free to get creative and make this delightful dessert your own with these fun twists!
-
Rose Meringue: Swap vanilla extract for rose water and tint the meringue with soft pink. The floral aroma elevates your tarts, enchanting taste buds with every bite!
-
Lime-Lavender Curd: Replace lemon juice with lime juice and infuse with culinary lavender for a refreshing twist. This fragrant curd adds a delightful zing!
-
Gluten-Free Shell: Substitute all-purpose flour with almond flour and a gluten-free baking mix. Now everyone can indulge without worrying about gluten!
-
Herb-Infused Curds: Experiment with herbs like basil or mint in your lemon curd for a unique flavor profile. The fresh herb notes complement the tartness beautifully, offering a delightful surprise.
-
Coconut Meringue: Replace sugar in the meringue with coconut sugar for a subtle sweetness. Adding unsweetened shredded coconut to the topping enhances the tropical vibe and adds texture.
-
Chocolate Drizzle: For a surprising twist, drizzle melted dark chocolate over the lilac meringue. The rich chocolate pairs wonderfully with the tangy lemon curd!
-
Fruity Toppings: Instead of edible flowers, garnish with fresh berries or sliced kiwi. Their vibrant colors create an irresistible look and add a pop of fruity flavor.
-
Spicy Kick: Add a hint of cayenne or chili powder to the lemon curd for a surprising spicy note that complements the sweetness. Your guests will love the unexpected heat!
Elevate your dessert offerings with these creative variations and don’t forget to try pairing them with a slice of Pumpkin Cornbread Cinnamon for a truly delightful meal!
Expert Tips for Mini Lemon Tart with Lilac Meringue
-
Chill Your Butter: Ensure your butter is very cold before mixing to achieve that perfectly flaky tart shell—warm butter will lead to a dense crust.
-
Room Temperature Egg Whites: Make sure your egg whites are at room temperature when making the lilac meringue. This helps them whip to their fullest volume, creating that light, airy texture.
-
Watch Curd Consistency: Stir the lemon curd constantly over medium heat to prevent it from curdling. The goal is a smooth, thick mixture that coats the back of a spoon.
-
Avoid Over-Whipping Meringue: When whipping your meringue, stop as soon as stiff peaks form. Over-whipping can lead to a dry texture that doesn’t hold its shape well when piped.
-
Assemble Before Serving: To keep the meringue at its best texture, assemble the mini lemon tarts just before serving. Store unassembled components separately to maintain freshness.
Mini Lemon Tart with Lilac Meringue Recipe FAQs
How do I choose the right lemons for this recipe?
Absolutely! Look for lemons that are bright yellow, firm, and slightly heavy for their size; this usually indicates juiciness. Avoid any that have dark spots or wrinkles, as they may be overripe or dried out. Fresh lemons provide the best flavor for the tangy lemon curd.
What’s the best way to store my mini lemon tarts?
I recommend storing your assembled mini lemon tarts in an airtight container in the fridge for up to 2 days. This helps them maintain their freshness while preventing the tart shell from becoming soggy. To keep the crust crispy and the meringue fluffy, it’s best to store the components separately and assemble just before serving.
Can I freeze the mini lemon tarts?
Absolutely! For freezing, I suggest wrapping the baked tart shells (without curd or meringue) in plastic wrap and then aluminum foil to prevent freezer burn. They can be kept in the freezer for up to 1 month. When you’re ready to enjoy them, thaw the shells in the fridge overnight, and then re-crisp them in a preheated oven at 350°F (175°C) for about 5-7 minutes before filling with fresh lemon curd and topping with meringue.
What if my meringue doesn’t form stiff peaks?
Very! If your meringue isn’t forming stiff peaks, ensure that your mixing bowl and beaters are completely clean and free of any grease, which can hinder volume. Also, make sure your egg whites are at room temperature; this helps them whip up nicely. If your meringue seems too runny at first, continue to beat it for a few more minutes—patience is key! If you accidentally over-whip the meringue, try folding a bit more egg white into it to regain some texture.
Are there any dietary considerations for the mini lemon tarts?
Absolutely! If you need a gluten-free option, substitute the all-purpose flour with a gluten-free flour blend or almond flour in the tart shells. For those allergic to eggs, unfortunately, this recipe relies heavily on eggs for both the curd and meringue. You might explore vegan substitutes, but achieving the same lightness and texture can be tricky. Always check ingredient labels to ensure that all substitutions fit your dietary needs!
Can I use a different flavor for the meringue?
Very! Instead of lilac meringue, feel free to swap out the flavors. For a lovely twist, use rose water instead of vanilla for a romantic rose meringue; just add a few drops of pink food coloring for visual appeal. Or, consider a zestier lime-lavender meringue by adding some lime juice and zest for a refreshing variation!
Mini Lemon Tart with Lilac Meringue
Ingredients
Equipment
Method
- Make the tart shells by pulsing together flour and powdered sugar in a food processor, adding cold butter, egg yolk, and water until dough forms. Chill, roll out, and bake for 10-12 minutes.
- Prepare the lemon curd by whisking lemon juice, lemon zest, granulated sugar, and eggs in a saucepan over medium heat until thickened, then stir in butter.
- Make the lilac meringue by combining egg whites, superfine sugar, and cream of tartar in a heatproof bowl over simmering water, whisking until warm. Beat until stiff peaks form, and fold in vanilla and food coloring.
- Toast and garnish by piping meringue on chilled tarts, lightly toasting with a kitchen torch, and garnishing with edible flowers before serving.
Leave a Reply