
As I stood in my kitchen, the familiar aroma of spiced cookies wafted through the air, instantly transporting me to my favorite cozy cafe. That’s when the idea struck me: why not combine the beloved flavors of those cookies into a delightful dessert? Enter my No-Bake Mini Biscoff Cheesecakes. These irresistible little treats are perfect for anyone seeking a quick, easy dessert that doesn’t skimp on charm. With a crunchy Biscoff cookie crust and a luscious cheesecake filling infused with creamy cookie butter, they’re the perfect sweet ending to any meal or a delightful snack. Plus, they require no baking and can be prepared in a flash, making them a perfect choice for gatherings. Curious to see how you can whip these up in no time? Let’s dive in!
Why are Mini Biscoff Cheesecakes a Must-Try?
Irresistible Flavor: The blend of cream cheese and Biscoff spread creates a luscious filling that delights the palate with every bite.
No-Bake Wonder: Perfect for busy schedules, this dessert requires no oven, letting you spend more time enjoying and less time cooking.
Quick & Easy: With simple ingredients and straightforward steps, even novice cooks will shine with these cheesecakes!
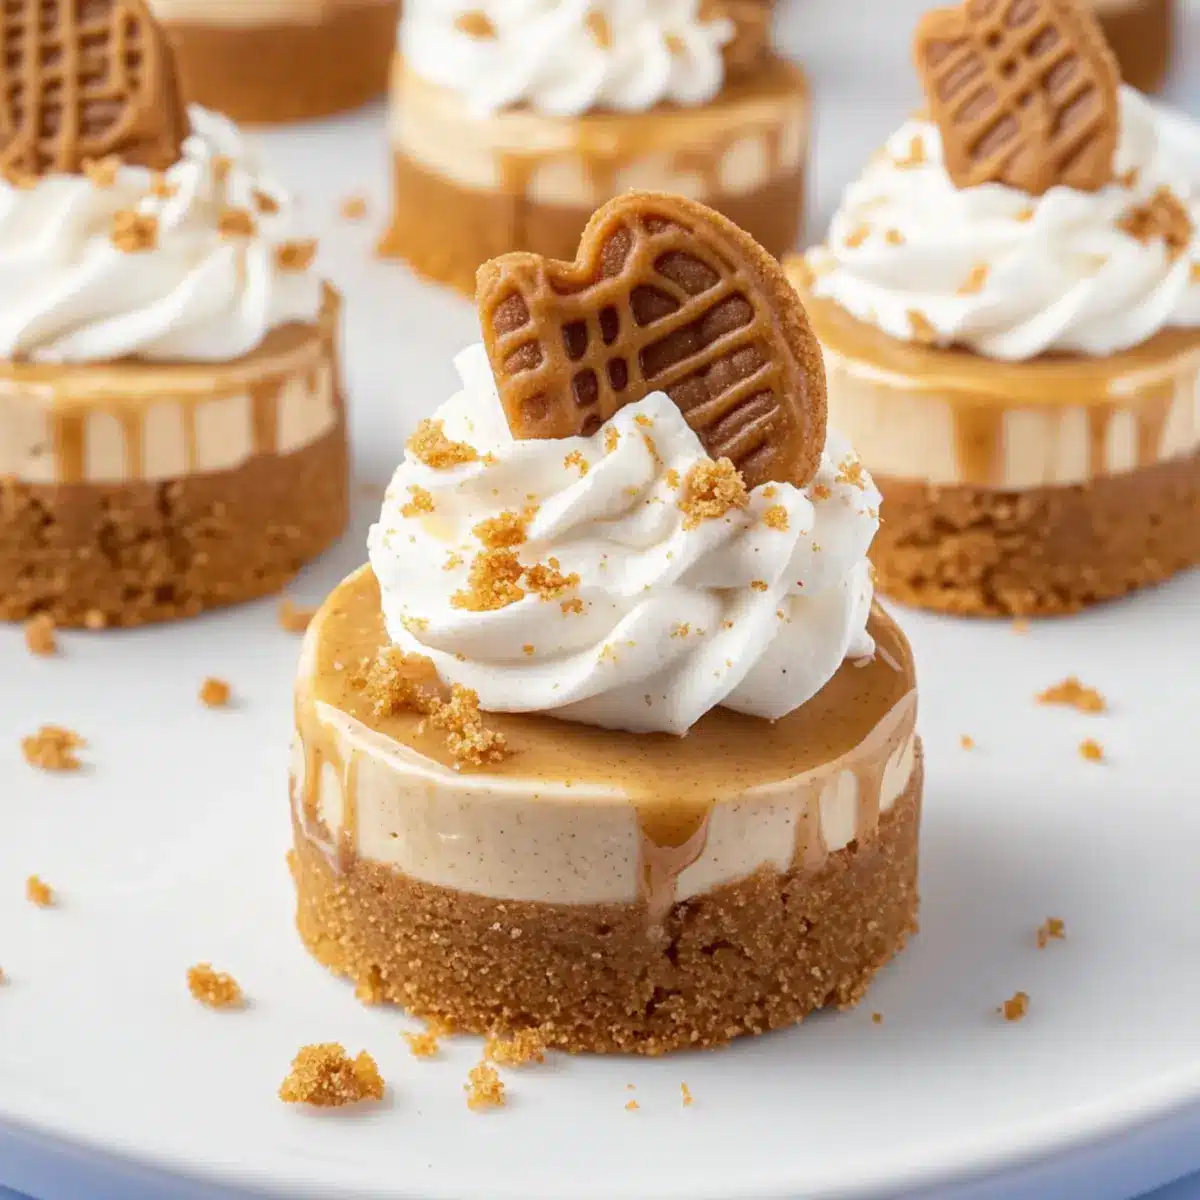
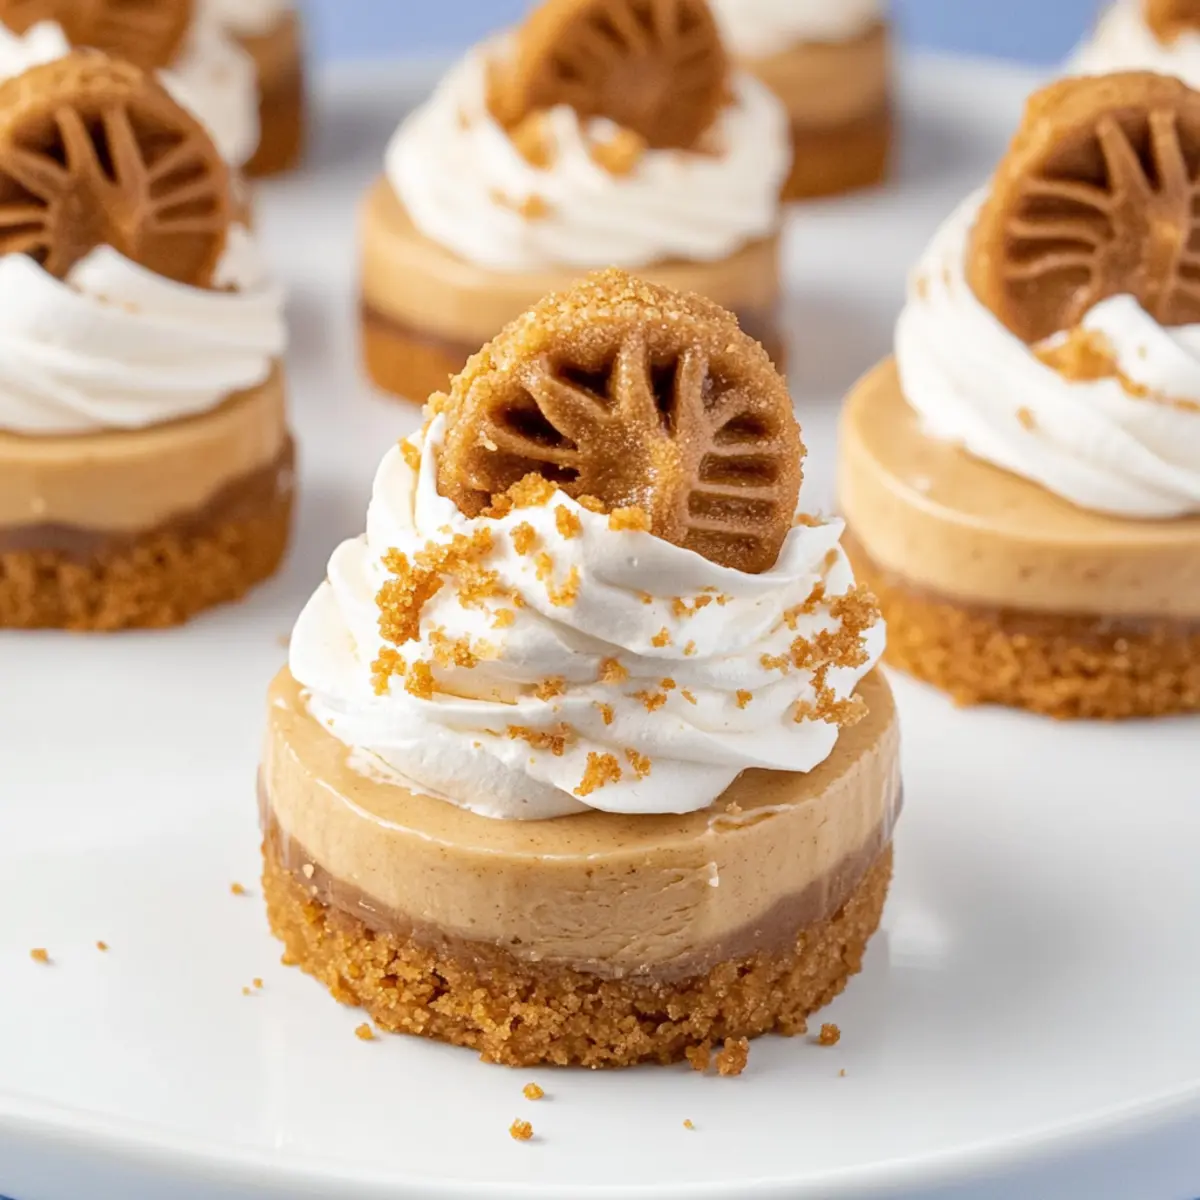
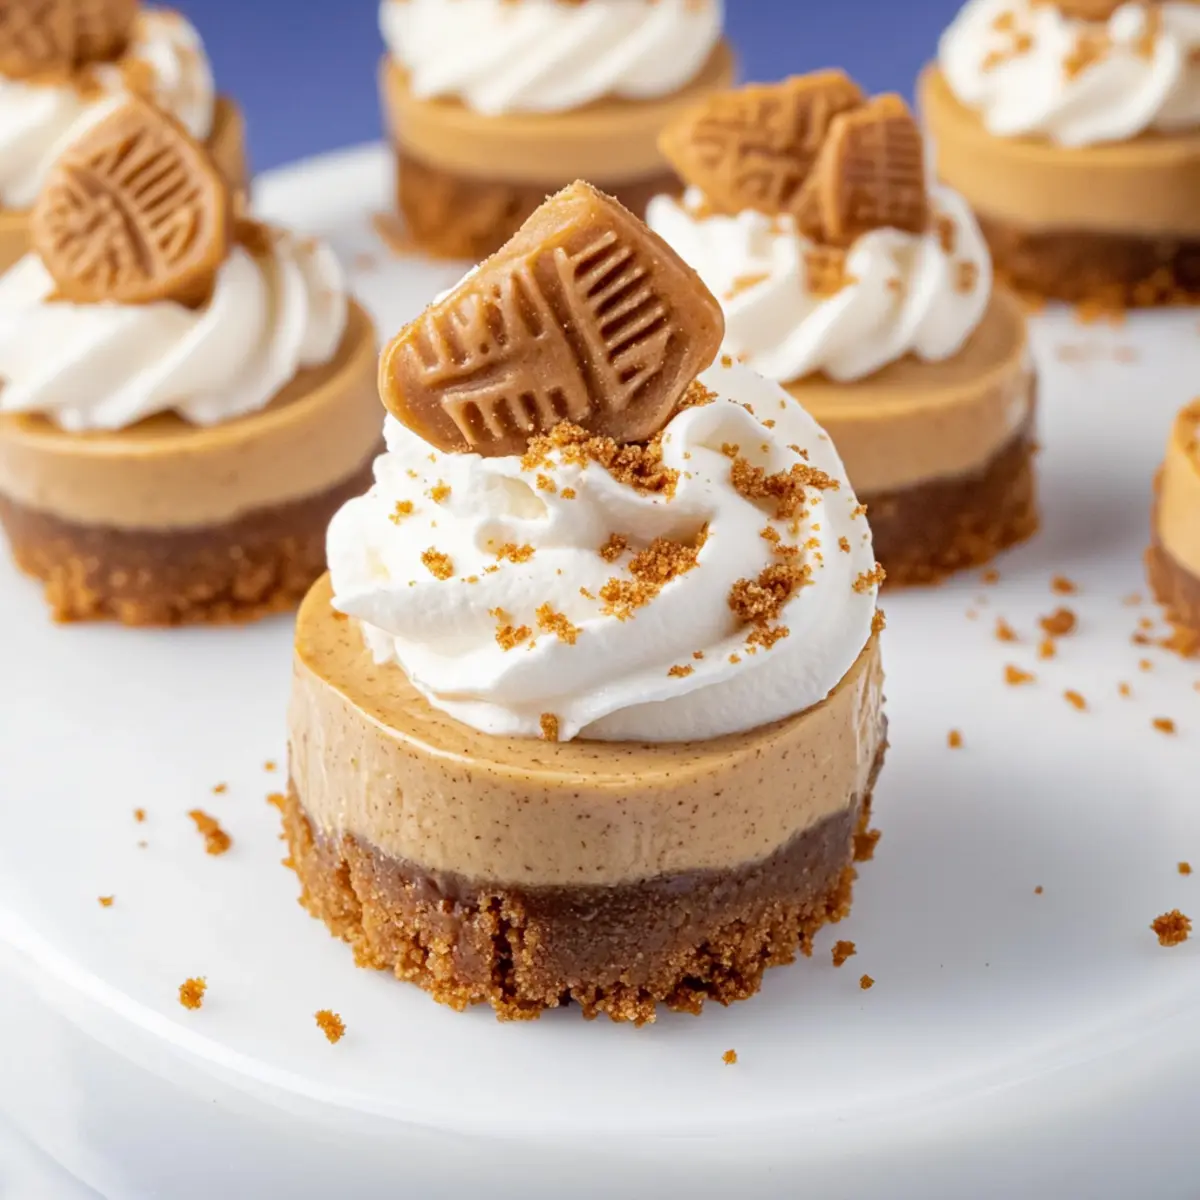
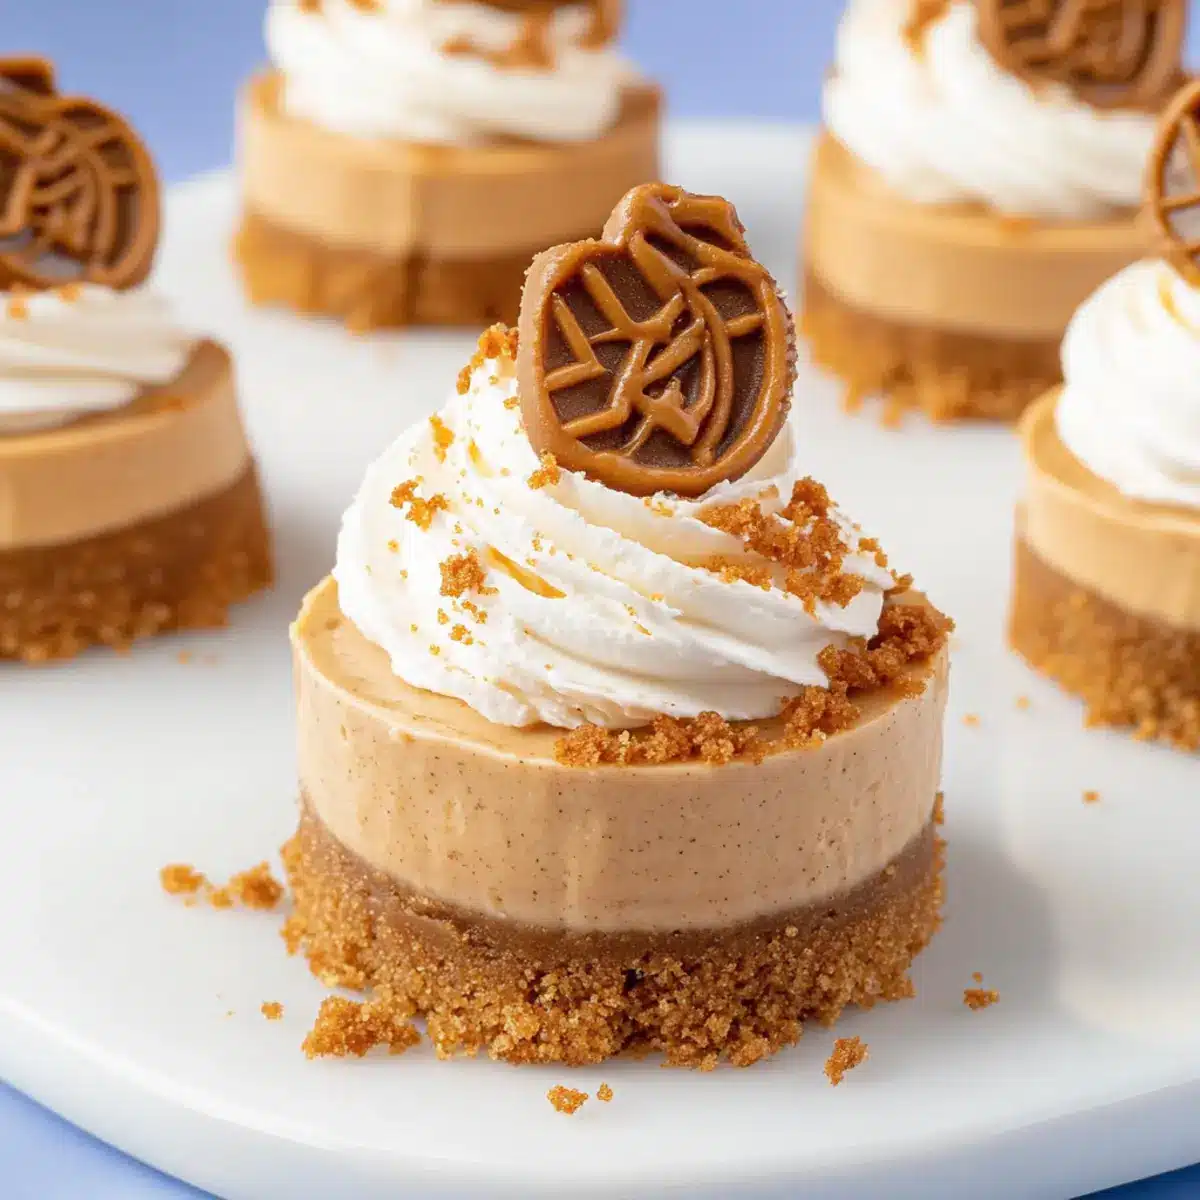
Visual Appeal: A beautiful presentation crowned with whipped cream and cookie crumbs makes these treats a showstopper at any gathering.
Crowd-Pleasing Delight: Whether it’s a family dinner or a casual get-together, these mini cheesecakes will leave your guests wanting more!
Want more delicious treats? Don’t miss out on my easy Biscoff Cookie Butter or luscious Apple Crumble Cheesecake.
Mini Biscoff Cheesecake Ingredients
• Here’s everything you need to create these delightful treats!
For the Crust
- Biscoff Cookies – These provide a crunchy, spiced base that enhances the overall flavor.
- Granulated Sugar – Adds a touch of sweetness to balance the crust.
- Salted Butter – Binds the crust together and adds richness to the flavor.
For the Cheesecake Filling
- Cream Cheese – The creamy base of the filling; make sure it’s at room temperature for easy mixing.
- Powdered Sugar – Sweetens the cheesecake filling, resulting in a smooth texture.
- Biscoff Spread (Cookie Butter) – Infuses the filling with its signature cookie butter essence, making these Mini Biscoff Cheesecakes irresistible.
- Vanilla Extract – Boosts the flavor complexity to elevate the taste.
- Heavy Cream – Whipped to create a light, airy texture in the filling and as a topping.
For the Toppings
- Additional Biscoff Spread – Drizzling on top adds a delightful finishing touch.
- Biscoff Cookie Crumbs – For garnishing and a crunchy texture contrast.
- Biscoff Cookies (Halved) – Perfect for a charming decoration on each cheesecake.
Enjoy crafting these delectable Mini Biscoff Cheesecakes that will leave cookie lovers yearning for more!
Step‑by‑Step Instructions for Mini Biscoff Cheesecakes
Step 1: Prepare the Crust
In a mixing bowl, combine Biscoff cookie crumbs, granulated sugar, and melted butter until well blended. This mixture should resemble wet sand. Firmly press the crumb mixture into mini cheesecake pans, creating an even layer at the bottom. Aim for a compact crust to hold your Mini Biscoff Cheesecakes together. Set aside while you prepare the filling.
Step 2: Make Cheesecake Filling
In a separate bowl, beat together softened cream cheese, powdered sugar, Biscoff spread, and vanilla extract using an electric mixer on medium speed until smooth and creamy, about 2-3 minutes. The mixture should be free of lumps and light in color. Gradually pour in the heavy cream, mixing until the filling thickens and becomes fluffy, which should take an additional 2-3 minutes.
Step 3: Assemble Cheesecakes
Using a piping bag or a spoon, carefully pipe the cheesecake filling into the prepared crusts, filling them to the brim for a beautiful dome shape. Ensure each dessert is generously filled for the best presentation. Once filled, gently smooth the tops with a spatula, then place the mini cheesecakes in the refrigerator to chill for at least 12 hours, allowing them to set properly.
Step 4: Make Whipped Cream
In a clean bowl, whip heavy cream, powdered sugar, and vanilla extract together until medium-stiff peaks form, about 3-5 minutes. You want the whipped cream to hold its shape but remain soft and airy. Once your Mini Biscoff Cheesecakes have set, use a piping bag to add a decorative dollop of whipped cream on top of each cheesecake.
Step 5: Final Touches
Gently warm the extra Biscoff spread in the microwave for about 10-15 seconds until it’s pourable. Drizzle this over the whipped cream for an indulgent finish. Finally, sprinkle with Biscoff cookie crumbs and place halved Biscoff cookies on top for a stunning presentation. Your Mini Biscoff Cheesecakes are now ready to be served!
Expert Tips for Mini Biscoff Cheesecakes
-
Softened Cream Cheese: Make sure your cream cheese is completely softened to prevent lumps and achieve a smooth, creamy filling.
-
Chill Time Matters: Allow the cheesecakes to chill for the full 12 hours; it’s essential for the best texture and flavor.
-
Use Piping Bags: For a neater application, use piping bags for filling and topping the cheesecakes, ensuring a professional finish.
-
Gently Warm Biscoff Spread: Heat additional Biscoff spread slightly before drizzling to achieve a smooth, luscious topping on your cheesecakes.
-
Keep It Airtight: Store any leftovers in an airtight container in the refrigerator for up to 3 days, keeping them fresh and delicious!
-
Avoid Overfilling: When piping the cheesecake mixture into the crust, fill slightly above the rim for aesthetic appeal but avoid overflowing to maintain a clean look.
Mini Biscoff Cheesecakes Variations
Feel free to let your creativity shine with these delightful variations that elevate your Mini Biscoff Cheesecakes to new heights!
-
Chocolate Twist: Swap the Biscoff cookie crust for a chocolate cookie crust for an indulgent chocolate experience. This rich base complements the sweet filling beautifully, creating a chocolate lover’s dream dessert.
-
Nutella Delight: Replace Biscoff spread with Nutella for a hazelnut twist that’s equally delightful. The combination of cream cheese and Nutella creates an irresistible hazelnut cheesecake filling.
-
Nutty Crunch: Incorporate crushed nuts into the crust by mixing in some walnuts or pecans. This adds a lovely crunch and nuttiness that pairs well with the creamy filling.
-
Spiced Pumpkin: Mix in some pumpkin puree and pumpkin spice into your cheesecake filling for a seasonal twist. These flavors bring warmth and coziness, perfect for fall gatherings.
-
Fruit Fusion: Top each cheesecake with fresh berries or sliced bananas for a refreshing burst of flavor. The fruits add color and a delightful contrast to the richness of the cheesecake.
-
Dairy-Free Option: Use a dairy-free cream cheese alternative and coconut whipped cream for a vegan version. You can still enjoy the decadent flavor of cookie butter without the dairy.
-
Maple Bliss: Replace the granulated sugar in the filling with maple syrup for a natural sweetness and a lovely maple flavor enhancement. This adds a unique twist to your cheesecakes.
Want more scrumptious ideas? Check out these easy Biscoff Cookie Butter treats or dive into my delightful Apple Crumble Cheesecake.
Make Ahead Options
Mini Biscoff Cheesecakes are ideal for those looking to save time without sacrificing flavor! You can prepare the crust and filling up to 24 hours in advance. Simply follow your usual steps to create the crust, press it firmly into the mini cheesecake pans, and store them in the refrigerator. Next, whip up the cheesecake filling and pour it into the prepared crusts. Cover with plastic wrap and let them chill overnight to allow the flavors to meld beautifully. When ready to serve, simply finish off with the whipped cream, drizzle extra Biscoff spread on top, and enjoy the same delightful taste as if you just made them! This makes for a stress-free dessert that’s just as delicious when prepared ahead.
What to Serve with Mini Biscoff Cheesecakes
Elevate your dessert experience by pairing these delightful mini treats with complementary flavors and textures.
-
Fresh Berries: Serve with a mix of strawberries, raspberries, and blueberries for a refreshing contrast that balances the richness of the cheesecake.
-
Chocolate Ganache: Drizzle warm chocolate ganache on top for an indulgent twist that adds a rich, creamy texture to each bite.
-
Coffee or Espresso: Pair these cheesecakes with a robust cup of brewed coffee or a shot of espresso to enhance the warm spices and sweet flavors.
-
Vanilla Ice Cream: A scoop of creamy vanilla ice cream alongside will bring a cool creaminess that balances the flavors beautifully.
-
Whipped Cream Topping: Elevate the cheesecakes even further with an extra dollop of freshly whipped cream, adding lightness and a touch of sweetness.
-
Mint Leaves: A sprig of fresh mint not only adds a pop of color but also a refreshing contrast to the sweet, spiced notes of the cheesecake.
-
Spiced Chai Latte: Serve with a warm cup of spiced chai latte for a comforting drink that complements the flavors of the Biscoff.
-
Dessert Wine: A sweet dessert wine can enhance the overall experience, creating a luxurious pairing that’s perfect for special occasions.
-
Chocolate-Dipped Strawberries: For a touch of elegance, serve with chocolate-dipped strawberries that echo the indulgent flavors of the cheesecakes.
How to Store and Freeze Mini Biscoff Cheesecakes
Fridge: Store your Mini Biscoff Cheesecakes in an airtight container in the refrigerator for up to 3 days to maintain their freshness and creamy texture.
Freezer: If you want to savor these treats longer, freeze the cheesecakes for up to 2 months. Wrap them individually in plastic wrap, then place in a freezer bag.
Thawing: To enjoy frozen cheesecakes, thaw them in the fridge overnight for a gentle defrost. Avoid microwaving, as it may alter the texture of the filling.
Reheating: These cheesecakes are best served chilled and are not intended to be reheated. Enjoy them straight from the fridge for an instant taste of delight!
Mini Biscoff Cheesecakes Recipe FAQs
How do I choose the best Biscoff cookies for the crust?
Absolutely! When selecting Biscoff cookies, look for those that are fresh and free from any dark spots or visible damage. The cookies should have a nice crunch; this ensures a sturdy crust. If you’re looking for something a bit different, you can also consider using graham cracker crumbs for a subtle flavor twist.
How should I store leftover Mini Biscoff Cheesecakes?
To keep your Mini Biscoff Cheesecakes fresh, simply place them in an airtight container in the refrigerator. They will stay delicious for up to 3 days. I often store them in single-serving containers, making it easy to grab a treat whenever I want!
Can I freeze Mini Biscoff Cheesecakes?
Certainly! To freeze your Mini Biscoff Cheesecakes, first wrap each cheesecake tightly in plastic wrap to prevent freezer burn. Then place them in a freezer-safe bag or container. They can be safely stored in the freezer for up to 2 months. When you’re ready to enjoy them, just thaw them in the refrigerator overnight for the best texture.
Why is my cheesecake filling lumpy, and how can I fix it?
Very common! If your cheesecake filling is lumpy, it’s likely due to the cream cheese being too cold. To fix this, ensure that the cream cheese is at room temperature before mixing it with the other ingredients. If you still run into lumps after mixing, you can pass the filling through a fine-mesh sieve for a super smooth texture.
Are Mini Biscoff Cheesecakes safe for those with nut allergies?
Good question! Since Biscoff cookies and spread are made from speculoos, they typically do not contain nuts, making them a suitable dessert for those with nut allergies. However, it’s essential to check the product packaging for allergen warnings, as production methods can vary between brands.
Mini Biscoff Cheesecakes That Will Delight Any Cookie Lover
Ingredients
Equipment
Method
- In a mixing bowl, combine Biscoff cookie crumbs, granulated sugar, and melted butter until well blended. Firmly press into mini cheesecake pans.
- Beat together softened cream cheese, powdered sugar, Biscoff spread, and vanilla extract until smooth. Gradually add heavy cream, mixing until fluffy.
- Pipe the cheesecake filling into the prepared crusts, filling to the brim. Smooth the tops and place in the refrigerator to chill for at least 12 hours.
- Whip heavy cream, powdered sugar, and vanilla extract until medium-stiff peaks form. Pipe or spoon on top of each cheesecake.
- Warm extra Biscoff spread briefly. Drizzle over whipped cream, sprinkle with cookie crumbs, and decorate with halved Biscoff cookies.
Leave a Reply