
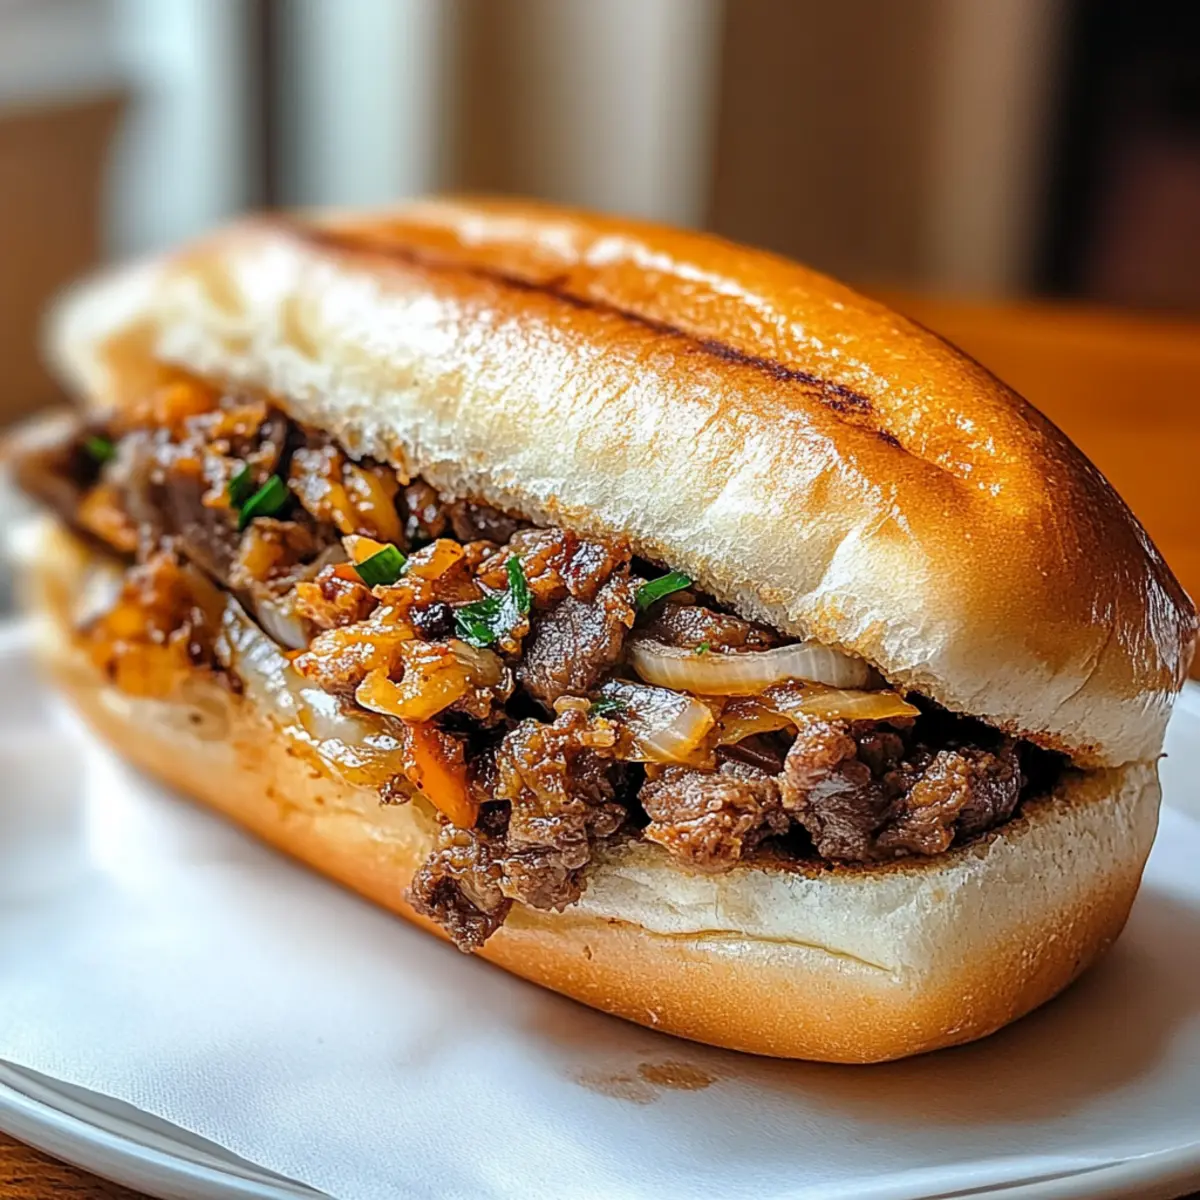
The sound of sizzling beef fills the kitchen, pulling me from my thoughts as the bold aroma wafts through the air. That’s the magic of the Korean-Inspired Kimchi Bulgogi Cheesesteak, a delightful fusion that perfectly blends the savory richness of Korean bulgogi with the classic American cheesesteak. What I love most about this dish is how quickly it comes together—ideal for busy weeknights or surprising guests at a casual gathering. Plus, with options for beef, chicken, or tofu, it caters to everyone’s tastes, making it a versatile crowd-pleaser. Ready to dive into a world where savory meets spicy? Let’s uncover how to make this irresistible creation together!
Why is Kimchi Bulgogi Cheesesteak a must-try?
Flavor Explosion: Every bite combines the savory depth of bulgogi with the spicy kick of kimchi, creating a deliciously unique twist on a classic.
Quick and Easy: With minimal prep and cooking time, this recipe is perfect for busy weeknights or last-minute gatherings.
Customizable: Whether you prefer beef, chicken, or tofu, the options allow everyone to enjoy their favorite flavors.
Melted Perfection: Gooey cheese adds an irresistible richness, enveloping the tender meat and crispy veggies in each bite.
Crowd Favorite: Serve it with crispy sweet potato fries or a refreshing cucumber salad, and watch your guests rave about this fusion masterpiece! For another tasty twist, don’t miss out on our Philly Cheesesteak Mac or if you’re counting carbs, try our Keto Philly Cheesesteak for a healthy option.
Kimchi Bulgogi Cheesesteak Ingredients
For the Beef
- Beef Sirloin – This is your main protein; provides a flavorful base. Substitute with chicken or tofu for variations.
- Soy Sauce – Adds umami and saltiness to marinate the beef; use tamari for a gluten-free option.
- Sesame Oil – Enriches flavor with a nutty aroma; can replace with olive oil if unavailable.
- Minced Garlic – Offers warmth and depth of flavor; fresh garlic is preferable for best results.
- Sugar – Balances savory with a hint of sweetness; you can use honey or coconut sugar.
For the Veggies
- Onion and Bell Peppers – Sautéed veggies add sweetness and texture; replace with other favorites if desired.
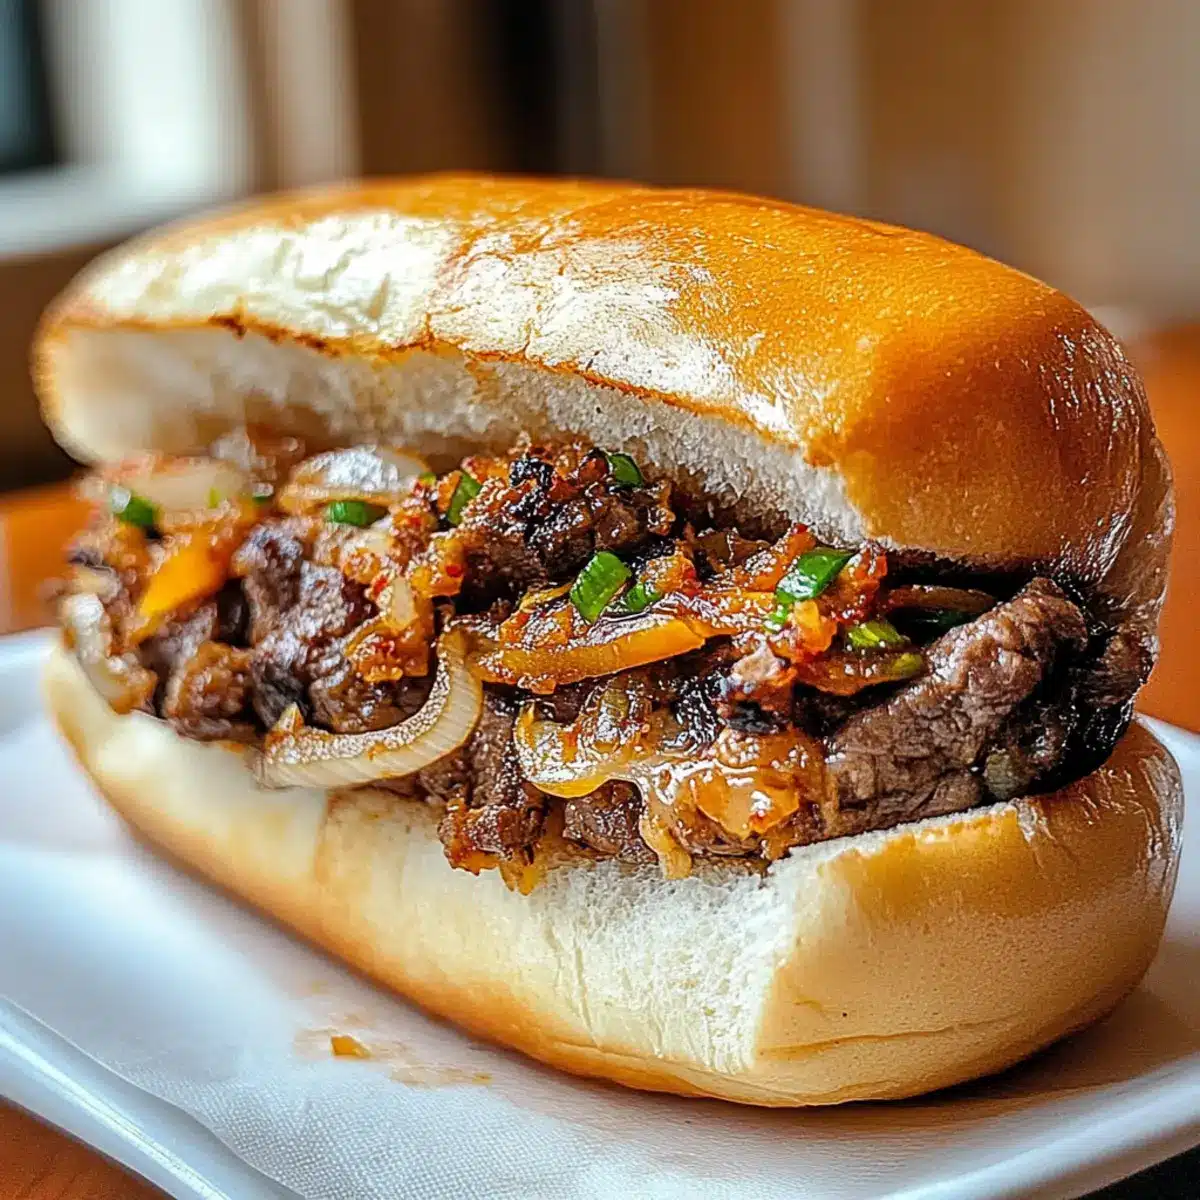
- Kimchi – Introduces a spicy and tangy kick; sauerkraut serves as a mild substitute if needed.
For the Sandwich
- Sub Rolls or Hoagie Bread – Acts as the vessel for your cheesesteak; opt for gluten-free bread if necessary.
- Cheese (Provolone, American, etc.) – Melts beautifully to enrich the sandwich; try cheddar or pepper jack for an extra kick.
Step‑by‑Step Instructions for Kimchi Bulgogi Cheesesteak
Step 1: Prep Ingredients
Begin by slicing the beef sirloin thinly against the grain, ensuring tenderness in your Kimchi Bulgogi Cheesesteak. Next, chop the onions and bell peppers into bite-sized pieces. Having everything prepped before you start cooking will streamline the process and keep your flavors fresh and vibrant.
Step 2: Marinate Beef
In a mixing bowl, whisk together soy sauce, sesame oil, minced garlic, and sugar to create a flavorful marinade. Add the sliced beef to the bowl, ensuring each piece is thoroughly coated. Let the beef marinate for at least 15 minutes while you prepare the rest of your ingredients, which will allow those rich flavors to penetrate.
Step 3: Sauté Veggies
Heat a skillet over medium-high heat and add a splash of vegetable oil. Once hot, toss in the chopped onions and bell peppers, sautéing them for about 5 minutes until they’re tender and slightly caramelized. Stir occasionally to prevent sticking and ensure they cook evenly, creating a delightful base for your cheesesteak.
Step 4: Cook Beef
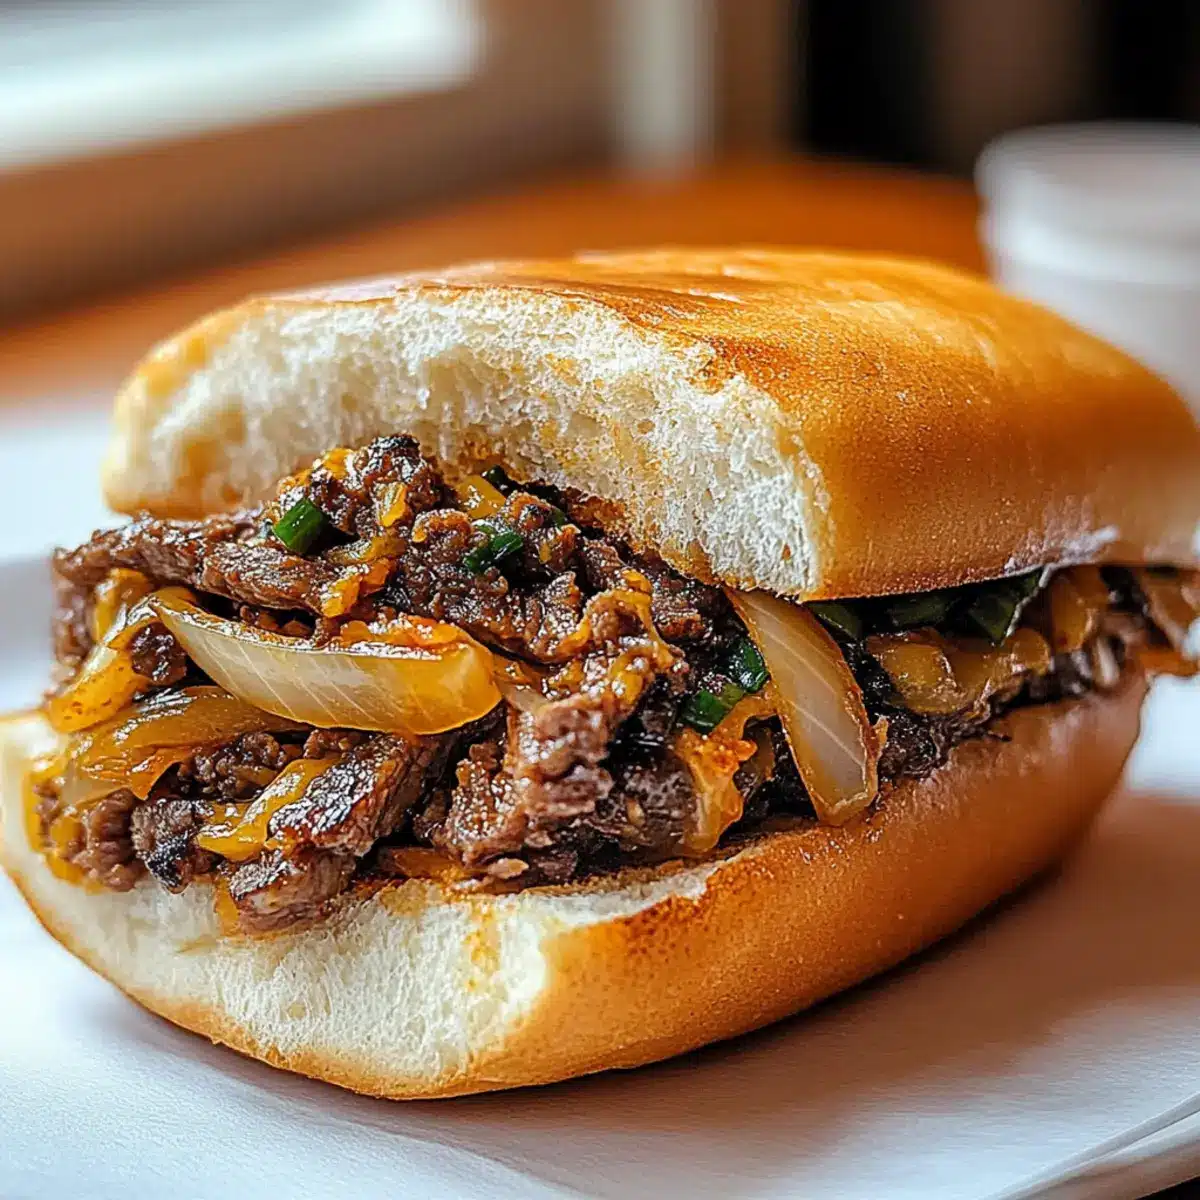
Push the sautéed veggies to the side of the skillet and add the marinated beef. Cook the beef for approximately 5 minutes, stirring occasionally until it’s browned and fully cooked. It should be sizzling and fragrant, filling your kitchen with mouthwatering aromas sure to entice your family or friends.
Step 5: Add Kimchi
Once the beef has cooked through, stir in the chopped kimchi and allow it to cook with the beef and veggies for an additional 2 minutes. This step will meld all the flavors together, infusing the dish with that signature spicy kick, while the kimchi warms and softens just enough to complement the bulgogi.
Step 6: Assemble Cheesesteaks
Preheat your broiler while you move ahead to assemble the cheesesteaks. Take toasted sub rolls and spoon generous portions of the bulgogi mixture onto each roll. Top each with your choice of melted cheese, ensuring it covers the filling completely, then place under the broiler for about 2 minutes until the cheese is bubbly and golden.
Step 7: Serve and Enjoy
Remove the cheesesteaks from the oven, allowing them to cool slightly before serving. Slice them in half for easier handling and serve warm. These Kimchi Bulgogi Cheesesteaks are perfect for a hearty meal that fuses the bold, spicy notes of Korean cuisine with the comfort of American classics.
Expert Tips for Kimchi Bulgogi Cheesesteak
-
Slice Against the Grain: Ensure your beef is sliced against the grain for maximum tenderness; this will make a noticeable difference in your cheesesteak’s texture.
-
Marinate Longer: For a deeper flavor, consider marinating the beef for about 30 minutes instead of just 15. This allows the soy sauce and sesame oil to infuse thoroughly.
-
Use a Hot Skillet: Always preheat your skillet to medium-high before sautéing. This helps achieve that perfect sear on the beef and caramelization on the veggies.
-
Watch the Broiler: Keep a close eye on the cheese under the broiler; it melts quickly but can burn if left unattended. Aim for bubbly and golden, not brown and crispy.
-
Adjust Spiciness: Kimchi can vary in heat; start with a smaller amount and taste as you go, adjusting to your spice preference in your Kimchi Bulgogi Cheesesteak.
-
Experiment with Toppings: Don’t hesitate to personalize this dish with your favorite toppings. Try avocado for creaminess or jalapeños for an extra kick!
Make Ahead Options
These Kimchi Bulgogi Cheesesteaks are perfect for meal prep and can be made ahead to fit even the busiest schedules! You can marinate the beef up to 24 hours in advance, allowing those flavors to deepen while you focus on other tasks. Additionally, the sautéed veggies can be cooked in advance and stored in the refrigerator for up to 3 days. To maintain their quality, store the beef and veggies separately until you’re ready to assemble. When it’s time to enjoy this delicious dish, just heat the beef and veggies in a skillet until warmed through, then assemble the cheesesteaks with your choice of cheese and broil for 2 minutes. This way, you’ll savor restaurant-quality flavors with minimal effort!
What to Serve with Kimchi Bulgogi Cheesesteak
Pairing the rich flavors of this scrumptious sandwich with complementary sides makes the meal an experience to remember.
- Crispy Sweet Potato Fries: Their natural sweetness contrasts beautifully with the spicy cheesesteak, adding a delightful crunch.
- Fresh Cucumber Salad: A light and refreshing addition that balances the bold flavors of the sandwich while providing a nice crunch.
- Pickled Vegetables: These tangy bites elevate the meal, bringing a zesty contrast that enhances the umami and spice of the cheesesteak.
- Coleslaw: Creamy or vinegar-based, the slaw adds a refreshing and crunchy element that pairs wonderfully with the savory cheesesteak.
For a drink, consider serving an ice-cold Korean beer or a crisp ginger ale. Both will cleanse the palate and complement the vibrant flavors of your Kimchi Bulgogi Cheesesteak. Enjoy your feast!
How to Store and Freeze Kimchi Bulgogi Cheesesteak
Fridge: Place leftover cheesesteaks in an airtight container and refrigerate for up to 3 days. This helps keep the flavors fresh and prevents sogginess.
Freezer: For longer storage, wrap individual cheesesteaks tightly in foil or plastic wrap and freeze for up to 3 months. This preserves its taste and texture.
Reheating: When ready to enjoy, reheat frozen cheesesteaks in the oven at 350°F for about 10-15 minutes or until warmed through, ensuring the cheese is melted and gooey.
Make-Ahead Tip: You can prepare and marinate the beef a day in advance, storing it in the fridge to save time on cooking day for a quick, delicious Kimchi Bulgogi Cheesesteak!
Kimchi Bulgogi Cheesesteak Variations
Feel free to tweak this dish to suit your taste buds and dietary needs—after all, deliciousness knows no bounds!
-
Chicken or Tofu: Swap beef for chicken or tofu for a lighter, yet equally flavorful alternative. Both options absorb the marinade beautifully, making them just as irresistible.
-
Extra Kick: Add sliced jalapeños for a spicy boost that suits heat lovers. It elevates the excitement of every bite while complementing the savory bulgogi beautifully.
-
Creamy Avocado: Top your cheesesteak with slices of creamy avocado to introduce a luscious texture. This addition balances the spiciness of the kimchi perfectly.
-
Different Cheeses: Experiment with different cheeses like gouda or mozzarella; they melt wonderfully and offer unique flavors. Each cheese brings a new twist to your cheesesteak experience.
-
Vegetable Medley: Replace the onions and bell peppers with a medley of your favorite veggies, such as mushrooms, zucchini, or spinach. This varies the nutrients and adds fantastic colors to your dish.
-
Sauerkraut Swap: If kimchi isn’t your thing, use sauerkraut for a milder tangy flavor. It’ll still provide that delectable crunch and adds a lovely punch to each bite.
-
Gluten-Free Options: Substitute sub rolls with gluten-free bread or lettuce wraps to enjoy this delicious dish without gluten. It meets your dietary needs while keeping the flavors intact.
-
Herbs and Spices: Boost flavor with fresh herbs such as cilantro or green onions sprinkled on top. They add freshness, elevating your cheesesteak to gourmet status, making every bite memorable!
Remember, whether you’re in it for a flavor explosion or looking to adapt to dietary needs, there’s no shortage of ways to personalize your Kimchi Bulgogi Cheesesteak. If you loved this twist, be sure to check out our Philly Cheesesteak Mac for a unique spin or our Keto Philly Cheesesteak for a healthier choice!

Kimchi Bulgogi Cheesesteak Recipe FAQs
What type of beef works best for the Kimchi Bulgogi Cheesesteak?
Absolutely! Beef sirloin is the best choice for this dish as it provides a rich flavor and tender texture when sliced thinly against the grain. If you’re looking for alternatives, chicken or tofu can also work beautifully, catering to different dietary preferences.
How can I store leftover Kimchi Bulgogi Cheesesteaks?
To keep your leftovers fresh, place them in an airtight container and store them in the refrigerator for up to 3 days. Make sure to let them cool completely before sealing. This prevents condensation that can lead to sogginess.
Can I freeze Kimchi Bulgogi Cheesesteaks?
Very! To freeze, wrap each cheesesteak tightly in foil or plastic wrap, and place them in a freezer-safe bag. They can be stored for up to 3 months. When you’re ready to enjoy, simply reheat them in the oven at 350°F for about 10-15 minutes, until warmed through and the cheese is gooey.
How should I adjust the recipe for dietary restrictions?
If you have any dietary restrictions, that’s no problem! For a gluten-free option, swap regular soy sauce for tamari. You can replace the sub rolls with gluten-free bread. Additionally, if you’re avoiding dairy, consider using vegan cheese or leaving it out altogether for a delightful, cheese-free version.
What if I have trouble with the marinating process?
No worries! If you’re short on time, marinating the beef for as little as 15 minutes will still impart delicious flavor. However, for deeper flavor, aim for 30 minutes. If you notice your kimchi is particularly spicy, start with a smaller amount and adjust according to your taste. This way, everyone can enjoy the cheesesteak’s unique flavors without being overwhelmed by heat.
Ultimate Kimchi Bulgogi Cheesesteak for Flavor Fanatics
Ingredients
Equipment
Method
- Begin by slicing the beef sirloin thinly against the grain.
- In a mixing bowl, whisk together soy sauce, sesame oil, minced garlic, and sugar to create a marinade. Add the sliced beef and marinate for at least 15 minutes.
- Heat a skillet over medium-high heat, add vegetable oil, and sauté the chopped onions and bell peppers for about 5 minutes until tender.
- Push the veggies to the side and add the marinated beef, cooking for about 5 minutes until browned.
- Stir in the chopped kimchi and cook for an additional 2 minutes.
- Preheat the broiler and assemble the cheesesteaks on toasted rolls, topping with cheese.
- Broil for about 2 minutes until the cheese is bubbly and golden.
- Allow to cool slightly, slice in half, and serve warm.
Leave a Reply