
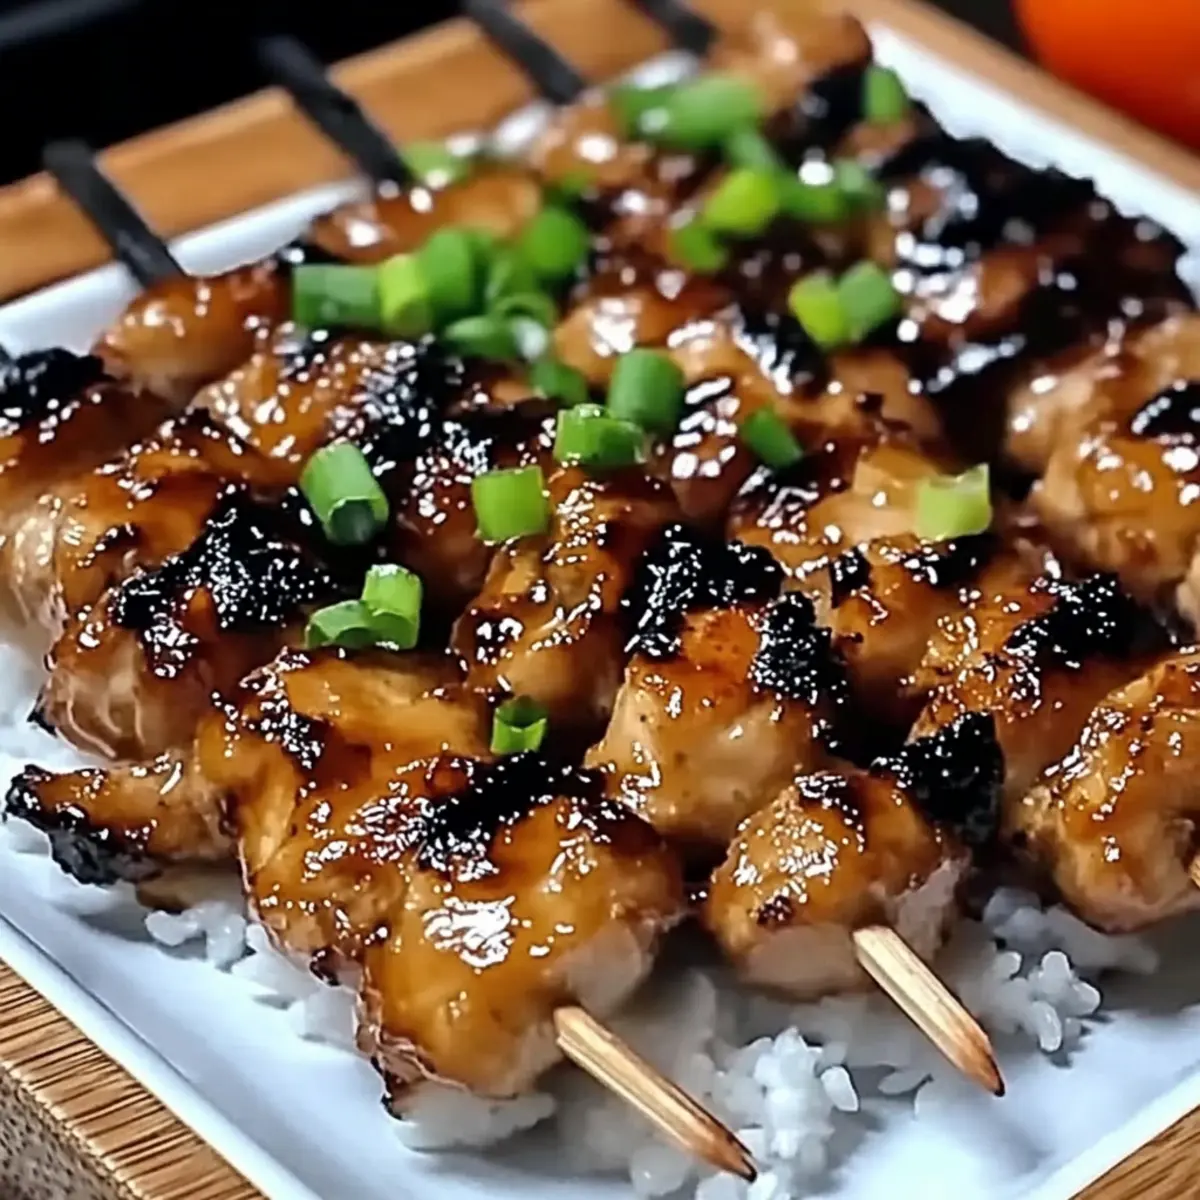
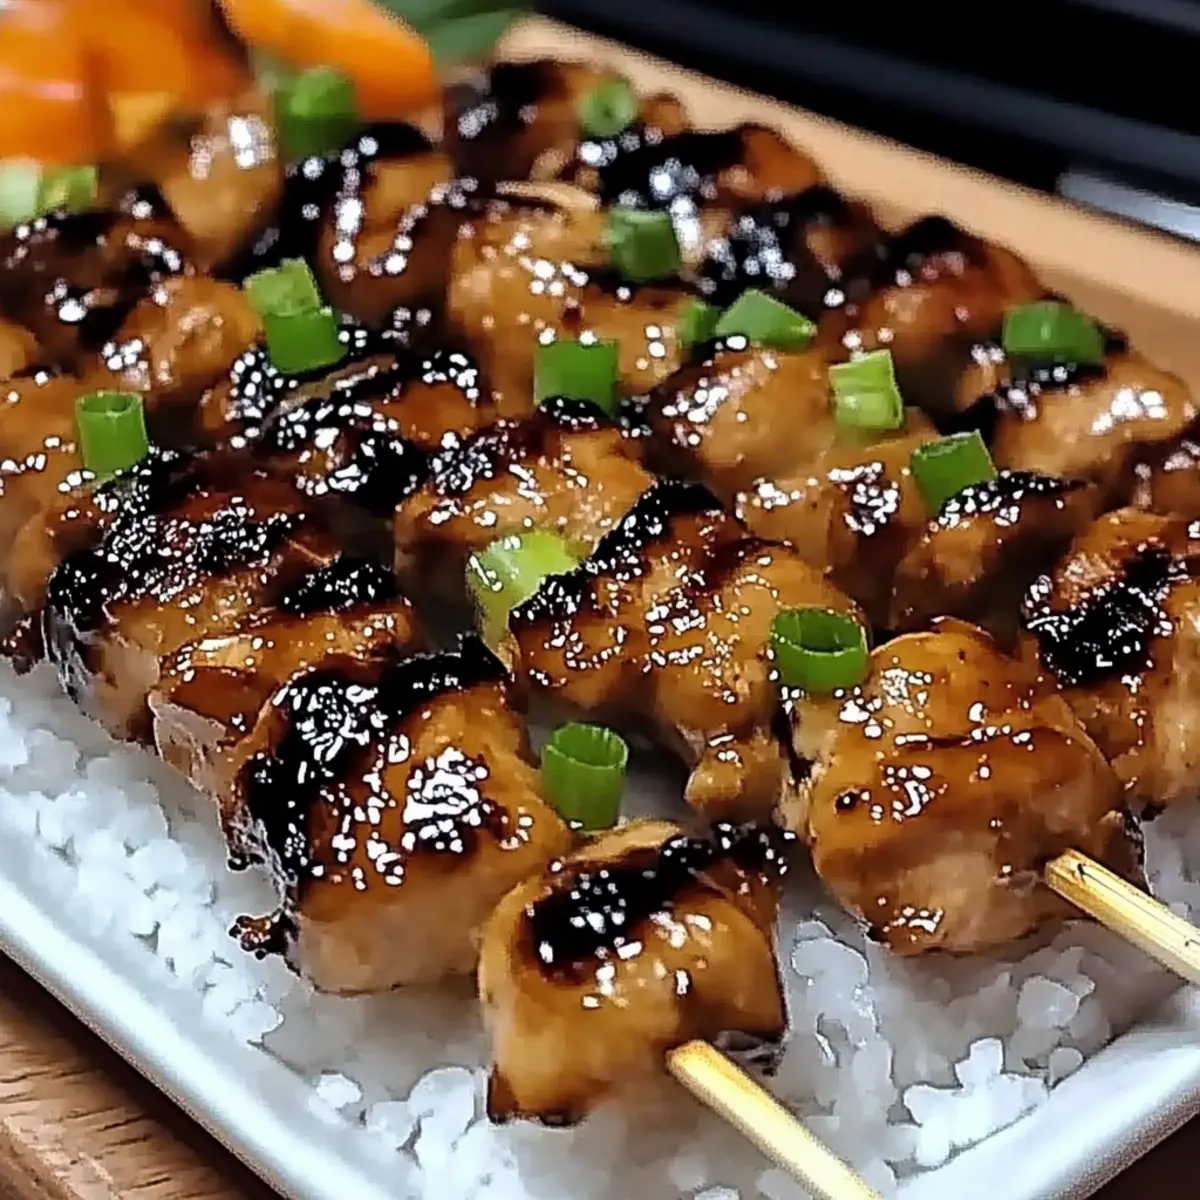
As I sank my teeth into the first bite of Japanese Chicken Yakitori, I was instantly transported to the lively streets of Tokyo, where the aromas of grilled delights waft from every corner. This recipe not only celebrates tender skewers of chicken, perfectly glazed in a sweet-savory sauce, but it also invites you to make it uniquely yours—whether you’re craving the smoky essence of grilled chicken or the satisfying texture of marinated tofu. Perfect for quick weeknight dinners or a weekend barbecue, these yakitori skewers are an effortless crowd-pleaser that can easily accommodate gluten-free and vegetarian variations. Ready to impress your family with a dish that sings with delicious flavor? Let’s dive into this culinary adventure together!
What Makes Japanese Chicken Yakitori Special?
Irresistible Taste: The sweet-savory glaze beautifully caramelizes, creating a mouthwatering finish that will have everyone reaching for seconds.
Customizable Adventure: Whether you opt for chicken, firm tofu, or seasonal veggies, you can tailor this recipe to fit dietary needs and preferences.
Quick to Prepare: With just a few steps, you can whip up these flavorful skewers, making them ideal for busy weeknights or spontaneous gatherings.
Crowd-Pleasing Appeal: Perfect for family dinners or summer barbecues, these yakitori skewers offer a deliciously unique twist on traditional grilling that everyone will love.
Versatile Pairings: Serve them on a bed of rice or alongside pickled vegetables for a complete meal, or enjoy them as a decadent appetizer. Dive into this delightful dish and experience the magic of Japanese Chicken Yakitori!
Japanese Chicken Yakitori Ingredients
• Get ready to grill!
For the Marinade
- Soy Sauce – A must-have for that signature umami flavor; use tamari or coconut aminos for a gluten-free twist.
- Garlic – Adds aromatic depth; fresh or crushed works perfectly.
- Ginger – Fresh ginger brings a zesty brightness; powdered ginger can substitute if needed.
- Red Wine or Mirin – This adds sweetness; you can swap in a splash of white wine mixed with sugar if you’re in a pinch.
- Brown Sugar – Enhances sweetness and caramelization; honey can be an alternative for a floral note.
- Rice Vinegar – Balances flavors beautifully; distilled vinegar can be used in a pinch but with a different taste profile.
For the Skewers
- Boneless Chicken – Key protein that stays juicy when grilled; consider firm tofu or your favorite vegetables for a vegetarian option.
- Cornstarch – Essential for thickening your sauce; it ensures that tasty glaze clings to your skewers.
- Wooden Skewers – Necessary for grilling; remember to soak them to prevent burning during cooking.
For Serving
- Steamed Rice – Serve these delicacies over rice to soak up the glaze.
- Pickled Vegetables – They make a refreshing side to cut through the richness.
- Miso Soup or Edamame – Excellent accompaniments, bringing authentic Japanese flair to your meal.
Now that you have all the delicious ingredients ready, let’s create some unforgettable Japanese Chicken Yakitori that will undoubtedly impress your taste buds!
Step‑by‑Step Instructions for Japanese Chicken Yakitori
Step 1: Prepare Skewers
Begin by soaking wooden skewers in water for 10–20 minutes. This essential step prevents the skewers from burning while grilling, ensuring your Japanese Chicken Yakitori remains beautifully intact. As they soak, gather your other ingredients to streamline the cooking process and minimize last-minute disruptions.
Step 2: Make Yakitori Sauce
In a medium bowl, whisk together soy sauce, water, red wine or mirin, brown sugar, and rice vinegar. Stir until the brown sugar completely dissolves, forming a rich and glossy yakitori sauce. Set aside roughly a quarter of this mixture for basting later while grilling, as it enhances the flavor of your skewers.
Step 3: Prep Chicken
Trim any excess fat from your boneless chicken and cut it into bite-sized 1–2 inch chunks for even cooking. Lightly pound the chicken with a meat mallet to tenderize it—this will promote a juicy result in your yakitori. This preparation will ensure that the chicken absorbs the flavors of the marinade thoroughly.
Step 4: Marinate Chicken
In a clean bowl, combine minced garlic, grated ginger, black pepper, and 1/4 cup of the yakitori sauce. Add the chicken pieces to this mixture, tossing them well to ensure each piece is evenly coated. Cover the bowl and let the chicken marinate for at least 10 minutes at room temperature, allowing all those rich flavors to meld beautifully.
Step 5: Cook and Thicken Sauce
Pour the remaining yakitori sauce into a small saucepan and bring it to a boil over medium heat. Reduce the heat to low and let it simmer for a few minutes until it thickens slightly. Mix a bit of cornstarch with water to form a slurry and stir it in to achieve your desired sauce consistency, which should be thick enough to glisten on your yakitori.
Step 6: Grill Chicken
Preheat your grill to medium-high heat. Thread the marinated chicken pieces onto the soaked skewers, making sure to leave a little space between them for even cooking. Grill the skewers for 8–12 minutes, turning occasionally and basting with the thickened sauce, until the chicken reaches an internal temperature of 165°F (74°C) and has a lovely caramelized finish.

Japanese Chicken Yakitori Variations
Feel free to get creative and make this recipe your own with delightful twists that enhance flavor and accommodate everyone at the table!
-
Gluten-Free: Substitute soy sauce with tamari or coconut aminos for a gluten-free option without compromising flavor. You can still savor that signature umami goodness!
-
Vegetarian-Friendly: Use firm tofu or marinated vegetables like bell peppers and zucchini in place of chicken. These alternatives soak up the delicious yakitori sauce beautifully.
-
Spicy Kick: Add chili flakes or a splash of your favorite hot sauce to the marinade for an exciting heat level that will tantalize your taste buds. This twist caters to those who enjoy a little extra spice.
-
Pork or Beef: Replace chicken with pork or beef chunks. Just remember to adjust cooking times based on the thickness, ensuring everything cooks evenly to perfection.
-
Savory Sweetness: Mix in slices of pineapple or peaches on the skewers alongside the protein for a sweet and savory contrast that complements the rich sauce beautifully.
-
Seafood Delight: Consider substituting traditional protein with shrimp or salmon for a quick cooking seafood option that pairs wonderfully with the sweet-savory glaze.
-
Crunchy Toppings: Finish your yakitori with toasted sesame seeds or chopped scallions to add a delightful texture and fresh flavor. This final touch elevates the experience on every bite.
-
Rice Alternatives: Instead of serving on white rice, try a fragrant jasmine or sticky rice to bring in another layer of flavor while providing a delightful base for the grilled goodness.
For more delicious ways to embrace the flavors of chicken, check out the Creamy Garlic Parmesan Chicken for a rich twist or explore the vibrant taste of Chicken Teriyaki Noodles for a satisfying meal option!
How to Store and Freeze Japanese Chicken Yakitori
Fridge: Store leftover yakitori in an airtight container for up to 3 days. Reheat gently in the oven or on the stovetop to maintain moisture and flavor.
Freezer: For longer storage, freeze the grilled yakitori skewers in a single layer on a baking sheet, then transfer to an airtight container or freezer bag. They can be frozen for up to 3 months.
Reheating: When ready to enjoy your frozen yakitori, thaw overnight in the fridge. Reheat in the oven at 350°F (175°C) for 10–15 minutes, basting with extra sauce for added flavor.
Meal Prep: Prepare a batch of yakitori sauce in advance and store it in the fridge for up to a week, allowing you to whip up a quick meal with minimal effort.
Make Ahead Options
Preparing Japanese Chicken Yakitori ahead of time is a fantastic way to save time during busy weeknights! You can marinate the chicken up to 24 hours in advance; simply follow the marinating step and refrigerate it in an airtight container to keep the flavors fresh. Additionally, the yakitori sauce can be made up to 3 days ahead—just store it in a sealed jar in the fridge to maintain its quality. When you’re ready to grill, thread the marinated chicken onto soaked skewers, cook as directed, and baste with the pre-prepared sauce for that rich, caramelized finish. This approach allows you to serve up a delicious meal with minimal last-minute effort, so you can truly enjoy your time with family and friends!
Expert Tips for Japanese Chicken Yakitori
-
Fresh Ingredients Matter: Using fresh garlic and ginger enhances flavor significantly. Dried spices lack the punch of their fresh counterparts, impacting your yakitori’s taste.
-
Proper Marinating Time: Allow the chicken to marinate for at least 30 minutes or longer if possible. The longer it soaks in the yakitori sauce, the more flavorful and tender it will be.
-
Monitor the Grill: Keep an eye on the grill temperature. Cooking too quickly can char the outside while leaving the inside undercooked.
-
Baste for Extra Flavor: Regularly basting the chicken with the thickened yakitori sauce while grilling creates a beautifully caramelized coating and deeper flavors.
-
Check Temperature: Ensure your chicken reaches an internal temperature of 165°F (74°C) for safety. Investing in a kitchen thermometer can save you from overcooking or undercooking.
-
Skewer Variations: Feel free to mix in vegetables or alternate proteins like firm tofu. This customization can make your Japanese Chicken Yakitori even more enjoyable!
What to Serve with Japanese Chicken Yakitori
Picture your dining table set for a lively evening, where the tantalizing aroma of grilled delights beckons everyone to gather and savor the moment.
- Steamed Rice: This fluffy base soaks up the rich yakitori sauce, creating a satisfying and harmonious pairing that enhances every bite.
- Pickled Vegetables: Their crisp, tangy qualities provide a refreshing contrast to the savory skewers, adding a delightful crunch and brightness to your meal.
- Miso Soup: A warm bowl of miso soup brings a comforting element to the table, perfectly complementing the grilled flavors of the yakitori. Its umami depth resonates beautifully with the savory notes.
- Edamame: Lightly salted edamame offers a nutritious side filled with protein, making for a vibrant snack that guests can munch on while enjoying the skewers.
- Grilled Corn: The sweet, charred kernels of corn pair exceptionally well with the sweet-savory sauce of the chicken, creating a summery vibe that’s irresistible.
- Japanese Beer or Sake: A crisp, cold Japanese beer or a glass of sake elevates the meal, enhancing the flavors while enriching the dining experience.
- Green Salad: A fresh salad with sesame dressing provides a bright and light contrast, balancing the richness of the sauce while adding lovely textures.
- Fruit Skewers for Dessert: Finish the meal with some grilled or skewered fresh fruit. The natural sweetness complements the yakitori while leaving a light, refreshing aftertaste.
Offer these delightful accompaniments alongside your Japanese Chicken Yakitori for a meal that feels both festive and fresh!
Japanese Chicken Yakitori Recipe FAQs
How do I know if my chicken is tender enough?
Absolutely! To ensure your chicken is tender, look for different signs: the meat should be juicy and easily pierced with a fork, and when marinated properly and grilled to an internal temperature of 165°F (74°C), it will be perfectly tender. Lightly pounding the chicken before marinating also helps to break down the proteins, yielding a more tender bite.
How should I store leftover Japanese Chicken Yakitori?
Leftovers can be stored in an airtight container in the refrigerator for up to 3 days. I often make a double batch to enjoy later! Just make sure to reheat gently in the oven at 350°F (175°C) for about 10–15 minutes to keep the chicken moist and tasty.
Can I freeze Japanese Chicken Yakitori?
Yes! To freeze your yakitori, first, let it cool completely. Then, place the skewers in a single layer on a baking sheet and freeze until solid. Afterward, transfer them to an airtight container or a freezer bag for up to 3 months. When you’re ready to enjoy, thaw them overnight in the fridge and reheating is a breeze—just pop them in the oven at 350°F (175°C) for 10–15 minutes!
What if my yakitori sauce is too thin?
Very good question! If your sauce is on the thin side, you can easily thicken it by mixing a tablespoon of cornstarch with an equal part of cold water to create a slurry. Bring the sauce to a gentle boil and stir in the slurry, cooking for an additional minute or two until it reaches your desired thickness. This will ensure a nice, sticky glaze that clings perfectly to your skewers.
Are there gluten-free options for this recipe?
Absolutely! You can swap soy sauce for tamari or coconut aminos, which are fantastic gluten-free alternatives. These substitutions maintain that delicious umami flavor while accommodating dietary restrictions. Just check the labels to ensure they’re certified gluten-free, and you’ll have a fabulous yakitori ready for everyone to enjoy!
Can I use different proteins or vegetables for my yakitori?
The more the merrier! Feel free to use pork, beef, lamb, or even firm tofu for a vegetarian version. Just adjust your cooking times accordingly – thinner pieces will cook faster. For an added punch, you can also toss in your favorite veggies like bell peppers, onions, or zucchini for a vibrant and colorful platter that everyone will love!

Japanese Chicken Yakitori: Melt-in-Your-Mouth Grilled Goodness
Ingredients
Equipment
Method
- Soak wooden skewers in water for 10–20 minutes to prevent burning during grilling.
- In a medium bowl, whisk together soy sauce, water, red wine or mirin, brown sugar, and rice vinegar.
- Trim excess fat from chicken and cut into 1-2 inch chunks.
- Combine minced garlic, grated ginger, and black pepper with the yakitori sauce, marinate chicken for at least 10 minutes.
- Pour the remaining yakitori sauce into a saucepan, boil, then simmer until thickened.
- Preheat grill to medium-high heat, thread chicken onto skewers, grill for 8-12 minutes while basting.
Leave a Reply