
As I stood in my kitchen, the enticing aroma of garlic and herbs wafted through the air, instantly transporting me to a cozy European bakery. That’s when I knew it was time to bake my favorite Garlic Herb Braided Bread. This recipe not only offers a stunning presentation with its lovely twisted shape but also warms the heart with its soft, fluffy interior and golden crust. What I adore most about this bread is its versatility; whether you enjoy it as a side with a hearty soup or as a star on your holiday table, it’s sure to impress. Plus, it’s easily adaptable for gluten-free diets without sacrificing taste or texture. Are you ready to elevate your baking game and fill your home with irresistible scents? Let’s dive in!
Why is Garlic Herb Braided Bread special?
Irresistible Aromas: Imagine filling your kitchen with the fragrant blend of roasted garlic and fresh herbs, making it impossible to resist this mouthwatering artisan bread.
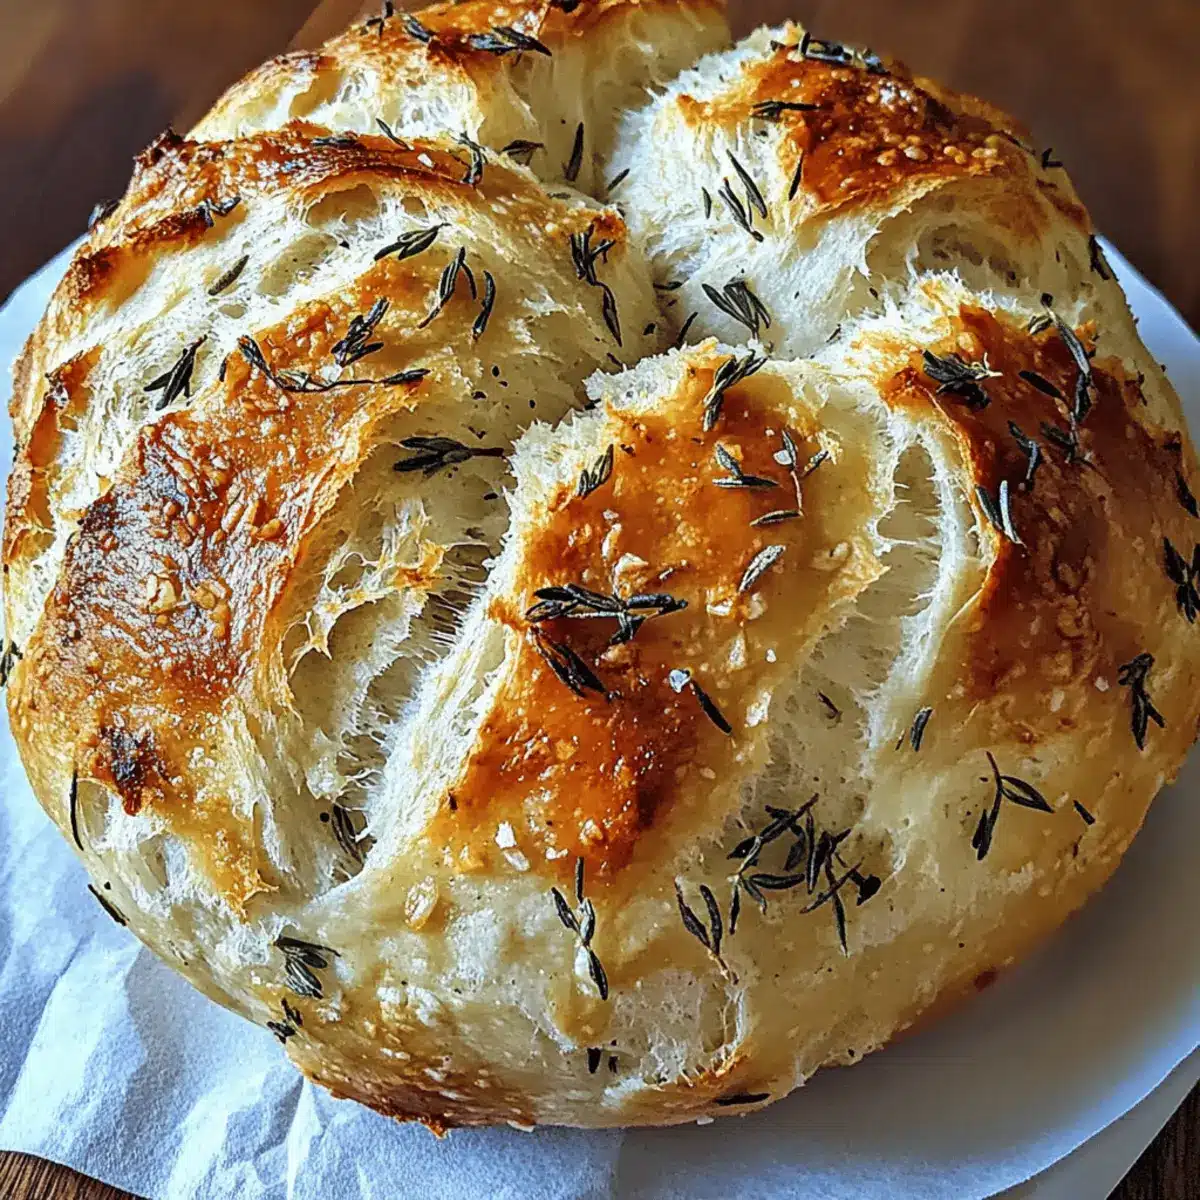
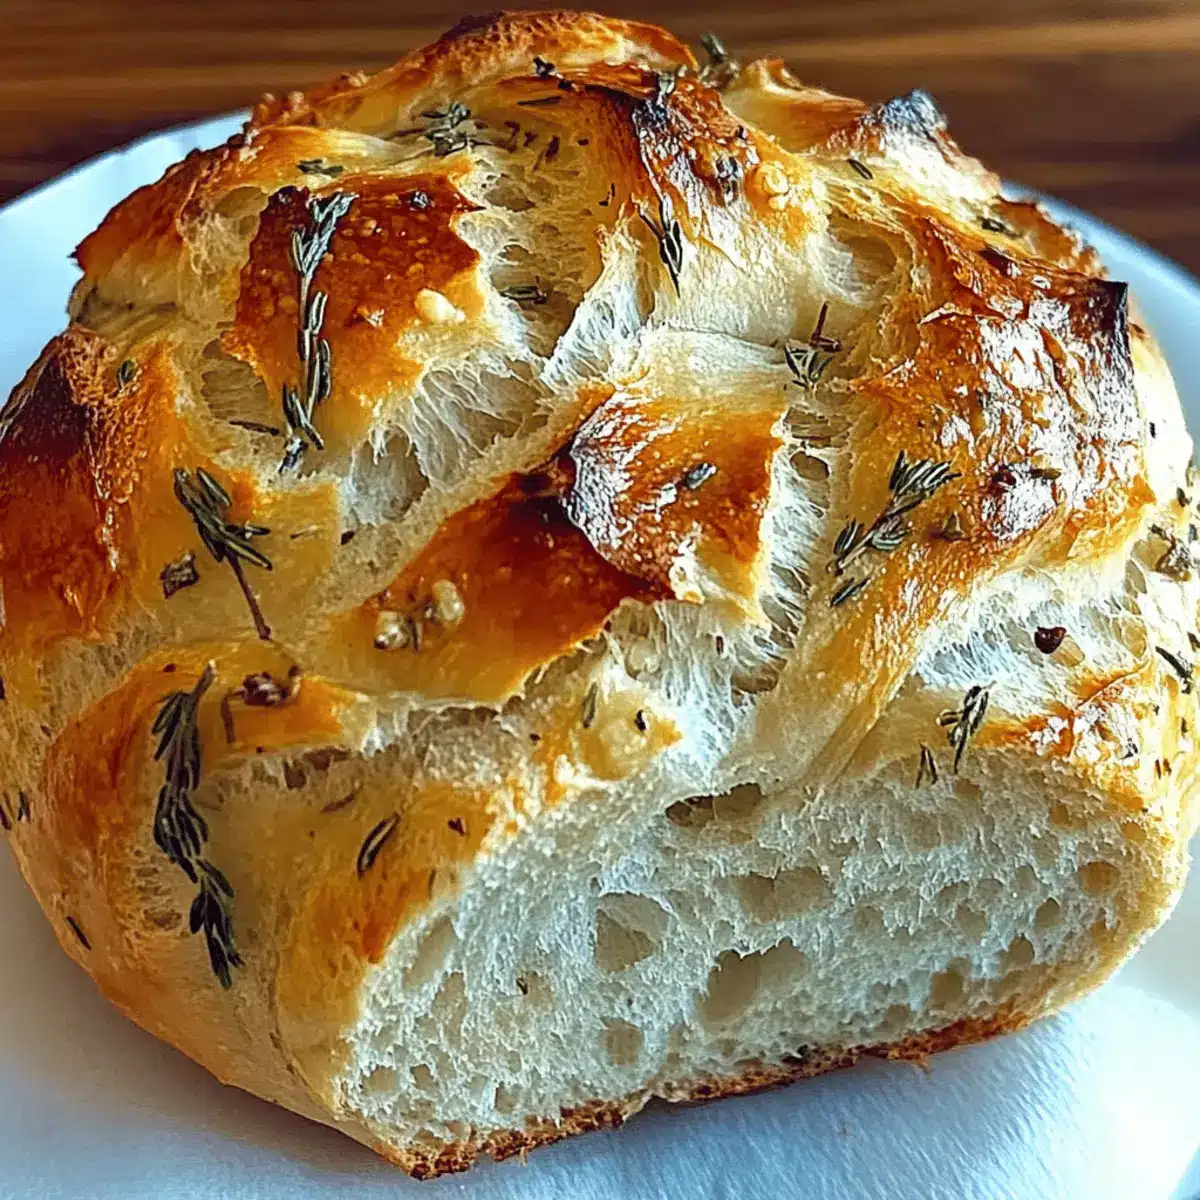
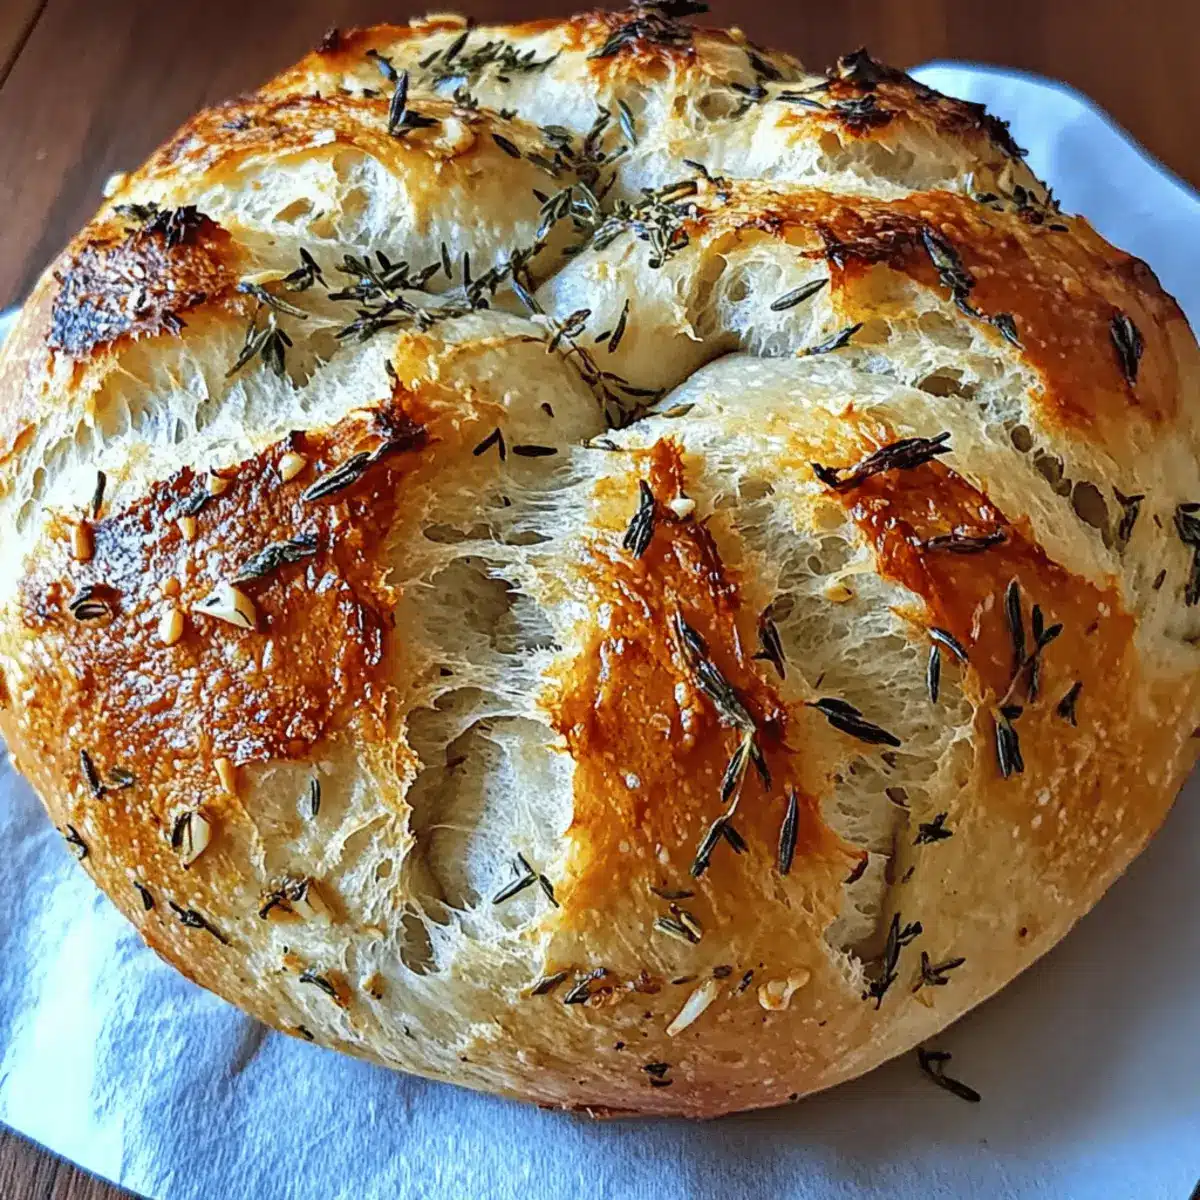
Visual Appeal: The beautifully braided shape not only looks impressive but also enhances its texture, giving you that perfect chew with every bite!
Versatile Options: Feel free to adapt this recipe! Transform it into rolls or experiment with different add-ins like sun-dried tomatoes or olives for a fun twist.
Convenient Make-Ahead: Prepare the dough ahead of time and refrigerate it to enhance flavors – you’ll get fresh bread on demand while saving time!
Perfect Pairing: Whether served alongside a hearty soup, like potato broccoli cheddar, or as a stunning centerpiece at family gatherings, this bread will leave everyone craving more.
Deliciously Homemade: Experience the magic of homemade bread that brings warmth and joy to your meals, making it the ultimate comfort food option!
Garlic Herb Braided Bread Ingredients
For the Dough
- All-Purpose or Bread Flour – Provides structure and form to the bread; use bread flour for a chewier texture.
- Active Dry Yeast – Causes the dough to rise, giving it lightness and fluffiness; instant yeast may shorten rise times.
- Warm Water (110°F) – Activates the yeast and hydrates the flour for optimal dough development.
- Olive Oil – Adds moisture and richness; garlic butter is a delightful alternative for extra flavor.
- Salt – Enhances taste and controls yeast fermentation for a balanced flavor.
- Sugar – Feeds the yeast and contributes to browning, giving your bread a lovely tint.
For Flavor
- Garlic (minced or roasted) – Infuses the bread with a savory kick; adjust based on your personal garlic preference.
- Dried Mixed Herbs – Brings aromatic notes to the bread; substituting with fresh herbs will brighten the flavor.
- Grated Parmesan Cheese – Adds a rich, savory element; can be replaced with mozzarella for a cheesier variant or omitted for a dairy-free option.
For Topping
- Melted Butter (for brushing) – Gives the crust a golden finish and extra flavor you’ll love.
- Optional Add-ins – Sprinkle in red pepper flakes for heat, add shredded mozzarella for cheesiness, or use fresh parsley for an eye-catching garnish.
With these ingredients, your homemade Garlic Herb Braided Bread will bring warmth and flavor right to your table!
Step‑by‑Step Instructions for Garlic Herb Braided Bread
Step 1: Prepare the Yeast Mixture
In a large mixing bowl, combine 1 cup of warm water (about 110°F) and 1 tablespoon of sugar; sprinkle 2 ¼ teaspoons of active dry yeast on top. Allow it to foam for 5-10 minutes until the yeast is bubbly, indicating it’s active. This step is crucial for achieving the lightness in your Garlic Herb Braided Bread.
Step 2: Mix the Dough Ingredients
Once the yeast is ready, add 2 tablespoons of olive oil, 2 minced garlic cloves, 1 tablespoon of dried mixed herbs, and 1 teaspoon of salt to the bowl. Gradually incorporate 2 ½ cups of all-purpose or bread flour, stirring until a shaggy dough begins to form. This combination will allow the flavors to meld beautifully in your bread.
Step 3: Knead the Dough
Transfer the dough to a floured surface or use a stand mixer with a dough hook. Knead the mixture for about 6-8 minutes, adding in ½ cup of grated Parmesan cheese halfway through until the dough becomes smooth and elastic. You’ll know it’s ready when it springs back slightly when pressed.
Step 4: First Rise
Shape the dough into a ball and place it in a greased bowl, covering it with a clean kitchen towel. Let it rise in a warm place for approximately 1 hour or until it has doubled in size. This rise is essential for creating that airy texture in your Garlic Herb Braided Bread.
Step 5: Shape the Dough
Once risen, punch down the dough to release air, then divide it into 3 equal parts. Roll each piece into a 14-16 inch rope. Carefully braid the three strands together, tucking the ends underneath the loaf to create a neat shape. Enjoy the visual beauty as your bread starts to take form!
Step 6: Second Rise
Place the braided dough on a parchment-lined baking sheet, cover it with the towel again, and allow it to rise for another 30-40 minutes. This crucial step helps the bread achieve a lovely fluffy texture and enhances the flavors in your Garlic Herb Braided Bread.
Step 7: Preheat and Prepare for Baking
While the dough is rising, preheat your oven to 375°F (190°C). Once the second rise is complete, brush the loaf generously with melted butter and sprinkle on any optional toppings like sesame seeds or herbs for extra flavor and color. This finishing touch enhances the appearance and taste of the bread.
Step 8: Bake the Bread
Place the baking sheet in the preheated oven and bake the Garlic Herb Braided Bread for 25-30 minutes, or until it turns golden brown and emits a fragrant aroma. Keep an eye on it towards the end to ensure it doesn’t over-brown. Your kitchen will soon be filled with irresistible scents!
Step 9: Cool and Serve
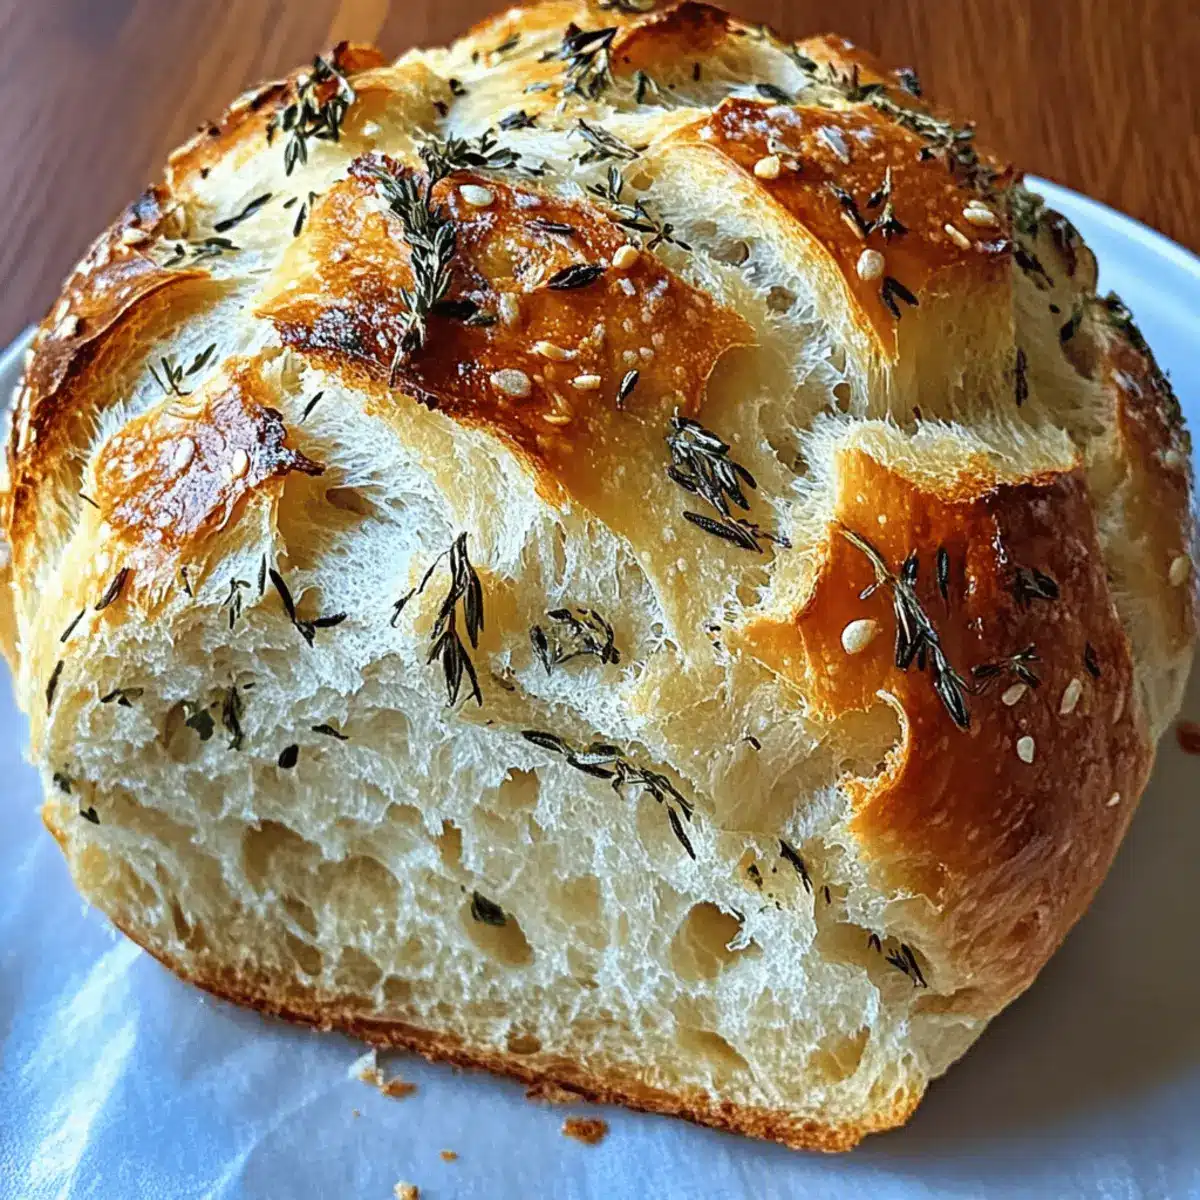
Once baked, remove the bread from the oven and allow it to cool on a wire rack for a few minutes. This step lets the steam escape, ensuring a perfect texture. Slice and serve warm, reveling in the delightful blend of garlic and herbs that define your delicious Garlic Herb Braided Bread.
How to Store and Freeze Garlic Herb Braided Bread
Room Temperature: Store any leftover Garlic Herb Braided Bread in an airtight container at room temperature for up to 3 days to maintain its softness and flavor.
Freezer: For longer storage, wrap the bread tightly in plastic wrap and then in aluminum foil, storing it in the freezer for up to 3 months.
Reheating: To enjoy the bread warm, simply thaw it in the fridge overnight, then reheat in a 350°F (175°C) oven for about 10-15 minutes until warmed through.
Make-Ahead Tip: You can also prepare the dough in advance, refrigerate it overnight, and bake fresh bread the next day for a delightful, homemade experience anytime!
Expert Tips for Garlic Herb Braided Bread
Uniform Braiding: Ensure even tension when braiding the dough to achieve a consistent shape and beautiful presentation.
Chill for Flavor: Prepare the dough in advance and refrigerate it overnight to deepen the flavors of your Garlic Herb Braided Bread.
Storing Leftovers: For optimal freshness, store any leftover bread in an airtight container at room temperature for up to 3 days, or freeze for longer-lasting enjoyment.
Gluten-Free Note: If using gluten-free flour blends, be cautious as they may require different hydration levels and not yield the same texture as traditional flour.
Check for Doneness: When baking, look for a golden-brown crust and a hollow sound when tapping the bottom of the loaf; this indicates perfect cooking.
Garlic Herb Braided Bread Variations
Feel free to get creative and customize your Garlic Herb Braided Bread to suit your taste buds!
-
Rolls: Transform the dough into individual rolls by dividing it before braiding. Each roll captures the same delicious flavors in a fun, bite-sized form. Perfect for family dinners or a picnic!
-
Gluten-Free: Use a quality gluten-free flour blend to adapt this recipe. Just be cautious, as gluten is vital for achieving the perfect texture.
-
Flavor Boost: Incorporate sun-dried tomatoes, olives, or roasted red peppers for a Mediterranean flair. These add-ins create a delightful surprise with every bite.
-
Cheesy Twist: Replace parmesan with shredded mozzarella or feta for a cheesy delight. Mix and match cheeses for a unique flavor profile that will make your bread a star!
-
Herb Varieties: Experiment with fresh herbs like rosemary, thyme, or basil to enhance the aroma and taste. Fresh herbs elevate the bread, making it feel even more delightful.
-
Spicy Kick: Add red pepper flakes to the dough for a touch of heat. This subtle spice balances nicely with the garlic and herbs, giving an exciting twist to your bread.
-
Sweet Addition: Drizzle the finished loaf with honey or spread it with fruit preserves. This sweet addition contrasts beautifully with the savory flavors, making it a delicious treat at breakfast or brunch.
-
Perfect Pairing: Serve your Garlic Herb Braided Bread alongside a steaming bowl of potato broccoli cheddar to complement its flavors beautifully. It turns a simple meal into an unforgettable experience!
With these variations, your Garlic Herb Braided Bread can be tailored to fit any occasion, ensuring every bite bursts with flavor and warmth!
What to Serve with Garlic Herb Braided Bread
Indulging in your fresh-baked Garlic Herb Braided Bread is a sensory experience that invites a delightful array of pairings to create a full, heartwarming meal.
-
Creamy Tomato Soup: This classic pairing enhances the bread’s warmth, creating a comforting symphony of flavors that complement each other beautifully.
-
Mixed Green Salad: A refreshing blend of crisp greens and a tangy vinaigrette brings a bright contrast to the richness of the bread. The lightness of the salad balances its heartiness, making it a perfect duo.
-
Hearty Beef Stew: The savory, robust flavors of a beef stew seamlessly harmonize with the garlic and herbs, making this combination a match made in comfort food heaven.
-
Savory Cheese Platter: Curate a selection of artisanal cheeses to create a luxurious spread where the bread shines as the delightful vehicle for tasting different flavors and textures.
-
Olive Tapenade: This zesty, briny spread pairs wonderfully, adding a burst of flavor that brightens every bite of your bread.
-
Grilled Vegetables: Marinated and grilled veggies add a charred goodness that enhances the aromatic qualities of the bread while providing a colorful side.
-
Sparkling Lemonade: A light, fizzy drink with a citrus punch complements the savory notes of the bread and refreshes your palate.
-
Chocolate Mousse: End your meal on a sweet note with a rich dessert that contrasts itself against the savory bread, creating a wonderful balance overall.
-
Chardonnay: A chilled glass of chardonnay offers fruity notes that harmonize with the garlic and herbs, enhancing your dining experience with every sip.
Make Ahead Options
These Garlic Herb Braided Bread options are perfect for busy home cooks looking to save time without compromising on flavor! You can prepare the dough up to 24 hours in advance by following the first rise steps, then cover it tightly and refrigerate to enhance flavors. If you’re planning ahead, shape the braids, cover them, and let them rise for 30-40 minutes just before baking to ensure a fresh, fluffy result. For longer storage, freeze the braided unbaked dough for up to 3 months; simply let it thaw overnight in the fridge before allowing it to rise again (about 30-40 minutes) before baking. Enjoy fresh, homemade Garlic Herb Braided Bread with minimal effort!
Garlic Herb Braided Bread Recipe FAQs
How do I know if my garlic is ripe enough for the recipe?
Look for garlic bulbs that are firm and dry with no soft or dark spots. Fresh garlic should have tight, unbroken skin and should feel heavy for its size. If your garlic has begun to sprout, it’s still usable but may have a milder flavor.
What is the best way to store leftover Garlic Herb Braided Bread?
To keep your bread fresh, store any leftovers in an airtight container at room temperature for up to 3 days. For optimal flavor and texture, make sure it’s completely cooled before sealing. If you need to keep it longer, consider freezing it.
Can I freeze Garlic Herb Braided Bread? How?
Absolutely! To freeze your Garlic Herb Braided Bread, wrap it tightly in plastic wrap followed by aluminum foil. This prevents freezer burn. You can store it in the freezer for up to 3 months. When ready to enjoy, thaw overnight in the fridge, then reheat it in a 350°F (175°C) oven for about 10-15 minutes.
What if my bread doesn’t rise properly?
If your dough hasn’t risen, it could be due to inactive yeast—check its expiration date or ensure the water was not too hot (should be around 110°F). If the dough is too sticky, gradually add small amounts of flour until it’s manageable. Patience is key, so give the dough more time to rise.
Is this recipe suitable for people with gluten intolerance?
You can easily adapt this recipe for gluten-free diets! Just use a reliable gluten-free flour blend. Keep in mind that gluten-free doughs often require different hydration levels, so you may need to add a bit more liquid to get the right consistency. Follow the manufacturer’s instructions for the best results.
Can I use different types of cheese in this recipe?
Very! You can mix it up with different cheeses, such as mozzarella for a gooey texture or leave it out completely for a dairy-free version. Adding herbs or sun-dried tomatoes can also complement the flavors beautifully. Experiment and find your favorite combination!
Garlic Herb Braided Bread: Taste the Homemade Magic
Ingredients
Equipment
Method
- Prepare the yeast mixture by combining warm water and sugar, then sprinkle yeast and let foam for 5-10 minutes.
- Mix dough ingredients by adding olive oil, garlic, herbs, and salt to the yeast mixture, then incorporate flour.
- Knead the dough for 6-8 minutes until smooth and elastic, adding Parmesan halfway through.
- Let the dough rise in a greased bowl for about 1 hour or until doubled in size.
- Shape the dough into a braid, tucking ends underneath.
- Allow the braided dough to rise for another 30-40 minutes.
- Preheat the oven to 375°F and prepare the loaf with melted butter and toppings.
- Bake for 25-30 minutes until golden brown.
- Cool and serve warm, enjoying the garlic and herb flavors.
Leave a Reply