
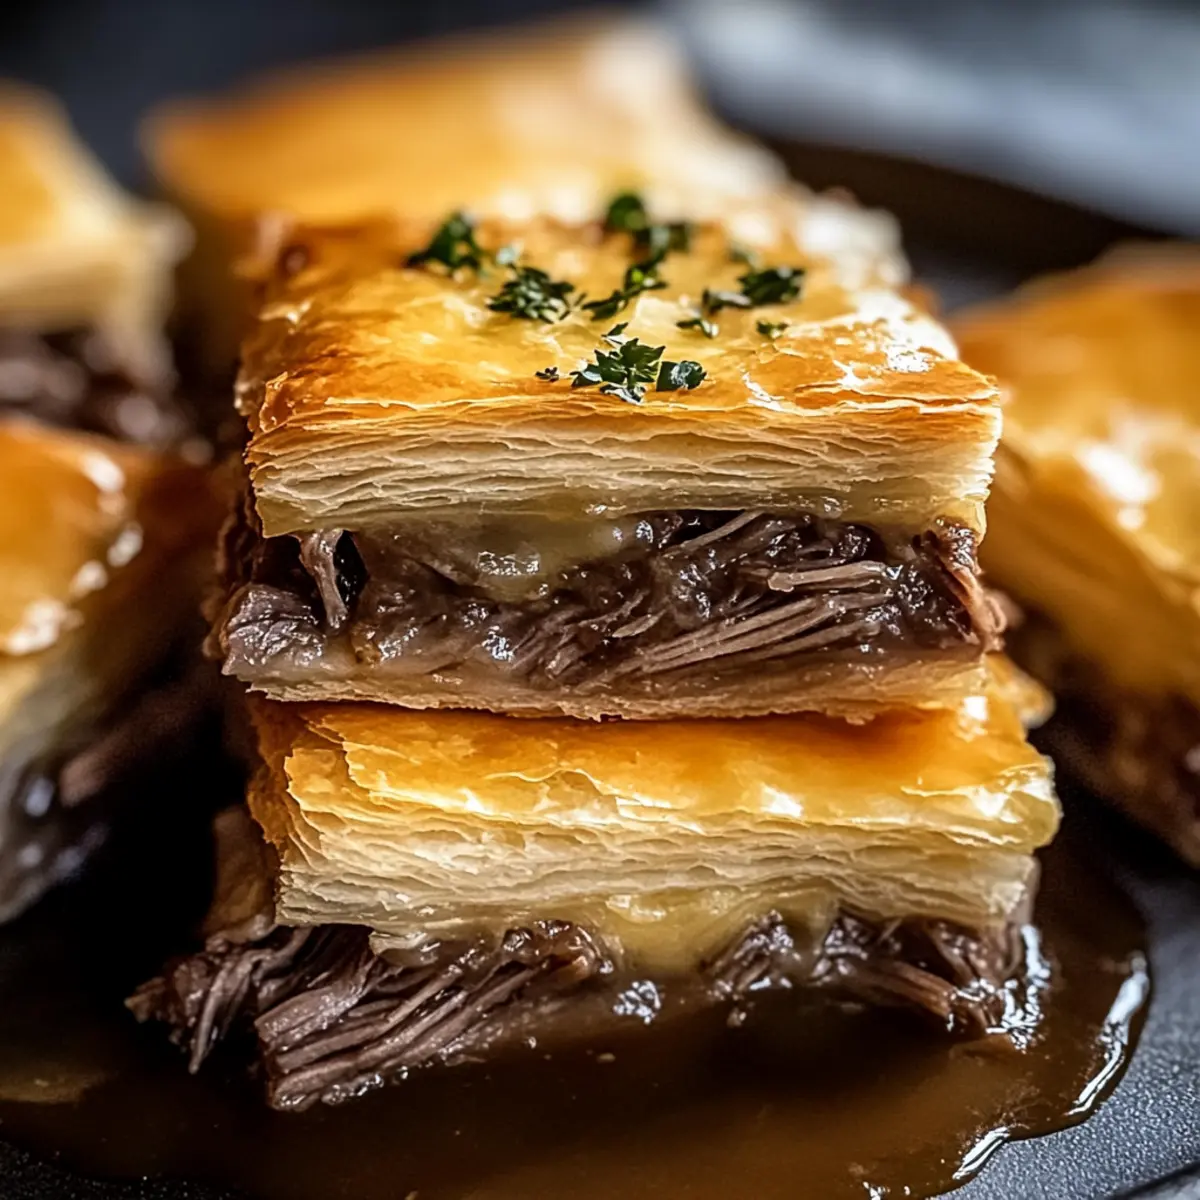
The sizzling smell of roast beef wafted through the air, instantly transporting me to the comforting embrace of my childhood kitchen, where flavors mingled like old friends. If you’re searching for a dish that elegantly captures that nostalgia, let me introduce you to my Easy French Dip Squares. This delightful recipe transforms a classic sandwich into a shareable casserole that dazzles at potlucks and family gatherings. With buttery crescent roll layers enveloping tender roast beef and melty Swiss cheese, these squares boast both richness and ease, making them perfect for those busy weeknights or casual parties. They come together quickly, allowing you to savor quality time with loved ones rather than fussing in the kitchen. Curious about how this homage to tradition can become the new star of your dinner table? Let’s dive in!

Why Are These French Dip Squares Amazing?
Flavor Explosion: Each bite is a tantalizing mix of savory beef and gooey cheese, elevated by a buttery crescent roll crust.
Quick & Easy: With just a few simple ingredients, you’ll be on your way to heavenly squares in no time.
Perfect for Entertaining: These delightful bites are ideal for sharing at potlucks, turning heads and sparking conversations.
Comforting Satisfaction: They capture the warm, nostalgic essence of traditional French Dip sandwiches but in a fun, shareable format.
Make-Ahead Marvel: Prep them a day early and pop them in the oven right before guests arrive—simple and stress-free!
If you love easy party recipes, you’ll also enjoy Pumpkin French Toast that’s comforting and delicious!
French Dip Squares Ingredients
For the Base
• Refrigerated Crescent Rolls – These are your secret weapon for a flaky, buttery crust that bakes to perfection.
For the Filling
• Deli Roast Beef – Choose deli-sliced for the best tender texture; it’s the star protein in your French Dip Squares.
• Swiss Cheese – Melts smoothly to create that dreamy, cheesy layer; feel free to swap with provolone or cheddar for a twist.
• Dry Onion Soup Mix – Contributes a savory depth that enhances the overall flavor; can be replaced with caramelized onions for a fresher touch.
For the Drizzle
• Butter – This ingredient adds richness and helps the flavors meld beautifully; don’t skip it!
• Worcestershire Sauce – Infuses your dish with a complex, savory kick; soy sauce can be a fine substitute for a different flavor.
• Garlic Powder – A pinch adds a lovely hint of warmth; fresh garlic can be used for a bolder taste.
For Dipping
• Beef Broth – A warm dipping sauce that elevates your French Dip Squares to a new level; it’s essential for that classic French Dip experience.
Step‑by‑Step Instructions for French Dip Squares
Step 1: Preheat and Prepare
Begin by preheating your oven to 375°F (190°C). While the oven heats, grab a 9×13 inch baking dish and give it a light spray with non-stick cooking spray. This ensures your French Dip Squares will come out easily after baking. The warm kitchen will soon fill with the mouthwatering aroma of the impending delightful dish!
Step 2: Roll Out the Base
Unroll one can of refrigerated crescent rolls onto a clean countertop or directly into your prepared baking dish. Carefully pinch the seams together to form a cohesive dough layer that covers the bottom of the dish. This flaky base is critical for holding the filling and gives your French Dip Squares a lovely texture.
Step 3: Add the Roast Beef
Layer the deli-sliced roast beef evenly over the crescent roll base, ensuring every inch is covered. This hearty layer is the star of your French Dip Squares, providing that satisfying, savory flavor. Gently press down to secure the beef in place for a nicely packed filling.
Step 4: Sprinkle the Cheese
Now, generously sprinkle shredded Swiss cheese over the roast beef layer. This cheesy goodness will melt beautifully during baking, creating that comforting element you crave in French Dip Squares. Ensure an even distribution for a perfect cheesy experience in every bite.
Step 5: Prepare the Flavorful Drizzle
In a mixing bowl, combine the dry onion soup mix, melted butter, Worcestershire sauce, and garlic powder. Stir until well blended, creating a fragrant drizzle. Pour this mixture evenly over the cheese, allowing it to soak into the layers below. It will enhance the flavors significantly as the dish bakes.
Step 6: Cover with the Second Layer
Unroll the second can of crescent rolls and place it over the assembled layers, making sure to pinch the seams together to create a sealed top. This step is important for preventing any leakage while baking. Your French Dip Squares are now fully assembled and ready for the oven!
Step 7: Bake to Perfection
Pop the baking dish into your preheated oven and bake for 15-20 minutes. Keep an eye on them, looking for a golden brown top that signals they are done. You want a perfectly flaky crust that is slightly crisp, contrasting with the melty interior of your French Dip Squares.
Step 8: Heat the Dipping Broth
While your squares are baking, pour the beef broth into a small pot and heat it over medium heat. Stir occasionally as it warms through for about 5 to 7 minutes until steaming. This warm broth will be a delightful dipping accompaniment for the rich flavors of your freshly baked French Dip Squares.
Step 9: Cool and Serve
Once baked, let your squares cool for 5-10 minutes for easier slicing. Use a sharp knife to cut them into perfect squares, revealing the delicious layers inside. Serve them warm alongside the heated beef broth for dipping, creating an irresistible and cozy meal that everyone will love!
What to Serve with Easy French Dip Squares
These comforting squares are perfect for creating a hearty, delightful meal that everyone will love.
- Crispy French Fries: The crunch of fries contrasts beautifully with the tender squares, making for a satisfying bite. Serve them with garlic aioli for an extra flavor kick!
- Simple Green Salad: A refreshing salad with mixed greens, cherry tomatoes, and a light vinaigrette balances the richness of the French Dip Squares, providing a lovely counterpoint.
- Coleslaw: Crunchy coleslaw adds a tangy crunch that complements the savory flavors of the beef and cheese, enhancing your dining experience.
- Sautéed Vegetables: A medley of sautéed bell peppers, onions, and zucchini lends color and fresh textures, making your meal feel more vibrant and healthy.
- Potato Wedges: Seasoned potato wedges provide a filling side that holds up to the heartiness of the dish while adding complementary flavors and delicious crisp.
- Beer or Wine Pairing: A refreshing lager or a light red wine like Pinot Noir brings out the savory elements of the French Dip Squares, making each bite even more enjoyable.
- Sweet Potato Chips: The sweetness of these chips contrasts wonderfully with the savory elements of the squares, offering a unique twist on traditional sides.
- Creamy Macaroni and Cheese: For those craving comfort, the richness of mac and cheese pairs excellently with the flavor-packed squares, creating a cozy, indulgent feast.
- Warm Garlic Bread: Crisp, buttery garlic bread is perfect for dipping in the beef broth, bringing an extra layer of flavor and enjoyment to your meal.
- Dessert Option: Finish your meal with a light dessert, like lemon tart or fruit salad, to cleanse the palate and provide a refreshing end to your savory experience.
How to Store and Freeze French Dip Squares
Fridge: Keep leftover French Dip Squares in an airtight container for up to 3 days. This will help maintain their delicious flavor and texture.
Freezer: For longer storage, freeze squares wrapped tightly in plastic wrap and then in aluminum foil for up to 2 months. Thaw in the fridge before reheating.
Reheating: To reheat, place squares in a preheated oven at 350°F (175°C) for about 10-15 minutes until warmed through—this keeps the crust flaky and delightful!
Make-Ahead: You can assemble the French Dip Squares a day ahead, cover tightly, and store in the fridge. Just bake when ready to serve!
Expert Tips for French Dip Squares
Seam Sealing: Ensure dough seams are pinched tightly to prevent any leakage during baking, ensuring perfect squares.
Watch Closely: Monitor your baking closely, covering with foil if they brown too fast. You want a golden hue, not burnt edges!
Let Cool: Allow the squares to cool for a few minutes before cutting to achieve clean edges and proper layering that’s worthy of serving.
Spicy Twist: For a zesty kick, consider adding horseradish or Dijon mustard directly onto the roast beef layer for an exciting flavor boost.
Reheat Wisely: If you have leftovers, reheat in the oven for a few minutes rather than the microwave to maintain that delightful crispy texture.
Trust Your Taste: Feel free to customize the fillings or cheese types to suit your preferences—French Dip Squares are incredibly versatile!
Make Ahead Options
These Easy French Dip Squares are perfect for busy home cooks looking to save time in the kitchen! You can assemble the dish up to 24 hours in advance; simply cover the baking dish tightly with plastic wrap and refrigerate it until you’re ready to bake. This not only allows the flavors to meld beautifully, making the squares even tastier but also streamlines your cooking process on the day of serving. When you’re ready to enjoy them, just pop them in the oven and bake as directed, adding an extra 5-10 minutes to the baking time if they’re coming straight from the fridge. Trust me, these French Dip Squares will be just as delicious as if you had made them fresh!
French Dip Squares Variations & Substitutions
Feel free to let your creativity shine and make this recipe uniquely yours, with flavors and textures that suit your taste buds!
-
Lean Protein: Swap out roast beef for sliced turkey or ham for a lighter version that still satisfies.
-
Cheese Swap: Use provolone or cheddar for a different spin on the cheesy interior; each adds its own unique flair. You might find that provolone offers a sharper taste, while cheddar brings a comforting richness.
-
Onion Boost: Add caramelized onions in place of the dry onion soup mix to enhance the sweet, savory essence. This twist not only elevates flavor but adds a delightful texture.
-
Sautéed Veggies: Incorporate sautéed mushrooms or bell peppers for an earthy touch and a veggie boost, bringing more depth to each bite.
-
Herb Infusion: Sprinkle fresh herbs like thyme or rosemary into the filling to brighten up the flavor profile; their aromatic essence will tantalize your senses.
-
Spicy Kick: The addition of horseradish or a hint of sriracha in the drizzle can bring a satisfying heat that pairs beautifully with the savory beef.
-
Creamy Twist: Consider cream cheese mixed with herbs as an additional layer under the cheese—this will create a delightful creaminess that melts into the other flavors.
If you find yourself looking for more comforting recipes, check out Pumpkin French Toast for another seasonal treat! Additionally, you can bring a veggie-focused flair to your table by trying these options. There are plenty of ways to adapt this dish to fit any dietary needs or flavor preferences. Enjoy the journey of culinary creativity!
French Dip Squares Recipe FAQs
How do I choose the best roast beef?
Absolutely! When selecting deli roast beef, opt for freshly sliced from the deli counter instead of pre-packaged options. Look for beef that is a nice rosy color without any dark spots, which can indicate age. For the best flavor, choose a cut labeled as “top round” or “prime rib.”
What’s the best way to store leftover French Dip Squares?
Very simple! Store any leftovers in an airtight container in the fridge for up to 3 days. Be sure to let them cool completely before sealing to prevent condensation, which can make the crust soggy. Reheat in the oven for that deliciously crispy exterior once again!
Can I freeze French Dip Squares?
Absolutely! To freeze, wrap individual squares tightly in plastic wrap and then in aluminum foil to prevent freezer burn. They can be frozen for up to 2 months. Thaw in the fridge overnight and reheat in a preheated oven at 350°F (175°C) for about 10-15 minutes for the best results.
What if the crescent roll dough leaks during baking?
Don’t worry, it’s a common issue! To prevent leakage, ensure the seams are well-pinched, and you can use a bit of extra dough to reinforce weak spots. If it does leak, no biggie; just scoop the filling back inside after baking and enjoy the crispy, flaky crust!
Are French Dip Squares suitable for a gluten-free diet?
For sure! To make this dish gluten-free, simply substitute the refrigerated crescent rolls with a gluten-free pastry option that bakes well. Additionally, check that your Worcestershire sauce and broth are gluten-free. Always consult product labels to ensure they meet your dietary needs!
How can I make French Dip Squares spicier?
The more the merrier! For a spicy kick, mix some horseradish or Dijon mustard into the beef layer before adding the cheese. You could even sprinkle in some red pepper flakes for an extra layer of heat. Enjoy crafting your perfect spicy squares!
Irresistible French Dip Squares: Comfort Food Delight
Ingredients
Equipment
Method
- Preheat your oven to 375°F (190°C) and prepare a 9x13 inch baking dish with non-stick spray.
- Unroll one can of refrigerated crescent rolls into the prepared baking dish, pinching seams together.
- Layer the deli-sliced roast beef evenly over the crescent roll base.
- Sprinkle shredded Swiss cheese generously over the roast beef.
- In a mixing bowl, combine dry onion soup mix, melted butter, Worcestershire sauce, and garlic powder. Mix well and pour over the cheese.
- Unroll the second can of crescent rolls and place over the assembled layers, pinching seams together.
- Bake for 15-20 minutes until golden brown on top.
- While baking, heat beef broth in a small pot over medium heat until steaming.
- Let the squares cool for 5-10 minutes before slicing and serve with the warm beef broth for dipping.
Leave a Reply