
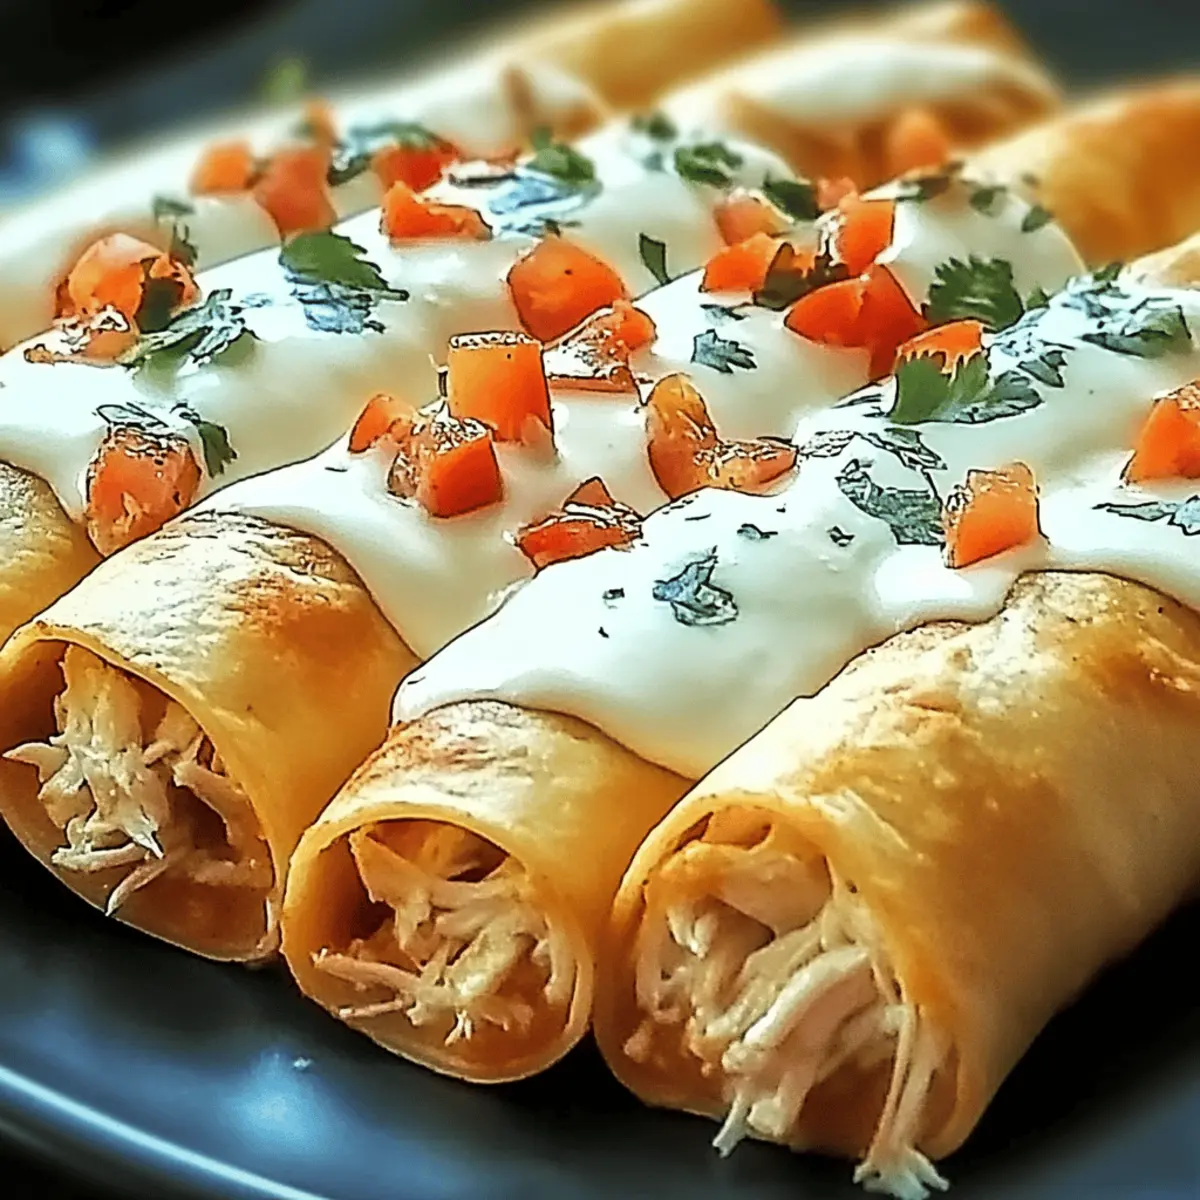
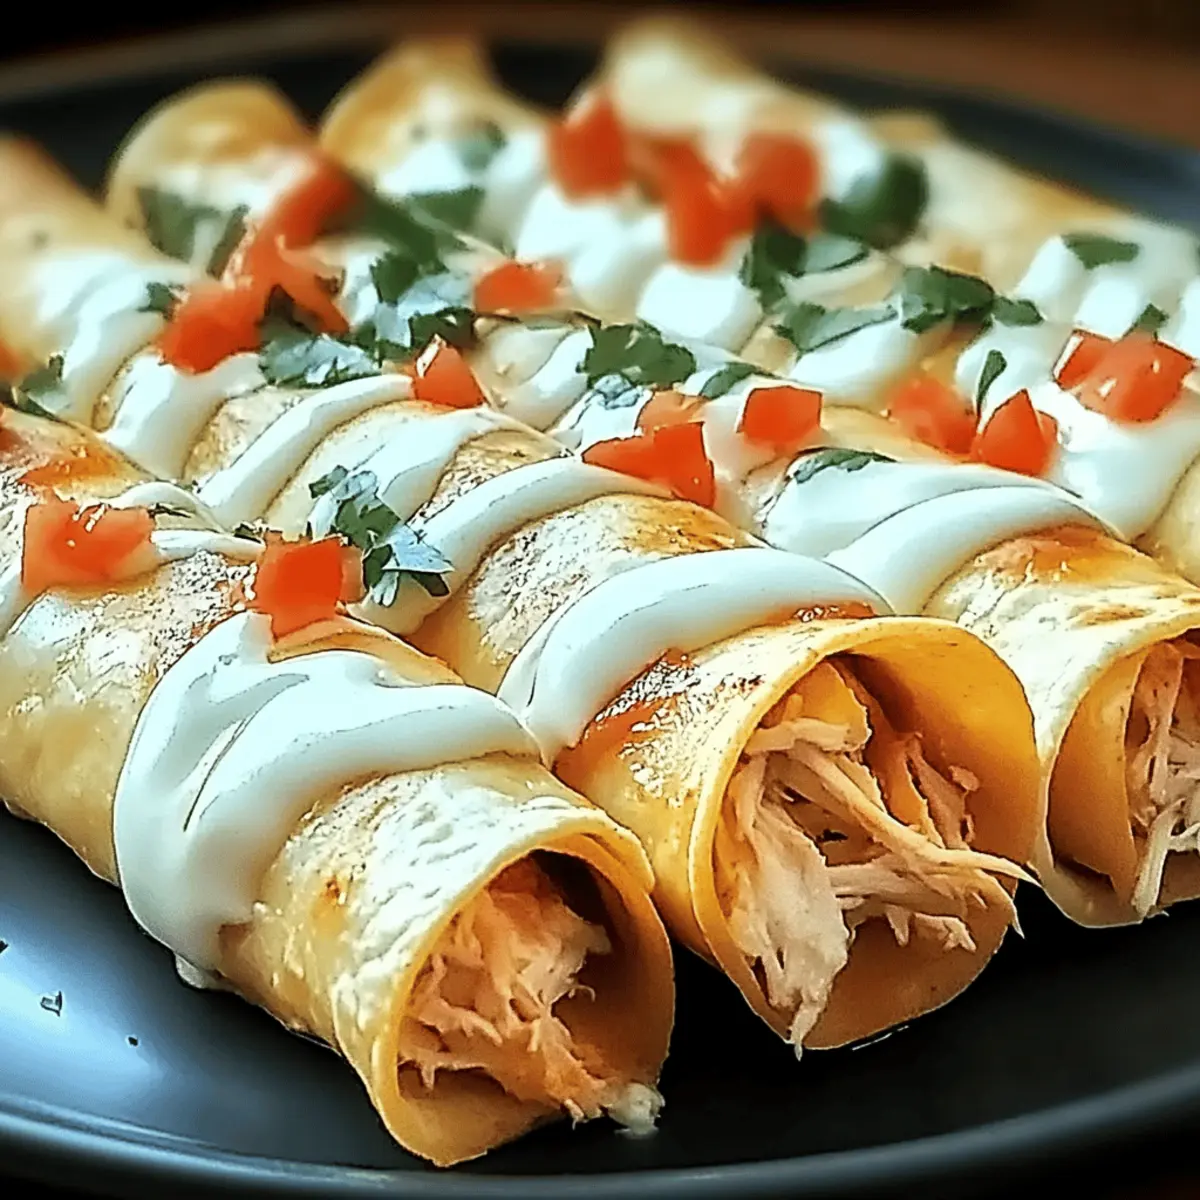
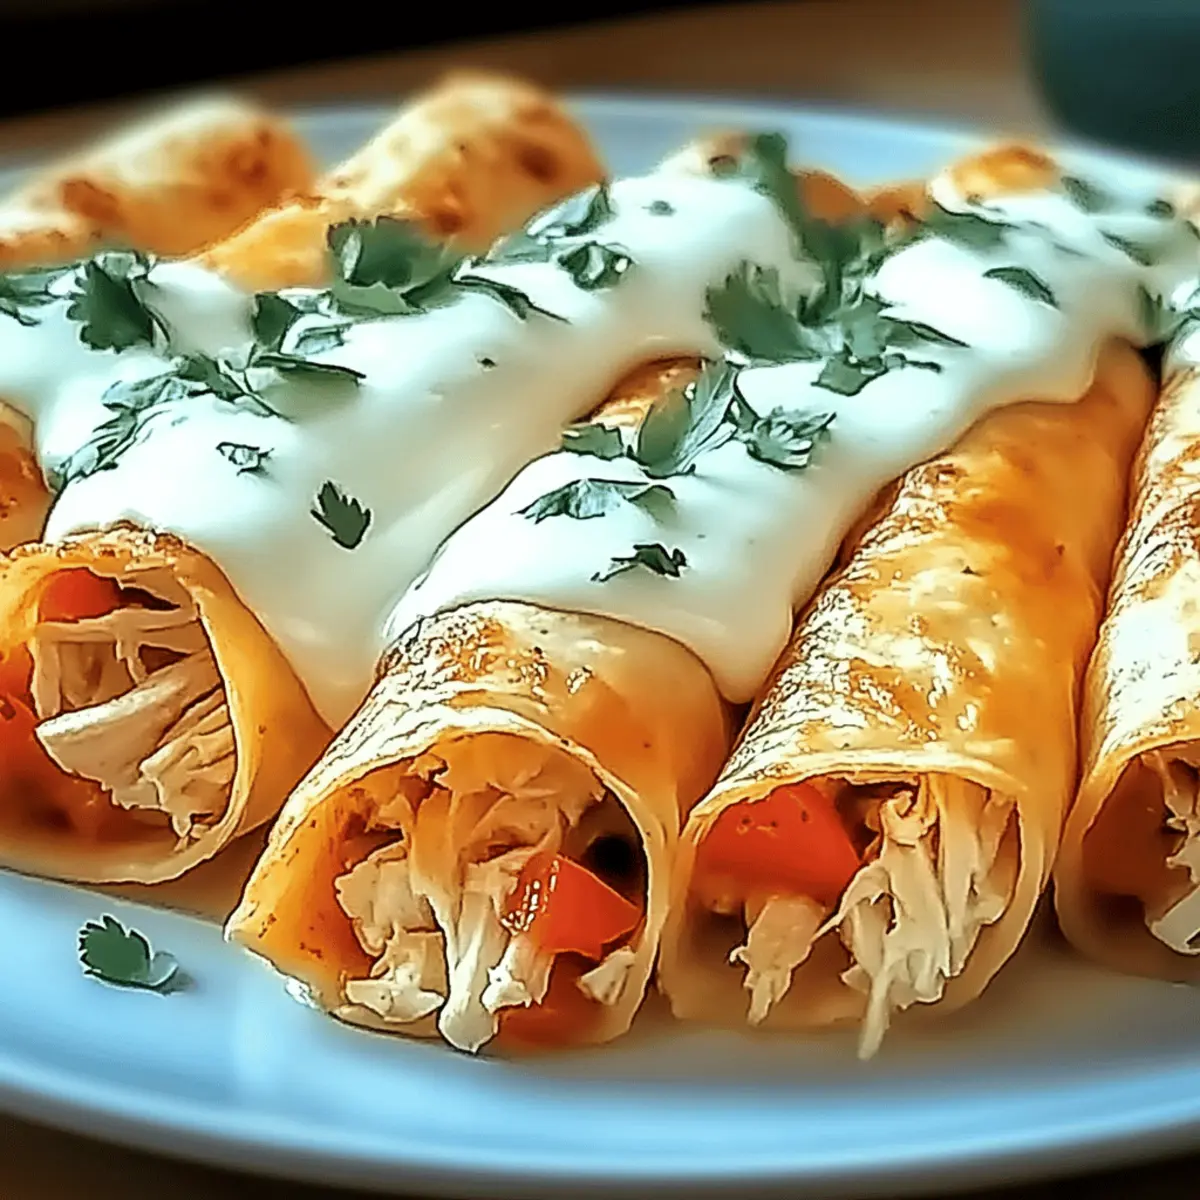
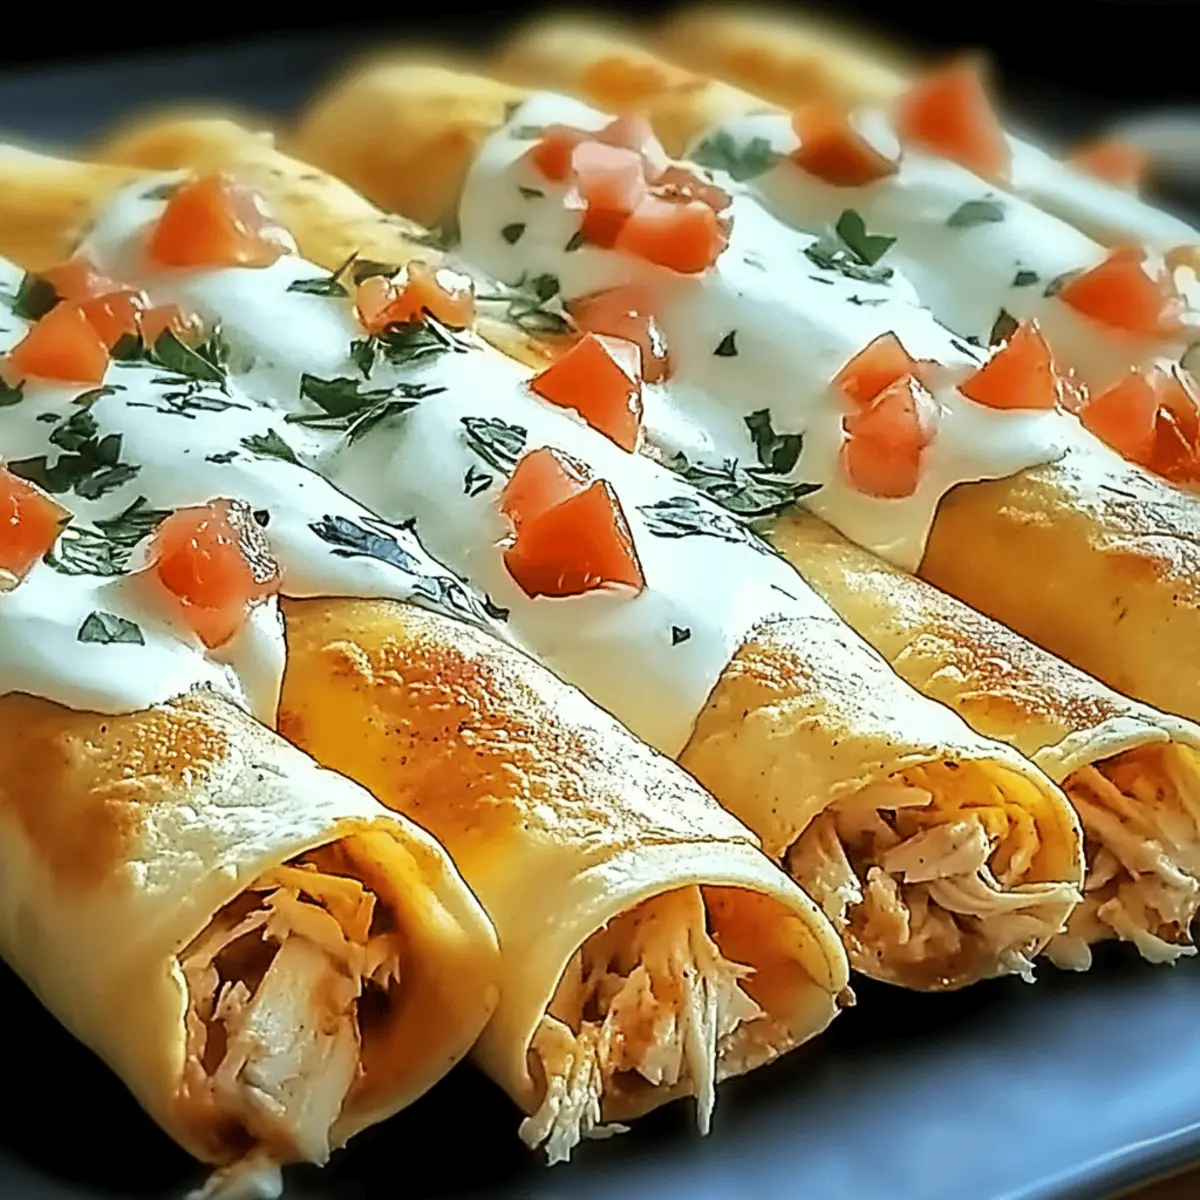
There’s a certain magic that happens when creamy goodness meets a crispy exterior, and let me tell you, that’s exactly what you’ll discover with these Easy Cream Cheese Chicken Taquitos. Perfect for a busy weeknight dinner or a gathering where you want to impress, this recipe is delightfully simple and requires just a handful of ingredients. What’s even better? The taquitos can be ready in under 30 minutes, making them a savior for those hectic evenings. Plus, they’re baked, not fried, offering a healthier twist without sacrificing that satisfying crunch we all crave! Are you ready to wrap up some tasty goodness? Let’s dive in!
Why are these taquitos a must-try?
Easy Prep: These Easy Cream Cheese Chicken Taquitos come together in no time, making them perfect for those busy weeknights when you want something delicious without the hassle.
Crispy Goodness: Baked to perfection, they deliver that satisfying crunch without the guilt of frying.
Versatile Flavor: With customizable fillings, you can mix and match spices or cheese to suit any taste, just like my Cajun Chicken Pasta.
Crowd-Pleaser: Whether for a family dinner or a gathering with friends, these taquitos are sure to impress and are great for sharing!
Healthy Twist: By using baked wraps and simple ingredients, you’re indulging without going overboard.
Easy Storage: Prepare in advance and store unbaked taquitos in the freezer for up to three months—perfect for last-minute meals!
Easy Cream Cheese Chicken Taquitos Ingredients
For the Filling
- Shredded Chicken – This is your main protein source, adding heartiness; using rotisserie chicken makes it a breeze.
- Cream Cheese – Essential for a rich, creamy filling; opt for non-dairy cream cheese for a dairy-free version.
- Cheddar Cheese – Provides that melty sharpness; feel free to experiment with other cheeses if desired.
- Salsa – Adds moisture and delightful flavor; choose based on your spice preference for those Easy Cream Cheese Chicken Taquitos.
- Garlic Powder – Enhances the savory depth of the filling.
- Onion Powder – Complements garlic for a well-rounded taste.
- Cumin – Imparts authentic Mexican flavor; adjust the amount based on your taste.
For the Wraps
- Flour or Corn Tortillas – Either works well; corn gives an authentic vibe, while flour is more pliable for easy rolling.
- Cooking Spray or Olive Oil – Used to achieve a crispy exterior during baking, ensuring a delightful crunch.
Step‑by‑Step Instructions for Easy Cream Cheese Chicken Taquitos
Step 1: Preheat the Oven
Begin by preheating your oven to 425°F (220°C). While it’s heating, line a baking sheet with parchment paper to prevent the taquitos from sticking. This step is crucial as it ensures the oven is at the ideal temperature for achieving a perfectly crispy exterior on your Easy Cream Cheese Chicken Taquitos.
Step 2: Prepare the Filling
In a mixing bowl, combine shredded chicken, cream cheese, cheddar cheese, salsa, garlic powder, onion powder, cumin, salt, and pepper. Stir the mixture until it is smooth and well-combined, with all the ingredients evenly distributed. This flavorful filling is the heart of your taquitos, bringing that creamy, savory goodness to each bite.
Step 3: Warm the Tortillas
To ensure your tortillas are pliable and easy to roll, wrap them in a damp paper towel and microwave them for about 15 seconds. This will help soften them without making them soggy. Soft tortillas are key when assembling your Easy Cream Cheese Chicken Taquitos, as they prevent cracking during the rolling process.
Step 4: Fill and Roll the Taquitos
Take each warm tortilla and spoon 2-3 tablespoons of the prepared filling onto the center. Carefully roll the tortilla tightly around the filling, tucking in the sides as you go, and place the taquito seam-side down on the lined baking sheet. Be careful not to overstuff, as this could cause them to burst while baking.
Step 5: Bake the Taquitos
Once all the taquitos are assembled, lightly spray the tops with cooking spray or drizzle them with olive oil to help achieve that golden, crispy finish. Bake in the preheated oven for 15-18 minutes. Watch closely for a beautifully golden color, indicating they’re ready to come out and be enjoyed!
Expert Tips for Easy Cream Cheese Chicken Taquitos
-
Warm Tortillas: Ensure tortillas are fully warmed before filling to prevent cracking. A damp paper towel in the microwave works wonders.
-
Don’t Overfill: Be mindful not to fill the taquitos too much. A little filling goes a long way and prevents bursting during baking.
-
Customize Your Filling: Feel free to explore different cheeses or spices that suit your palate. Using fresh or leftover ingredients allows for unique flavor combinations in your Easy Cream Cheese Chicken Taquitos.
-
Crispy Finish: A light spray of cooking oil enhances crispiness. Don’t skip this step if you want that golden, crunchy exterior!
-
Make-Ahead Magic: Prepare taquitos in advance and refrigerate them for up to 24 hours, or freeze uncooked ones for up to 3 months. Just bake them straight from the freezer for a quick meal!
Make Ahead Options
These Easy Cream Cheese Chicken Taquitos are a fantastic choice for meal prep enthusiasts! You can assemble the taquitos and refrigerate them for up to 24 hours before baking, which saves valuable time on busy evenings. Simply follow the preparation steps, then cover the baking sheet with plastic wrap to keep the tortillas from drying out. Alternatively, you can freeze unbaked taquitos for up to 3 months; just place them in a single layer in a freezer-safe container. When you’re ready to enjoy, bake them directly from frozen for an easy weeknight meal or a last-minute snack—just add an extra few minutes to the baking time for that perfect crispy finish.
Easy Cream Cheese Chicken Taquitos Variations
Feel free to put your spin on these delightful taquitos and create something uniquely yours!
-
Dairy-Free: Substitute cream cheese with non-dairy cream cheese for a delicious alternative that caters to your dietary needs.
-
Spice it Up: Adding diced jalapeños or a sprinkle of cayenne pepper in the filling will elevate the heat level to suit your taste.
-
Vegetable Boost: Incorporate finely chopped spinach or bell peppers into the filling for added nutrition and vibrant color.
-
Cheese Variety: Experiment with different cheeses like pepper jack or mozzarella to alter the flavor profile and create your own masterpiece.
-
Gluten-Free: Opt for gluten-free tortillas to ensure everyone can enjoy these taquitos without compromising on taste or texture.
-
More Protein: Add black beans or refried beans into the filling for a heartier meal that packs a protein punch.
-
Herb Infusion: Mix in some fresh cilantro or parsley to brighten up the flavors and add an aromatic touch, perfect if you’re serving them alongside a fresh salsa.
-
Unique Dipping Sauce: Serve with a zesty chipotle sauce or avocado crema to enhance your dining experience, echoing the flavors found in my Philly Cheesesteak Mac or Garlic Parmesan Chicken.
Feel inspired to make these taquitos your own, and don’t forget to share your creations with friends and family!
What to Serve with Easy Cream Cheese Chicken Taquitos
There’s something magical about the combination of crispy taquitos and delightful sides that can truly elevate your meal experience.
-
Guacamole: This creamy dip adds a fresh, zesty touch, perfectly balancing the rich flavors of the taquitos. A dollop on the side brings extra excitement to every bite!
-
Sour Cream: A classic pairing, sour cream adds cool creaminess to the crispy taquitos, enhancing each crunchy morsel. It’s also great for dipping, making it a must-have!
-
Pico de Gallo: Fresh and vibrant, this chunky salsa brings a burst of flavor and color to your plate, brightening the overall dish. The crisp vegetable elements beautifully contrast the warm, creamy taquitos.
-
Mexican Rice: A comforting side that complements the dish while rounding out your meal. Its mild seasoning pairs well with the loaded flavors in the taquitos while providing a satisfying base.
-
Refried Beans: Creamy and hearty, refried beans add a wonderful texture contrast and will absorb some of the delicious salsa juices. Perfect for scooping alongside your taquitos.
-
Chips and Salsa: Crisp tortilla chips served with your favorite salsa set the stage for a full fiesta experience. They bring crunch and another layer of flavor to your meal!
-
Margaritas: Sipping on a refreshing margarita pairs perfectly with the savory goodness of taquitos. This delightful drink adds a festive touch to any occasion.
-
Churros: For dessert, opt for sugary churros to satisfy that sweet tooth while wrapping up a satisfying savory experience. Perfectly crispy with just the right amount of sweetness!
How to Store and Freeze Easy Cream Cheese Chicken Taquitos
Fridge: Store leftover taquitos in an airtight container for up to 3 days. Reheat in the oven to restore crispiness before serving.
Freezer: Freeze unbaked taquitos by placing them on a baking sheet until solid, then transfer to a freezer-safe bag for up to 3 months. Bake from frozen, adding a few extra minutes to the cooking time.
Make-Ahead: Assemble and refrigerate taquitos for up to 24 hours before baking. This is perfect for busy days when you want to streamline meal prep.
Reheating: For best results, reheat leftover taquitos in the oven at 350°F (175°C) for about 10 minutes, ensuring they regain their crunchy texture.
Easy Cream Cheese Chicken Taquitos Recipe FAQs
How do I choose the best shredded chicken for the filling?
Absolutely! I recommend using rotisserie chicken for convenience and flavor. Look for chicken that is moist with no dark spots or unpleasant odor. If using uncooked chicken, ensure it’s thoroughly cooked and shredded to achieve the right texture in your taquitos.
What’s the best way to store leftover Easy Cream Cheese Chicken Taquitos?
Store any leftover taquitos in an airtight container in the fridge for up to 3 days. When you’re ready to enjoy them again, simply reheat in the oven at 350°F (175°C) for about 10 minutes. This will help restore their crispy exterior and make them as delightful as when they were first baked.
Can I freeze taquitos for later use?
Yes, and it’s super easy! To freeze unbaked Easy Cream Cheese Chicken Taquitos, first, arrange them on a baking sheet in a single layer and place them in the freezer until they’re solid (about 2-3 hours). Once frozen, transfer them to a freezer-safe bag or container for up to 3 months. When you’re ready to bake, just pop them in the oven straight from the freezer, adding a few extra minutes to the cooking time (around 18-20 minutes).
What should I do if my taquitos burst open while baking?
Very! If your taquitos burst during baking, it’s likely due to overfilling or the tortillas being too cold or stiff. Next time, ensure that you warm the tortillas sufficiently and only use 2-3 tablespoons of filling per taquito. If one does burst, don’t fret! It will still taste great—it just won’t have that perfect crunch!
Are these taquitos suitable for a gluten-free diet?
Yes, definitely! You can easily make these Easy Cream Cheese Chicken Taquitos gluten-free by using corn tortillas instead of flour. Just check the label on the tortilla package to ensure they’re certified gluten-free. This way, you can enjoy a delicious, crispy treat without compromising on health or taste.
Can my pets enjoy the taquitos too?
While the filling ingredients like shredded chicken and cheese may be safe for pets in small amounts, remember that some spices (like garlic powder) can be harmful to dogs. It’s best to save the taquitos for your enjoyment only and treat your pet to something specially made for them!
Easy Cream Cheese Chicken Taquitos for a Crunchy Delight
Ingredients
Equipment
Method
- Preheat your oven to 425°F (220°C) and line a baking sheet with parchment paper.
- In a mixing bowl, combine shredded chicken, cream cheese, cheddar cheese, salsa, garlic powder, onion powder, cumin, salt, and pepper. Stir until smooth and well-combined.
- Wrap tortillas in a damp paper towel and microwave for about 15 seconds to soften them.
- Spoon 2-3 tablespoons of the filling onto each tortilla, roll tightly, and place seam-side down on the baking sheet.
- Lightly spray the tops with cooking spray or drizzle with olive oil and bake for 15-18 minutes until golden.
Leave a Reply