
Flipping through my favorite cookbook one evening, I stumbled upon a recipe that whisked me straight to bustling streets of Seoul—the tantalizing Easy Korean Chicken Bulgogi. This dish instantly caught my attention with its promise of juicy, tender chicken thighs, marinated in a symphony of sweet and savory flavors, perfect for a weeknight dinner. What’s even better? It’s a quick and easy meal that can be grilled, baked, or cooked on the stovetop, making it incredibly versatile for any cooking skill level. Plus, it’s naturally gluten-free if you swap in tamari for soy sauce! Whether you’re serving it wrapped in crisp lettuce or alongside a vibrant cucumber salad, this Korean delight will have your taste buds dancing. Ready to venture into the world of homemade Korean cuisine? Let’s dive into this delicious adventure together!
Why Is This Chicken Bulgogi Amazing?
Quick and Easy: This dish comes together in no time, perfect for busy weeknights. It requires minimal prep and can be ready in under an hour!
Flavor Explosion: The marinade is a delightful mix of sweet, savory, and a hint of spice, giving every bite a burst of flavor that will leave everyone craving more.
Versatile Cooking Methods: Grill, bake, or stovetop—choose your favorite cooking method to suit your mood or available equipment!
Perfect for Sharing: Whether you’re hosting friends or enjoying a cozy family dinner, this Korean Chicken Bulgogi is sure to impress and satisfy. Pair it with a refreshing cucumber salad or your favorite rice dishes, like the Garlic Parmesan Chicken for a complete meal.
Healthy Delight: With lean chicken and wholesome ingredients, it’s a guilt-free option that’s packed with protein, making it suitable for those watching their diet. Enjoy a taste of Korea while keeping your meals nutritious!
Easy Chicken Bulgogi Recipe Ingredients
For the Marinade:
- Boneless Skinless Chicken Thighs – The juiciest choice for marinating; you can swap in chicken breasts or beef if desired.
- Rice Vinegar – This adds a zesty kick; apple cider vinegar makes a fine substitute.
- Soy Sauce (Low Sodium) – Essential for that umami flavor; use tamari for a gluten-free option.
- Sesame Oil – Gives the dish a delicious nutty flavor; try olive oil if you’re after something different.
- Honey – A natural sweetener that enhances the marinade; opt for maple syrup as a vegan alternative.
- Sugar – Helps caramelize the chicken beautifully; coconut sugar is a healthier choice.
- Chili Paste – Introduces heat to the dish; adjust to your spice preference with Sriracha or gochujang for authenticity.
- Minced Garlic – Adds aromatic depth; fresh garlic packs the best punch.
- Green Onions (Sliced) – Offers a mild onion flavor; substitute with chives if limited.
- Red Onions (Diced) – Provides a sweet crunch; feel free to use white or yellow onions instead.
- Salt – A key seasoning ingredient; kosher salt is recommended for controlled measurement.
- Pepper – Enhances overall flavor with its mild heat.
For Garnishing:
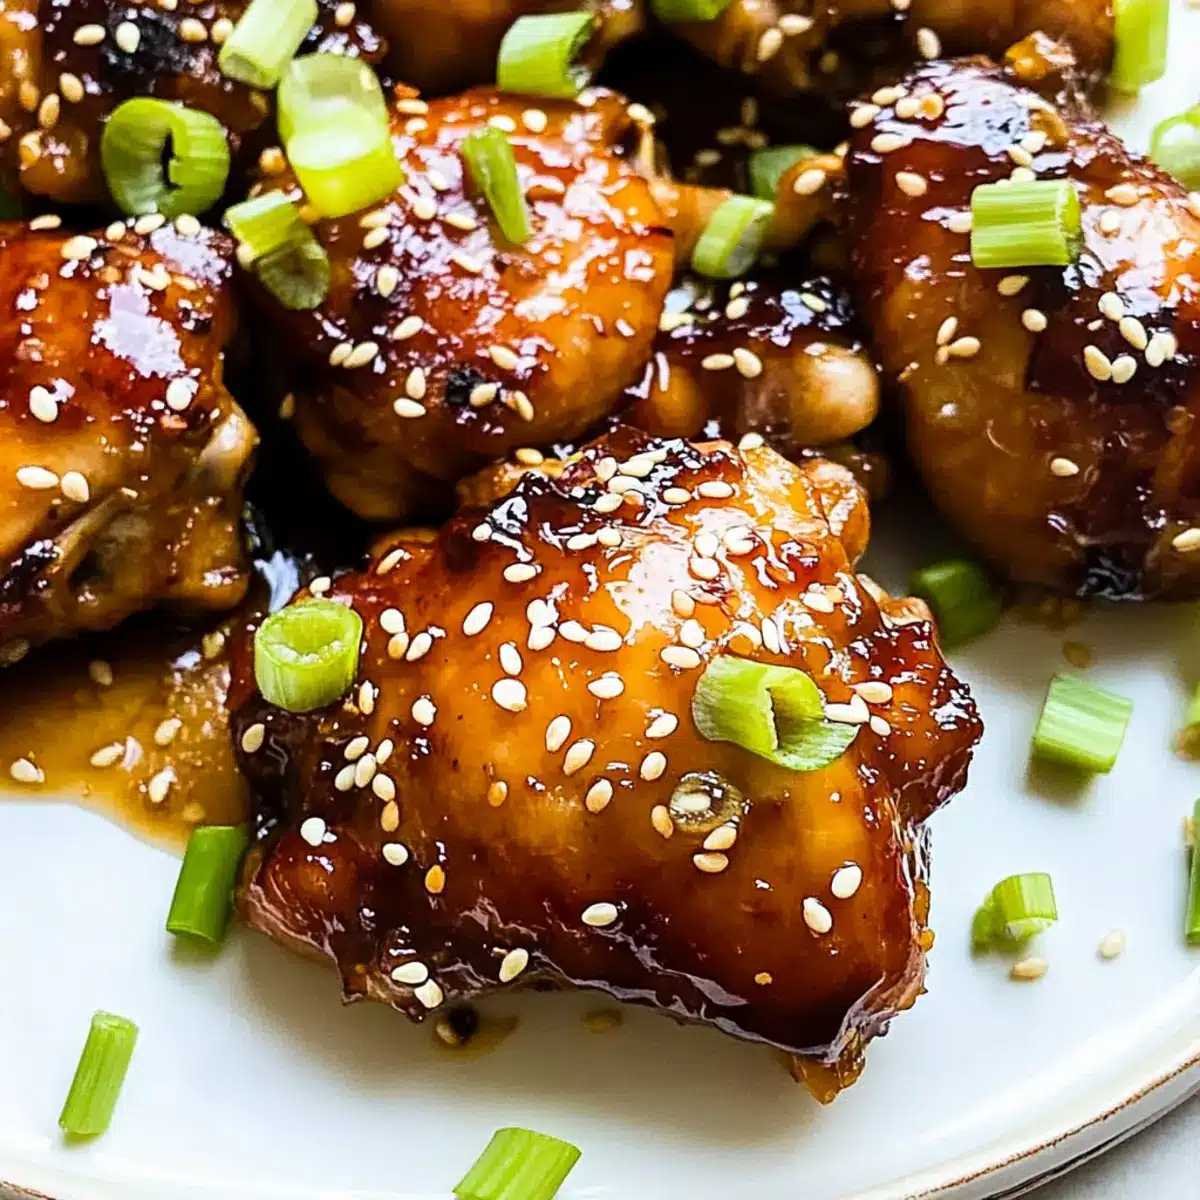
- Sesame Seeds – Optional but adds nice texture and presentation flair.
With this Easy Chicken Bulgogi Recipe, you’ll awaken your taste buds and create a flavorful masterpiece that’s perfect for any weeknight meal! Enjoy the delightful blend of flavors and the joy of homemade Korean cuisine.
Step‑by‑Step Instructions for Easy Chicken Bulgogi Recipe
Step 1: Prepare Chicken
Rinse the boneless skinless chicken thighs under cold water, then trim away any excess fat. Pat the chicken dry using paper towels to ensure even marination, setting the stage for a flavor-packed Easy Chicken Bulgogi.
Step 2: Make Marinade
In a medium bowl or Ziploc bag, combine rice vinegar, low-sodium soy sauce, sesame oil, honey, sugar, chili paste, minced garlic, sliced green onions, diced red onions, salt, and pepper. Use a whisk or your hands to mix the ingredients thoroughly until well-blended, creating a rich marinade that envelops the chicken in delightful flavor.
Step 3: Marinate Chicken
Carefully add the prepared chicken thighs to the marinade, ensuring each piece is completely coated. If using a bag, seal it tightly, removing as much air as possible, and refrigerate for 3 to 4 hours. This allows the chicken to absorb all the delicious flavors of your Easy Chicken Bulgogi marinade.
Step 4: Preheat the Oven
About 20 minutes before cooking, preheat your oven to 425°F (218°C). This high temperature will help achieve a beautiful caramelization on the chicken while retaining its juices for the perfect Easy Chicken Bulgogi.
Step 5: Bake Chicken
Take a cast-iron skillet and place it in the preheated oven for 5 to 7 minutes. Carefully add the marinated chicken thighs to the sizzling skillet, ensuring they are not overcrowded. Bake for 25 to 30 minutes, basting the chicken every 5 minutes, until it reaches an internal temperature of 165°F (74°C).
Step 6: Optional (Broiling)
For added flavor and aesthetics, switch your oven to broil for the last few minutes of cooking. Keep a close watch on the chicken to prevent burning while it develops a lightly charred surface, enhancing the overall taste of your Easy Chicken Bulgogi.

Expert Tips for Easy Chicken Bulgogi
-
Marination Time: Don’t over-marinate your chicken; 3-4 hours is the sweet spot to ensure flavor without overwhelming saltiness.
-
Pat-Dry for Success: Always pat-dry the chicken before cooking to avoid steaming, which can restrict that delicious caramelization you want in your Easy Chicken Bulgogi.
-
Thermometer Use: Invest in a meat thermometer for precise doneness; the chicken should reach an internal temperature of 165°F (74°C) for safety.
-
Grilling Technique: If grilling, make sure to sear each side until nicely charred, and consider basting with extra marinade to keep the chicken juicy and flavorful.
-
Customize Heat: Adjust the chili paste according to your family’s spice preference, ensuring everyone can enjoy your delicious Easy Chicken Bulgogi without the heat being overpowering.
-
Rest Before Serving: Letting your chicken rest for a few minutes after cooking allows juices to redistribute, resulting in each bite being moist and flavorful.
What to Serve with Easy Chicken Bulgogi?
The perfect meal calls for delicious sides that will elevate your dining experience and complement each tender bite.
-
Fluffy Steamed Rice: A classic pairing that soaks up the savory marinade, making every bite more enjoyable. It’s the canvas for your bulgogi masterpiece!
-
Asian Cucumber Salad: This refreshing salad brings a cool crunch, balancing the rich flavors of the chicken while adding brightness to your plate.
-
Kimchi: The spicy fermented goodness of kimchi offers a tangy contrast that beautifully enhances the sweetness of the bulgogi.
-
Lettuce Wraps: Wrap your bulgogi in crisp lettuce leaves for a fun, low-carb twist that adds texture and freshness to every bite.
-
Sesame Noodles: Tossed in a light sesame dressing, these noodles provide a delightful chewiness alongside the succulent chicken, creating a harmony of textures.
-
Miso Soup: This warm, umami-packed broth makes for an inviting starter that prepares your palate for the bold flavors of Korean cuisine.
-
Chilled Sake or Soju: For drinks, a chilled bottle of sake or soju adds a traditional touch, enhancing the overall experience without overpowering the dish.
Engage your senses and enjoy a full feast that captures the essence of Korean flavors with every element of your meal!
Make Ahead Options
These Easy Chicken Bulgogi are perfect for busy home cooks looking to save time! You can marinate the chicken thighs up to 24 hours in advance by preparing the marinade and soaking the chicken overnight in the refrigerator to fully absorb the flavorful ingredients. Additionally, the marinated chicken can be stored and refrigerated for up to 3 days. To maintain quality, ensure the chicken is tightly sealed in a container to prevent drying out. When you’re ready to enjoy this delightful dish, simply preheat your oven, bake the chicken as instructed, and savor the delicious, tender results that will remind you of a restaurant-quality meal right at home!
Storage Tips for Easy Chicken Bulgogi
-
Fridge: Store leftovers in an airtight container for up to 3 days, ensuring each piece is sealed to maintain moisture and flavor.
-
Freezer: Freeze cooked Easy Chicken Bulgogi in a freezer-safe container for up to 3 months. Allow it to cool completely before wrapping tightly to prevent freezer burn.
-
Reheating: Reheat in the oven at 350°F (175°C) for about 15-20 minutes, or until warmed through, to preserve the chicken’s juicy texture. Avoid microwaving if possible, as it can lead to dryness.
-
Avoiding Spoilage: Always check for any signs of spoilage before using leftovers, including off smells or texture changes, to ensure your meal remains safe to enjoy.
Easy Chicken Bulgogi Variations
Feel free to customize this delightful dish to suit your cravings and dietary preferences!
-
Beef or Pork: Swap out chicken for thinly sliced beef or pork, marinating just as you would for chicken for a different flavor profile.
-
Dairy-Free: Use coconut milk instead of honey for a creamy twist that’s also dairy-free. This adds a subtle sweetness while keeping it rich.
-
Gluten-Free: Swap soy sauce for tamari to create a delectable gluten-free meal without sacrificing any of the original flavor.
-
Extra Veggies: Add sliced bell peppers or zucchini to the marinade for a more vibrant dish. The vegetables take on the rich flavors while adding texture.
-
Spicy Kick: Increase the chili paste or sprinkle some crushed red pepper flakes during cooking for an extra zing that spice lovers will adore.
-
Cooking Method: Try grilling or stir-frying if you want a quicker cooking method. Each option gives a slight char that enhances the meal’s flavor profile.
For more variations, try serving the bulgogi alongside steamed jasmine rice or a fresh cucumber salad. Think about mixing it with your favorite noodles, like in Chicken Teriyaki Noodles for a delightful fusion-inspired dinner.
Whatever path you choose, enjoy the journey of flavors that this Easy Chicken Bulgogi brings to your table!

Easy Chicken Bulgogi Recipe FAQs
How do I select the best chicken for bulgogi?
Absolutely! For the juiciest outcome, I recommend using boneless skinless chicken thighs. They tend to stay moist during cooking thanks to their fat content. If you prefer a leaner cut, chicken breasts work too, but keep an eye on cooking time to avoid dryness.
What’s the best way to store leftover chicken bulgogi?
To keep your Easy Chicken Bulgogi fresh, store the leftovers in an airtight container in the refrigerator for up to 3 days. Ensure the container is sealed well to maintain moisture and flavor. If you’d like to keep it longer, you can freeze it!
How can I freeze cooked bulgogi?
Certainly! To freeze your cooked Easy Chicken Bulgogi, let it cool completely first. Then, transfer it to a freezer-safe container or a resealable freezer bag, squeezing out any excess air. It can last up to 3 months in the freezer. When ready to enjoy, simply thaw in the refrigerator overnight before reheating.
What if my bulgogi is too salty?
Very good question! If you find the bulgogi too salty after marination, next time, reduce the soy sauce or use a low-sodium version. Also, try soaking the chicken in milk for about 30 minutes before marinating; this can help neutralize excess saltiness while tenderizing the meat.
Can I substitute ingredients for dietary restrictions?
Certainly! For a gluten-free version, just swap regular soy sauce for tamari. Additionally, if you want to avoid honey, maple syrup serves as a perfect vegan alternative. And if anyone has nut allergies, substitute sesame oil with olive oil to keep the flavor delightful but safe.
How can I tell when the chicken is done cooking?
The best way to ensure your chicken is perfectly cooked is by checking its internal temperature. Using a meat thermometer is ideal—make sure it hits 165°F (74°C). If you don’t have one, check that the juices run clear when pierced, with no pink remaining. Happy cooking!

Savory Easy Chicken Bulgogi Recipe for Blissful Weeknight Meals
Ingredients
Equipment
Method
- Rinse the chicken thighs under cold water, trim excess fat, and pat dry with paper towels.
- Combine all marinade ingredients in a bowl or Ziploc bag and mix thoroughly until blended.
- Add chicken to the marinade, ensuring it's fully coated. Refrigerate for 3 to 4 hours.
- Preheat oven to 425°F (218°C) about 20 minutes before cooking.
- Place a cast-iron skillet in the preheated oven for 5 to 7 minutes. Add marinated chicken to the skillet and bake for 25 to 30 minutes, basting every 5 minutes.
- Optional: Switch to broil for the last few minutes of cooking for added flavor and char.
Leave a Reply