
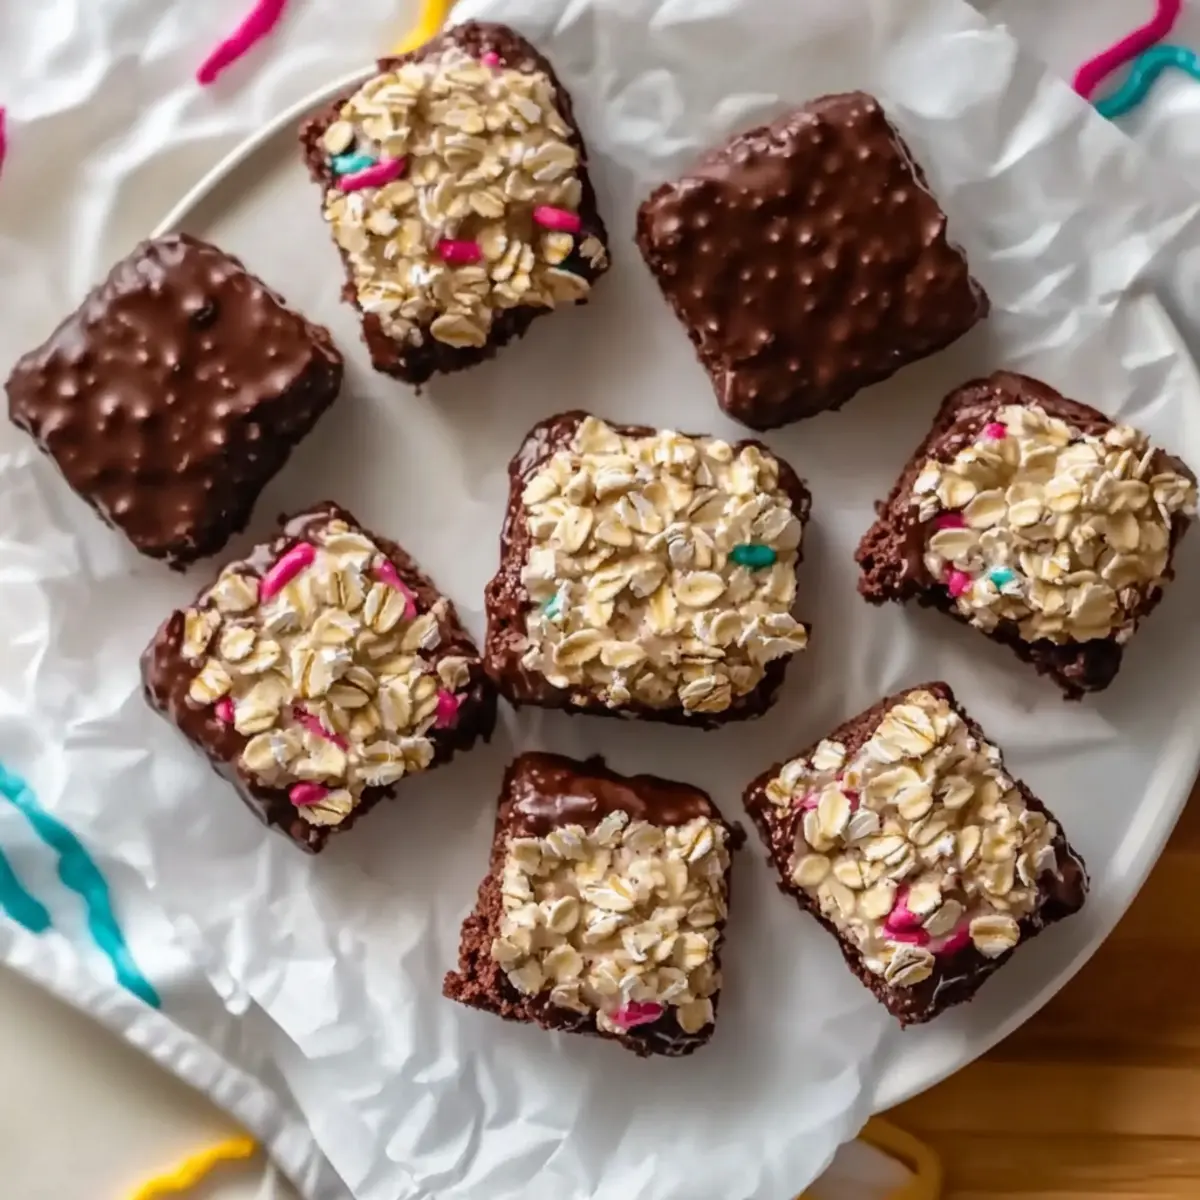
As I stood in my kitchen, a bright afternoon sun streaming through the window, I found myself craving something sweet yet incredibly simple. That’s when I remembered this delightful recipe for 4-Ingredient No-Bake Gluten-Free Chocolate Oat Cookies. With just a handful of wholesome ingredients—oats, nut butter, honey or maple syrup, and cocoa powder—these cookies come together in a flash and are absolutely satisfying. Not only are they a breeze to whip up, but they also serve as a guilt-free indulgence, packed with fiber and healthy fats that make for a delightful snack anytime. If you’ve been seeking a quick way to elevate your dessert game without the oven, these cookies are your ticket to sweet success! So, are you ready to dive into cookie bliss?
Why are these cookies a must-try?
Simplicity at Its Best: With just four ingredients, these cookies are a breeze to make, perfect for both beginners and seasoned chefs.
Guilt-Free Indulgence: Each bite packs a nutritious punch with oats and nut butter providing fiber and healthy fats, making them a perfect snack!
No Baking Required: Say goodbye to the oven; these no-bake cookies come together in minutes, saving you time and effort for other culinary adventures like Coconut Chicken Rice.
Customization Galore: With endless variations, you can add flavorful twists with extras like shredded coconut or chocolate chips to suit your taste.
Crowd-Pleasing Treat: Perfect for gatherings, these cookies will impress friends and family, ensuring everyone leaves satisfied. Their unique texture and flavor will have you reaching for more!
Chocolate Oat Cookies Ingredients
• Unlock a world of flavor with these simple components!
For the Cookies
- Oats – Provides structure and chewiness; ensure they’re gluten-free if needed.
- Nut Butter – Acts as a binder and adds creaminess; almond butter or sunbutter are great nut-free alternatives.
- Honey or Maple Syrup – Supplies natural sweetness; for a vegan option, choose agave syrup.
- Cocoa Powder – Imparts a rich chocolate flavor; for a fun twist, try carob powder instead.
For Variation Ideas
- Shredded Coconut – Adds a tropical flair and texture; feel free to sprinkle in as desired!
- Chopped Nuts – Introduces a delightful crunch and additional flavor; mixed walnuts or pecans work wonderfully.
- Chocolate Chips – For an extra indulgent treat, fold in some chips to enhance the chocolate experience.
Step‑by‑Step Instructions for 4-Ingredient No-Bake Gluten-Free Chocolate Oat Cookies
Step 1: Combine Dry Ingredients
In a large mixing bowl, measure out your oats and cocoa powder, then mix them together until well combined. This process only takes a minute, but it’s crucial to ensure that the cocoa is evenly distributed for a rich chocolate flavor in your no-bake cookies.
Step 2: Add the Nut Butter and Sweetener
Next, add in your choice of nut butter and honey or maple syrup to the bowl. Using a sturdy spatula or mixer’s paddle attachment, stir everything together until the mixture is uniform and sticky, which should take about 2-3 minutes. The dough should hold together well but still be pliable.
Step 3: Shape Your Cookies
Using a spoon or cookie scoop, drop the mixture onto a parchment paper-lined baking sheet, creating small mounds roughly 2 inches apart. With clean hands, press each mound down gently to form cookie shapes, ensuring they stick together. This step will yield lovely, thick cookies when set.
Step 4: Refrigerate to Set
Place the tray in the refrigerator and let the cookies chill for at least 30 minutes. This helps them firm up nicely, preventing any crumbliness. You’ll know they’re ready when they feel solid to the touch, which is key to enjoying your delicious chocolate oat cookies.
Step 5: Enjoy Your Treats
Once your cookies have set, take them out of the fridge, and they are ready to be tasted! Store any leftovers in an airtight container in the fridge for up to one week, ensuring these chewy, chocolatey delights are close at hand for when cravings strike.
Make Ahead Options
These 4-Ingredient No-Bake Gluten-Free Chocolate Oat Cookies are perfect for meal prep enthusiasts! You can mix the dough and refrigerate it up to 24 hours in advance, allowing the flavors to meld beautifully. Simply combine your oats, cocoa powder, nut butter, and honey (or maple syrup), then store it in an airtight container in the fridge. When ready to serve, just scoop and shape the mixture into cookies, then refrigerate for an additional 30 minutes to set. To maintain quality, ensure the cookies are covered lightly with parchment paper to avoid sticking together. With prep done ahead of time, you’ll have delicious, homemade treats within minutes, making those busy weeknights a little sweeter!
Expert Tips for No-Bake Chocolate Oat Cookies
-
Mix Well: Ensure the mixture is fully combined; this prevents crumbly cookies. Give it a good stir until everything is sticky and consistent.
-
Use a Cookie Scoop: For evenly sized cookies, use a cookie scoop to portion the dough. This will ensure uniform cooking time and texture.
-
Chill Sufficiently: Refrigerate for at least 30 minutes to set properly, but don’t exceed 1 hour. Over-chilling can make them too hard to enjoy!
-
Add Flavor Variations: Enhance your cookies by adding shredded coconut or chocolate chips; these extras bring delightful variety to your chocolate oat cookies.
-
Store Properly: Keep these delectable treats in an airtight container in the fridge for freshness. They’ll last about a week and may also be frozen for later enjoyment!
What to Serve with 4-Ingredient No-Bake Gluten-Free Chocolate Oat Cookies
These delightful no-bake treats are so satisfying on their own, but why not elevate your snack experience with a few perfect pairings?
-
Creamy Greek Yogurt: A dollop of Greek yogurt adds a rich creaminess and tang, balancing the sweetness of the cookies beautifully. Enjoy it as a dip or alongside for a delicious contrast.
-
Fresh Berries: Juicy strawberries or blueberries introduce a refreshing burst of flavor, making each bite a perfect blend of rich chocolate and fruity brightness.
-
Nutty Granola: A sprinkle of crunchy granola offers a delightful texture contrast. The added flavors from the granola enhance the cookie experience, making each nibble even more satisfying.
-
Plant-Based Milk: A glass of almond or oat milk perfectly complements these cookies while keeping it plant-based and light. Dip your cookies for an indulgent and nostalgic experience!
-
Chilled Fruit Salad: A light, chilled fruit salad is a refreshing accompaniment, providing a natural sweetness that pairs well with the rich chocolatey flavor of the cookies.
-
Ice Cream Scoop: Treat yourself by serving these cookies alongside a scoop of vanilla or coconut ice cream. The cold creaminess forms a delicious marriage with the chewy texture of the cookies.
-
Homemade Chocolate Sauce: For those who want an extra indulgence, a drizzle of homemade chocolate sauce could turn each bite into an even more heavenly experience, heightening the chocolatey goodness of these treats!
How to Store and Freeze Chocolate Oat Cookies
Fridge: Store your chocolate oat cookies in an airtight container in the refrigerator for up to one week. This will keep them fresh while maintaining their delightful chewy texture.
Freezer: For longer storage, place the cookies in a single layer on a baking sheet and freeze until solid. Then, transfer them to a freezer-safe bag for up to three months.
Reheating: When you’re ready to enjoy a cookie from the freezer, simply let it thaw at room temperature for a bit or microwave it for about 10–15 seconds to enhance the chocolatey goodness.
Avoid Crumbliness: Make sure the cookies are well-formed before placing them in storage; this ensures they hold together nicely when you’re ready to enjoy your delicious chocolate oat cookies!
Chocolate Oat Cookies Variations
Feel free to explore different twists on the classic chocolate oat cookies that’ll tantalize your taste buds!
-
Nut-Free: Substitute nut butter with sunflower seed butter to create deliciously chewy, nut-free treats.
-
Vegan Delight: Use agave syrup instead of honey for a vegan-friendly version that everyone can indulge in!
-
Flavor Burst: Mix in a teaspoon of vanilla extract for an extra layer of flavor, creating aromatic bites every time you munch.
-
Coconut Bliss: Add a handful of shredded coconut to bring a tropical twist that pairs beautifully with chocolate.
-
Fruitful Surprise: Incorporate dried fruits like raisins or cranberries to add a chewy and fruity contrast to your cookies.
-
Chocolate Chips: Fold in dark chocolate chips for even richer chocolate flavor and a delightful melty texture; who can resist a double dose of chocolate?
-
Crunchy Texture: Toss in some chopped nuts or seeds to elevate the texture; walnuts or pumpkin seeds can add a lovely crunch.
-
Spice It Up: Add a pinch of cinnamon or a dash of sea salt for a flavor kicker that complements the sweetness perfectly.
These delightful variations may lead you to discover which version you love best, whether paired with a tall glass of milk or alongside homemade Chocolate Chip Cookies. The beauty of these treats lies in your creativity, united by simplicity!
Chocolate Oat Cookies Recipe FAQs
How do I choose the right oats for these cookies?
Absolutely! For the best results, use gluten-free oats if you’re preparing a gluten-free version of these chocolate oat cookies. Look for oats that are certified gluten-free, with no added fillers. If you prefer a chewier texture, opt for rolled oats rather than instant oats, as they hold their shape better in the recipe.
How long can I store these chocolate oat cookies?
You can keep your chocolate oat cookies fresh in an airtight container in the refrigerator for up to one week. Just make sure to keep them sealed well to maintain their delightful chewy texture, and you can even pop one out as a snack whenever the craving hits!
Can I freeze chocolate oat cookies?
Yes, you can definitely freeze these cookies for later enjoyment! To do this, lay the cookies in a single layer on a baking sheet to freeze them until solid, which usually takes about 1-2 hours. Once set, transfer the cookies to a freezer-safe bag, making sure to remove as much air as possible. They can be stored for up to three months. When you’re ready to indulge, thaw them at room temperature or pop them in the microwave for just 10–15 seconds.
What should I do if my cookie mixture is too crumbly?
Very common! If your mixture isn’t sticking together and seems crumbly, try adding a bit more nut butter or sweetener—this will help bind the ingredients together. You can add a tablespoon of water if needed, but add it gradually to avoid making the mixture too wet. Mix it thoroughly to combine and form a stickier cookie dough that will hold its shape once chilled.
Are these cookies suitable for those with nut allergies?
Absolutely! You can easily substitute nut butter with sunbutter or a seed butter of your choice for a nut-free version of these delicious chocolate oat cookies. Always check for dairy-free options for any additional ingredients you might include, and if you’re making them for kids or parties, it’s always wise to consider potential allergies before serving.
Can I add other ingredients to my cookies?
Oh, the more the merrier! Feel free to customize your chocolate oat cookies with add-ins like shredded coconut, dried fruit, or even a sprinkle of sea salt on top for a sweet-salty vibe! Just ensure that any additions don’t overpower the delightful chocolate flavor, and enjoy experimenting with different combinations!
Irresistible Chocolate Dipped Rice Krispy Treats You’ll Love
Ingredients
Equipment
Method
- Combine oats and cocoa powder in a large mixing bowl until well combined.
- Add nut butter and honey or maple syrup, mixing until the mixture is uniform and sticky.
- Drop the mixture onto a parchment paper-lined baking sheet, pressing down to form cookie shapes.
- Refrigerate for at least 30 minutes to set.
- Once set, enjoy your treats!
Leave a Reply