
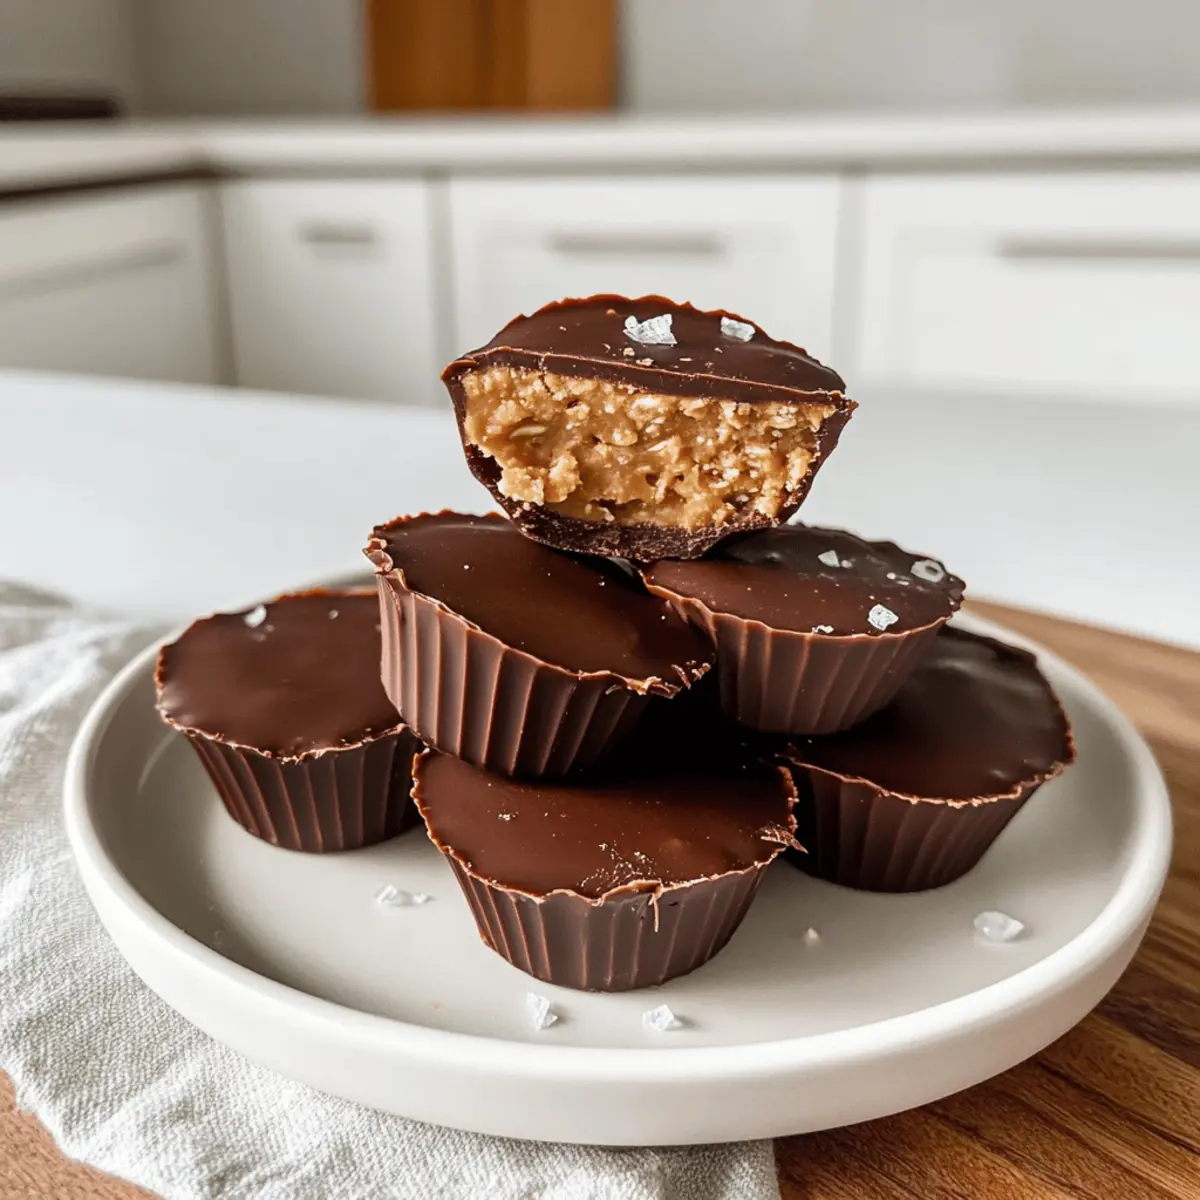
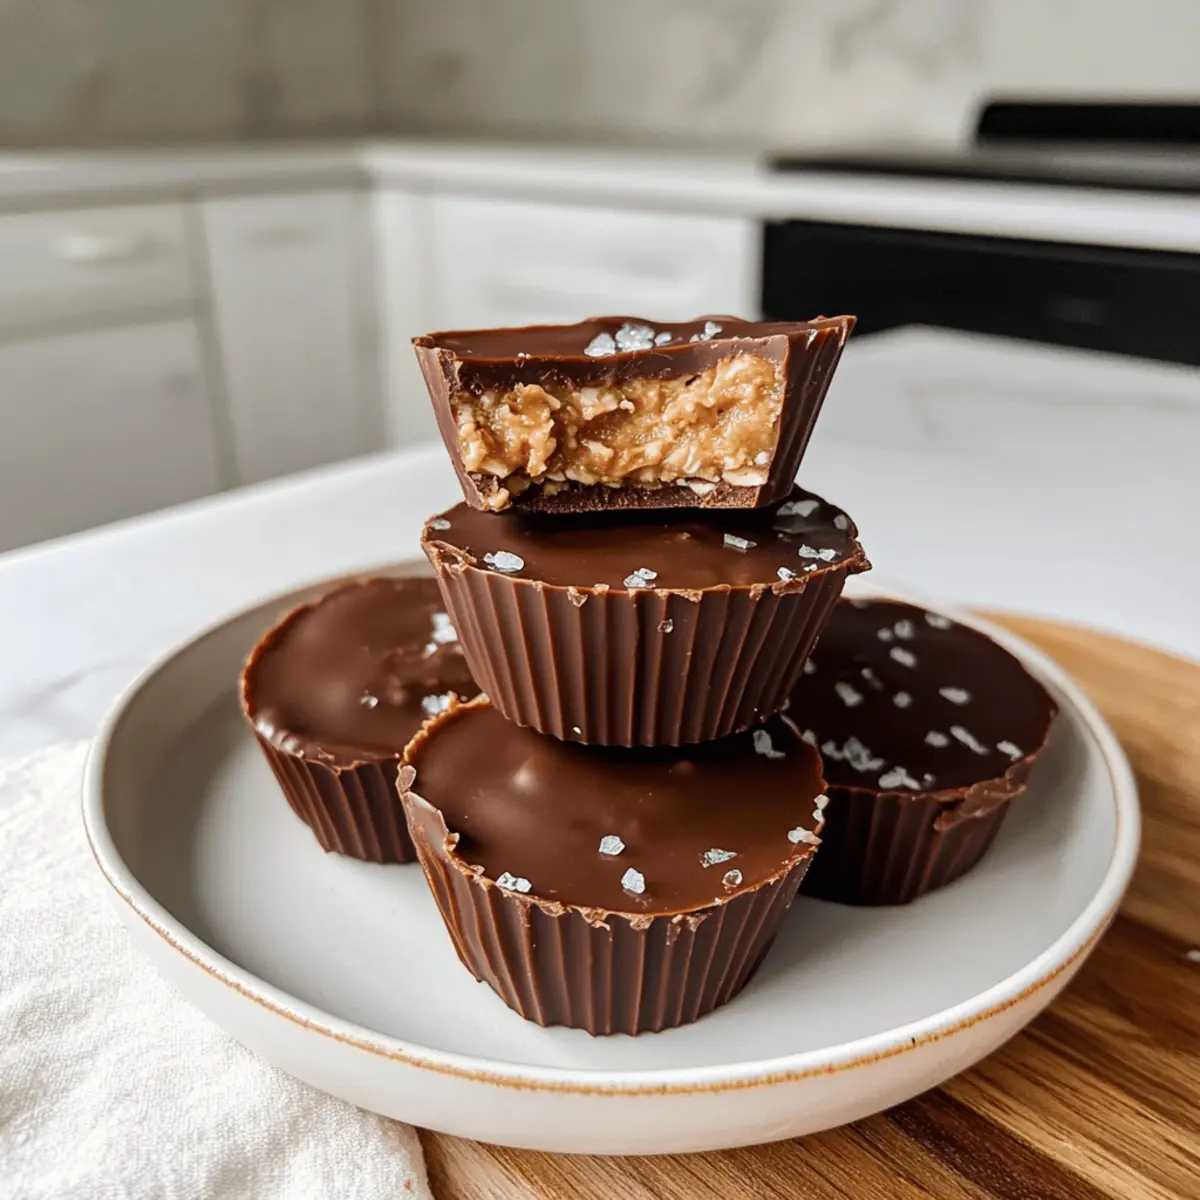
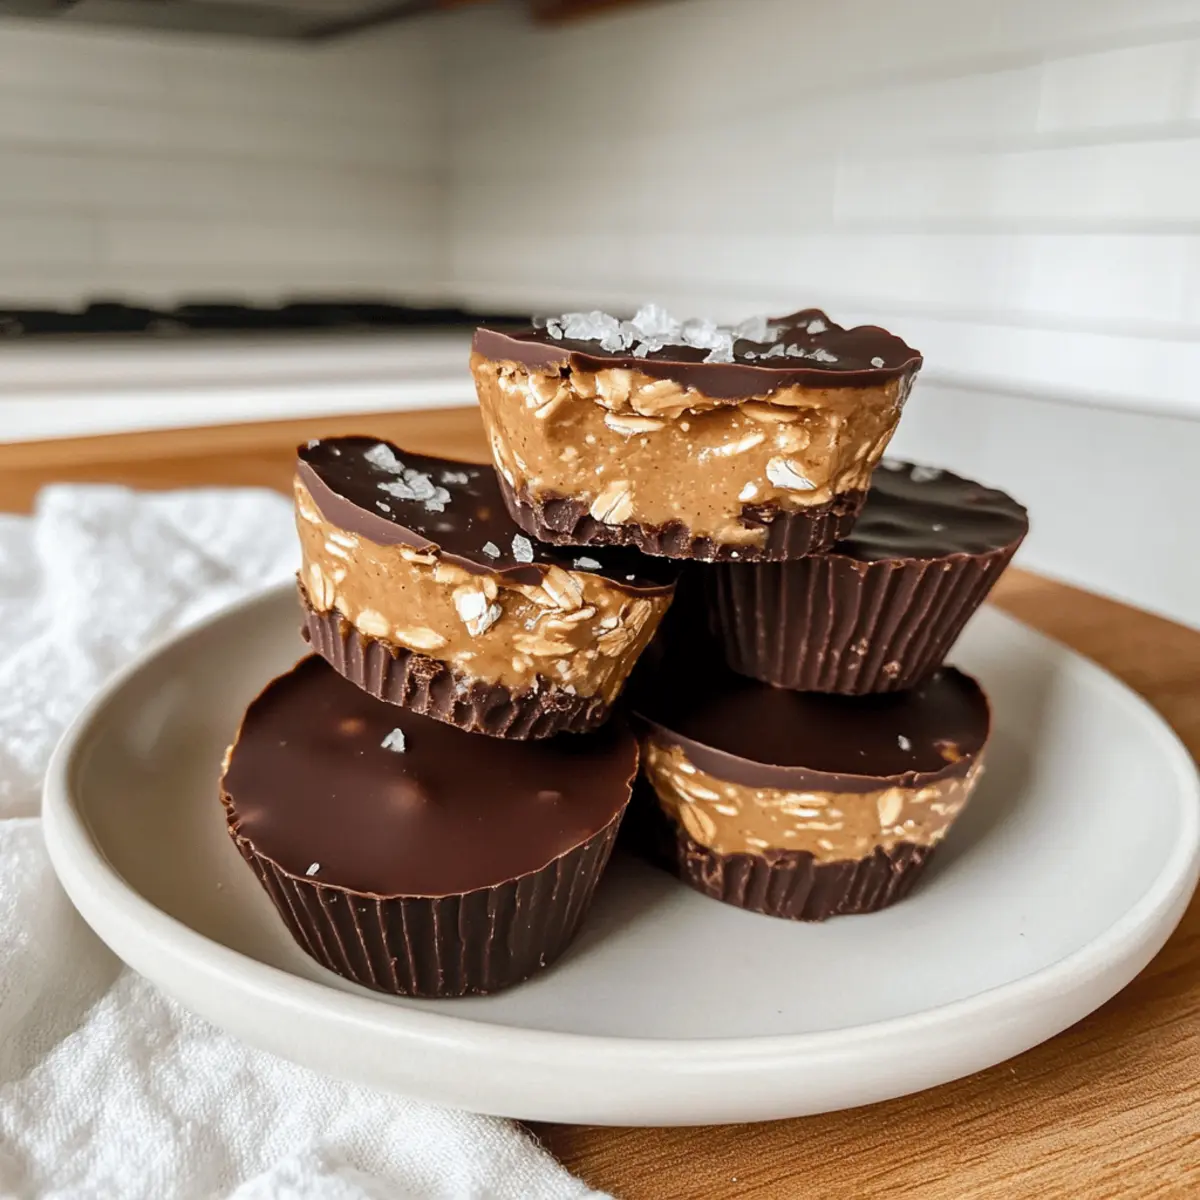
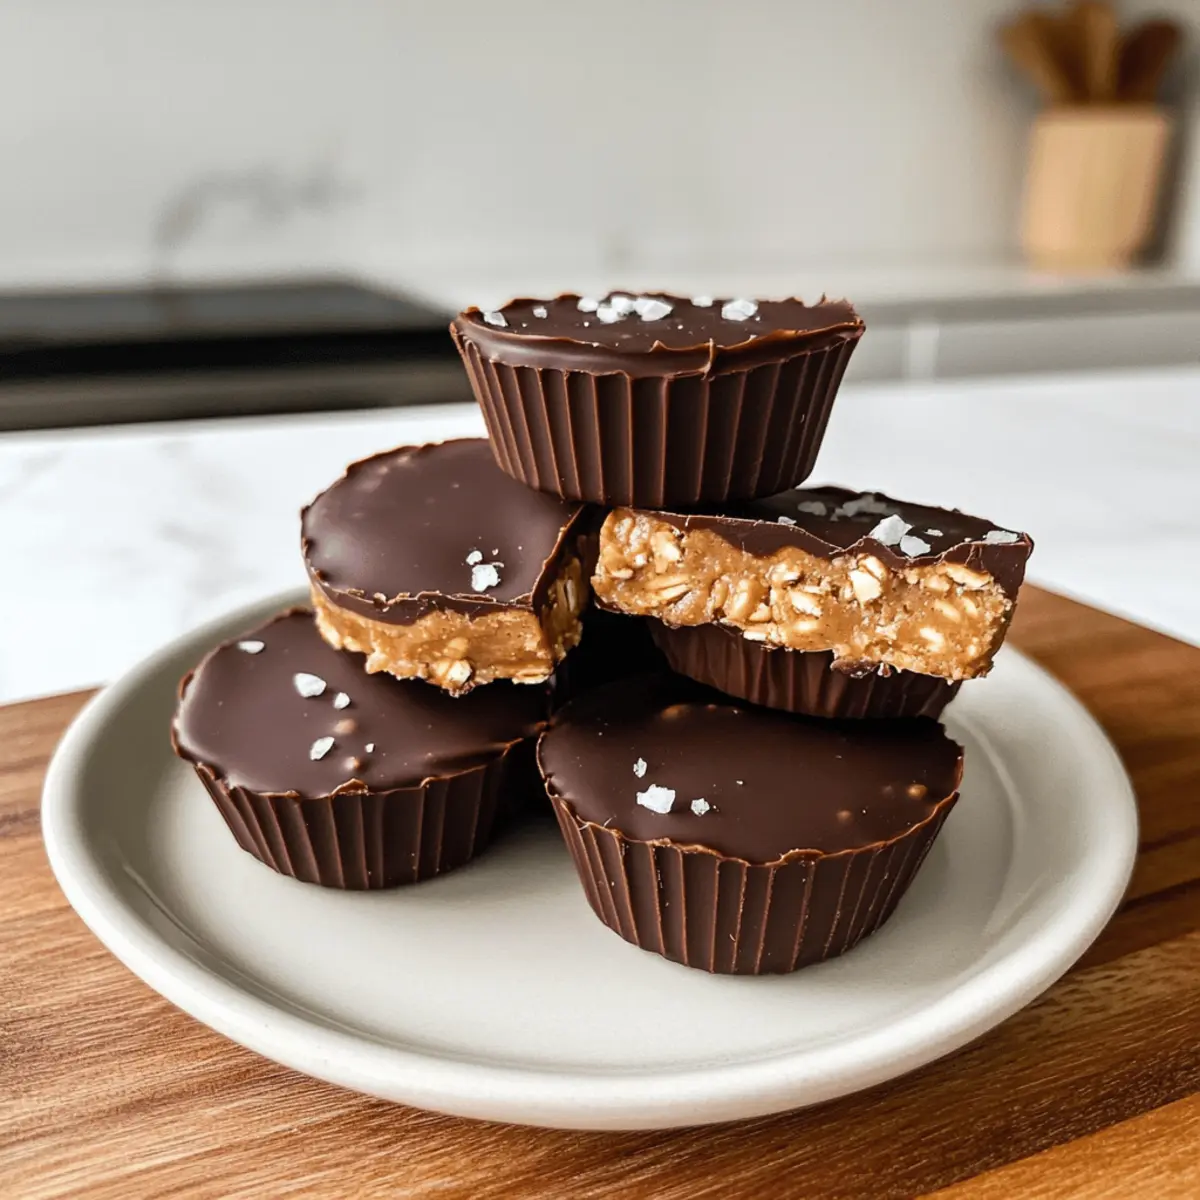
As I stood in my kitchen one sweltering afternoon, I craved something sweet yet light—an effortless treat to keep me cool. Enter my No-Bake Peanut Butter Oat Cups! In just 20 minutes, these delightful bites come together without ever turning on the oven, making them the perfect snack for those warm days. With a creamy blend of peanut butter and rolled oats, these cups boast an irresistible chewy texture, topped with rich melted chocolate that’s simply heavenly. Not only are they an indulgent crowd-pleaser, but they also cater to various dietary needs—they’re vegan, gluten-free, and can be easily customized with your favorite nut butter or sweetener. Are you ready to treat yourself while keeping your kitchen chill? Let’s dive into this deliciously simple recipe!
Why Are Peanut Butter Oat Cups So Loved?
Convenience: These No-Bake Peanut Butter Oat Cups come together in a flash, making them the ideal last-minute treat or snack for busy days.
Versatile Base: Feel free to personalize with different nut butters or sweeteners, ensuring everyone can enjoy this crowd-pleaser.
Health-Conscious: Packed with rolled oats and nut butter, they strike a perfect balance between satisfying and nutritious.
Indulgent Flavor: The combination of creamy peanut butter and rich, dark chocolate provides a delightful experience that rivals any store-bought treat.
Diet-Friendly: Not only are they vegan and gluten-free, but they also cater to various dietary preferences without sacrificing taste—perfect for everyone in your family!
If you love easy treats like these, you might also enjoy Pumpkin Cornbread with Cinnamon Honey Butter or even Ingredient Chocolate Oat Cookies.
Peanut Butter Oat Cups Ingredients
• These Peanut Butter Oat Cups are super flexible, perfect for any dietary need!
For the Base
- Peanut Butter – Adds creaminess and a rich flavor; substitute with almond or sunflower butter for nut-free options.
- Old Fashioned Rolled Oats – Provides structure and chew; opt for certified gluten-free oats for a gluten-free version.
- Maple Syrup – Sweetens the mixture; can be replaced with agave nectar for a vegan alternative or omitted for low sugar.
For the Topping
- Chocolate Chips – Drizzled on top for added sweetness; choose dairy-free dark chocolate to keep it vegan.
- Flakey Sea Salt – A delightful finishing touch that enhances the sweetness and adds depth to each bite.
Feel free to experiment by adding different nut butters or toppings to make these cups uniquely yours!
Step‑by‑Step Instructions for Peanut Butter Oat Cups
Step 1: Mix Peanut Butter & Maple Syrup
In a medium bowl, combine 1 cup of creamy peanut butter and 1/3 cup of maple syrup. Use a spatula to mix them until smooth and well incorporated. You should see a glossy, cohesive mixture without any lumps. This flavorful base brings together the nuttiness of peanut butter with the sweetness of maple syrup.
Step 2: Incorporate Oats
Next, add 2 cups of old-fashioned rolled oats into the peanut butter mixture. Stir vigorously until the oats are fully coated and evenly distributed throughout the mixture. The texture should resemble a sticky, thick dough, ensuring that every oat is enveloped in the peanut buttery goodness. This is the foundation for your Peanut Butter Oat Cups.
Step 3: Shape Oat Cups
Spoon the mixture into silicone molds, filling each one about two-thirds full. Use the back of a spoon to press down firmly, creating an even base for each cup. Ensure the mixture is packed tightly so that the cups hold their shape once frozen. This step is crucial for achieving the perfect form and texture when you pop them out.
Step 4: Top with Peanut Butter
Optionally, you can add a dollop of additional peanut butter on top of each filled mold. If you want a protein boost, mix a scoop of protein powder into the extra peanut butter before spreading it on top of the cups. This layer not only enhances the flavor but also adds a delightful creaminess to every bite of your Peanut Butter Oat Cups.
Step 5: Freeze Base
Transfer the filled silicone molds to the freezer and allow them to set for about 20 minutes. You’ll know they’re ready when they feel firm and hold their shape. This step is essential for setting the oat mixture, making it easy to add the chocolate topping without it sliding off.
Step 6: Melt Chocolate
While the oat cups are firming up, melt 1 cup of chocolate chips with a teaspoon of oil in a microwave-safe bowl. Heat in 30-second intervals, stirring between each interval until smooth and fully melted. Be careful not to overheat. The melted chocolate should have a luscious, glossy consistency perfect for drizzling over your Peanut Butter Oat Cups.
Step 7: Add Chocolate Topping
Once the oat bases are set, drizzle the melted chocolate generously over each cup. Use a spoon or a piping bag for precise drizzle patterns. This layer of chocolate will add a delightful sweetness and a beautiful finish to your cups, making them even more irresistible.
Step 8: Final Freeze
Return the filled molds to the freezer for an additional 20 minutes to allow the chocolate to set completely. They should feel firm to the touch and be easy to peel from the molds once ready. This final freeze ensures that every component of your Peanut Butter Oat Cups is perfectly integrated and ready to enjoy.
Step 9: Serve
Carefully remove the Peanut Butter Oat Cups from the molds. If desired, sprinkle a pinch of flaky sea salt on top to enhance the flavors. These delightful cups can be served immediately or stored in an airtight container in the fridge or freezer for later. Enjoy the chewy, creamy goodness of your homemade Peanut Butter Oat Cups!
How to Store and Freeze Peanut Butter Oat Cups
Room Temperature: These Peanut Butter Oat Cups can be kept at room temperature for up to 2–3 days in a cool, dry place. However, they may lose their ideal texture.
Fridge: Store the cups in an airtight container in the fridge for up to 7 days for a softer, chewier treat that’s ready to grab whenever your sweet tooth strikes.
Freezer: For long-term storage, keep them in the freezer for up to 3 months in an airtight container or sealable bag, separating layers with parchment paper if needed.
Reheating: If stored in the freezer, allow the cups to sit at room temperature for a few minutes to soften before enjoying.
Peanut Butter Oat Cups Variations
Feel free to get creative with these Peanut Butter Oat Cups, customizing them to fit your taste buds or dietary needs!
- Nut-Free: Substitute peanut butter with sunflower seed butter for a deliciously creamy alternative.
- Gluten-Free: Use certified gluten-free oats to ensure these cups are friendly for gluten-sensitive palates.
- Lower Sugar: Opt for unsweetened almond milk instead of maple syrup, or decrease the syrup amount for a less sweet version.
- Protein Boost: Mix in your favorite protein powder directly into the peanut butter for a nutritious enhancement.
- Decadent Toppings: Try topping with shredded coconut, chia seeds, or crushed almonds for a delightful texture contrast.
- Flavorful Swaps: Experiment by replacing chocolate chips with dried fruit or your favorite candy pieces for a fun twist.
- Spiced Delight: Add a sprinkle of cinnamon or a dash of vanilla extract to the mixture for an extra layer of flavor.
These versatile cups can easily be adapted to suit your cravings or dietary preferences. If you’re looking for more tasty treats, don’t miss my Biscoff Cookie Butter Cinnamon Rolls or the satisfying Garlic Butter Steak. Enjoy experimenting!
Expert Tips for Peanut Butter Oat Cups
-
Choose the Right Peanut Butter: Use creamy peanut butter for smooth mixing. Natural, oily varieties may require longer freezing times to firm up properly.
-
Silicone Molds Are Key: These ensure easy removal of your Peanut Butter Oat Cups. If using paper liners, dampen them slightly for easier peeling.
-
Customize Smartly: Experiment with nut butters or add-ins like protein powder, but keep the ratios consistent to maintain the structure of the cups.
-
Watch the Freezing Time: Don’t skip or rush the freezing stages; this helps set the texture and ensures easy handling while adding toppings.
-
Finishing Touches: A sprinkle of flaky sea salt on top elevates the flavor, enhancing the sweetness of the cups with its subtle contrast.
Make Ahead Options
These Peanut Butter Oat Cups are perfect for busy home cooks looking to save time on hectic weeknights! You can prepare the oat mixture and mold it up to 24 hours in advance, storing the filled molds in the refrigerator to keep them fresh. When ready to serve, simply melt the chocolate and drizzle it over the oat cups before returning them to the freezer for about 20 minutes to fully set. This way, you ensure each cup is just as delicious, with that delightful, chewy texture. For optimal quality, store the finished cups in an airtight container. With these make-ahead options, enjoying a healthy snack is easier than ever!
What to Serve with No-Bake Peanut Butter Oat Cups
These delightful treats are simple to whip up, making them perfect to pair with other fresh and tasty options for a well-rounded experience.
- Fresh Fruit Salad: A bright mix of seasonal fruits adds a refreshing contrast, balancing the rich peanut butter and chocolate flavors perfectly.
- Yogurt Parfait: Creamy dairy or plant-based yogurt layered with granola and berries complements the chewy texture of the oat cups while amplifying the healthy benefits.
- Chilled Almond Milk: Serve with a tall glass of almond milk for a delightful vegan drink that enhances the nutty flavors of the oat cups.
- Nutty Granola: Crunchy homemade or store-bought granola adds extra texture and a satisfying bite, making for a wonderful afternoon snack combination.
- Chocolate-Covered Strawberries: The sweetness of ripe strawberries encased in rich chocolate echoes the flavors of the oat cups while introducing a fresh element.
- Matcha Latte: A creamy matcha latte offers an earthy, vibrant contrast to the sweet treats, providing a calm energy boost.
- Peanut Butter Smoothie: Blend up a peanut butter smoothie with banana and spinach for a creamy drink that resonates with the oat cups’ flavor and nutritional profile.
- Oatmeal Cookies: Pair these cups with soft oatmeal cookies to share that familiar comforting vibe in one harmonious dessert spread.
Each pairing serves to elevate your treat time, creating an indulgent yet balanced experience that you and your loved ones will thoroughly enjoy!
Peanut Butter Oat Cups Recipe FAQs
What type of peanut butter should I use?
Absolutely! For the best results, use creamy peanut butter, as it mixes smoothly into the oat mixture. Natural peanut butter can work too, but it may have oil separation and can take longer to freeze. If you’re looking for nut-free options, sunflower seed butter or almond butter are delicious alternatives that maintain the great taste.
How long can I store these oat cups in the fridge?
You can keep your Peanut Butter Oat Cups in an airtight container in the refrigerator for up to 7 days. They’ll be wonderfully soft and chewy—a perfect snack to satisfy your cravings during the week! Just remember, if you do keep them in the fridge for too long, check for any dark spots or off smells before enjoying.
Can I freeze my Peanut Butter Oat Cups?
Certainly! For long-term storage, place the oat cups in a freezer-safe bag or container for up to 3 months. Make sure to separate layers with parchment paper to prevent sticking. When you’re ready to enjoy them, allow the cups to sit at room temperature for a few minutes to soften slightly before eating. This will help retain their delightful texture!
What should I do if my mixture is too dry?
If you find that the mixture is crumbly or too dry, don’t fret! Simply add a touch more peanut butter or a splash of plant-based milk to achieve the desired consistency. Mix thoroughly until everything is well combined. Remember, the mixture should be thick yet cohesive enough to hold together once pressed into the molds.
Are these oat cups safe for people with nut allergies?
Great question! While traditional recipes use peanut butter, you can easily make these Peanut Butter Oat Cups nut-free by substituting peanut butter with sunflower seed butter. Just make sure to also check any other ingredients for potential allergens. These adaptations will ensure everyone can enjoy these delicious treats without worries!
Irresistible Peanut Butter Oat Cups for Easy Healthy Snacking
Ingredients
Equipment
Method
- In a medium bowl, combine 1 cup of creamy peanut butter and 1/3 cup of maple syrup. Mix until smooth and well incorporated.
- Add 2 cups of old-fashioned rolled oats into the peanut butter mixture. Stir until the oats are fully coated.
- Spoon the mixture into silicone molds, filling each one about two-thirds full. Press down firmly.
- Optionally, add a dollop of additional peanut butter on top.
- Transfer to the freezer and allow to set for about 20 minutes.
- Melt 1 cup of chocolate chips with a teaspoon of oil in a microwave-safe bowl, heating in 30-second intervals.
- Drizzle the melted chocolate generously over each cup.
- Return the filled molds to the freezer for an additional 20 minutes.
- Carefully remove the cups from the molds and sprinkle with flaky sea salt before serving.
Leave a Reply