
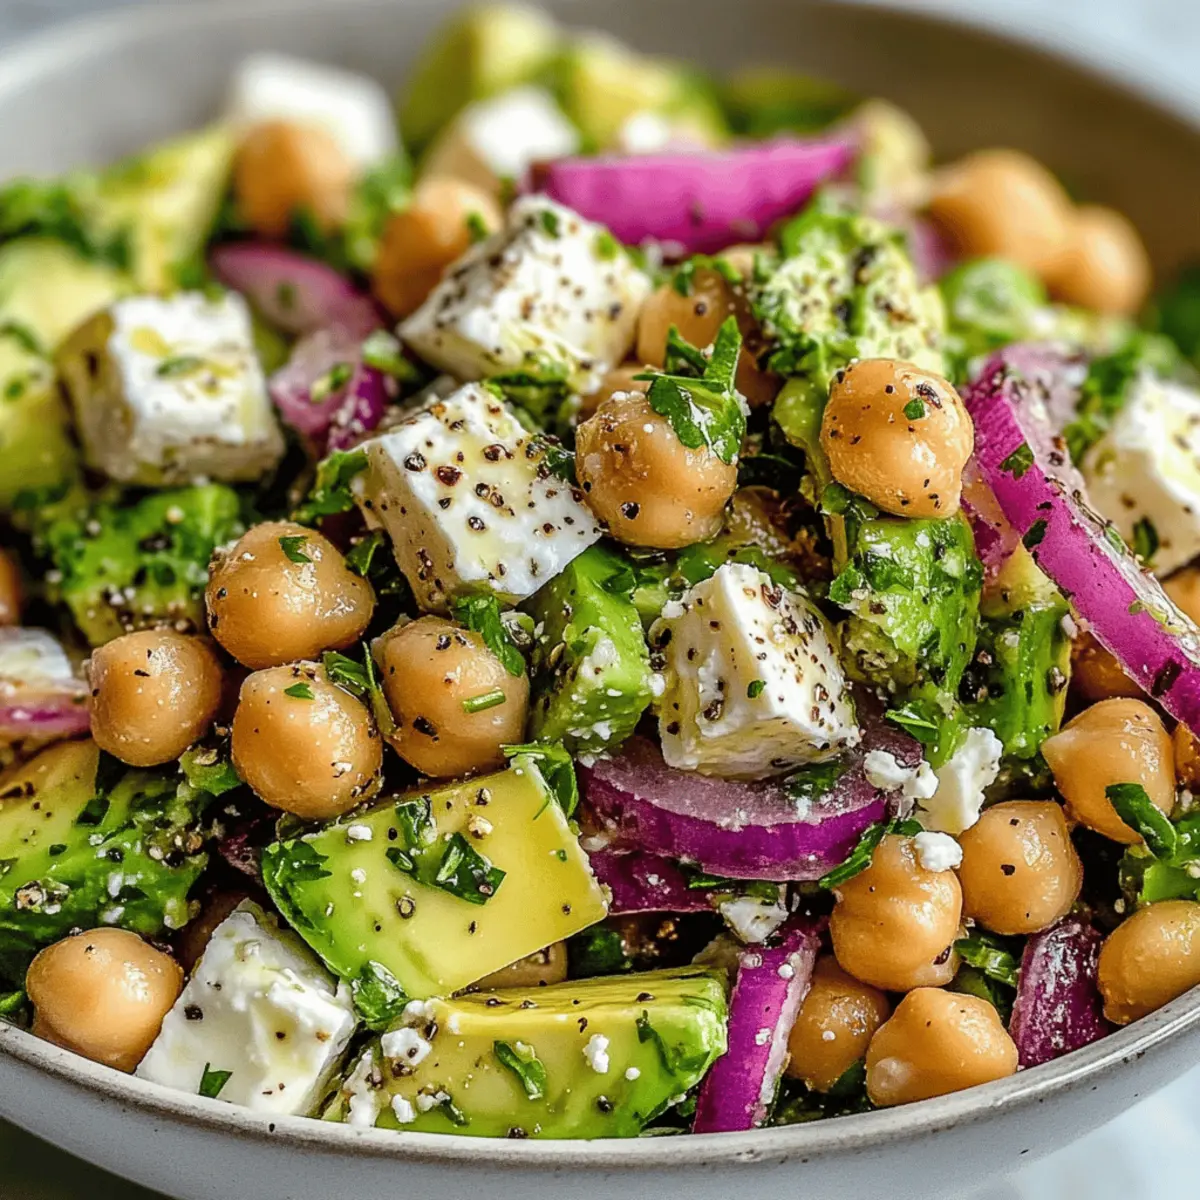
As I sliced into that creamy avocado, it felt like unearthing a hidden gem, ready to join forces with zesty feta and hearty chickpeas. This Chickpea Feta Avocado Salad is not just a dish; it’s a vibrant celebration of Mediterranean flavors that comes together in just 15 minutes. Perfect for a light lunch or a quick dinner, it’s an easy way to swap out heavy meals for something healthy yet satisfying. The combination of fresh, wholesome ingredients makes this salad a colorful feast for the eyes and the taste buds alike. Plus, you can easily customize it with your favorite veggies or herbs! What variations will you try in your own kitchen?
Why is this salad a winner?
Quick and Easy: With just 15 minutes prep time, you can whip up a delightful meal that doesn’t skimp on flavor.
Nutrient-Packed: Each serving of this Chickpea Feta Avocado Salad includes healthy fats, protein, and fiber, making it a wholesome option for any meal.
Versatile Flavor Pairings: You can customize this salad with an array of vegetables. Toss in diced bell peppers or cherry tomatoes for added color, or try it alongside a refreshing Corn Cucumber Salad for a delightful spread.
Mediterranean Flair: The combination of creamy avocado, salty feta, and herbs brings a taste of the Mediterranean right to your kitchen, embracing freshness in every bite.
Crowd-Pleasing Appeal: Serve it as a light lunch or a side dish, and watch as guests fall in love with this vibrant offering!
Chickpea Feta Avocado Salad Ingredients
• A fabulous mix awaits you!
For the Salad
- Chickpeas – Primary protein source, providing heartiness; use canned chickpeas for convenience, draining and rinsing to cut down on sodium.
- Avocado – Adds creaminess and healthy fats; for a creamy twist, use Greek yogurt, though it changes the flavor.
- Feta Cheese – Contributes saltiness and tang; always opt for high-quality feta for the best flavor profile.
- Red Onion – Provides a sharp bite; soaking in water briefly can mellow the flavor if desired.
- Fresh Parsley – Adds freshness and vibrant color; dried parsley can work too, but reduce the amount by half.
- Fresh Mint – Enhances the Mediterranean flavor; omit if unavailable or replace with basil for a different taste.
For the Dressing
- Olive Oil – A key dressing ingredient adding richness; extra virgin olive oil is preferred for its superior taste.
- Lemon Juice – Provides acidity, brightening the dish; lime juice is a great substitute for a different citrus flavor.
- Garlic – Adds depth and pungency; adjust the amount to match your personal preference.
- Dried Oregano – Offers aromatic flavor; fresh oregano can also be an excellent alternative if you have it on hand.
- Salt & Pepper – Essential for seasoning; adjust according to your taste preferences.
Step‑by‑Step Instructions for Chickpea Feta Avocado Salad
Step 1: Prepare the Chickpeas
Begin by draining and rinsing a can of chickpeas under cold water for about 30 seconds. This not only removes excess sodium but also ensures a fresh flavor in your Chickpea Feta Avocado Salad. After rinsing, use a colander to let them sit and dry briefly while you prep the other ingredients.
Step 2: Chop the Fresh Ingredients
In a large bowl, combine the diced avocado, crumbled feta cheese, thinly sliced red onion, chopped parsley, and fresh mint. Aim to have your ingredients prepared in about 5 minutes. The vibrant colors of the veggies will begin to create a visually appealing mixture, showcasing what’s to come in your creamy and zesty salad.
Step 3: Whisk the Dressing
In a separate small bowl, whisk together 3 tablespoons of extra virgin olive oil, 2 tablespoons of freshly squeezed lemon juice, 1 clove of minced garlic, 1 teaspoon of dried oregano, and a pinch of salt and pepper. Allow the dressing to sit for 5 to 10 minutes so the flavors can meld together perfectly, enriching the taste of your Chickpea Feta Avocado Salad.
Step 4: Combine Salad and Dressing
Once the dressing is ready, pour it over the salad mixture in the large bowl. Gently toss everything together using a spatula or large spoon, taking care not to mash the creamy avocado pieces. This technique ensures the flavors are well distributed without compromising the salad’s delightful textures.
Step 5: Serve or Chill
You can serve your Chickpea Feta Avocado Salad immediately for a fresh treat or cover it and chill in the refrigerator for up to 30 minutes if you prefer a colder version. Keep in mind that the salad is best enjoyed fresh, so it’s a great idea to prepare just before serving to maintain all its vibrant flavors.
What to Serve with Chickpea Feta Avocado Salad
Elevate your dining experience by pairing this refreshing salad with delightful sides that complement its vibrant Mediterranean flavors.
-
Grilled Chicken Skewers: Juicy and smoky, these skewers add protein and a charred flavor that enhances the freshness of the salad.
-
Quinoa Tabbouleh: A herbed, grain-based salad that offers a tender, nutty texture, perfectly balancing the creaminess of the avocado.
-
Pita Chips with Hummus: Crunchy pita chips dipped in smooth hummus bring an added crunch and flavor depth, perfect for scooping up that rich salad.
-
Roasted Vegetable Medley: Sweet, caramelized veggies create a beautiful contrast to the tangy feta, embellishing your plate with color and earthiness.
-
Mediterranean Couscous: Fluffy couscous infused with olive oil and fresh herbs complements the salad and adds a wonderful chewy texture.
-
Sparkling Lemonade: The refreshing fizz and zesty notes of homemade sparkling lemonade cleanse the palate and elevate the meal experience.
-
Dark Chocolate Mousse: A rich, creamy dessert balances the lightness of your meal, offering a satisfying end to your Mediterranean feast.
How to Store and Freeze Chickpea Feta Avocado Salad
Fridge: Store your Chickpea Feta Avocado Salad in an airtight container in the refrigerator and enjoy it fresh within 1 day for best quality.
Room Temperature: Avoid leaving the salad out for more than 2 hours, especially if the ingredients have been prepped ahead of time, to prevent spoilage.
Make-Ahead Tips: If you prep the salad in advance, keep the diced avocado separate and add it just before serving to maintain its vibrant color and creamy texture.
Reheating: This salad is best enjoyed cold or at room temperature; avoid reheating to preserve the textures and flavors of your Chickpea Feta Avocado Salad.
Make Ahead Options
This Chickpea Feta Avocado Salad is perfect for meal prep and can make your busy weeknights so much easier! You can prepare all the ingredients, except for the avocado, up to 24 hours in advance. Simply chop the chickpeas, feta, red onion, parsley, and mint, then store them in an airtight container in the refrigerator to maintain freshness. To prevent browning, add the diced avocado just before serving. When you’re ready to enjoy your salad, whip up the dressing and combine everything for a vibrant, quick meal. By following these make-ahead tips, you’ll savor restaurant-quality results with minimal effort!
Expert Tips for Chickpea Feta Avocado Salad
- Prevent Browning: Toss diced avocado with lemon juice immediately to keep it vibrant and fresh, avoiding any unsightly browning in your Chickpea Feta Avocado Salad.
- Opt for Quality: Choose high-quality feta cheese for a richer flavor; it makes a noticeable difference in the overall taste of your salad.
- Mind Your Herbs: When using dried herbs, remember that they are more potent than fresh; use about one-third the amount to ensure balanced flavors.
- Chill for Flavor: Allowing the salad to chill for 30 minutes lets the flavors meld beautifully, enhancing the taste of your Chickpea Feta Avocado Salad.
- Adjust Seasoning: Always taste and adjust your seasoning before serving, as personal preferences can vary; a little more salt or pepper can make all the difference!
Chickpea Feta Avocado Salad Variations
Feel free to make this Chickpea Feta Avocado Salad your own by trying out these delightful twists and substitutions!
- Add Crunch: Toss in diced bell peppers or crispy cucumbers for an extra layer of refreshing crunch and color.
- Bring the Heat: For a spicy kick, include diced jalapeños or a sprinkle of red pepper flakes; it’s an easy way to elevate the flavors!
- Herb Swap: Experiment with different herbs like cilantro or dill—these can provide exciting new flavor profiles while keeping the Mediterranean flair!
- Protein Boost: Add grilled shrimp or chicken to turn this salad into a hearty main dish that’s still light and refreshing.
- Nutty Twist: Include chopped walnuts or slivered almonds for an added crunch and earthy richness that complements the salad beautifully.
- Creamy Change: For a different texture, substitute the avocado with Greek yogurt; just remember it will shift the flavor to a tangier note.
- Fruity Twist: Try adding diced apples or pomegranate seeds for a sweet contrast that brightens the flavor profile!
- Citrus Upgrade: Switch the lemon juice for lime juice for an exciting twist that adds a tropical flair to each bite.
If you’re in the mood for more exciting salads, check out this delicious Chickpea Feta Avocado or try the refreshing Mexican Quinoa Salad with Honey Lime Vinaigrette. Each offers its own unique take on vibrant, healthy fare.
Chickpea Feta Avocado Salad Recipe FAQs
How do I select ripe avocados for this salad?
Absolutely! Look for avocados that are slightly soft when gently squeezed, indicating they’re ripe. A dark green color and a smooth skin with minimal blemishes are also good indicators. If they are too firm, leave them at room temperature for a couple of days, checking daily until they reach the perfect softness.
How long can I store Chickpea Feta Avocado Salad in the fridge?
It’s best to consume your Chickpea Feta Avocado Salad within one day. Store it in an airtight container in the refrigerator to keep it fresh. If you prepare it a day in advance, consider adding the avocado just before serving to prevent it from browning.
Can I freeze Chickpea Feta Avocado Salad?
Unfortunately, I don’t recommend freezing this salad because the avocado and feta may lose their texture, turning mushy upon thawing. However, if you wish to freeze components like the chickpeas, drain and rinse them, place in a freezer-safe bag, and store for up to 3 months. Just remember to thaw and incorporate them fresh into your salad later!
What if my chickpeas are too firm?
Very! If your chickpeas seem firm or undercooked (like if you’re using dried chickpeas), you can soak them overnight. Then, cook them in boiling water for about 30-40 minutes until they’re tender. For convenience, using canned chickpeas is perfect; just drain and rinse them to enhance flavor and reduce sodium.
Are there any dietary considerations for pets or allergies?
Yes, absolutely! This salad is primarily made from plant-based ingredients and is generally safe for most people, but be cautious if anyone has dairy allergies because of the feta cheese. If you’re serving this salad in a household with pets, keep in mind that onions can be toxic to dogs and should be omitted or used very sparingly. Always check with a vet if you’re unsure!
Can I substitute ingredients based on dietary restrictions?
Yes! The beauty of the Chickpea Feta Avocado Salad is its versatility. For a dairy-free option, try using a non-dairy feta cheese or simply omit it. If you’re avoiding gluten, rest assured that this salad is naturally gluten-free. For those with egg allergies, you can still enjoy this dish as it doesn’t contain any eggs. Just get creative and make it your own!
Chickpea Feta Avocado Salad for a Fresh Mediterranean Vibe
Ingredients
Equipment
Method
- Prepare the Chickpeas by draining and rinsing a can of chickpeas under cold water for about 30 seconds.
- Chop the Fresh Ingredients by combining the diced avocado, crumbled feta cheese, thinly sliced red onion, chopped parsley, and fresh mint in a large bowl.
- Whisk the Dressing together in a separate small bowl with olive oil, lemon juice, minced garlic, dried oregano, and a pinch of salt and pepper.
- Combine Salad and Dressing by pouring the dressing over the salad mixture and gently tossing everything together.
- Serve or Chill your Chickpea Feta Avocado Salad immediately or cover it and chill in the refrigerator for up to 30 minutes.
Leave a Reply