
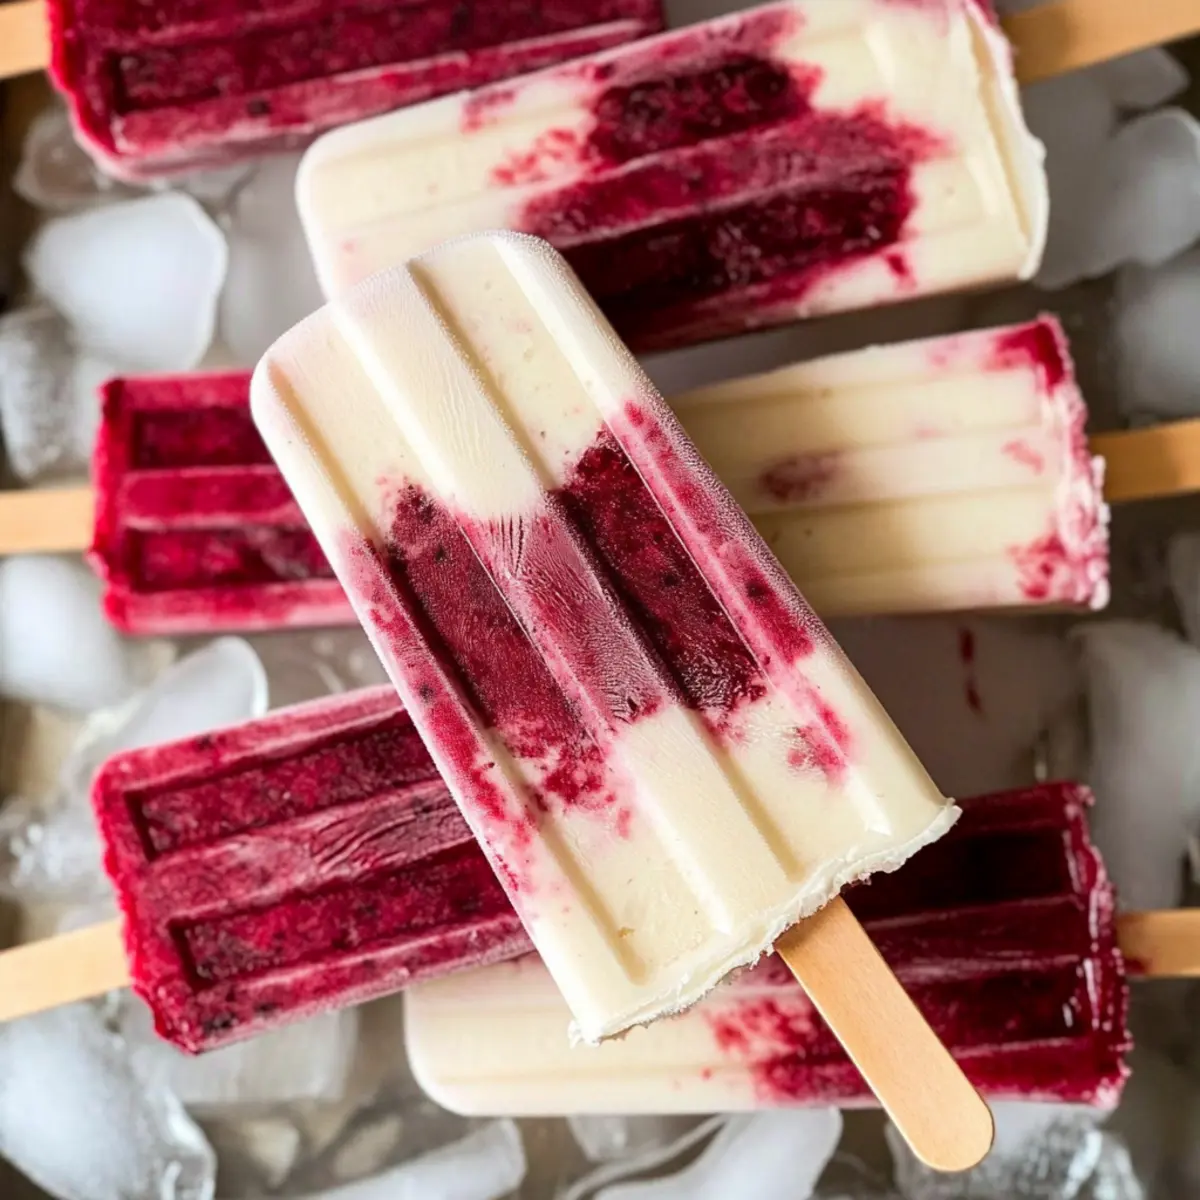
As the sun blazes overhead, memories of childhood summers flood back—each bite of a Cherry Creamsicle igniting happiness and nostalgia. Why settle for store-bought when you can create your own deliciously creamy treat? With ripe cherries and wholesome ingredients, my Cherry Creamsicles boast no refined sugar, making them a guilt-free indulgence perfect for those sweltering days. Not only are they a delightful way to cool off, but they’re also quick and easy to whip up, with the added bonus of being gluten-free. You’ll fall in love with the vibrant cherry flavor that pairs beautifully with a creamy vanilla base. So, are you ready to dive into a world of refreshing fun that your family will adore?
Why Make Cherry Creamsicles Today?
Deliciously Fun: These Cherry Creamsicles are a blast of flavor, combining sweet cherries with a velvety texture that’s hard to resist!
Guilt-Free Treat: Made without refined sugars, you can indulge without the worry, making them a wholesome choice for kids and adults alike.
Versatile Creations: Don’t stop at cherries! Feel free to experiment with seasonal fruits like strawberries or blueberries for a refreshing twist.
Quick Prep: You can whip these up in no time—perfect for those busy summer days!
Crowd-Pleaser: Whether it’s a family gathering or an afternoon snack, these popsicles are sure to win over hearts (and taste buds!).
Allergy-Friendly: Offering a dairy-free option with coconut cream means everyone can enjoy these delights, making them inclusive for kids with dietary restrictions.
So, grab your ingredients and start blending up a treat your family will love, bursting with real fruit and nostalgic flavors!
Cherry Creamsicles Ingredients
For the Popsicle Base
- Organic Cherries – Provides natural sweetness and rich cherry flavor; you can substitute with other stone fruits if desired.
- Coconut Water or Filtered Water – Serves as the liquid base, allowing the cherries to blend seamlessly; use filtered water for a neutral flavor.
- Raw Cream or Organic Whipping Cream – Creates the creamy texture; for a dairy-free version, substitute with coconut cream from full-fat coconut milk.
- Organic Vanilla Extract – Enhances the overall flavor profile; ensure it is pure for the best results.
- Raw Honey – Adds sweetness; try local raw clover honey or agave syrup as an alternative for a healthier option.
For Serving
- Fresh Fruit – Consider pairing with fresh berries or slices of fruit for a colorful presentation.
- Chocolate Sauce – Drizzle some for an extra indulgent treat; it complements the cherry flavor beautifully!
Step‑by‑Step Instructions for Cherry Creamsicles
Step 1: Chill the Mixing Bowl
Start by placing a large mixing bowl into the refrigerator for about 15 minutes. This chilling step ensures that your cream whips up beautifully, creating that luscious texture in your Cherry Creamsicles. While the bowl cools, gather all your ingredients and tools for a smooth cooking process.
Step 2: Prepare the Cherries
If you’re using frozen cherries, now’s the time to thaw them—just let them sit at room temperature for 10-15 minutes. For fresh cherries, wash and pit them thoroughly. Once prepped, you’ll be ready to blend them into a vibrant cherry puree that will serve as the fruity foundation for your popsicles.
Step 3: Blend the Cherry Mixture
In a blender, combine the prepared cherries with coconut water or filtered water. Blend until the mixture is completely smooth and has a rich, velvety consistency, which should take around 1-2 minutes. Once blended, set this vibrant cherry puree aside; it will add a sweet burst to your Cherry Creamsicles.
Step 4: Whip the Cream
Retrieve the chilled mixing bowl from the fridge. Add the raw cream or coconut cream, organic vanilla extract, and raw honey. Using an electric mixer, whip the mixture on medium-high speed for about 1-1.5 minutes, or until you see soft peaks forming. Aim for a thick, fluffy consistency that will fold beautifully with the cherry puree.
Step 5: Prepare the Popsicle Molds
Grab your popsicle molds and get ready to layer your mixture. For a stunning marbled effect, alternate spoonfuls of the whipped cream and cherry puree in each mold. Start with a layer of cream, followed by cherry, and repeat until each mold is filled, ensuring you leave a little space at the top.
Step 6: Fill and Settle the Molds
Once filled, gently tap the molds on the counter a couple of times. This step helps release any air bubbles and ensures the mixture settles evenly, creating perfectly structured Cherry Creamsicles. Now, it’s time to pop them in the freezer!
Step 7: Freeze Until Solid
Place the filled molds into the freezer and allow them to freeze for 6-8 hours or overnight for the best results. During this time, you can relax and daydream about the delicious flavors that await you in these homemade Cherry Creamsicles.
Step 8: Release the Popsicles
When you’re ready to enjoy your refreshing treats, take the molds out of the freezer. Run warm water over the outside of the molds for a few seconds to loosen the popsicles. Gently pull them out and admire your beautiful Cherry Creamsicles, ready to be enjoyed on a hot day!
How to Store and Freeze Cherry Creamsicles
Fridge: Store any leftover Cherry Creamsicles in their molds in the refrigerator for up to 3 days. For best texture, keep them covered.
Freezer: Keep the popsicles in the freezer for long-term storage. Wrap each mold in plastic wrap or transfer to an airtight container to prevent freezer burn. They can be stored for up to 2 months without losing quality.
Reheating: When you’re ready to enjoy them, run warm water over the outside of the molds for a few seconds to release the frozen treats easily.
Avoid Refreezing: Once thawed, do not refreeze the Cherry Creamsicles, as this can affect their smooth texture and flavor. Enjoy them fresh!
Expert Tips for Cherry Creamsicles
• Use Fresh Cherries: For the best flavor, opt for fresh, ripe cherries whenever possible. Frozen cherries can be used, but fresh will deliver a more vibrant taste.
• Avoid Overwhipping: Watch the cream closely while whipping; stop when soft peaks form. Overwhipping can lead to a grainy texture in your Cherry Creamsicles.
• Layering for Aesthetic: When filling molds, take your time to layer the whipped cream and cherry mixture for a beautiful marbled effect, ensuring each popsicle looks as good as it tastes.
• Chill Everything: Keep all your ingredients cold, especially the cream and mixing bowl. This ensures better whipping and creaminess in your popsicles.
• Experiment with Flavors: Feel free to mix in other fruits like strawberries or blueberries to create unique Cherry Creamsicles that will delight your family and friends!
• Proper Freezing: Make sure to freeze your molds for at least 6-8 hours to achieve the perfect texture—no one likes a mushy popsicle!
Make Ahead Options
These Cherry Creamsicles are fantastic for meal prep enthusiasts, allowing you to enjoy a refreshing treat without the last-minute rush! You can prepare the cherry puree up to 24 hours in advance; simply blend the cherries with coconut water and refrigerate in an airtight container. Additionally, you can whip the cream (using your chilled bowl!) and store it in the fridge for a maximum of 3 days. When you’re ready to assemble, just combine the puree and whipped cream in your molds and freeze for 6-8 hours. This way, your Cherry Creamsicles will be just as delicious and perfectly structured, making them ideal for busy weeknights or spontaneous summer gatherings!
What to Serve with Cherry Creamsicles
Indulging in creamy, cherry-fueled nostalgia is just the beginning; pair them for a full summer feast!
- Fresh Berries: Bright and juicy, fresh strawberries or raspberries not only elevate the presentation but also enhance the sweet-tart flavor experience.
- Creamy Yogurt: A dollop of tangy Greek yogurt adds a nice contrast and makes for a deliciously balanced snack. It’s perfect for dipping!
Summer is all about being vibrant and fresh. Consider serving these pops with a light summer salad made of mixed greens, goat cheese, and a light vinaigrette.
-
Light Salad: A refreshing cucumber and tomato salad balances the sweetness, creating a harmonious meal in every bite.
-
Sparkling Lemonade: This refreshing drink’s citrus zest complements the cherry flavors perfectly, making your treats feel even more festive.
-
Chocolate Drizzle: A decadent drizzle adds a touch of indulgence to each popsicle. The rich chocolate will leave everyone wanting more!
As you savor each bite of your Cherry Creamsicles, remember that these pairings make every moment feel like a summer celebration. 🍒
Cherry Creamsicles Variations & Substitutions
Get creative and make these Cherry Creamsicles uniquely yours with these fun and flavorful twists!
-
Dairy-Free: Substitute regular cream with full-fat coconut cream for a rich, creamy texture without dairy. The coconut flavor blends beautifully with cherries!
-
Berry Bliss: Swap out cherries for a medley of strawberries, blueberries, or raspberries. Each fruit adds its own delightful twist to the sweetness.
-
Sweetener Swap: Instead of honey, try using maple syrup or agave nectar. This will give your creamsicles a different flavor profile while still being natural sweeteners.
-
Coconut Water Variation: For a tropical flair, add a splash of pineapple juice in place of coconut water. It brings a sunny taste to your frozen treats!
-
Creamy Avocado: For a unique twist, incorporate ripe avocado into the whipped cream. It enhances creaminess and adds a subtle flavor that pairs perfectly with the cherries.
-
Chocolate Drizzle: After freezing, drizzle melted dark chocolate over the popsicles just before serving. It adds a decadent touch that takes these treats over the top!
-
Spicy Kick: Add a pinch of cayenne or chili powder to the cherry puree for a surprising yet delightful heat that contrasts with the sweetness.
-
Nutty Crunch: Consider folding in crushed nuts or granola into the whipped cream for an unexpected crunchy element in your creamsicles. It not only adds texture but also enhances nutrition!
Explore these variations and make a new family favorite! You can also take a look at dairy-free desserts or discover more fun popsicle ideas to keep the summer vibes going!
Cherry Creamsicles Recipe FAQs
What kind of cherries should I use?
Absolutely! Fresh, ripe organic cherries are ideal for making these Cherry Creamsicles as they provide the best flavor. Look for cherries that are firm and vibrant red, avoiding any with dark spots or softness. If fresh cherries aren’t available, frozen cherries can be a suitable substitute; just ensure they’re thawed before blending.
How should I store leftover Cherry Creamsicles?
For optimal texture, store leftover Cherry Creamsicles in their molds in the freezer. Wrap the molds in plastic wrap or transfer the popsicles into an airtight container to prevent freezer burn. They can be enjoyed for up to 2 months without compromising quality!
Can I freeze the Cherry Creamsicles?
Certainly! After you’ve made the Cherry Creamsicles, freeze them for at least 6-8 hours until solid. Once frozen, you can run warm water over the outside of the molds to release them easily. Just take care not to refreeze any that have already been thawed, as this can affect their smooth texture.
What if my whipped cream isn’t fluffy enough?
If your whipped cream isn’t fluffy, it may not have been whipped long enough, or the ingredients were too warm. Ensure your cream and bowl are thoroughly chilled before whipping, and whip until soft peaks form—usually around 1-1.5 minutes. If you’ve overwhipped it to a grainy texture, you may need to start over with fresh cream.
Are there any allergies I should be aware of?
Absolutely! For this recipe, the main potential allergens include dairy (if not using the dairy-free option) and honey. For a fully vegan or dairy-free treat, substitute raw honey with agave syrup and use coconut cream instead of dairy cream. Always check for any additional allergies, especially with guests or kids!
What’s a good alternative sweetener if I can’t use honey?
If you’re looking for alternatives to honey, maple syrup or agave nectar are both wonderful options that blend seamlessly into the Cherry Creamsicles. Adjust the quantity based on your sweetness preference, as different sweeteners may vary in potency!
Cherry Creamsicles – Wholesome Treat with Real Fruit Flavor
Ingredients
Equipment
Method
- Chill the Mixing Bowl: Place a large mixing bowl into the refrigerator for about 15 minutes.
- Prepare the Cherries: Thaw frozen cherries or wash and pit fresh ones.
- Blend the Cherry Mixture: In a blender, combine prepared cherries with coconut water.
- Whip the Cream: Add raw cream, vanilla extract, and honey to the chilled bowl and whip until soft peaks form.
- Prepare the Popsicle Molds: Alternate layers of whipped cream and cherry puree in molds.
- Fill and Settle the Molds: Tap molds on the counter to release air bubbles.
- Freeze Until Solid: Freeze for 6-8 hours or overnight.
- Release the Popsicles: Run warm water over molds to loosen popsicles.
Leave a Reply