
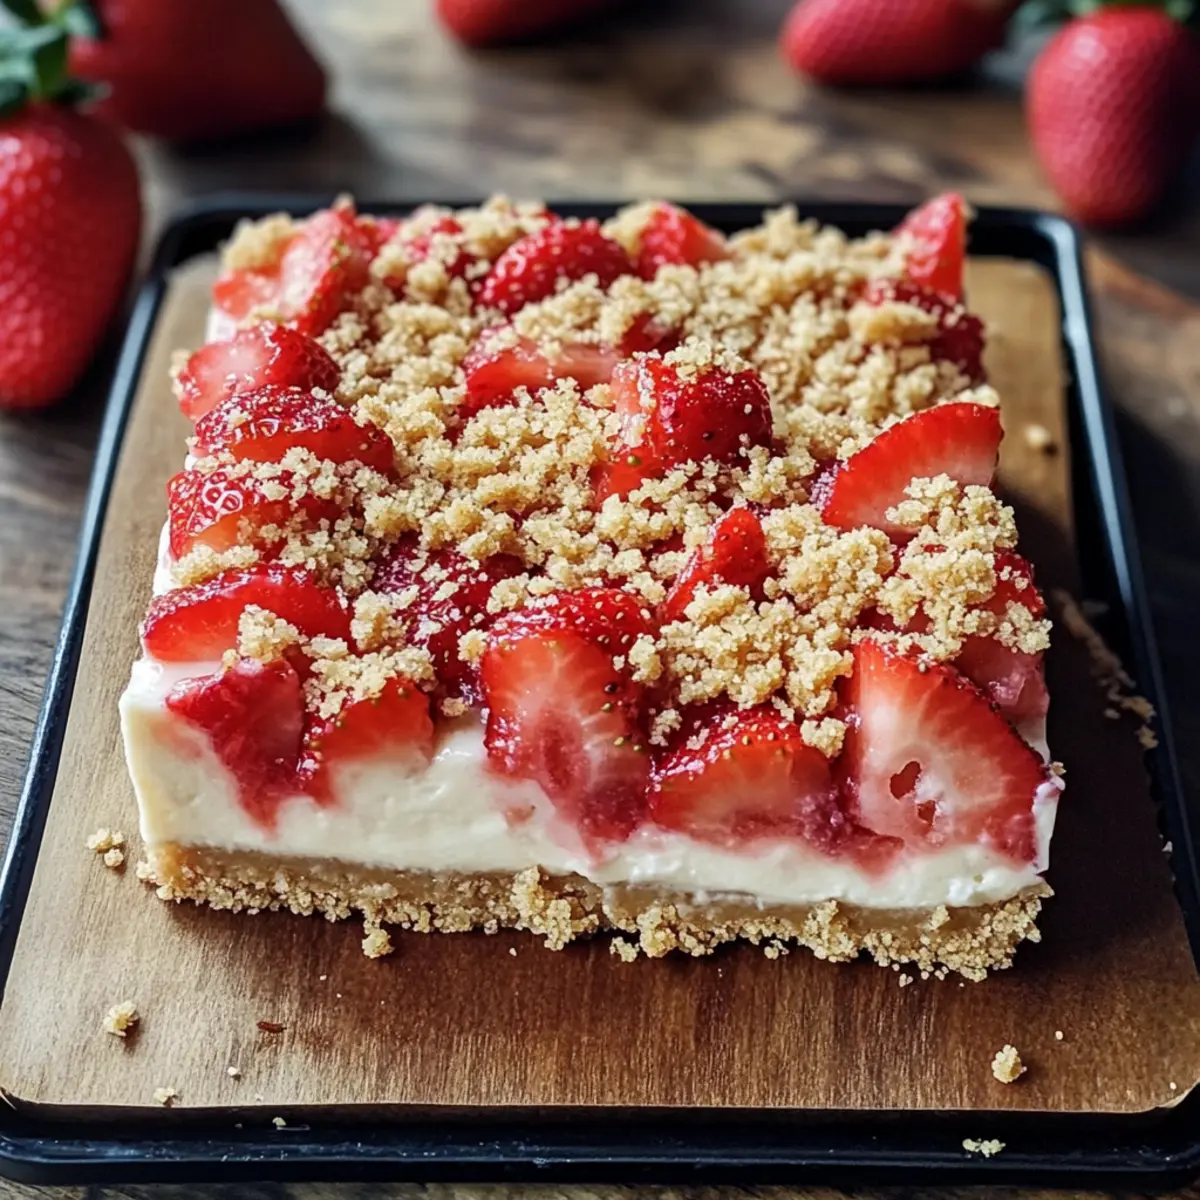
There’s something magical about biting into a dessert that captures the essence of summer. These Easy Strawberry Cheesecake Bars bring that enchantment right to your kitchen, nestled between a crunchy graham cracker crust and a light, creamy cheesecake filling infused with fresh strawberries. Perfect for family gatherings or simply an indulgent treat for a weeknight, these bars shine with vibrant flavors while being remarkably easy to prepare. Plus, they’re make-ahead friendly, so you can whip them up in advance—ideal for those busy evenings when you want to impress without the last-minute stress. Who wouldn’t want to indulge in a slice (or two) of this delightful creation? Ready to dive into the recipe that will have everyone asking for seconds?
Why Are These Bars So Irresistible?
Deliciously Simple: The beauty of these Strawberry Cheesecake Bars lies in their effortless preparation—perfect for any home cook.
Family-Friendly Delight: You’ll love how well they appeal to both kids and adults. They make a fantastic addition to birthdays or family get-togethers.
Make-Ahead Magic: Prepare them in advance, and simply chill until it’s time to serve! Talk about stress-free entertaining.
Bursting with Flavor: Each bite is an explosion of strawberry sweetness, balanced by the creamy texture that pairs beautifully with the crunchy crust.
Flexible Ingredients: Feel free to swap in other berries or try a drizzle of chocolate sauce—tailoring this dessert to your taste has never been easier!
Ready to whip up some delicious treats? Check out my Apple Cider Cheesecake for another flavor-packed dessert you’ll love!
Strawberry Cheesecake Bars Ingredients
Let’s gather everything you need to create these delectable Strawberry Cheesecake Bars!
For the Crust
- Graham Cracker Crumbs – A crunchy base that adds texture; opt for store-bought or make your own.
- Melted Butter – Binds the crumbs together and gives richness; substitute with coconut oil for a dairy-free option.
- Granulated Sugar – Sweetens the crust; brown sugar can deepen the flavor for a twist.
For the Cheesecake Filling
- Cream Cheese – The heart of the cheesecake; ensures a smooth and creamy texture. Use Neufchâtel for a lower-fat alternative.
- Eggs – Provide stability and structure; consider flax eggs for a vegan approach.
- Vanilla Extract – Elevates the flavor—pure vanilla will give the best results.
- Salt – Balances the sweetness beautifully.
For the Strawberry Topping
- Fresh Strawberries – Adds a juicy burst and vibrant color; feel free to mix with blueberries or raspberries.
For the Crumble Topping
- All-Purpose Flour – Gives texture to the crumble; can be swapped with gluten-free flour as needed.
- Brown Sugar (for crumble) – Adds sweetness and a caramelized flavor; complements the fruit perfectly.
- Butter (for crumble) – Enhances richness in the topping; a dairy-free butter can be used for a vegan option.
Gather these ingredients, and you’re on your way to impressing your family with these fantastic Strawberry Cheesecake Bars!
Step‑by‑Step Instructions for Strawberry Cheesecake Bars
Step 1: Prepare the Baking Dish
Preheat your oven to 350°F (175°C) to ensure it’s hot and ready for baking. While the oven warms, line a 9×9-inch baking dish with parchment paper, allowing some overhang for easy removal later. This will create the perfect base for your Strawberry Cheesecake Bars, ensuring they bake evenly and don’t stick to the pan.
Step 2: Make the Crust
In a medium mixing bowl, combine graham cracker crumbs, melted butter, and sugar until the mixture resembles wet sand. Use a fork or your fingers to mix, ensuring all the crumbs are thoroughly coated. Press this mixture firmly into the bottom of your prepared baking dish, creating an even layer. Bake for 10 minutes until slightly golden, then set aside to cool.
Step 3: Prepare the Cheesecake Filling
In a large bowl, using a mixer, beat softened cream cheese until smooth. Gradually add in eggs, sugar, vanilla extract, and a pinch of salt, continuing to mix until well combined and creamy. Avoid over-mixing to prevent air bubbles. Spread this luscious cheesecake filling evenly over your cooled crust, creating a perfect canvas for the fruity layer to follow.
Step 4: Add Strawberries
Take your fresh strawberries and gently dice them into small pieces. Sprinkle the diced strawberries evenly over the cheesecake filling, ensuring they’re well-distributed for balance in every bite. The fruity bursts will marry beautifully with the creamy layer as they bake, enhancing the overall flavor of your Strawberry Cheesecake Bars.
Step 5: Make Crumble Topping
In a separate bowl, mix together all-purpose flour, brown sugar, and a pinch of salt. Pour in melted butter, mixing with your hands or a fork until crumbles form. This topping will create a delightful crunch. Carefully sprinkle the crumble over the diced strawberries, ensuring every part of the surface is covered for a delicious topping.
Step 6: Bake
Place the entire baking dish in the preheated oven and bake for 35-40 minutes. Keep an eye on the center; it should be set but still have a slight jiggle when moved. The edges will be golden, indicating that your Strawberry Cheesecake Bars are coming together beautifully.
Step 7: Cool and Chill
Once baked, remove the dish from the oven and let it cool on a wire rack for about an hour. This step is crucial for ensuring the right texture. After cooling, cover the dish with plastic wrap and refrigerate for at least one hour, or overnight if you can wait, to let the flavors meld beautifully before slicing into bars.
How to Store and Freeze Strawberry Cheesecake Bars
Fridge: Store your Strawberry Cheesecake Bars in an airtight container in the refrigerator for up to 5 days. This keeps them fresh and ready to enjoy at a moment’s notice.
Freezer: For longer storage, wrap individual bars tightly in plastic wrap and then place them in a freezer-safe bag. They can be frozen for up to 2 months. Thaw in the fridge before serving.
Serving Temperature: These bars are delicious served chilled or at room temperature. If you’re thawing from the freezer, allow them to sit out for about 30 minutes before serving for optimal flavor and texture.
Reheating: If you prefer your bars slightly warm, pop them in a preheated oven at 300°F (150°C) for about 10 minutes. This will rejuvenate the creamy filling without compromising texture.
What to Serve with Easy Strawberry Cheesecake Bars?
Indulging in these luscious bars opens the door to endless delightful pairings that elevate your dessert experience.
-
Whipped Cream: A dollop of freshly whipped cream adds a light, airy touch, enhancing the creaminess of the cheesecake bars. This classic topping balances the sweetness with its fluffy texture.
-
Fresh Berries: Serve with a colorful medley of fresh berries like raspberries and blueberries for a burst of juicy flavor that complements the strawberries beautifully. Their tartness provides a refreshing contrast.
-
Mint Leaves: Garnish your bars with fresh mint leaves for a fragrant touch that brightens each bite. The herbal notes work wonders alongside the rich cheesecake, making every mouthful feel special.
-
Vanilla Ice Cream: A scoop of vanilla ice cream brings a creamy, dreamy element that melds perfectly with the strawberry flavor. It’s a decadent pairing that everyone will love on warm summer evenings.
-
Chocolate Drizzle: For chocolate lovers, a warm chocolate drizzle adds an indulgent twist. Pouring it over the cheesecake bars introduces a rich, contrasting flavor that elevates the entire dessert.
-
Coffee or Espresso: Pair your bars with a cup of brewed coffee or espresso to balance the sweetness. The deep, robust flavors of coffee enhance the creamy cheesecake while adding warmth to your dessert experience.
Make Ahead Options
These Easy Strawberry Cheesecake Bars are perfect for meal prep enthusiasts who want to save time during busy weeks! You can prepare the crust and cheesecake filling up to 24 hours in advance. Simply make the crust, press it into the baking dish, and then prepare the cheesecake filling, spreading it over the cooled crust. Cover the dish tightly and refrigerate. When ready to serve, add the strawberries and crumble topping just before baking, to ensure the freshest flavor and texture. After baking, let the bars cool completely, then refrigerate for up to 5 days or freeze wrapped tightly for up to 2 months. Enjoy the same delightful taste while making your life easier!
Strawberry Cheesecake Bars Variations
Feel free to personalize your Strawberry Cheesecake Bars with these delightful twists that will pique your culinary creativity!
-
Dairy-Free: Substitute cream cheese with vegan cream cheese and use coconut oil for the crust to make it completely dairy-free. Enjoy the same creamy texture without the dairy!
-
Berry Medley: Swap out strawberries for a mix of blueberries, raspberries, and blackberries. This combination not only looks stunning but also offers a burst of different flavors in every bite.
-
Chocolate Drizzle: For an indulgent touch, drizzle melted chocolate over the top right after baking. This adds a luxurious sweetness that will have chocolate lovers swooning!
-
Gluten-Free: Use gluten-free graham cracker crumbs or a gluten-free cookie crust to accommodate dietary restrictions, ensuring that everyone can enjoy these treats.
-
Nutty Crunch: Incorporate finely chopped nuts, such as pecans or almonds, into the crumble topping for an added crunch. The nutty flavor complements the sweetness of the cheesecake beautifully!
-
Flavored Extracts: Replace the vanilla extract with almond extract for a subtly different flavor that’s deliciously aromatic. It adds an unexpected twist that elevates the whole dessert.
-
Zesty Lemon: Add a teaspoon of lemon zest to the cheesecake filling for a refreshing citrus kick. The brightness will enhance the strawberry flavor and add a delightful zing.
If you’re looking for more sweet inspirations, you might want to try my Fried Strawberry Cheesecake for a fun variation or indulge in Brownie Cheesecake Bars for a rich chocolatey dessert. Each twist allows you to create a unique experience that your family will adore!
Expert Tips for Strawberry Cheesecake Bars
Room Temperature Cream Cheese: Ensure your cream cheese is at room temperature before mixing. This will create a smoother filling and help avoid lumps.
Mixing Caution: Avoid over-mixing the cheesecake batter; too much air can lead to cracks on the surface. Mix until just combined for perfect results.
Cooling is Key: Let the bars cool completely before refrigerating. This helps set the layers properly and enhances the texture of your Strawberry Cheesecake Bars.
Chill Overnight: For the best flavor and texture, allow the bars to chill overnight. This lets all the flavors meld and makes slicing easier.
Graham Cracker Alternative: If you’re short on time, use store-bought graham cracker crumbs for the crust, or try a cookie crust for a fun twist!
Fruit Variations: Don’t hesitate to experiment with different fruits! Blueberries or raspberries can replace strawberries for delicious variations in flavor.
Strawberry Cheesecake Bars Recipe FAQs
What type of strawberries should I use for the best flavor?
Absolutely! Opt for fresh, ripe strawberries that are bright red with no dark spots or blemishes. They should feel slightly firm to the touch—this ensures they’re juicy and sweet, which is vital for elevating the flavor of your Strawberry Cheesecake Bars. If you can’t find fresh strawberries, thawed frozen strawberries can also work, just be sure to drain excess moisture.
How should I store my Strawberry Cheesecake Bars?
To maintain freshness, store your Strawberry Cheesecake Bars in an airtight container in the refrigerator for up to 5 days. Make sure they’re completely cool before sealing to avoid condensation. Enjoy them at your leisure, no need to rush—these treats are ready to serve whenever you’re craving something sweet!
Can I freeze Strawberry Cheesecake Bars?
Yes! For long-term storage, wrap individual bars tightly in plastic wrap, then place them in a freezer-safe bag or container. They can be frozen for up to 2 months. When you’re ready to enjoy, simply thaw them in the refrigerator overnight, and they’ll be just as delicious as when you made them!
What if my cheesecake bars crack during baking?
No worries! Cracks can occur due to over-mixing or too much air in the batter. To prevent this, mix until just combined, and ensure your cream cheese is at room temperature. If cracks do form, you can always drizzle some melted chocolate or a berry sauce over the top after baking—this adds flavor and camouflages those imperfections beautifully.
Are these Strawberry Cheesecake Bars safe for my pets?
It’s best to avoid sharing these bars with pets, as they contain ingredients like cream cheese and sugar that aren’t healthy for them. If you’re looking for pet-friendly treats, try making a simple fruit puree for your furry friends instead!
Can I use different fruits for variations?
Very! Feel free to swap the strawberries for other fruits like blueberries or raspberries, or a mix for a delightful twist. You can also sprinkle nuts or chocolate chips on top for added texture and flavor. The more the merrier, as they say!
Irresistibly Creamy Strawberry Cheesecake Bars Everyone Loves
Ingredients
Equipment
Method
- Preheat your oven to 350°F (175°C). Line a 9x9-inch baking dish with parchment paper.
- In a mixing bowl, combine graham cracker crumbs, melted butter, and sugar. Press into the bottom of the baking dish. Bake for 10 minutes and let cool.
- In a large bowl, beat cream cheese until smooth. Gradually add in eggs, sugar, vanilla extract, and salt, mixing until creamy. Spread over the cooled crust.
- Dice fresh strawberries and sprinkle evenly over the cheesecake filling.
- In another bowl, mix flour, brown sugar, and salt. Add melted butter and mix until crumbly. Sprinkle over strawberries.
- Bake for 35-40 minutes until set but still slightly jiggly in the center.
- Let cool on a rack for an hour. Cover with plastic wrap and refrigerate for at least one hour before slicing.
Leave a Reply