
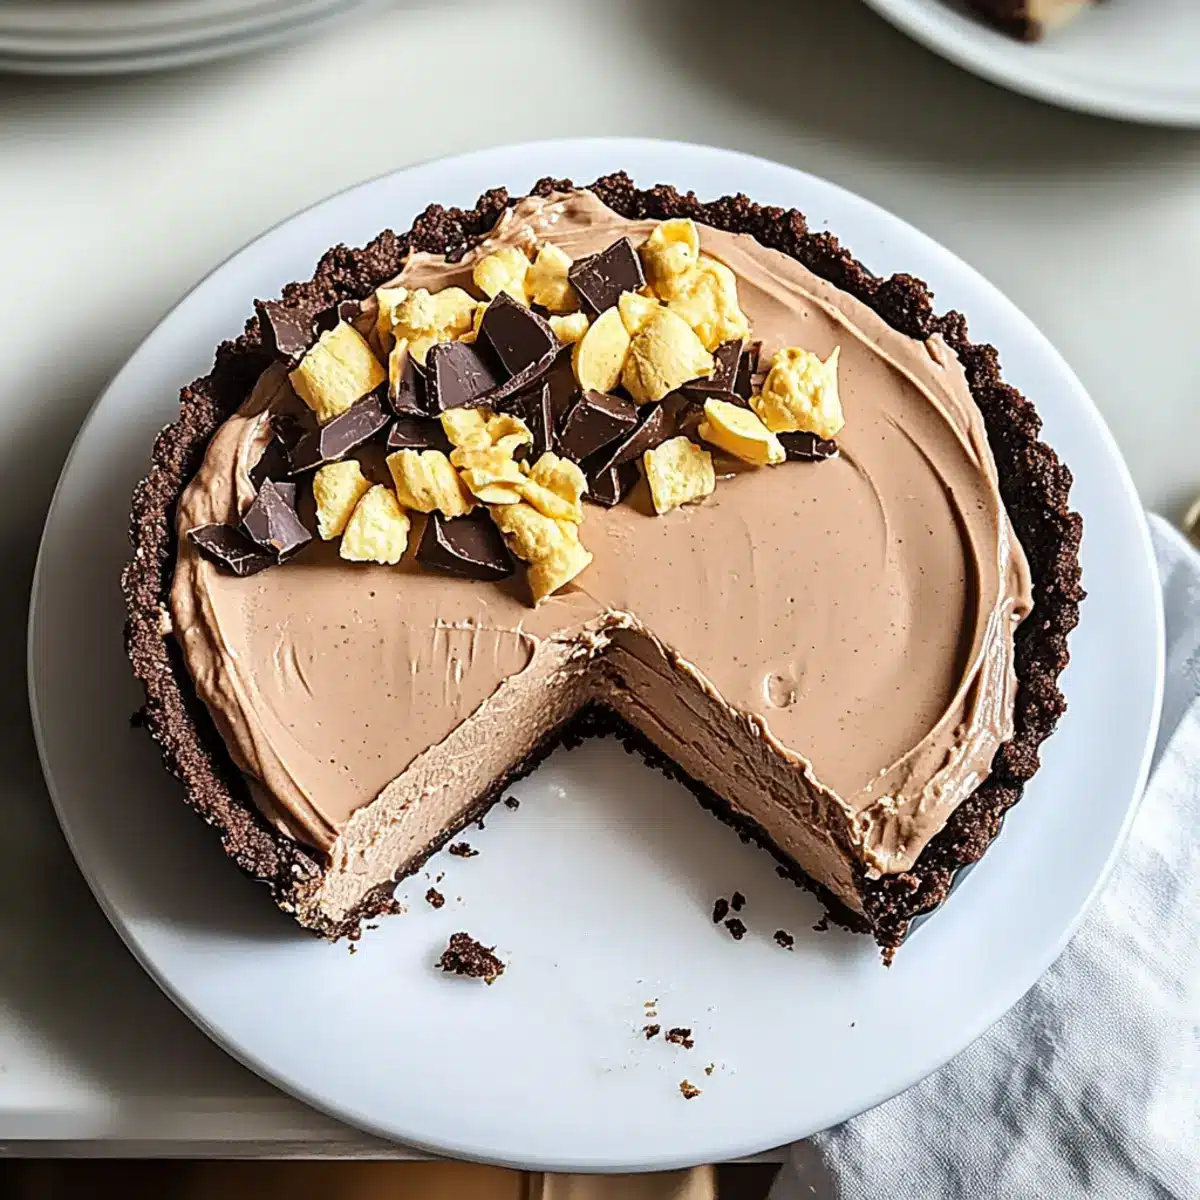
As I stood in my kitchen, the intoxicating aroma of melted chocolate wafted through the air and instantly transported me back to my childhood. That warm feeling of comfort got me thinking about my favorite dessert: a No-Bake Peanut Butter Pie with Chocolate Cream. This delightful treat is a miracle for busy bakers, as it comes together in a flash with no oven required! The silky peanut butter filling, punctuated by a luscious layer of airy chocolate whipped cream, strikes the perfect balance between rich and light. Plus, it’s the ultimate crowd-pleaser, guaranteeing smiles from family and friends alike. Ready to whip up something that’s as effortless as it is scrumptious? Let’s dive into this heavenly no-bake pie that’s bound to become a cherished favorite in your home!
Why is this pie a showstopper?
Irresistible Creaminess: The combination of silky peanut butter filling and fluffy chocolate whipped cream creates a dessert experience that’s smooth, dreamy, and hard to resist.
No Oven Required: This no-bake delight is perfect for busy days, letting you whip up an impressive dessert without any baking fuss.
Quick and Easy: With straightforward steps, you can have a stunning pie ready to chill in under an hour.
Crowd-Pleasing Flavor: This pie brings together beloved flavors that effortlessly put smiles on faces, making it ideal for gatherings.
Customizable Options: Feel free to experiment! You can easily switch up the toppings or crust to suit your taste, just like adding Biscoff Cookie Butter for a unique twist.
No-Bake Peanut Butter Pie Ingredients
For the Filling
- Peanut Butter – Adds a rich, creamy flavor; almond butter can be used for a nut-free option.
- Cream Cheese – Provides smoothness and stability; Greek yogurt is a lighter alternative.
- Powdered Sugar – Sweetens the filling; adjust according to your taste or swap for a sugar substitute.
For the Topping
- Chocolate Whipped Cream – Elevates the pie with a light and airy chocolate layer; using heavy cream will yield a thicker topping.
For the Crust
- Graham Cracker Crust – Offers a satisfying crunch; consider a gluten-free crust for a dietary variation.
Step‑by‑Step Instructions for No-Bake Peanut Butter Pie with Chocolate Cream
Step 1: Prepare the Crust
Start by preheating your oven to 350°F if you’re toasting the graham cracker crumbs, which will enhance their flavor. In a bowl, mix the graham cracker crumbs with melted butter until they resemble wet sand. Press this mixture evenly into the bottom of a 9-inch pie dish using the back of a measuring cup to create a solid base. Chill the crust in the refrigerator while you prepare the filling.
Step 2: Make Peanut Butter Filling
In a large mixing bowl, combine room-temperature cream cheese, creamy peanut butter, and powdered sugar. Using a hand mixer set to medium speed, beat these ingredients together until the mixture is smooth and well combined, about 2-3 minutes. The filling should be fluffy, with no lumps remaining, creating a rich texture that’s perfect for your no-bake peanut butter pie.
Step 3: Spread Filling
Once your peanut butter filling is ready, remove the chilled crust from the refrigerator. Pour the smooth peanut butter mixture into the crust and use a spatula to spread it evenly across the surface. Make sure the filling fills the edges and is level for a polished look. This luscious filling will be the star of your pie, so take a moment to ensure it’s perfectly distributed.
Step 4: Prepare Chocolate Whipped Cream
In a mixing bowl, combine heavy cream, cocoa powder, and a tablespoon of powdered sugar. Whip the ingredients together on high speed until soft peaks form, which should take about 3-5 minutes. Be careful not to overwhip—stop once the cream is light and fluffy, as this will create the perfect topping for your no-bake peanut butter pie with chocolate cream.
Step 5: Top the Pie
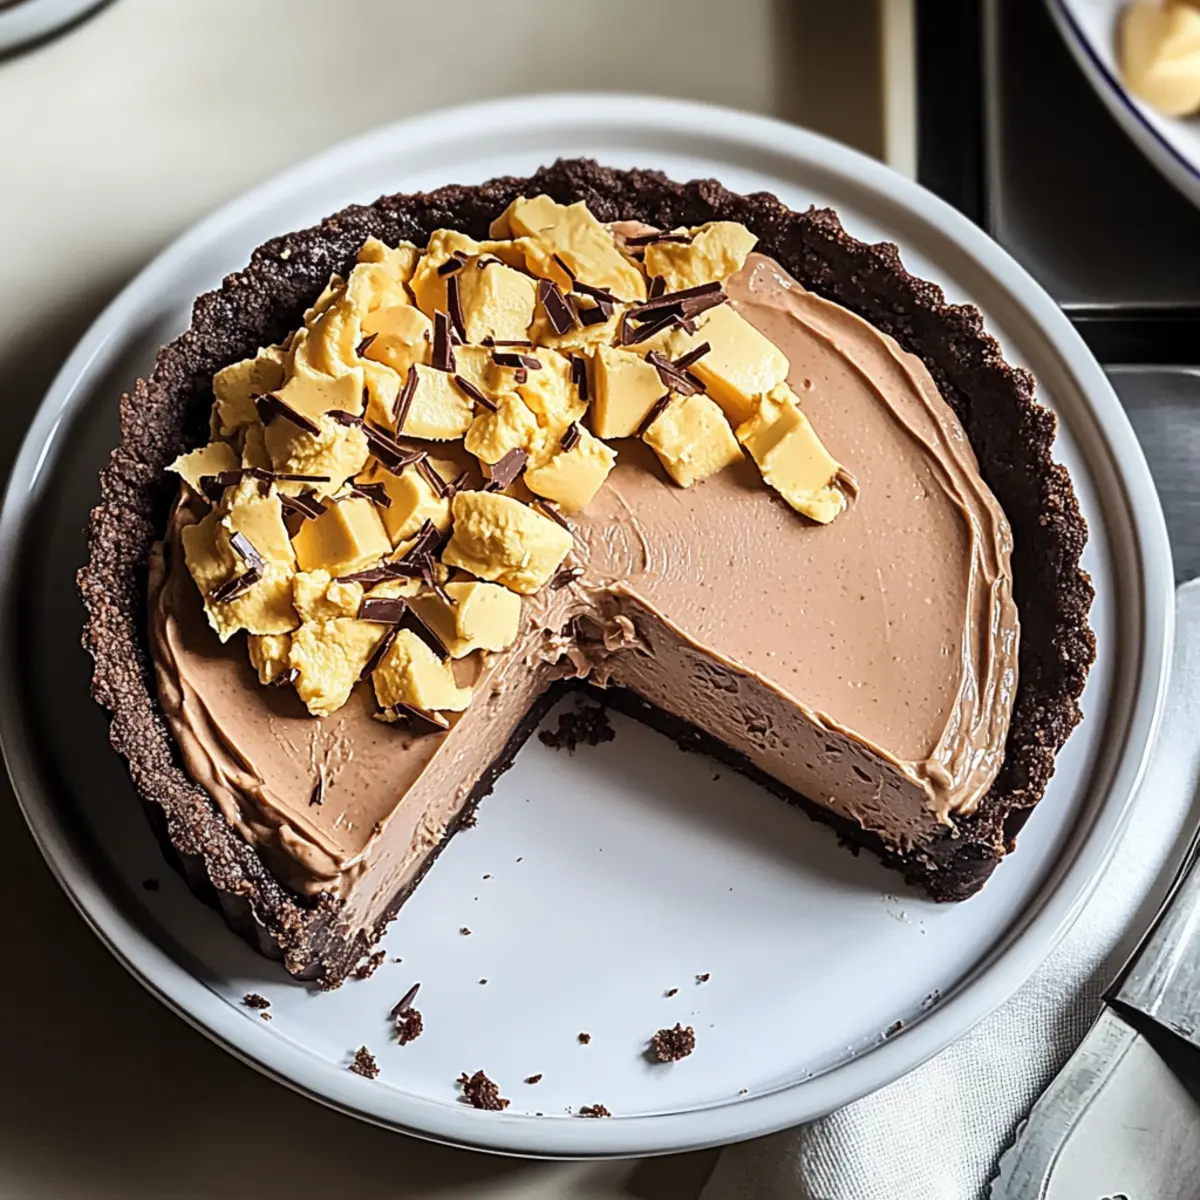
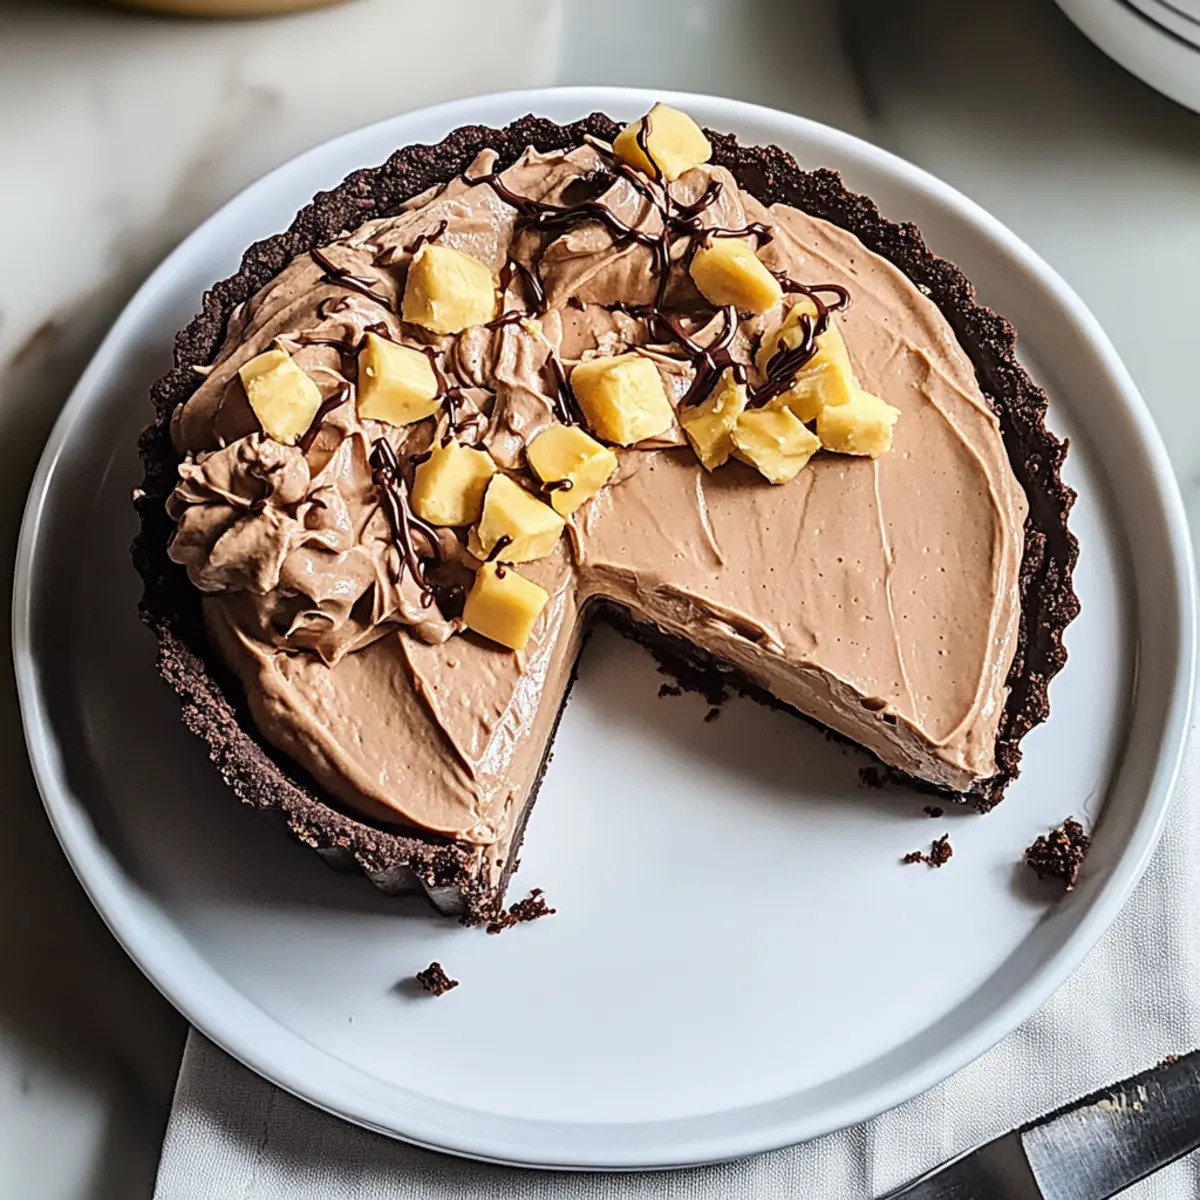
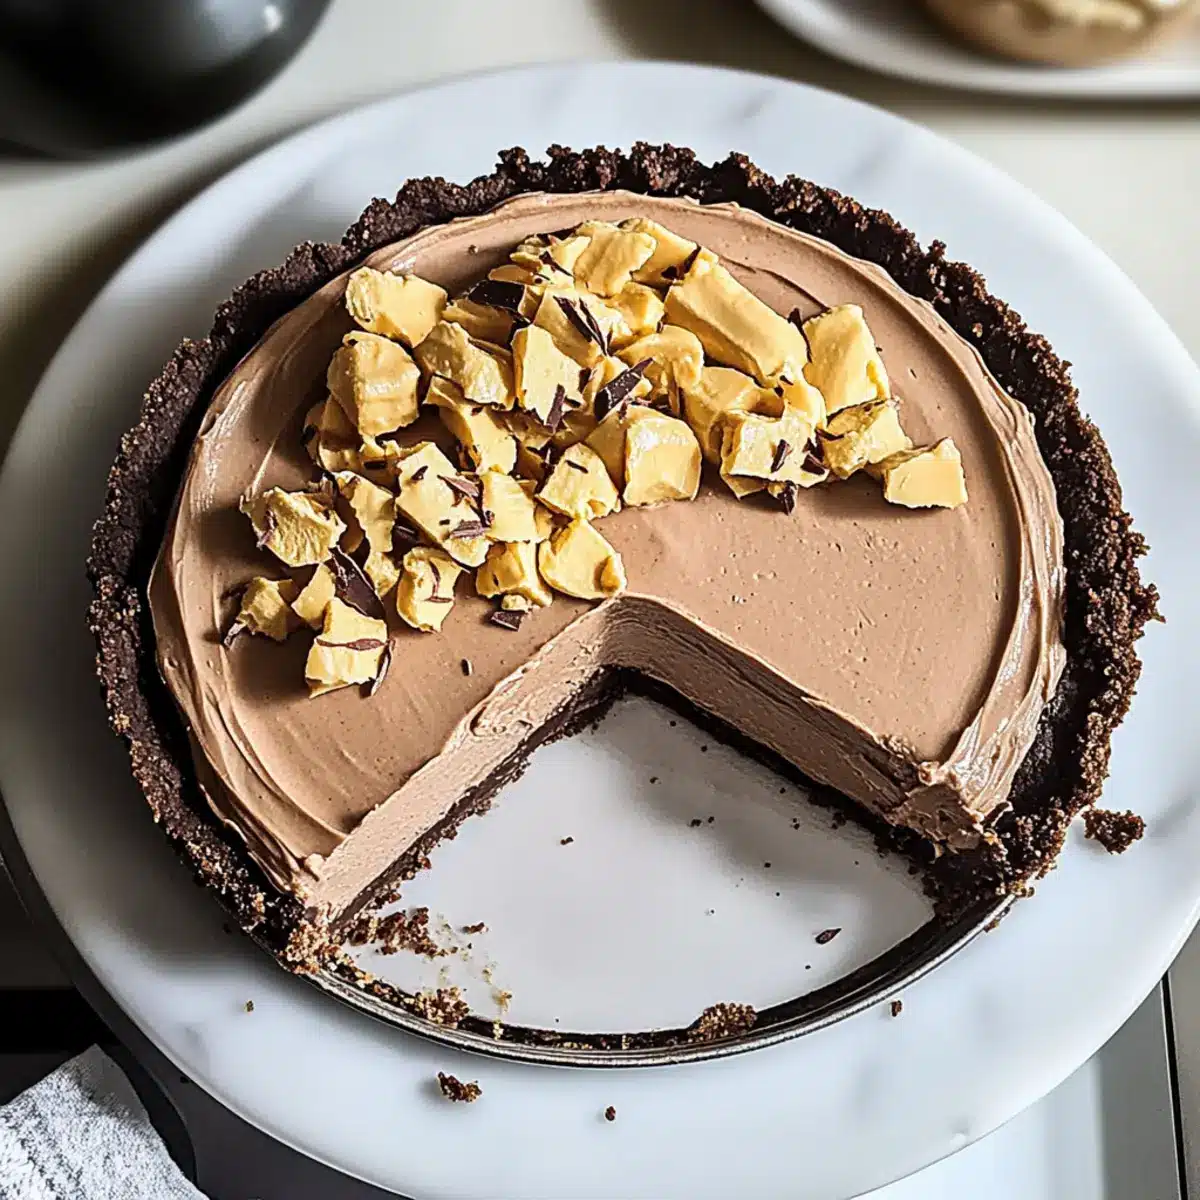
Gently spread the chocolate whipped cream over the peanut butter filling in a generous layer using a spatula. Make sure to cover the entire surface smoothly and evenly, creating beautiful peaks and swirls to enhance the visual appeal. The chocolate cream adds an indulgent contrast to the creamy peanut butter layer beneath and is sure to delight your taste buds.
Step 6: Chill
Cover the pie with plastic wrap and refrigerate it for at least 4 hours, or preferably overnight. This chilling time allows the flavors to meld beautifully and helps the pie set to the right consistency. When ready to serve, the no-bake peanut butter pie with chocolate cream will be perfectly chilled and ready to cut into smooth slices.
Expert Tips for No-Bake Peanut Butter Pie
-
Room Temperature Ingredients: Ensure all ingredients are at room temperature to make mixing easier and create a smoother filling.
-
Whipping Cream Wisely: Stop whipping the heavy cream as soon as soft peaks form; overwhipping can lead to a grainy texture, ruining your chocolate cream topping.
-
Chill for Best Results: For optimal flavor melding and texture, allow the pie to chill overnight instead of just four hours; patience pays off!
-
Level Up Your Crust: If using graham crackers, toast them lightly in the oven to enhance their flavor. Just be sure to cool them before mixing with butter.
-
Taste and Adjust: Always taste your peanut butter filling before spreading; adjust powdered sugar to satisfy your sweetness preference for the best no-bake peanut butter pie!
No-Bake Peanut Butter Pie Variations
Feel free to get creative and customize your pie with these fun variations that can elevate the flavors and textures.
- Nut-Free: Substitute almond butter for peanut butter to create a nut-free filling, perfect for those with allergies.
- Greek Yogurt Touch: Replace cream cheese with Greek yogurt for a lighter twist that adds a tangy flavor while keeping it creamy.
- Reduced Sugar: Use a sugar substitute or adjust the powdered sugar to suit your dietary preferences, making it a guilt-free indulgence.
- Chocolate Swirl: For a decadent chocolate-peanut butter swirl, gently fold melted chocolate into the peanut butter filling before spreading it in the crust.
- Chunky Additions: Stir in crushed Reese’s pieces into the filling or sprinkle them on top for an exciting crunch and an extra pop of flavor.
- Vanilla Twist: Swap the chocolate whipped cream for vanilla whipped cream on top for a light, delicate touch that still satisfies your sweet cravings.
Feeling adventurous? Serve it with a drizzle of chocolate sauce or maybe even a dollop of whipped cream for added flair to your dessert table! You can even try it alongside Biscoff Cookie Butter for a sweet twist.
What to Serve with No-Bake Peanut Butter Pie with Chocolate Whipped Cream
Looking to elevate your no-bake dessert experience? These delightful pairings will create a full, satisfying meal that’s sure to impress.
-
Classic Vanilla Ice Cream: A scoop of creamy vanilla complements the pie’s richness and provides a refreshing contrast to the decadent flavors.
-
Fresh Berries: Juicy strawberries or raspberries add a zesty brightness that contrasts beautifully with the creamy filling, making every bite a little more thrilling.
-
Chocolate Drizzle: An extra splash of rich chocolate sauce on top enhances the indulgent chocolate flavor, offering a gourmet touch to your presentation.
-
Coffee: A steaming cup of strong coffee invites warmth and balances the pie’s sweetness, creating a delightful duo that coffee lovers will adore.
-
Sweet Tea Lemonade: This refreshing blend of sweet tea and lemonade brings a sweet-tart balance that cuts through the richness, making for a lovely pairing.
-
Nutty Biscotti: Crunchy almond or hazelnut biscotti offers a delightful texture contrast while enhancing the nutty flavor of the peanut butter.
-
Whipped Cream on Top: Add a dollop of fresh whipped cream to serve at the table and elevate each slice, reminding everyone of the pie’s light, airy topping.
-
Chilled White Wine: A glass of chilled Riesling provides fruity notes that complement the peanut butter while keeping your dessert elegant.
-
Chocolate-Covered Strawberries: These decadent bites add a romantic touch and enchanting visual appeal, making your dessert table even more enticing.
-
Caramel Sauce Drizzle: A decadent drizzle of caramel can enhance the overall experience, adding a rich sweetness that pairs perfectly with each creamy slice.
How to Store and Freeze No-Bake Peanut Butter Pie
Refrigerator: Cover the pie with plastic wrap or a lid and store it in the fridge for up to 5 days. This will keep the no-bake peanut butter pie fresh and delightful.
Freezer: For longer storage, wrap individual slices in plastic wrap and place them in an airtight container. The pie can be frozen for up to 2 months; simply thaw in the refrigerator before enjoying.
Serving Preparation: When ready to serve leftovers, allow the pie to sit at room temperature for about 10-15 minutes to soften slightly for easier slicing.
Make Ahead Tip: This pie is perfect for pre-party preparation; you can make it up to 2 days in advance without losing any of its delightful flavors!
Make Ahead Options
These No-Bake Peanut Butter Pie with Chocolate Cream options are perfect for busy cooks looking to save time without sacrificing flavor! You can prepare the peanut butter filling and press the graham cracker crust up to 24 hours in advance. Simply refrigerate the filling in an airtight container to preserve its creamy texture. On the day you plan to serve, pour the filling into the crust and whip up the chocolate cream layer just before topping the pie. This keeps the whipped cream light and fluffy, ensuring the pie remains just as delightful when served. With these make-ahead steps, you’ll have an effortlessly impressive dessert ready to impress your guests!
No-Bake Peanut Butter Pie with Chocolate Whipped Cream Recipe FAQs
What type of peanut butter should I use for the filling?
Absolutely! I recommend using creamy peanut butter for the smoothest texture. However, if you have a nut allergy or prefer a different flavor, almond butter makes a great nut-free alternative. Just ensure it has a similar consistency for the best results!
How should I store the no-bake peanut butter pie?
Very important! Cover the pie with plastic wrap or store it in an airtight container in the refrigerator. It’ll keep fresh for up to 5 days. Just make sure it’s well-covered to maintain its flavor and prevent it from absorbing other odors in your fridge.
Can I freeze the no-bake peanut butter pie?
Yes, you can! To freeze, wrap individual slices in plastic wrap and place them in an airtight container. The pie can be stored in the freezer for up to 2 months. When you’re ready to enjoy, simply thaw it in the refrigerator for several hours or overnight. It’s just as delightful when served chilled!
What if my chocolate whipped cream doesn’t whip properly?
If your chocolate whipped cream isn’t getting fluffy, check that the heavy cream is very cold. Start whipping on a medium speed and gradually increase to high. If it’s still not thickening, try adding a bit more powdered sugar to stabilize it. Remember, stop whipping as soon as you see soft peaks to avoid a grainy texture—aim for a light, airy cream!
Can I make this pie ahead of time, and if so, how far in advance?
Yes, you can! This pie is a champion at being prepped ahead. You can make it up to 2 days in advance, which will enhance its flavors as they meld. Just ensure it’s stored properly in the refrigerator, covered to maintain its freshness and deliciousness.
Are there any dietary considerations I should be aware of?
Definitely! If you have guests with allergies, be sure to check the brand of peanut butter you use, as some may contain traces of nuts. Additionally, for gluten-free options, swap the graham cracker crust with a gluten-free crust alternative. There are many delicious varieties so everyone can enjoy this decadent no-bake peanut butter pie!
Decadent No-Bake Peanut Butter Pie with Chocolate Cream Delight
Ingredients
Equipment
Method
- Prepare the crust by mixing graham cracker crumbs with melted butter and pressing into a pie dish. Chill.
- Make the peanut butter filling by mixing cream cheese, peanut butter, and sugar until smooth.
- Spread the peanut butter filling into the chilled crust evenly.
- Prepare the chocolate whipped cream by whipping heavy cream, cocoa powder, and sugar until soft peaks form.
- Top the pie with the chocolate whipped cream evenly.
- Cover and chill the pie for at least 4 hours or overnight before serving.
Leave a Reply