
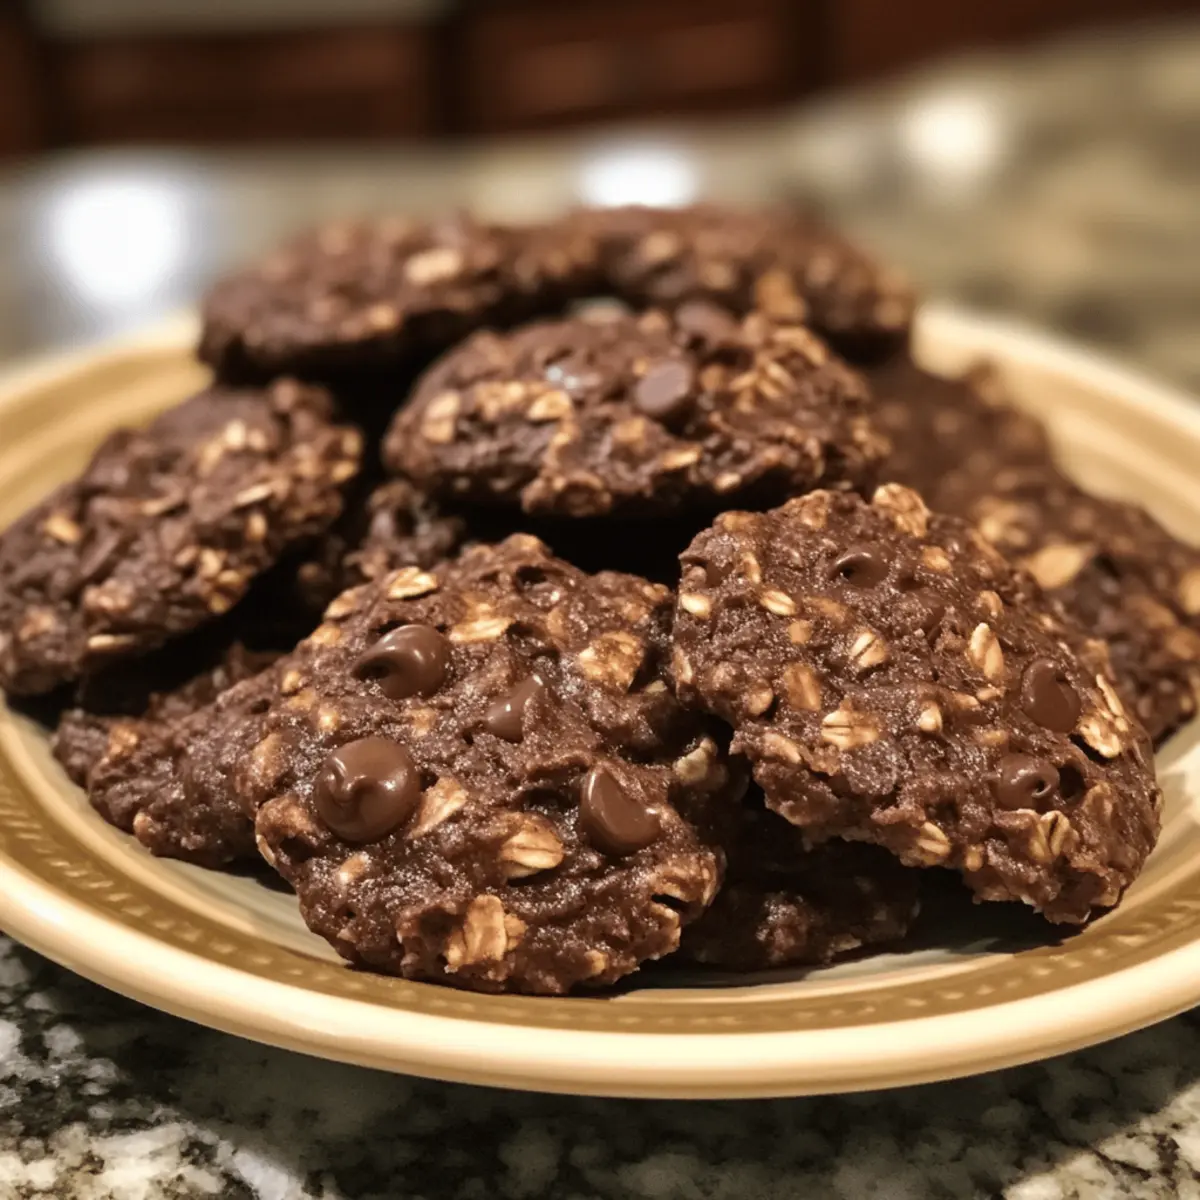
As I rummaged through my pantry, I stumbled upon a treasure trove of oats, nut butter, and a stash of chocolate chips. It hit me then: why not whip up some delightful 4-Ingredient No-Bake Chocolate Oat Cookies? These chewy little wonders are more than just a quick fix for your sweet tooth; they’re gluten-free and perfect for satisfying those snack cravings without any fuss. Whether paired with a cup of coffee or enjoyed solo as an afternoon treat, they’re an easy way to bring comfort and joy to your day. So, why not sprinkle in some creativity? What mix-ins will you choose to make these cookies uniquely yours?
Why are these cookies so irresistible?
Simplicity, with just four ingredients, these cookies come together in no time, perfect for busy days. Versatile, customize them with any mix-ins like dried fruits or nuts for a fun twist! Gluten-Free Delight, enjoy a sweet treat that everyone can savor without worries. Chewy Texture, they deliver that perfect bite, reminiscent of your favorite granola clusters. Snack Worthy, whether for a quick pick-me-up or paired with your favorite beverage, these cookies deliver sweetness without guilt. Try serving them alongside some Spiced Pumpkin Streusel for a seasonal flavor boost!
Chocolate Oat Cookie Ingredients
• Perfect for a guilt-free treat!
For the Mixture
- Rolled Oats – Provides structure and heartiness; ensure you use gluten-free oats for a gluten-free version.
- Nut Butter (peanut, almond, or cashew) – Acts as a binder and adds a rich creaminess; sunflower seed butter is a great nut-free alternative.
- Maple Syrup or Honey – Adds sweetness and moisture; opt for maple syrup if you’re looking for a vegan option.
- Chocolate Chips – Imparts a decadent chocolate flavor; dark chocolate chips will give a more intense taste.
Optional Mix-Ins
- Dried Fruits (like cranberries or raisins) – Add a touch of sweetness and chewiness; try different varieties for a flavor twist!
- Chopped Nuts (walnuts, pecans) – Introduces a satisfying crunch; be mindful to adjust the nut butter amount if adding these.
- Cocoa Powder – For an extra chocolatey bite; mix in a tablespoon to enhance that rich flavor.
- Sea Salt – A pinch before refrigerating elevates the flavors, making each bite even more delightful.
These Chocolate Oat Cookies are not just easy to whip up; they can also be tailored to your preferences, ensuring a sweet delight that resonates with every treat lover.
Step‑by‑Step Instructions for 4-Ingredient No-Bake Chocolate Oat Cookies
Step 1: Combine the Base Ingredients
In a large mixing bowl, stir together 2 cups of rolled oats and 1 cup of your chosen nut butter. Use a wooden spoon or spatula to mix until the oats are completely coated and well-combined, creating a thick, sticky mixture. This step is crucial for ensuring your cookies have the perfect chewy texture, so take your time to make sure everything is blended evenly.
Step 2: Add Sweetness
Next, pour in ½ cup of maple syrup or honey, depending on your preference. Mix thoroughly until a cohesive, sticky dough forms. The sweetener not only adds flavor but also helps bind the ingredients together. You’ll know it’s ready when the mixture holds together and has a uniform texture, showcasing the delightful blend of oats and nut butter.
Step 3: Incorporate Chocolate Chips
Now, fold in 1 cup of chocolate chips to your mixture, ensuring they are evenly distributed throughout the dough. Use a spatula for this step to avoid breaking the chips while integrating them. The chocolate will melt ever so slightly in the warm mixture, creating delicious pockets of flavor in your cookies, making each bite a delightful treat.
Step 4: Form the Cookies
Using a tablespoon, scoop out portions of the dough and drop them onto a parchment-lined baking sheet. Space them about an inch apart; they won’t spread in the fridge. You should have around 12-15 cookies after this step. To achieve a nice rounded shape, gently press the tops with the back of the spoon.
Step 5: Chill and Set
Place the baking sheet in the refrigerator for at least 30 minutes to allow the chocolate oat cookies to firm up. This step is essential for a satisfying bite. After chilling, they should feel solid to the touch but still soft, which means they’re ready to be enjoyed.
Step 6: Store and Enjoy
Once set, transfer your cookies to an airtight container. They can be stored in the refrigerator for up to a week, or frozen for longer storage. These homemade 4-Ingredient No-Bake Chocolate Oat Cookies are perfect for a quick snack or a sweet treat, ready to bring joy whenever you need a little pick-me-up.

How to Store and Freeze Chocolate Oat Cookies
Fridge: Store in an airtight container for up to 1 week. This keeps the cookies fresh, chewy, and ready for your next snack craving.
Freezer: For longer storage, freeze in a single layer on a baking sheet. Once firm, transfer to a freezer bag or container for up to 3 months.
Thawing: To enjoy, simply remove from the freezer and let sit at room temperature for about 10-15 minutes. They’ll soften back to their delectable texture!
Reheating (optional): If you prefer warm cookies, pop them in the microwave for about 10-15 seconds. Indulge in the melty chocolate goodness of your Chocolate Oat Cookies!
What to Serve with 4-Ingredient No-Bake Chocolate Oat Cookies
Elevate your cookie experience by pairing these delightful treats with accompaniments that bring out their chocolatey goodness and rich textures.
-
Fresh Fruit Salad: Bright and refreshing, a mix of seasonal fruits complements the sweetness of the cookies beautifully. The juicy burst from fruits balances the chewy texture perfectly.
-
Creamy Greek Yogurt: A dollop of plain or flavored yogurt adds a tangy contrast, creating a satisfying balance to the rich cookies. It’s a delightful way to enjoy a healthy twist while indulging.
-
Nutty Granola Mix: Sprinkling homemade or store-bought granola offers an extra crunch and flavor dimension. Try mixing it into the cookie dough for added texture, or serve it on the side.
-
Herbal Tea: A warm cup of chamomile or peppermint tea enhances the cozy experience of enjoying cookies. The soothing flavors create a perfect romantic setting for afternoon tea.
-
Dark Chocolate Drizzle: Take it to the next level by drizzling melted dark chocolate over the top of your cookies. This adds another layer of indulgence that every chocolate lover will adore.
-
Peanut Butter Dip: A side of creamy or crunchy peanut butter acts as a perfect dip, inviting you to immerse those cookies for a delightful combination of flavors.
-
Coffee or Espresso: Pairing these delectable cookies with a rich coffee or a shot of espresso awakens the taste buds, making for an energizing afternoon treat. The bitterness of coffee beautifully contrasts the sweetness.
-
Ice Cream: Enjoy these cookies alongside a scoop of vanilla or chocolate ice cream for a delightful dessert experience. The cold creaminess pairs perfectly with the chewy warmth of the cookies.
Chocolate Oat Cookies Variations & Substitutions
Feel free to add your own twist to these delightful chocolate oat cookies! The kitchen is your canvas, and I can’t wait to see what masterpiece you create.
- Nut-Free: Substitute nut butter with sunflower seed butter for a delicious nut-free option. You’ll still get that creamy texture without the nuts!
- Vegan: Use maple syrup instead of honey for an entirely vegan treat. It adds just the right amount of sweetness and pairs perfectly with the chocolate.
- Dark Chocolate Delight: Swap out regular chocolate chips for dark chocolate chips for a richer flavor. Dark chocolate elevates the taste, making these cookies feel extra indulgent.
- Fruit Fusion: Toss in dried fruits, like cranberries or raisins, for a burst of natural sweetness. Their juicy texture balances out the rich chocolate, creating a symphony of flavors and textures.
- Nutty Crunch: Add chopped nuts, like walnuts or pecans, for some satisfying crunch. Just remember to adjust the nut butter quantity to maintain the ideal consistency.
- Espresso Kick: Mix in a teaspoon of instant espresso powder for a coffee-flavored twist! This subtle addition intensifies the chocolate flavor and adds a delightful depth to every bite.
- Cocoa Boost: Stir in a tablespoon of cocoa powder for a chocolate lovers’ dream. This gives your cookies an even deeper chocolatey taste, elevating them to a whole new level.
- Sea Salt Sprinkle: Top each cookie with a pinch of sea salt before chilling. This not only enhances flavor but also adds a sweet-and-salty contrast that makes each bite unforgettable.
For other delightful recipes featuring the flavors of fall, don’t forget to check out my Fall Pumpkin Spice dessert or the creamy goodness of Pumpkin Spice Milk. Enjoy your cookie-making adventure!
Expert Tips for Chocolate Oat Cookies
- Mix Thoroughly: Ensure the oats and nut butter are well combined to prevent crumbly cookies. A good mix creates a chewy texture that holds together beautifully.
- Use Non-Stick Tools: When forming cookies, a non-stick spatula helps shape them neatly, making the process clean and hassle-free.
- Adjust Sweetness: If you prefer a less sweet cookie, reduce the maple syrup or honey slightly. Just be mindful of the overall binding quality of the mixture.
- Experiment with Mix-Ins: Adding seeds or dried fruits can enhance flavor and texture but adjust nut butter quantity accordingly to maintain consistency.
- Refrigerate Well: Ensure cookies chill for at least 30 minutes. This step is vital for achieving the ultimate texture in your chocolate oat cookies.
Make Ahead Options
These 4-Ingredient No-Bake Chocolate Oat Cookies are an absolute gem for busy home cooks looking to save time! You can easily prepare the dough up to 24 hours in advance by mixing together the rolled oats, nut butter, and sweetener, then refrigerate it until you’re ready to finish the cookies. Alternatively, after shaping the cookies on the lined baking sheet, they can be refrigerated for up to 3 days before serving—just ensure they are stored in an airtight container to maintain their delightful chewiness. When you’re ready to enjoy, simply pull them out and let them sit for a few minutes to soften slightly before indulging in these delicious delights!
Chocolate Oat Cookies Recipe FAQs
What type of oats should I use for these cookies?
Absolutely! For the best results, I recommend using rolled oats. If you’re going for a gluten-free version, make sure to select certified gluten-free rolled oats. They offer the perfect texture and chewiness that make these cookies so delightful!
How long can I store Chocolate Oat Cookies?
You can store these cookies in an airtight container in the refrigerator for up to a week. This helps maintain their chewy texture and rich flavor, ensuring they remain a perfect snack for several days.
Can I freeze these cookies?
Very! In fact, freezing is an excellent option for longer storage. To freeze, place the cookies in a single layer on a baking sheet and freeze until firm. Then, transfer them to a freezer bag or airtight container. They can be stored for up to 3 months! Just remember to allow them to thaw at room temperature for about 10-15 minutes before enjoying.
What if my cookie mixture is too crumbly?
If your mixture feels a bit crumbly, don’t worry! This can happen if the nut butter isn’t mixed in thoroughly. To fix it, simply add a teaspoon of maple syrup or honey and mix it in until the dough binds more easily. Remember, patience is key to getting that joyously chewy texture!
Are these cookies safe for those with nut allergies?
I often suggest using sunflower seed butter as a delicious nut-free alternative. It provides a similar consistency and flavor without the risk of nuts, making these cookies enjoyable for everyone, including those with nut allergies. Just double-check your chocolate chips for any allergen warnings as well!
Pumpkin Spice Cheesecake Bars the Ultimate Fall Treat
Ingredients
Equipment
Method
- Combine the Base Ingredients: Stir together rolled oats and nut butter in a large bowl until coated.
- Add Sweetness: Mix in maple syrup or honey until a cohesive dough forms.
- Incorporate Chocolate Chips: Fold in chocolate chips evenly into the dough.
- Form the Cookies: Scoop tablespoons of dough onto a parchment-lined sheet.
- Chill and Set: Refrigerate the cookies for at least 30 minutes to firm up.
- Store and Enjoy: Transfer to an airtight container for storage.
Leave a Reply