
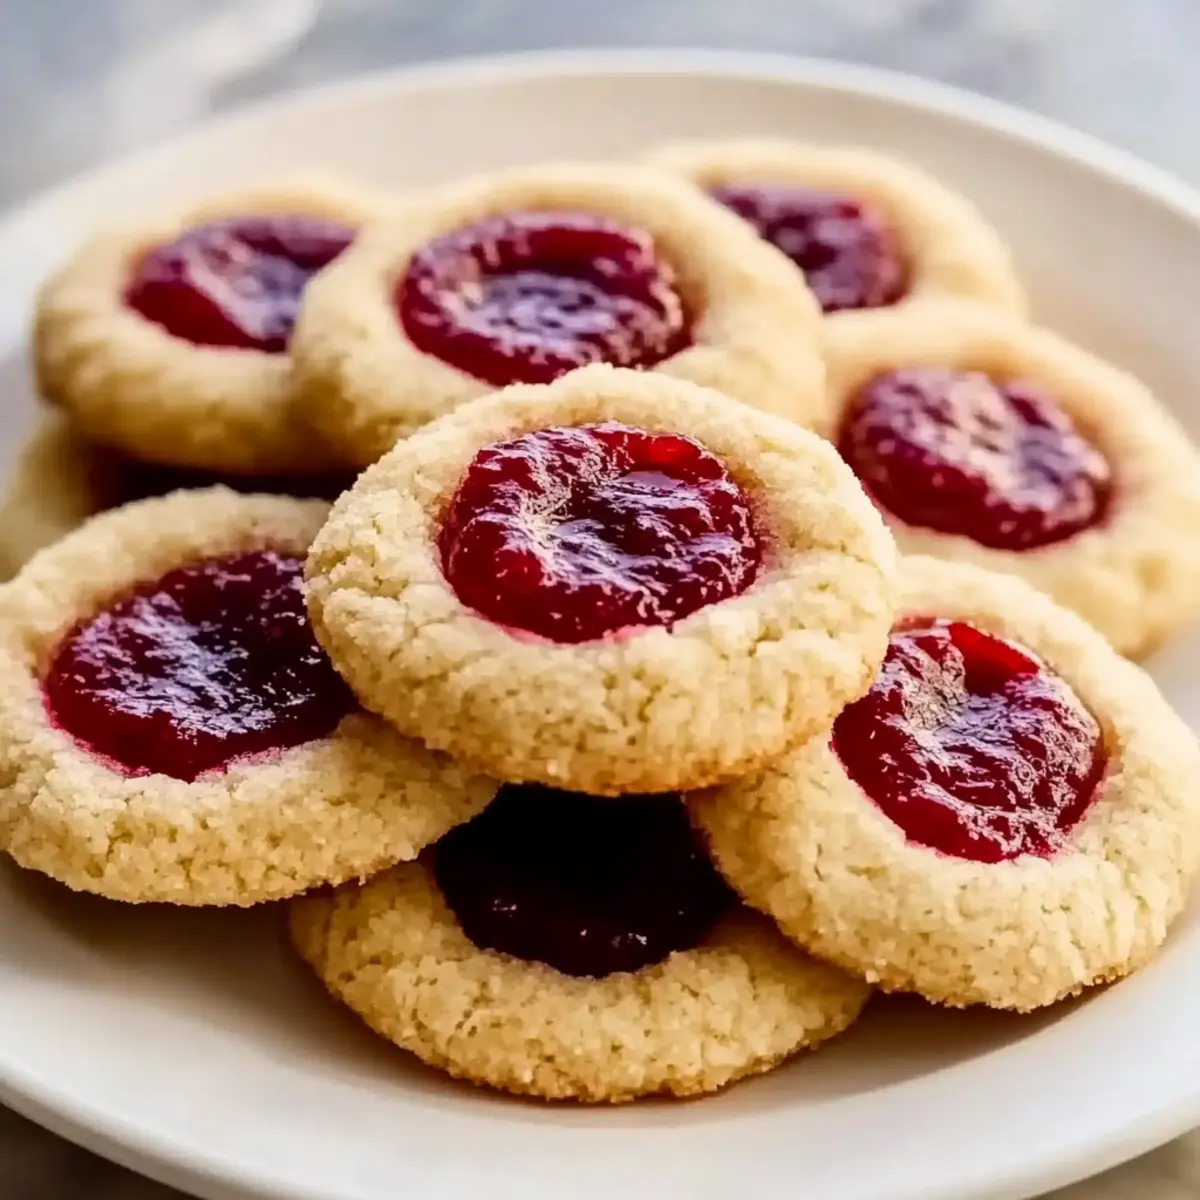
As I rummaged through my pantry last week, I stumbled upon a forgotten jar of raspberry jam. It sparked a wave of nostalgia, whisking me back to warm afternoons spent baking with my grandmother, who perfected her classic Thumbprint Cookies Recipe to cheer up the grayest of days. These delightful cookies, with their buttery dough and sweet, fruity centers, are perfect for every occasion, from festive gatherings to a cozy afternoon pick-me-up. Not only are they a crowd-pleaser, but they also make for a wonderful homemade gift when you want to share a slice of love. Plus, with easy adjustments for vegan and gluten-free diets, anyone can dive into this delightful baking adventure! Are you ready to create some memories of your own with these charming treats?
Why Make Thumbprint Cookies at Home?
Unforgettable Memories: Baking these Thumbprint Cookies brings back cherished moments, like afternoons spent in Grandma’s kitchen.
Versatile Flavors: With endless jam options, from raspberry to Nutella, you can customize to your heart’s content!
Crowd-Pleasing Treat: Perfect for any occasion, they’re loved by kids and adults alike.
Easy Dietary Alternatives: Need vegan or gluten-free options? We’ve got you covered with simple substitutions for all diets, ensuring everyone can enjoy!
Quick and Simple: This recipe requires minimal prep time, making it a wonderful choice for spontaneous baking sessions.
Dive into the joy of homemade cookies, and don’t forget to try them alongside your favorite coffee or tea for a delightful treat!
Thumbprint Cookies Recipe Ingredients
• Get ready to whip up a batch of these scrumptious Thumbprint Cookies!
For the Cookies
- Unsalted Butter – Provides a rich flavor and tender texture; replace with vegan butter for a dairy-free version.
- Granulated Sugar – Adds sweetness and aids in achieving the right texture.
- Light Brown Sugar – Contributes moisture and delightful caramel notes to the cookies.
- All-Purpose Flour – Forms the cookie’s structure, but can be substituted with a gluten-free flour blend if needed.
- Cornstarch – Ensures a soft and tender bite; arrowroot powder or tapioca starch can be used as alternatives.
- Egg Yolk – Enriches the dough and helps with the texture; use a flax egg for a vegan option (1 tbsp ground flaxseed + 3 tbsp water).
- Vanilla Extract – Enhances the overall flavor profile of the cookies.
For the Filling
- Jam (e.g., raspberry) – Fills the thumbprint with sweetness and fruity flavor; switch it out for any favorite jam, Nutella, or lemon curd for variations.
Prepare your ingredients, and let’s create some delightful memories with this Thumbprint Cookies Recipe!
Step‑by‑Step Instructions for Thumbprint Cookies Recipe
Step 1: Cream Butter and Sugars
Start by preheating your oven to 375°F (190°C) and line a baking sheet with parchment paper. In a large mixing bowl, use a hand mixer to cream 1/2 cup of softened unsalted butter until smooth and fluffy, about 2-3 minutes. Gradually add in 1/4 cup of granulated sugar and 1/4 cup of light brown sugar, mixing well to combine and scraping the bowl as needed.
Step 2: Incorporate Wet Ingredients
Next, add 1 egg yolk and 1 teaspoon of vanilla extract to the creamed mixture. Beat the mixture until the egg yolk is fully incorporated, which should take about 1 minute. The dough should start coming together, becoming silky and cohesive, perfect for our Thumbprint Cookies.
Step 3: Prepare the Dry Ingredients
In a separate bowl, whisk together 1 cup of all-purpose flour, 2 tablespoons of cornstarch, and a pinch of salt. Slowly add this dry mixture to your wet ingredients, stirring gently with a spatula until a crumbly dough forms. This dough will be the base for your delicious Thumbprint Cookies.
Step 4: Shape the Cookies
Scoop out tablespoon-sized portions of the dough and roll them into tight balls with your hands. If desired, roll each ball in granulated sugar for an extra sweet coating. Make an indentation in the center of each ball using your thumb—this will hold the sweet filling. For best results, chill the shaped dough in the refrigerator for at least 30 minutes.
Step 5: Fill the Thumbprints
While the dough chills, slightly warm your desired jam or filling of choice (like raspberry or Nutella) until it becomes more pourable. After the dough has chilled, carefully fill each indentation with a small dollop of the warmed jam, being mindful not to overfill, as this can cause overflow during baking.
Step 6: Bake the Cookies
Place your filled Thumbprint Cookies on the prepared baking sheet, spacing them about 2 inches apart. Bake in the preheated oven for 11 minutes, or until the edges are lightly golden while the centers remain soft. The aroma will fill your kitchen, signaling their delightful doneness.
Step 7: Cool and Serve
Once baked, remove the cookies from the oven and allow them to cool on the baking sheet for 5 minutes. This will help them firm up before transferring them to a wire rack to cool completely. Your homemade Thumbprint Cookies are now ready to be enjoyed, sharing warm memories and sweet moments with each delightful bite!

Thumbprint Cookies Recipe Variations
Feel free to personalize your Thumbprint Cookies with these delightful twists that beckon warmth and creativity in every bite!
-
Flavor Boost: Switch out the raspberry jam for strawberry, apricot, or even lemon curd for a refreshing twist. Each jam brings its personality, adding delightful layers to your cookies.
-
Nutty Crunch: Roll the cookie dough balls in crushed nuts before baking for an added crunch and nutty flavor. The contrast of textures will make your cookies unforgettable!
-
Chocolate Lover’s Dream: Use Nutella instead of jam for a rich, chocolatey center that’s sure to please. Just imagine biting into the soft cookie and tasting delectable hazelnut bliss.
-
Zesty Delight: Add citrus zest (like lemon or orange) to the dough for a bright, fresh flavor that pairs wonderfully with fruit fillings. The zest will awake your taste buds and elevate the cookie experience.
-
Gluten-Free Twist: Substitute all-purpose flour with a gluten-free flour blend for an equally tasty batch suitable for gluten-sensitive friends and family. They won’t even notice the difference!
-
Spicy Kick: Add a dash of cinnamon or a pinch of cayenne to the dough for a warm, spicy kick that’s a surprising delight with every bite.
-
Richness Factor: Replace egg yolk with a flax egg for a vegan alternative, ensuring everyone can enjoy these lovely cookies. The result will still be impressively tender and flavorful.
For more variations, you might enjoy trying your hand at these different recipes too! Don’t miss out on our Chocolate Chip Cookies or our delightful Pumpkin Chocolate Chip Cookies for more flavor ideas and baking inspiration. Dive into creativity, especially during holidays or gatherings, and let each cookie tell a story!
What to Serve with Classic Thumbprint Cookies?
Indulging in these sweet treats is a delightful experience, and pairing them with the right accompaniments elevates the moment.
-
Creamy Vanilla Ice Cream: The rich creaminess contrasts beautifully with the buttery texture of the cookies, enhancing their fruity sweetness.
-
Fresh Berries: A handful of fresh raspberries or strawberries adds a vibrant, tart flavor that complements the sweetness of the jam filling perfectly.
-
Herbal Tea: A warm cup of chamomile or mint tea brings warmth and fragrant notes, making for a comforting and soothing pairing.
-
Cheese Platter: Pair with soft cheeses like brie or goat cheese for a gourmet dessert experience, balancing the sweetness with a creamy, savory touch.
-
Nutty Coffee: A light coffee with hints of hazelnut or almond will contrast well and awaken the taste buds, enhancing the cookie’s flavors.
-
Chocolate Drizzle: Drizzle a bit of melted dark chocolate over your Thumbprint Cookies for added decadence and rich flavor, creating a delightful surprise with every bite!
Creating magical moments with your Thumbprint Cookies is easy when you explore these delicious pairings!
Expert Tips for Thumbprint Cookies Recipe
-
Butter Temperature: Use softened, room-temperature butter; it should be creamy but not melted for the right texture in your Thumbprint Cookies.
-
Chill the Dough: Don’t skip chilling the dough; it helps maintain the shape of your cookies and prevents them from spreading too much while baking.
-
Indentation Depth: Make a deep enough indentation in each cookie without reaching the bottom to hold the jam well, avoiding any spillover while they bake.
-
Jam Consistency: Slightly warm your jam before filling to make it more pourable; this will help it flow beautifully into the thumbprint without overflowing.
-
Watch Baking Time: Keep an eye on the cookies as they bake; they should be just golden at the edges—overbaking can result in a dry cookie instead of a tender bite.
-
Storage Tips: Store your Thumbprint Cookies in an airtight container with parchment paper between layers; this helps keep them fresh and prevents them from sticking together.
How to Store and Freeze Thumbprint Cookies
Airtight Container: Store your Thumbprint Cookies in an airtight container at room temperature for up to 4 days to keep them soft and delicious.
Refrigeration: If you live in a humid climate, consider refrigerating the cookies; they can last for up to 1 week but may become a bit firmer.
Freezer: For longer storage, freeze your cookies in a single layer on a baking sheet, then transfer to a freezer-safe bag for up to 3 months. You can bake them straight from the freezer, just adjust the baking time slightly.
Reheating: To enjoy cookies warm, reheat them in the oven at 300°F (150°C) for about 5-10 minutes, reviving their delightful texture!
Make Ahead Options
These Thumbprint Cookies are perfect for busy home cooks looking to save time without sacrificing flavor! You can prepare the cookie dough up to 24 hours in advance by following steps 1 through 4, rolling the dough into balls, and placing them in an airtight container in the refrigerator. Additionally, you can fill the thumbprints with jam up to 3 days ahead of baking; simply keep them stored in the fridge covered to preserve their softness. When you’re ready to bake, just preheat the oven and follow steps 5 and 6, and you’ll enjoy delicious, homemade Thumbprint Cookies whenever you crave them—all with minimal last-minute effort!
Thumbprint Cookies Recipe FAQs
What type of jam can I use for the thumbprint filling?
Absolutely! You can use any jam you prefer, such as raspberry, strawberry, or apricot. If you’re feeling adventurous, try filling them with Nutella or lemon curd for a fun twist!
How should I store my Thumbprint Cookies?
Store your Thumbprint Cookies in an airtight container at room temperature for up to 4 days. If you live in a humid area, refrigerate them for up to a week to keep them fresh, although they may become a bit firmer.
Can I freeze Thumbprint Cookies, and if so, how?
Yes, you can freeze these delightful cookies! After shaping and filling them, place the cookies in a single layer on a baking sheet. Freeze until solid, then transfer to a freezer-safe bag. They can be frozen for up to 3 months. When you’re ready to enjoy them, bake straight from the freezer, adjusting the bake time slightly to ensure they’re warmed through.
What should I do if my cookies spread too much while baking?
If your cookies spread too much, ensure that your butter is at the proper softened stage—not melted. Additionally, chilling the dough for at least 30 minutes before baking helps maintain the shape. If you frequently experience spreading, you might consider increasing the amount of cornstarch to give the cookies more structure.
Can I make these cookies vegan or gluten-free?
Very! For a vegan option, substitute the unsalted butter with vegan butter and replace the egg yolk with a flax egg (1 tablespoon ground flaxseed combined with 3 tablespoons water). You can also use a gluten-free flour blend instead of all-purpose flour to cater to gluten-free diets.
How can I tell if my Thumbprint Cookies are done baking?
The cookies are done when the edges turn a light golden brown while the centers remain soft. They may look slightly underbaked, but they will continue to firm up as they cool on the baking sheet. Enjoy your baking adventure with this Thumbprint Cookies Recipe!
Delicious Thumbprint Cookies Recipe for Sweet Moments
Ingredients
Equipment
Method
- Preheat oven to 375°F (190°C) and line a baking sheet with parchment paper. Cream together 1/2 cup butter, 1/4 cup granulated sugar, and 1/4 cup brown sugar until fluffy.
- Add 1 egg yolk and 1 teaspoon vanilla extract, mixing until fully incorporated.
- Whisk together 1 cup flour, 2 tablespoons cornstarch, and a pinch of salt in a separate bowl. Gradually mix into wet ingredients until crumbly dough forms.
- Scoop tablespoon-sized dough portions and roll into balls. Indent centers with your thumb; chill in fridge for 30 minutes.
- Warm desired jam slightly. Fill each indentation with a small dollop of jam after chilling.
- Bake for 11 minutes or until edges are lightly golden. Let cool for 5 minutes before transferring to a wire rack.
- Enjoy your homemade Thumbprint Cookies!
Leave a Reply