
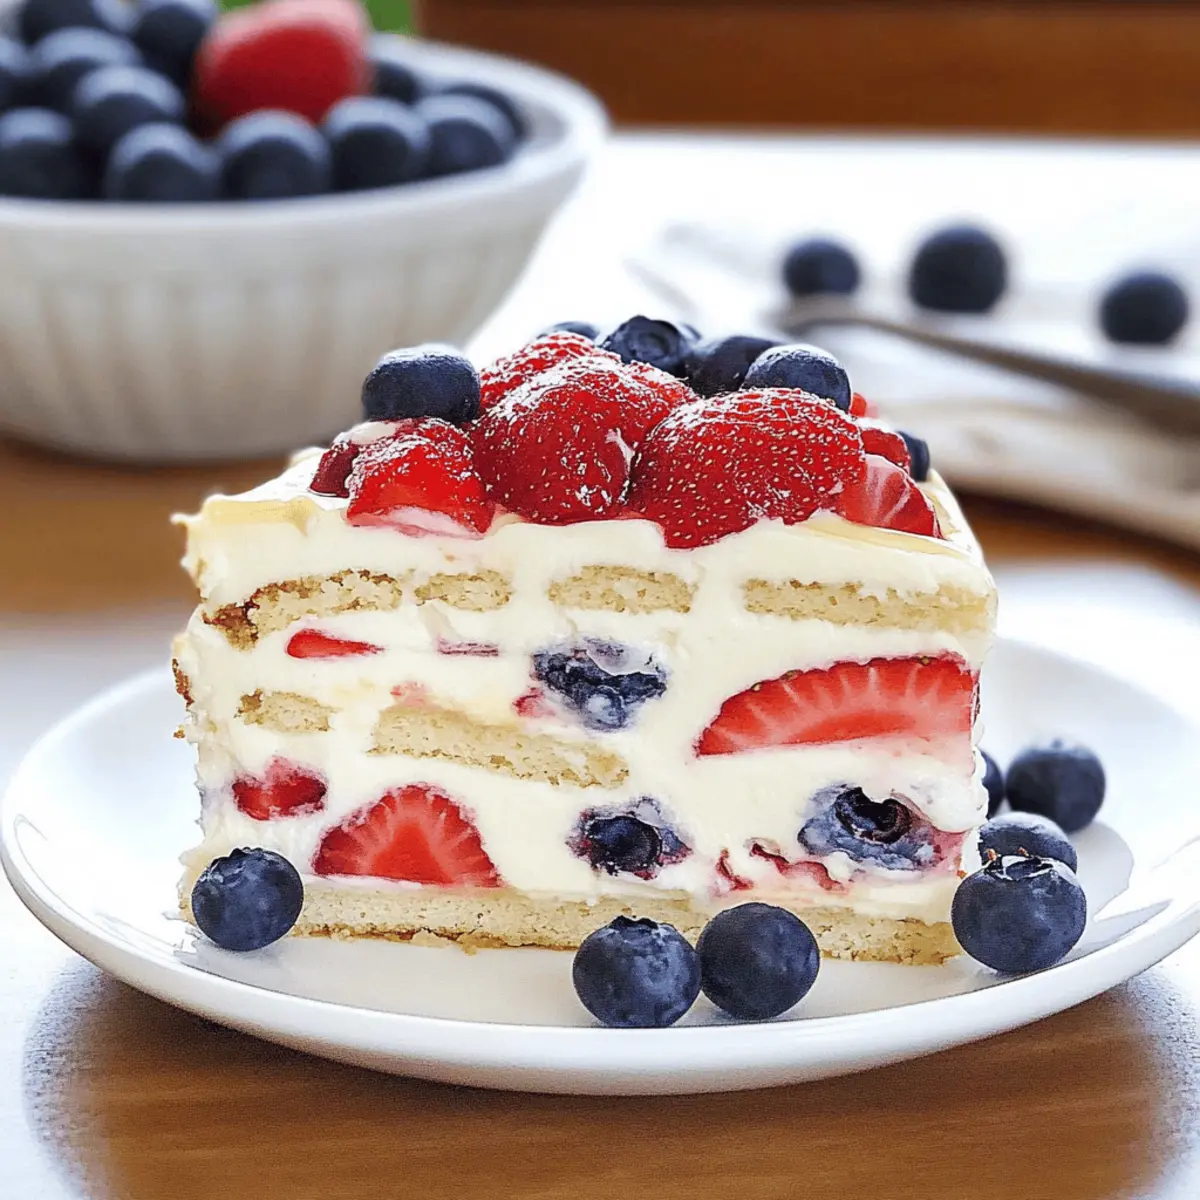
It’s amazing how a simple combination of fresh fruits can transform a warm day! As the sun shines brightly and the heat rolls in, I often find myself yearning for something cool and refreshing. That’s where my No Bake Summer Berry Icebox Cake comes in, featuring luscious strawberries and blueberries nestled in a creamy, dreamy filling all without turning on the oven. This quick and easy dessert is not only a delight to make, but it’s also a fantastic make-ahead treat, perfect for summer gatherings or last-minute barbecue plans. Layered with graham crackers that absorb the creamy filling, this cake delivers a light, fluffy experience that feels indulgent yet effortless. Curious about how to whip this enchanting dessert up? Let’s dive in!
Why Will You Love This Icebox Cake?
Simplicity is key: No baking is required, making it the perfect dessert for hot summer days when you want to avoid heating up the kitchen.
Refreshing flavors collide with vibrant strawberries and blueberries, creating a symphony of taste that’s both sweet and tangy.
Make-ahead magic: This cake can be prepared the day before your event, making entertaining easier than ever—simply chill and serve!
Versatile in substitutions, swap out cream cheese for a dairy-free option or use your favorite seasonal fruits like peaches.
Crowd-pleaser: It appeals to all, from kids to adults, elevating any barbecue or picnic with its stunning presentation and delightful taste.
Looking to impress even further? Try pairing it with a side of our Fried Strawberry Cheesecake or indulge in a slice of our Dubai Chocolate Cake.
Summer Berry Icebox Cake Ingredients
This delightful dessert is just a whisk away!
For the Cake Layers
- Graham Crackers – Create the perfect structure for this luscious Summer Berry Icebox Cake; substitute with vanilla wafers for a twist.
- Fresh Strawberries (3 cups, sliced) – Add refreshing sweetness and brightness; can be switched with raspberries if desired.
- Fresh Blueberries (1-1/2 cups) – Provide juicy bursts of flavor; can opt for blackberries for a different berry experience.
For the Cream Filling
- Cream Cheese (8 oz, softened) – Ensures a rich, creamy filling that complements the berries; use dairy-free cream cheese for a vegan alternative.
- Vanilla Instant Pudding (2 packages, 3.4 oz each) – Guarantees a smooth sweetness in every bite; swap with cheesecake-flavored pudding for added decadence.
- Cold Milk (2-1/2 cups) – Blends all filling ingredients seamlessly; any plant-based milk works beautifully too.
- Cool Whip (12 oz) or homemade whipped cream – Adds lightness and fluffiness; choose whipped coconut cream for a delightful dairy-free option.
For the Topping
- White Chocolate Chips (2 oz) – Drizzle on top for a touch of elegance and sweetness; dark chocolate makes a wonderful alternative.
This No Bake Summer Berry Icebox Cake is a refreshing treat that embodies the essence of summer in each bite!
Step‑by‑Step Instructions for Summer Berry Icebox Cake
Step 1: Prepare the Cream Filling
In a large mixing bowl, beat together 8 ounces of softened cream cheese and two packages of vanilla instant pudding until completely blended and smooth. This should take about 2-3 minutes using an electric mixer. The mixture should be creamy without lumps, creating a rich foundation for your Summer Berry Icebox Cake.
Step 2: Mix in the Milk
Gradually pour in 2-1/2 cups of cold milk while continuing to beat the mixture. Ensure that the milk is fully incorporated and the pudding mix is dissolved, which should take an additional 2 minutes of mixing. The filling will thicken slightly as you blend, resulting in a luxuriously creamy texture.
Step 3: Fold in the Whipped Cream
Gently fold in 12 ounces of Cool Whip or freshly whipped cream into the pudding mixture, taking care not to deflate it. Reserve about half a cup of whipped cream for later use. This step adds airiness and helps your Summer Berry Icebox Cake achieve a light and fluffy filling.
Step 4: Start Layering
Spread a thin layer of the reserved whipped cream on the bottom of a 9×13 inch pan. This layer acts as a sticky base for the graham crackers, preventing them from sliding. Use a spatula to ensure an even layer across the entire bottom, creating a perfect starting point for your delicious layers.
Step 5: Add the Graham Crackers
Layer graham crackers evenly over the base, ensuring they cover the entire surface. Depending on the size of your crackers, you might need to break some to fill gaps. This structure supports the creamy filling and fruit layers, soaking up the flavors as your Summer Berry Icebox Cake chills.
Step 6: Spread the Pudding Mixture
Using a spatula, spread a layer of the creamy pudding mixture evenly over the graham crackers. Make sure to cover every inch, so each bite is bursting with flavor. This filling will create a delightful creaminess that pairs perfectly with the fresh berries in your cake.
Step 7: Add the Berries
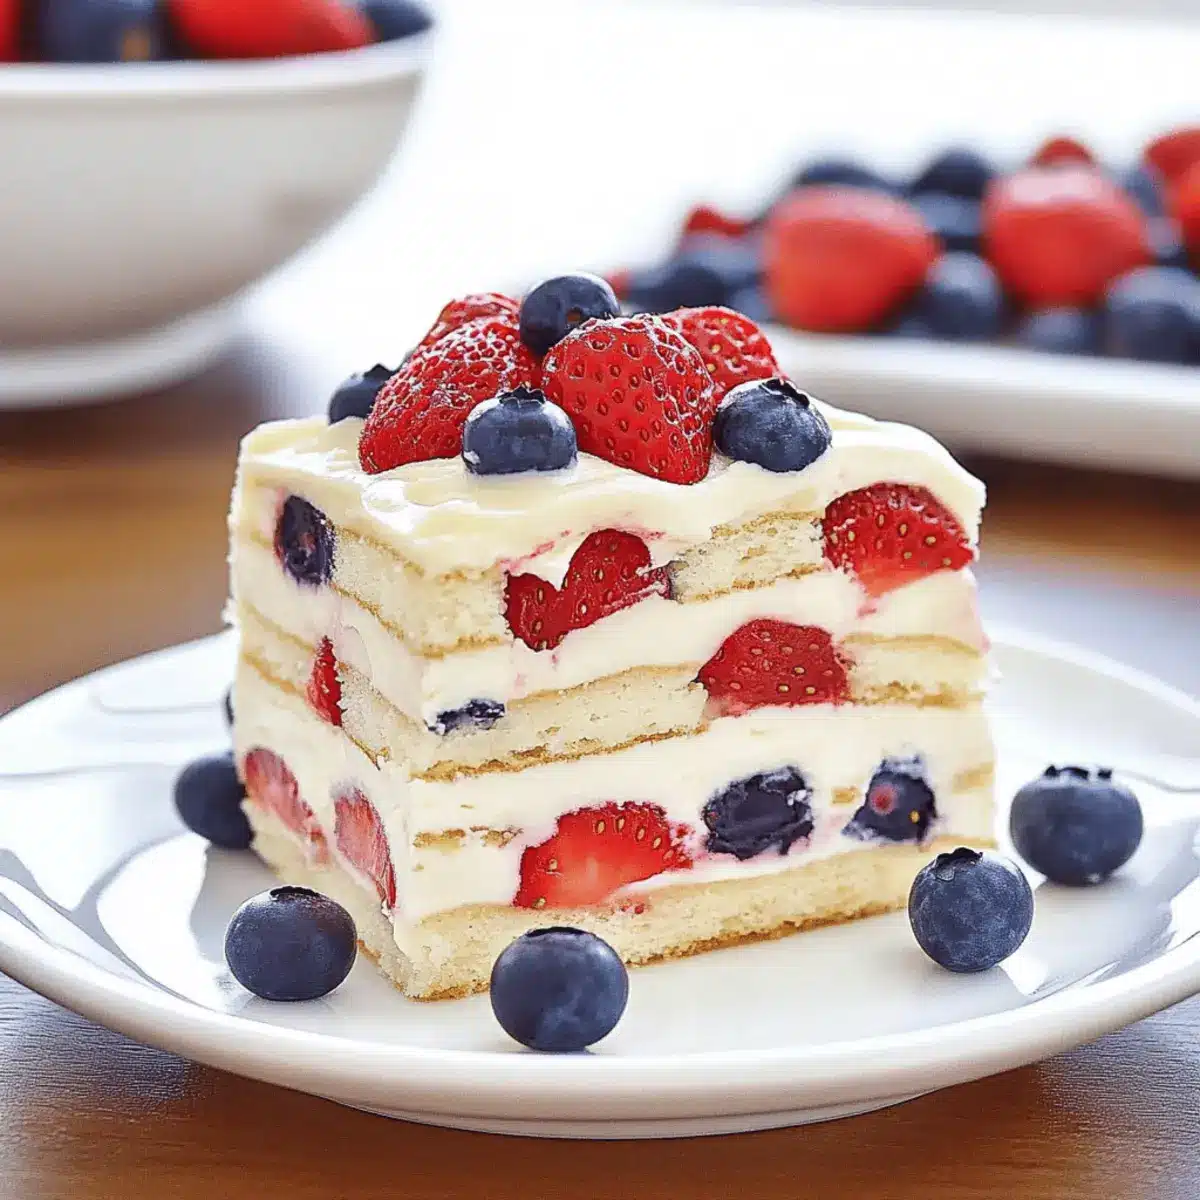
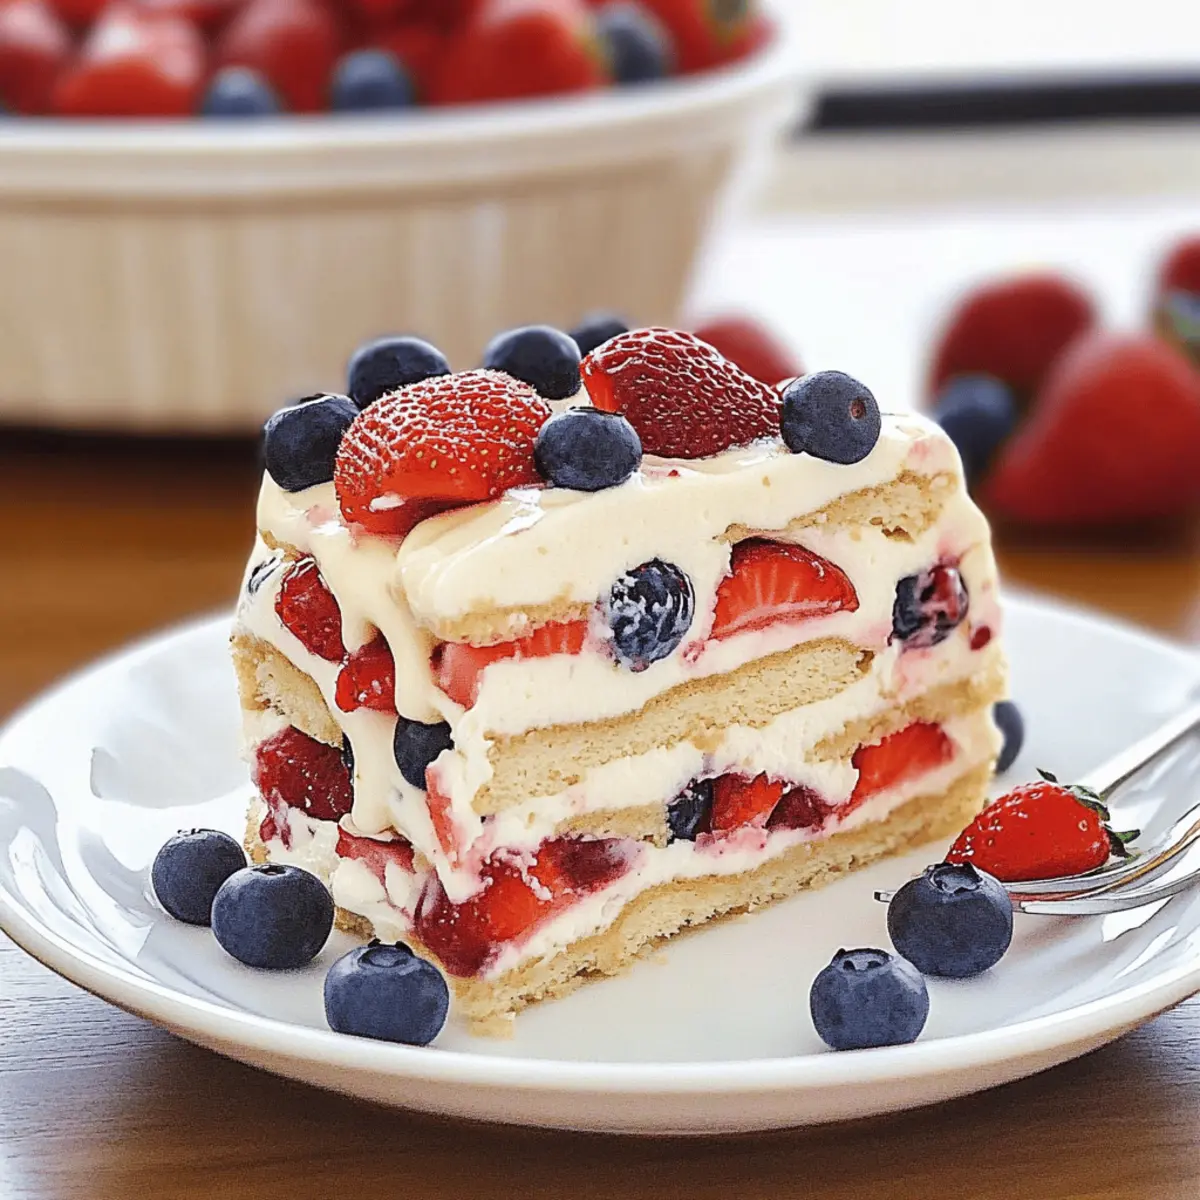
Next, place a layer of sliced strawberries and blueberries on top of the pudding layer. Aim for an even distribution to ensure everyone gets a taste of the refreshing fruit. The vibrant colors of the berries will peek through as you build your Summer Berry Icebox Cake, enhancing its visual appeal.
Step 8: Repeat the Layers
Continue layering by adding more graham crackers, followed by another layer of the pudding mixture and more berries. Repeat this process until all ingredients are used, finishing with a layer of berries on top. This creates a stunning striped effect that showcases the luscious ingredients.
Step 9: Chill the Cake
Cover the pan with plastic wrap and refrigerate for at least 4 hours, or ideally overnight. This chilling time allows the graham crackers to soften and absorb the filling, resulting in a creamy, cake-like texture that makes your Summer Berry Icebox Cake irresistible.
Step 10: Drizzle with Chocolate
Before serving, melt 2 ounces of white chocolate chips in the microwave for about 30 seconds, stirring until smooth. Drizzle the melted chocolate over the top of your cake for an elegant finishing touch. This adds a sweet note that beautifully complements the fruity layers of your delightful dessert.

What to Serve with No Bake Summer Berry Icebox Cake
Elevate your warm-weather gatherings with delightful accompaniments that complement this fruity, creamy wonder.
- Grilled Lemon Chicken: Juicy and zesty, the vibrant flavors of grilled chicken provide a savory balance to the sweet dessert.
- Fresh Fruit Salad: A medley of seasonal fruits brightens the palate, echoing the berry theme while adding refreshing contrasts.
- Minted Watermelon Slices: Crisp and cool, these slices cleanse the palate, making each bite of cake feel lighter.
- Homemade Lemonade: The tartness of homemade lemonade is a perfect foil to the sweet creaminess of the cake, keeping you refreshed.
- Chocolate Dipped Strawberries: For a chocolate lover’s twist, these decadent bites perfectly echo the sweetness of the icebox cake.
Pairing a light summer meal with the No Bake Summer Berry Icebox Cake creates a vibrant, delightful experience that leaves everyone smiling!
Make Ahead Options
These No Bake Summer Berry Icebox Cakes are perfect for busy home cooks looking to save time! You can prepare the entire cake up to 24 hours in advance. Simply follow the layering instructions and refrigerate it covered until you’re ready to serve. For the freshest results, wait to drizzle the melted white chocolate chips just before serving to maintain their creamy texture. If you’re making it a few days ahead, enjoy it within 3-4 days for the best flavor and texture, as the graham crackers will absorb moisture over time. Rest assured, your cake will be just as delicious and refreshing when it’s time to impress your guests!
Expert Tips for Summer Berry Icebox Cake
-
Room Temperature Cream Cheese: Make sure your cream cheese is softened to room temperature for easier blending and a smoother filling.
-
Fruit Preparation: Always wash and dry your strawberries and blueberries thoroughly before slicing. This helps with even layering and prevents extra moisture.
-
Layering Technique: Don’t rush the layering process; take your time to spread the pudding mixture evenly and layer the berries for an eye-catching presentation.
-
Chilling Time: Allow the cake to chill overnight if possible. This enhances the flavor and texture, making each bite of your Summer Berry Icebox Cake even more delightful.
-
Serving Tips: For a stunning presentation, garnish with additional fresh berries or a dollop of whipped cream when serving.
Summer Berry Icebox Cake Variations
Feel free to mix things up with these delightful twists on the Summer Berry Icebox Cake, inviting your creativity into the kitchen!
- Different Berries: Incorporate raspberries or blackberries for a tangy twist; each berry brings its own unique flavor profile to the table.
- Peach Paradise: Swap strawberries with chopped peaches for a sweet, summery alternative; the juicy peaches will add a lovely fragrance to the cake.
- Gluten-Free Option: Use gluten-free graham crackers or cookies; this allows everyone to enjoy this refreshing treat without worry!
- Dairy-Free Delight: Replace cream cheese with dairy-free cream cheese for a vegan version, and choose whipped coconut cream for a light, non-dairy touch.
- Cheesecake Flavor: Substitute vanilla pudding with cheesecake-flavored pudding mix; this adds an extra layer of richness that’s simply irresistible.
- Zesty Burst: Add a splash of lemon zest to the cream filling; it brightens the taste and gives a refreshing counterpoint to the sweetness of the berries.
- Chocolate Lover’s Twist: Drizzle with dark chocolate instead of white for a bolder flavor; the richness of dark chocolate perfectly complements the tart berries.
- Extra Crunch: Include a layer of chopped nuts, like almonds or pecans, for added texture; they lend a nice contrast to the smooth creamy layers.
These variations will surely add excitement to your No Bake Summer Berry Icebox Cake experience! If you’d like to explore more delicious dessert ideas, check out our Coffee Cake Cozy or indulge in a piece of Bee Sting Cake. Happy baking!
Storage Tips for Summer Berry Icebox Cake
Fridge: Store the cake covered in the refrigerator for up to 3-4 days. This will keep it fresh while allowing the flavors to meld beautifully.
Freezer: For longer storage, freeze the unassembled layers (graham crackers, filling, and fruit). Assemble and refrigerate when ready to serve; it’s best enjoyed fresh!
Reheating: No reheating needed! Serve cold directly from the fridge for that refreshing taste on warm summer days.
Make-Ahead: Prepare this cake a day in advance and let it chill overnight to enhance the delicious flavors, making it perfect for gatherings.
Summer Berry Icebox Cake Recipe FAQs
What fruits can I use for this recipe?
You can use a variety of fruits, but for this No Bake Summer Berry Icebox Cake, fresh strawberries and blueberries work best. However, feel free to substitute with raspberries or even chopped peaches to create your own unique flavor combination!
How should I store my Summer Berry Icebox Cake?
Store the cake covered in the refrigerator for up to 3-4 days. This will ensure it stays fresh while allowing the flavors to meld beautifully together. Make sure it’s in an airtight container to prevent any absorption of unwanted odors.
Can I freeze the Summer Berry Icebox Cake?
Absolutely! To freeze, I recommend freezing the unassembled layers instead of the finished cake. Just prep the graham crackers, filling, and fruit, then freeze them separately. When you’re ready to serve, assemble the cake and refrigerate it overnight for optimal texture and flavor. Enjoy it fresh!
What if my cream cheese filling is lumpy?
No worries! If your cream cheese filling turns out lumpy, it’s likely because the cream cheese wasn’t softened enough before mixing. For a smoother filling, make sure to bring your cream cheese to room temperature before blending, and consider cutting it into small chunks for easier mixing.
Are there any dietary considerations I should keep in mind?
If you have dietary restrictions, you can easily make this No Bake Summer Berry Icebox Cake dairy-free by swapping out the cream cheese and Cool Whip with their dairy-free alternatives. Additionally, check your graham crackers to ensure they are suitable for your dietary needs, and opt for gluten-free versions if needed.
Can I make this cake ahead of time?
Yes! This cake can be made a day in advance, making it a fantastic option for busy schedules. Allow it to chill in the refrigerator overnight for the best flavor and texture. Just ensure it’s properly covered to keep it fresh!
Refreshingly Summer Berry Icebox Cake to Beat the Heat
Ingredients
Equipment
Method
- In a large mixing bowl, beat together cream cheese and vanilla pudding until smooth and creamy.
- Gradually add cold milk while mixing until pudding is fully incorporated and thickened.
- Fold in Cool Whip gently, reserving some for later.
- Spread reserved whipped cream on the bottom of a 9x13 inch pan.
- Layer graham crackers evenly over the bottom.
- Spread a layer of pudding mixture over the graham crackers.
- Add a layer of sliced strawberries and blueberries on top.
- Repeat layering with remaining ingredients, ending with a layer of berries.
- Cover and refrigerate for at least 4 hours or overnight.
- Melt white chocolate and drizzle over the top before serving.
Leave a Reply