
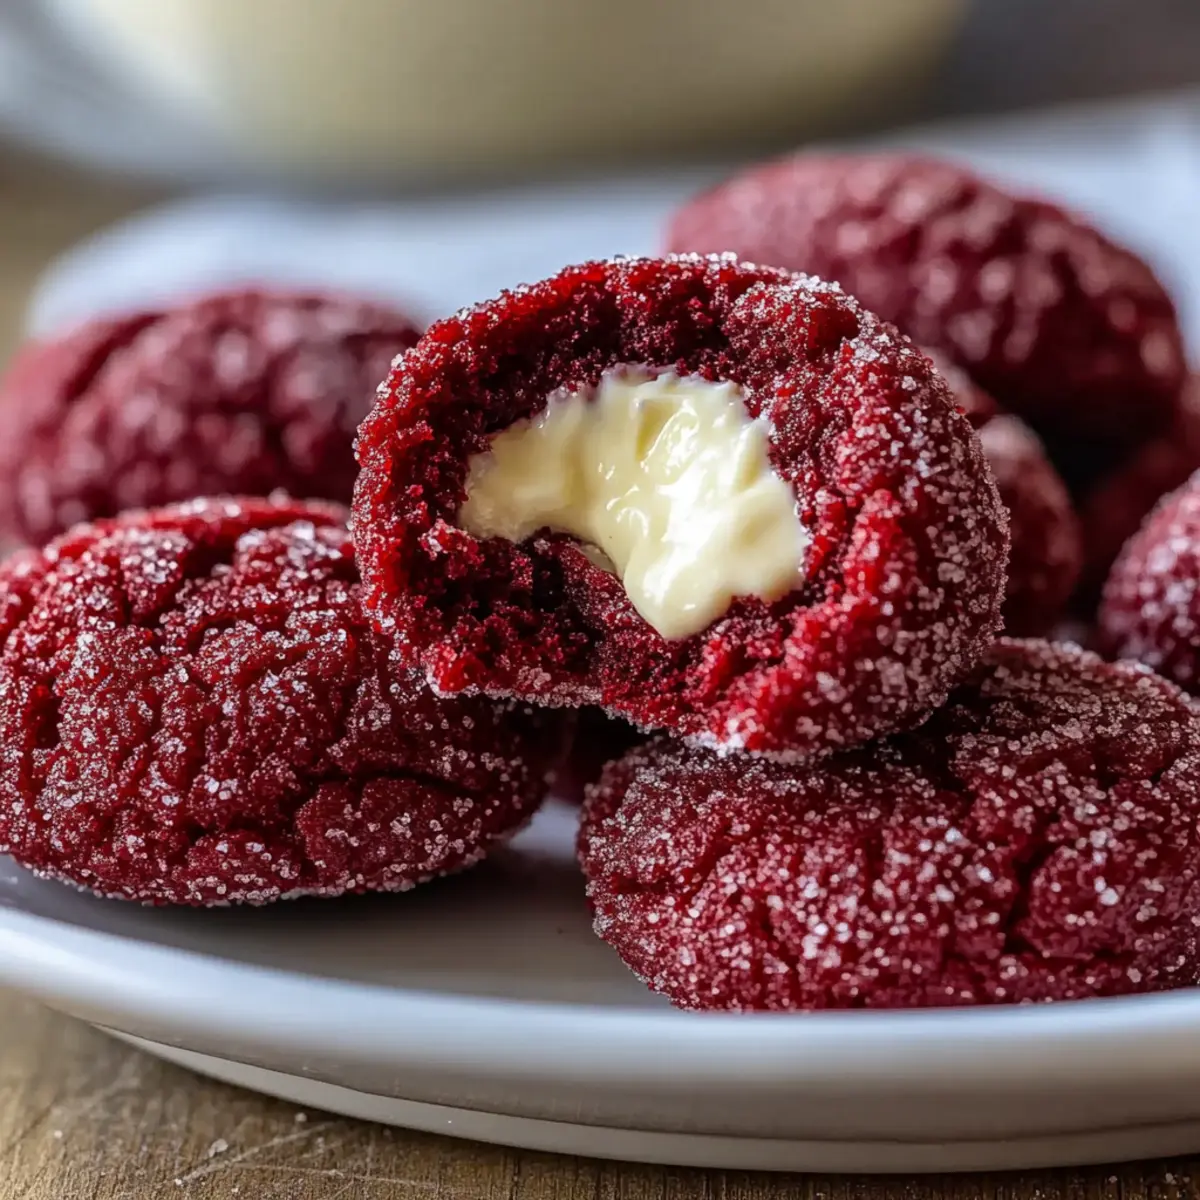
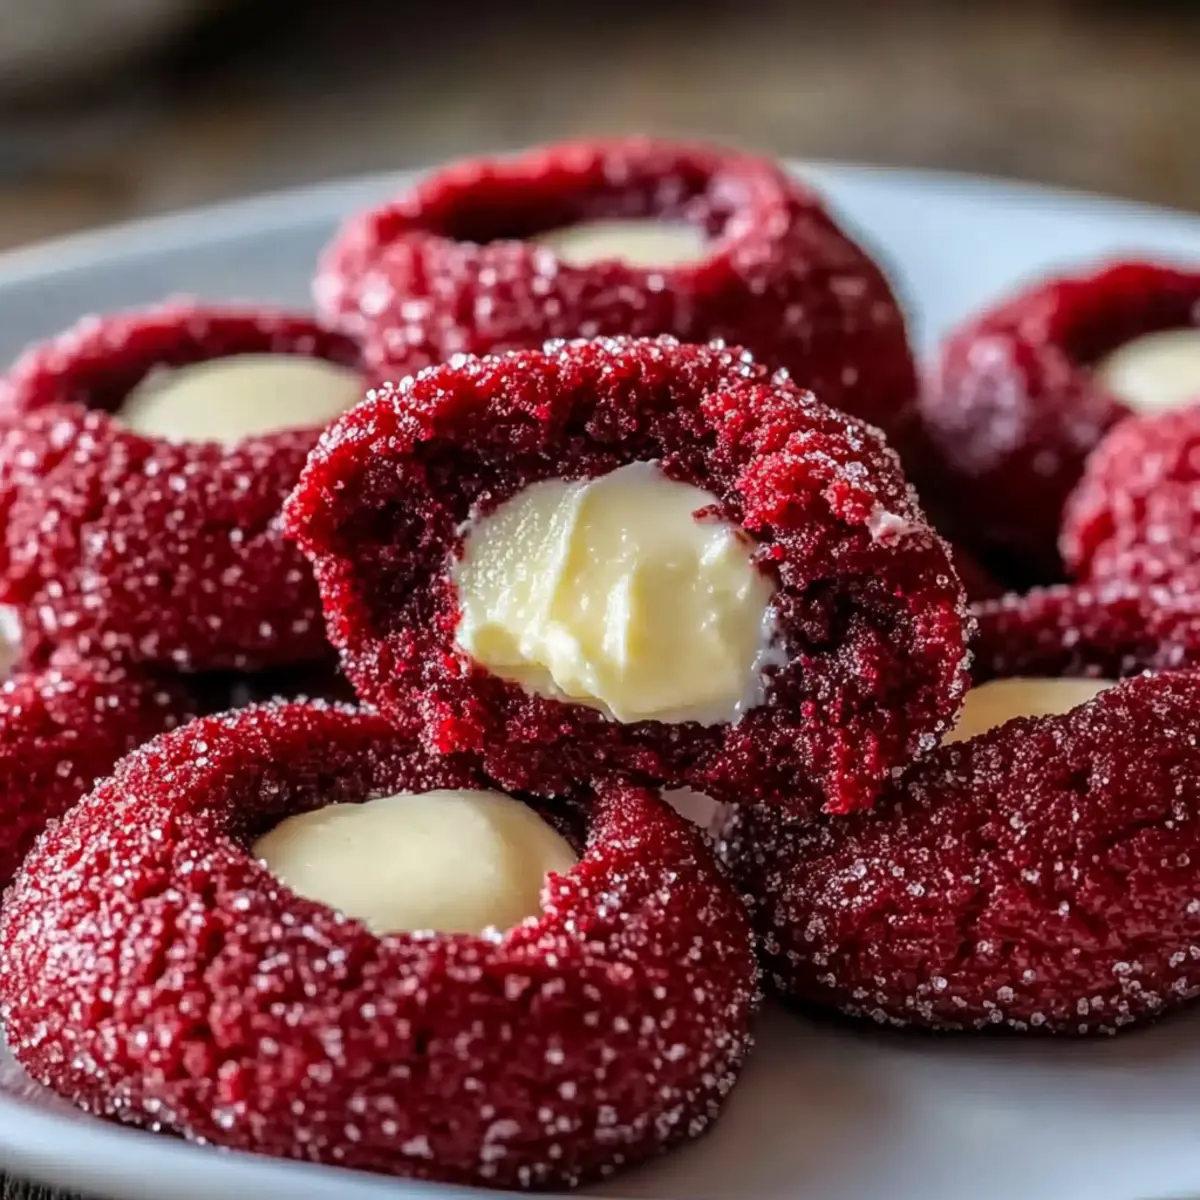
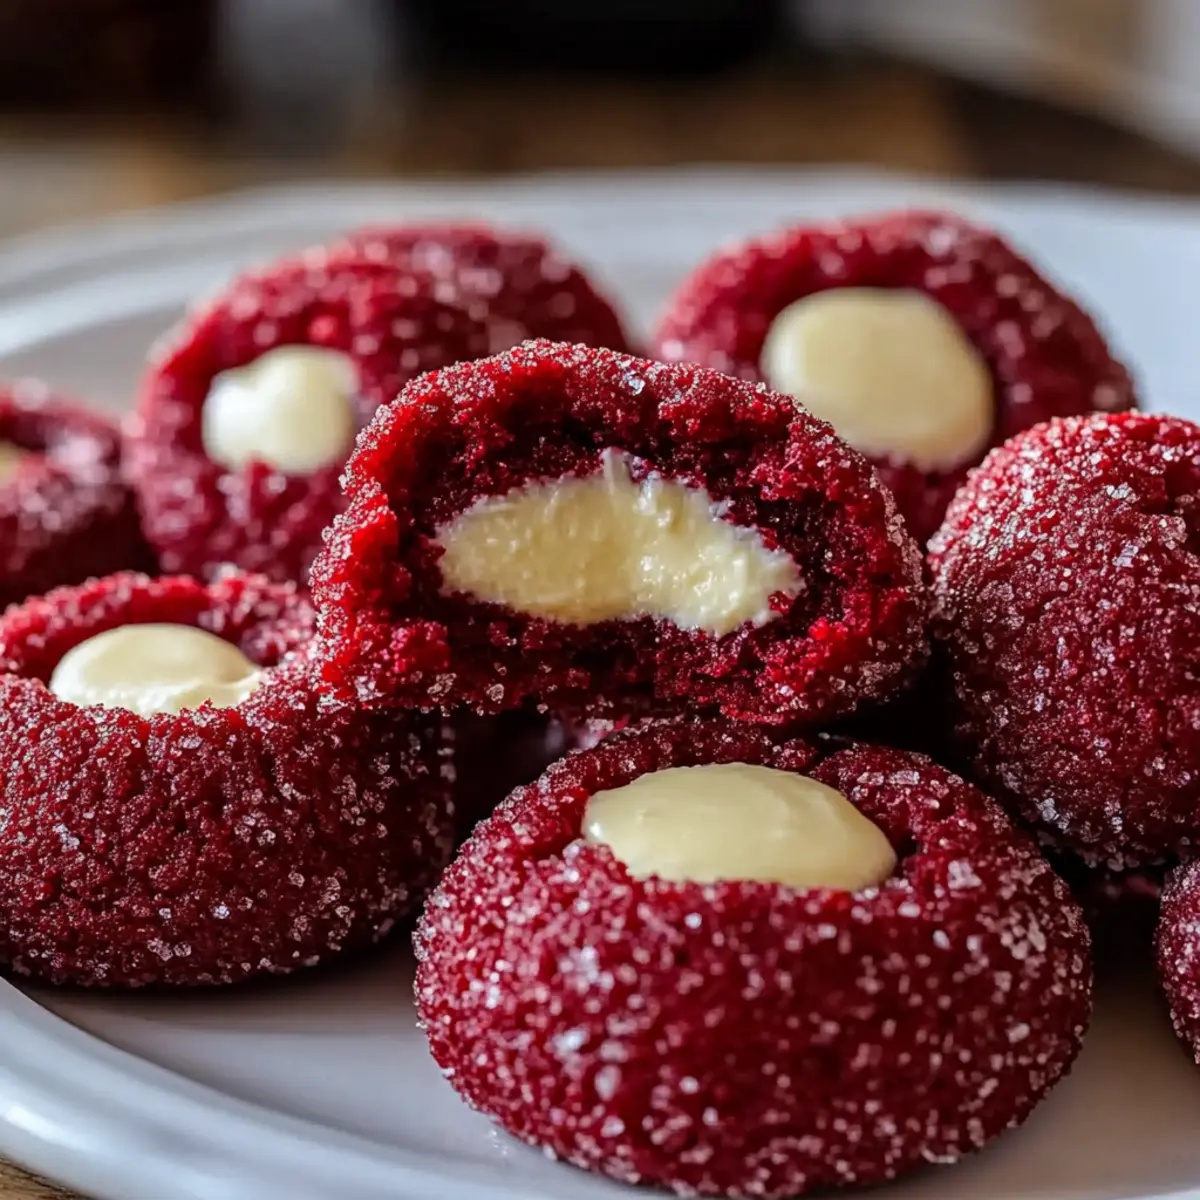
As I set out to create something special in my kitchen, the allure of Red Velvet Thumbprint Cookies called to me like a siren’s song. There’s just something magical about these vibrant treats, where the soft and chewy cookies cradle a creamy, dreamy cream cheese filling. Not only do these cookies shine on any dessert table, but their moist texture ensures you won’t encounter the dreaded dryness that often plagues baked goods. Plus, they are surprisingly simple to whip up, making them the perfect indulgence for a cozy afternoon or a delightful surprise for your loved ones. Are you ready to dive into the world of luscious flavors and vibrant colors? Let’s embark on this baking adventure together!
What makes these cookies irresistible?
Soft, Chewy Texture: These Red Velvet Thumbprint Cookies are a perfect blend of tender and chewy, making each bite a delightful experience.
Creamy Center Awaits: The tangy cream cheese filling complements the rich cookie, offering a scrumptious surprise with every mouthful.
Easily Customizable: Whether for a festive occasion or just a sweet craving, swap out the red hue for any color to match your theme.
Effortless Baking: A straightforward recipe that even novice bakers can conquer; you’ll impress friends and family without spending hours in the kitchen.
Crowd-Pleasing Appeal: These cookies are not just a treat; they’re a stunning centerpiece that’s sure to bring smiles and compliments.
For a chocolate twist, why not explore these Chocolate Chip Cookies next? Or, if you’re feeling adventurous, try the delightful flavors of Valentine Ganache Cookies.
Red Velvet Thumbprint Cookies Ingredients
Here’s everything you need to create the blissful Red Velvet Thumbprint Cookies filled with that dreamy cream cheese goodness!
For the Cookie Dough
- All-Purpose Flour – Provides essential structure to the cookies; measuring by weight ensures accuracy.
- Unsweetened Cocoa Powder – Brings a rich flavor that defines the red velvet profile; opt for high-quality brands for the best results.
- Baking Soda – Acts as a leavening agent, helping create tender cookies when activated by buttermilk.
- Salt – Enhances flavors and balances the sweetness; never underestimate its importance!
- Unsalted Butter (Softened) – Key for creaming with sugar, contributing to a light, fluffy texture.
- Granulated Sugar – Sweetens the cookies while allowing them to spread perfectly during baking for that lovely crackle.
- Large Eggs (Room Temperature) – Enriches the cookies, providing moisture; room temperature eggs mix better into the batter.
- Vanilla Extract – Elevates flavor and adds a hint of warmth; it’s a classic cookie ingredient.
- Red Food Coloring – Gives these cookies their signature show-stopping hue; gel options yield the most vibrant results.
- Buttermilk – Adds necessary moisture and a subtle tang; can easily be substituted with milk mixed with vinegar or lemon juice.
- Additional Granulated Sugar (for rolling) – Creates a sparkling finish on the cookies with a delightful crunch.
For the Cream Cheese Filling
- Cream Cheese (Softened) – Provides that dreamy, tangy sweetness; ensure it’s smooth for easy filling.
- Powdered Sugar (Sifted) – Sweetens the filling and achieves the perfect creamy consistency; sifting prevents grittiness.
With these ingredients in hand, you’re ready to bake up a storm and create some unforgettable Red Velvet Thumbprint Cookies that everyone will adore!
Step‑by‑Step Instructions for Red Velvet Thumbprint Cookies
Step 1: Preheat and Prepare
Begin by preheating your oven to 375°F (190°C). While the oven warms, line your baking sheets with parchment paper to ensure easy release of the cookies later. Setting up your work area with all the necessary tools like mixing bowls and a hand mixer will keep the process smooth and enjoyable.
Step 2: Mix Dry Ingredients
In a medium bowl, whisk together the all-purpose flour, unsweetened cocoa powder, baking soda, and salt until well combined. This step adds depth of flavor and ensures even distribution of the leavening agent. After mixing, set the bowl aside and focus on your wet ingredients for the Red Velvet Thumbprint Cookies.
Step 3: Cream the Butter and Sugar
In a large mixing bowl, use a hand mixer to cream together the softened unsalted butter and granulated sugar until the mixture is light and fluffy, about 2-3 minutes. This creaming process is essential as it incorporates air, contributing to the soft and chewy texture that defines your delicious cookies.
Step 4: Incorporate Eggs and Flavorings
With the mixer on low speed, add the large eggs one at a time to the creamed butter and sugar, blending well after each addition. Then, add the vanilla extract and red food coloring, mixing until everything is evenly combined and that beautiful red hue permeates the mixture, signaling it’s time for the dry ingredients.
Step 5: Combine Wet and Dry Ingredients
Gradually add the dry ingredients and buttermilk to the wet mixture, alternating between the two. Start with a third of the dry mix followed by half the buttermilk, and repeat, ending with the dry ingredients. Mix gently until just combined, avoiding overmixing to ensure the cookies remain tender and soft.
Step 6: Chill the Cookie Dough
Cover the dough with plastic wrap and chill it in the refrigerator for at least 30 minutes. Chilling the dough is crucial for easy handling later and helps maintain the shape of the cookies as they bake. While you wait, you can prepare the cream cheese filling for when the cookies are ready to be filled.
Step 7: Shape and Coat Cookies
Once chilled, scoop the cookie dough into uniform balls, about an inch in diameter. Roll each ball in granulated sugar for a sparkling finish before placing them on your prepared baking sheet, leaving enough space between them for spreading as they bake.
Step 8: Indent and Bake
Using your thumb or the back of a measuring spoon, create an indent in the center of each dough ball. Place the baking sheet in the preheated oven and bake for 8-10 minutes. Look for the edges to be set while the centers remain slightly underbaked to keep that chewy texture in the Red Velvet Thumbprint Cookies.
Step 9: Cool Before Filling
Carefully remove the cookies from the oven and let them cool on the baking sheet for a few minutes before transferring them to a wire rack. Allow the cookies to cool completely; this step is essential for the cookies to firm up and hold the cream cheese filling without becoming soggy.
Step 10: Prepare the Cream Cheese Filling
In a mixing bowl, combine the softened cream cheese and butter, mixing until smooth. Gradually add the sifted powdered sugar while continuing to beat until the filling is creamy and well-blended. Finish with a splash of vanilla extract for extra flavor before filling your cooled cookies.
Step 11: Fill the Cookies
Once your cookies are fully cooled, spoon or pipe the creamy filling into the indented centers of each cookie. These Red Velvet Thumbprint Cookies are now ready to shine with their rich filling — the perfect blend of tangy and sweet that will have your family or guests coming back for more!
What to Serve with Red Velvet Thumbprint Cookies?
The magic isn’t just in these cookies; it’s in how they complement your cozy gatherings and sweet moments.
-
Glass of Milk: The classic duo! Cold milk balances the sweetness and enhances the creamy filling, making every bite a delight.
-
Rich Coffee: Pair these cookies with a warm cup of coffee to accentuate the deep chocolate flavors, creating a delightful harmony of taste.
-
Vanilla Ice Cream: Scoop some vanilla ice cream alongside your cookies for a creamy contrast; the coolness offsets the rich, chewy texture beautifully.
-
Fresh Berries: Sweet and tart raspberries or strawberries add a pop of freshness, elevating the dessert platter and providing a refreshing bite.
-
Whipped Cream: A dollop of fluffy whipped cream on the side brings an airy texture that complements the dense cookies perfectly.
-
Chocolate Drizzle: Finish them off with a drizzle of melted chocolate for an indulgent touch that enhances their irresistibly rich flavor.
-
Sparkling Lemonade: Refreshing and bubbly, a glass of this adds a zesty twist that cuts through the sweetness of the cookies.
-
Tea Selection: A floral herbal tea can introduce calming notes, making for an exquisite afternoon snack with a hint of sophistication.
Storage Tips for Red Velvet Thumbprint Cookies
Fridge: Filled Red Velvet Thumbprint Cookies should be stored in an airtight container in the refrigerator for up to 3-4 days to maintain their moisture and texture.
Room Temperature: Unfilled cookies can be kept at room temperature in a covered container for up to 5 days, enjoying their soft and chewy goodness without refrigeration.
Freezer: For longer storage, freeze unfilled cookies for up to 3 months. Wrap them individually in plastic wrap, then place in a zip-top bag to prevent freezer burn.
Reheating: When ready to enjoy, simply thaw frozen cookies at room temperature for a few hours, or microwave for a few seconds. Avoid reheating filled cookies to preserve the cream cheese filling’s texture.
Make Ahead Options
These Red Velvet Thumbprint Cookies are perfect for anyone looking to save time during busy weeks! You can prepare the cookie dough and refrigerate it for up to 3 days before baking; just be sure to cover it tightly to prevent drying out. Additionally, the cream cheese filling can be made in advance and stored in the refrigerator for up to 2 days; simply re-whip it before filling the cooled cookies. This means you can enjoy delicious, freshly baked cookies with minimal effort on the day of serving. When you’re ready to bake, just scoop, roll, and allow your cookies to bake to perfection — they’ll be just as delightful, saving you time without sacrificing taste!
Red Velvet Thumbprint Cookies Variations
Feel free to mix things up with these delightful ideas that will spark your creativity and elevate your cookie experience!
-
Colorful Alternatives: Swap red food coloring for any gel colors like green or blue to match seasonal celebrations or personal favorites. This is a fun way to add a splash of color!
-
Gluten-Free: Substitute all-purpose flour with a certified gluten-free blend to make these cookies accessible for those with gluten sensitivities. They’re just as soft and chewy!
-
Nutty Addition: Incorporate finely chopped nuts, such as walnuts or pecans, into the dough for a delicious crunch that contrasts with the creamy filling. The nutty flavor brings warmth and texture.
-
Extra Chocolatey: Mix in some chocolate chips or chunks for an added chocolate kick. This variation will create a blissfully decadent treat that chocolate lovers can’t resist.
-
Spiced Up: Add a pinch of cinnamon or nutmeg to the dough for a warm, cozy flavor that pairs beautifully with the cream cheese filling. It’s like a hug in cookie form!
-
Vegan-Friendly: Use a flaxseed or chia seed mixture as an egg substitute, coconut oil in place of butter, and vegan cream cheese for the filling. You won’t miss the eggs or dairy at all!
-
Citrus Zest: Incorporate a teaspoon of orange or lemon zest into the cream cheese filling for a zesty twist that adds brightness and balances the sweetness. It’s a refreshing surprise!
-
Holiday Twist: During the holidays, consider adding peppermint extract to the cream cheese filling. This festive flavor will make your cookies smell and taste like the season.
If you’re seeking more exciting cookie ideas, try these Chocolate Chip Cookies or add an autumn flair with Pumpkin Chocolate Chip Cookies. Happy baking!
Expert Tips for Red Velvet Thumbprint Cookies
-
Chill for Success: A crucial step! Chilling the dough helps maintain the cookie shape and prevents excessive spreading during baking.
-
Perfect Bake Time: Keep an eye on your cookies! Remove them when the edges are set but the centers look slightly puffy to ensure the soft, chewy texture.
-
Avoid Tough Cookies: Remember to mix only until the ingredients are barely combined. Overmixing can lead to tough, dry Red Velvet Thumbprint Cookies.
-
Room Temperature Ingredients: Using room temperature eggs and cream cheese allows for better incorporation and a smooth texture in both cookies and filling.
-
Sift the Sugar: Sifting your powdered sugar before adding it to the cream cheese filling is essential for achieving that dreamy, smooth consistency without any grittiness.
Red Velvet Thumbprint Cookies Recipe FAQs
What is the best way to choose ripe ingredients for this recipe?
Absolutely! When selecting your ingredients, opt for fresh, high-quality items. For butter, choose unsalted and keep it at room temperature for easy creaming. Large eggs should also be room temperature; this not only helps with proper mixing but also contributes to a richer texture in your cookies. As for buttermilk, check the expiration date, and if unavailable, remember that milk mixed with a tablespoon of vinegar or lemon juice can serve as an excellent substitute!
How should I store my Red Velvet Thumbprint Cookies once they are made?
Very importantly! Filled cookies are best stored in an airtight container in the refrigerator for up to 3-4 days. This practice helps retain their beautiful moisture and texture. If you have unfilled cookies, you can keep them at room temperature for up to 5 days in a covered container to enjoy their soft, delightful flavor.
Can I freeze the Red Velvet Thumbprint Cookies?
Yes, indeed! For longer storage, unfilled cookies can be frozen for up to 3 months. Wrap each cookie individually in plastic wrap, making sure to keep them tightly sealed to avoid freezer burn. Place the wrapped cookies in a zip-top bag to add an extra layer of protection. When you’re ready to enjoy them, simply thaw at room temperature for a few hours or microwave for a few seconds — but be mindful to avoid reheating the filled cookies!
What should I do if my cookies turn out dry?
If you find your cookies are on the dry side, don’t fret! Common culprits include overbaking or overmixing the dough. It’s essential to remove them from the oven when the edges are set but the centers still look slightly underbaked; they will continue to firm up on cooling. Also, be gentle while mixing the batter — only combine until ingredients are just mixed. Remember, practice makes perfect!
Are there any allergy considerations for this recipe?
Certainly! These Red Velvet Thumbprint Cookies contain gluten (from all-purpose flour) and dairy (from butter, buttermilk, and cream cheese). If you’re making these for someone with dietary restrictions, you can easily substitute with certified gluten-free flour and dairy-free cream cheese alternatives. Always check the labels for potential allergens, and enjoy baking with a mindful heart!
How long can I keep the dough before baking?
You can chill your cookie dough in the refrigerator for up to 2-3 days before baking, which not only makes it easier to handle but also enhances the flavors as they meld together. Just be sure to wrap it tightly to prevent it from drying out. When you’re ready to bake, allow it to sit at room temperature for a few minutes to soften slightly before scooping!

Soft and Chewy Red Velvet Thumbprint Cookies with Cream Cheese
Ingredients
Equipment
Method
- Preheat your oven to 375°F (190°C) and line your baking sheets with parchment paper.
- In a bowl, whisk together flour, cocoa powder, baking soda, and salt.
- Cream together softened butter and sugar until light and fluffy, about 2-3 minutes.
- Add eggs one at a time, then add vanilla extract and red food coloring, mixing well.
- Gradually add dry ingredients and buttermilk, alternating until just combined.
- Chill the cookie dough, covered, in the fridge for at least 30 minutes.
- Scoop dough into balls and roll in granulated sugar.
- Indent the center of each ball and bake for 8-10 minutes.
- Let cool on baking sheets for a few minutes before transferring to a wire rack.
- Mix cream cheese and powdered sugar until smooth, then fill the cooled cookies.
Leave a Reply