
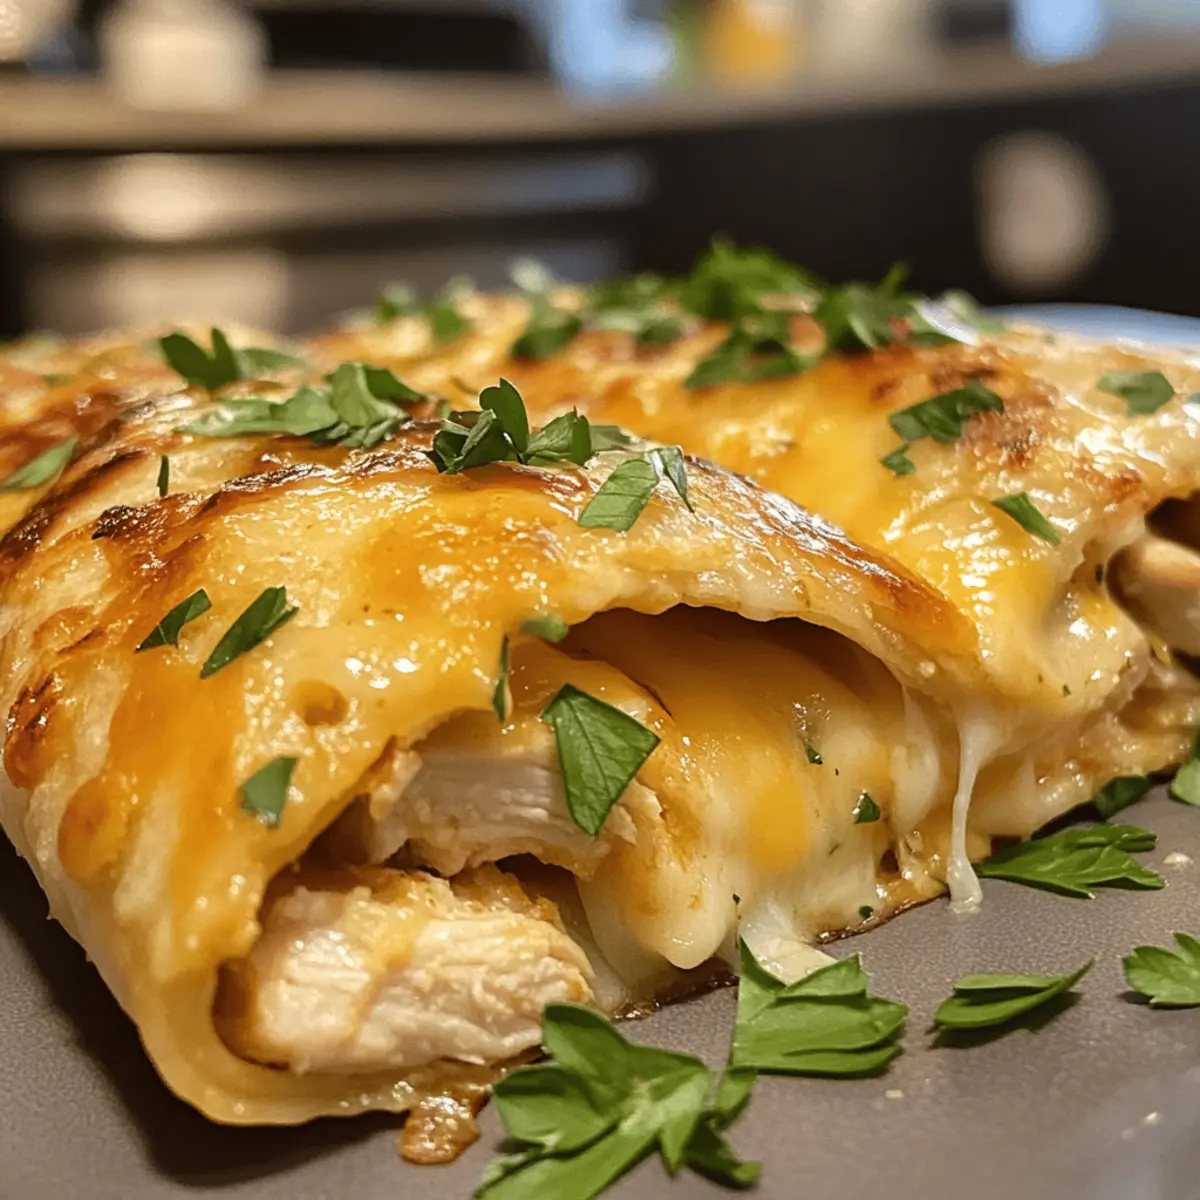
As I stood in my kitchen, the alluring aroma of garlic sizzled in the air, instantly transporting me to a cozy little café where comfort food reigned supreme. It’s amazing how something as simple as my Ooey-Gooey Cheesy Garlic Chicken Wraps can spark such delight. Juicy chicken, creamy melted cheese, and bold garlic combine to create a dish that’s not only indulgent but also a breeze to whip up—perfect for a busy weeknight dinner or a laid-back lunch. The best part? These wraps are incredibly versatile; customize them to fit your cravings, whether you prefer zesty pepper jack or veggie-loaded goodness. Ready to dive into a satisfying meal that may just become your new family favorite? Let’s roll!
Why Are These Wraps So Irresistible?
Comforting Satisfaction: There’s nothing quite like sinking your teeth into a warm, cheesy wrap that feels like a warm hug!
Quick and Easy: Whip them up in no time, making them perfect for busy weeknights or satisfying lunches.
Endless Customization: You can easily swap ingredients to create unique flavors or meet dietary needs—think gluten-free tortillas or spicy pepper jack cheese.
Crowd-Pleasing Appeal: From kids to adults, everyone loves these cheesy delights, making them fantastic for gatherings or family dinners.
Texture Heaven: Enjoy a delightful crunch on the outside while the inside is oozy and melty, achieving the ideal mouthfeel.
Once you try these Garlic Parmesan Chicken wraps, you’ll be hooked!
Ooey-Gooey Cheesy Garlic Chicken Wraps Ingredients
For the Chicken Filling
• Chicken – Provides protein and heartiness; rotisserie chicken is a time-saving option.
• Garlic – Delivers bold taste; freshly minced is best, but garlic powder works in a pinch.
• Cheese (e.g., mozzarella and cheddar) – Adds creaminess and richness; try pepper jack for a spicy twist.
For the Wraps
• Tortillas – Hold the filling together; opt for gluten-free tortillas if needed.
• Olive oil – Used for sautéing, infusing flavor into your wraps.
• Butter – Ensures a crispy exterior for the wraps as they cook.
For Garnishing
• Parsley – Optional, adds a pop of color and fresh flavor; don’t skip this touch!
Step‑by‑Step Instructions for Ooey-Gooey Cheesy Garlic Chicken Wraps
Step 1: Cook the Chicken
Begin by heating a skillet over medium heat and adding a splash of olive oil. Season your chicken with salt and pepper, then cook for about 6–8 minutes until golden-brown and fully cooked through. Once done, remove it from the heat, let it rest for a minute, and then dice the chicken into bite-sized pieces. Set it aside to be combined with your cheesy garlic filling.
Step 2: Sauté the Garlic
In the same skillet, add another drizzle of olive oil and bring the heat to medium. Toss in the minced garlic and sauté for about 30 seconds, or until it turns golden and fragrant—be careful not to burn it! This aromatic garlic base will add a sumptuous depth of flavor to your Ooey-Gooey Cheesy Garlic Chicken Wraps, so make sure it’s perfectly toasted before moving on.
Step 3: Combine Chicken and Cheese
Add the diced chicken back into the skillet with the sautéed garlic. Stir everything together to coat the chicken in the flavorful garlic oil. Remove the skillet from the heat and immediately add in your shredded mozzarella and cheddar cheeses, stirring until they melt into a creamy mixture that holds everything together beautifully.
Step 4: Prepare the Tortillas
Take a tortilla and lay it flat on a clean surface. Spoon a generous amount of the cheesy chicken mixture into the center of the tortilla, being careful not to overfill. Fold the sides of the tortilla in, then carefully roll it up tightly from the bottom to the top. This will create a snug wrap that keeps all the delicious filling secure.
Step 5: Crisp the Wraps
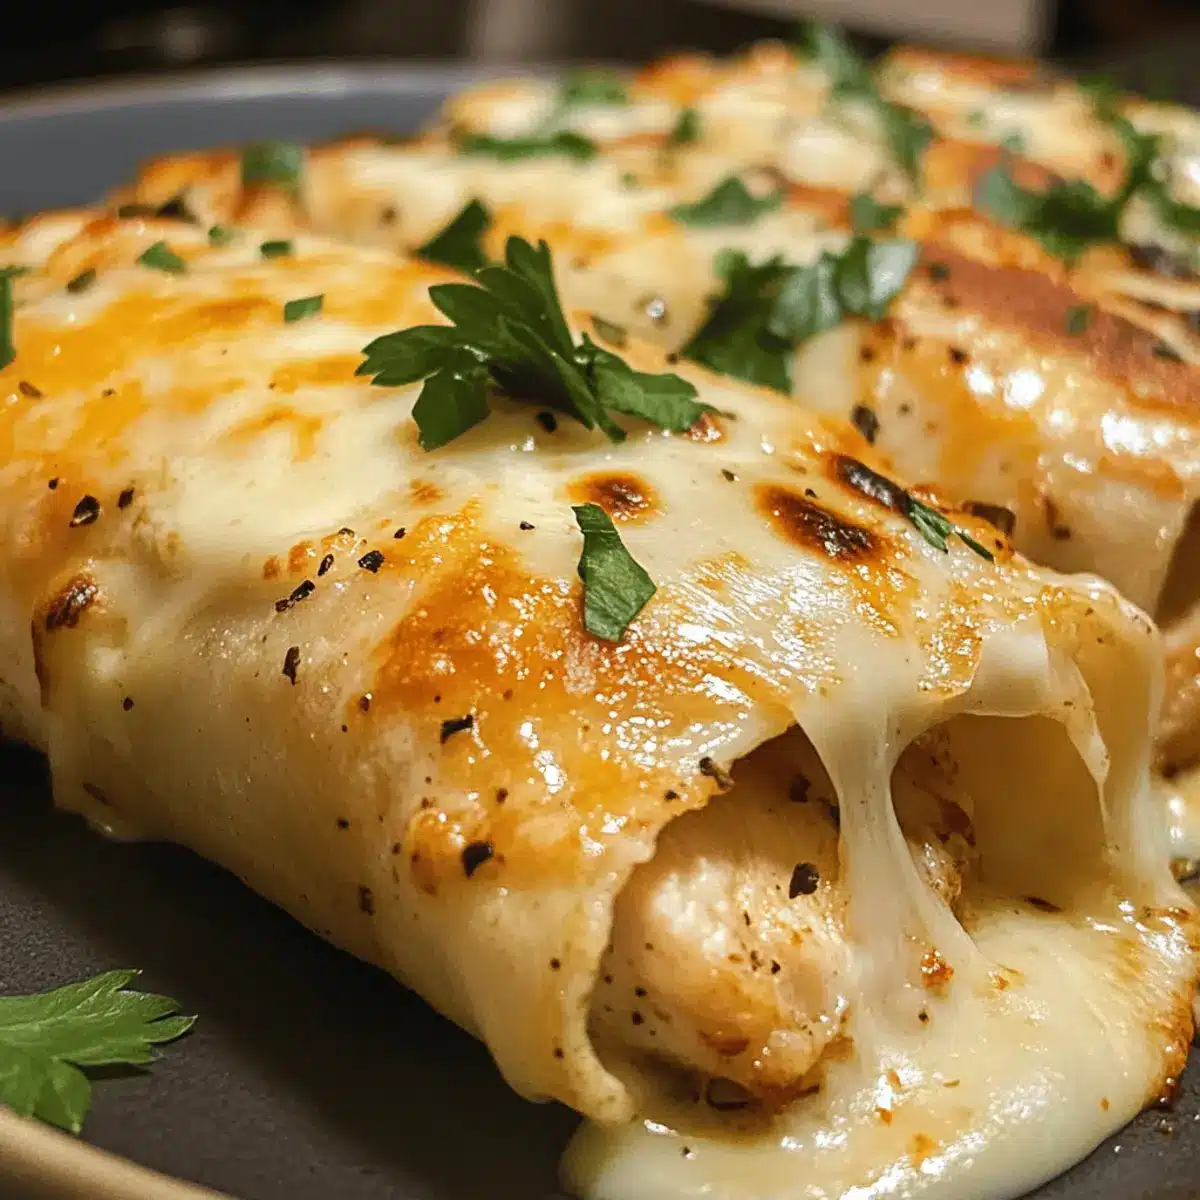
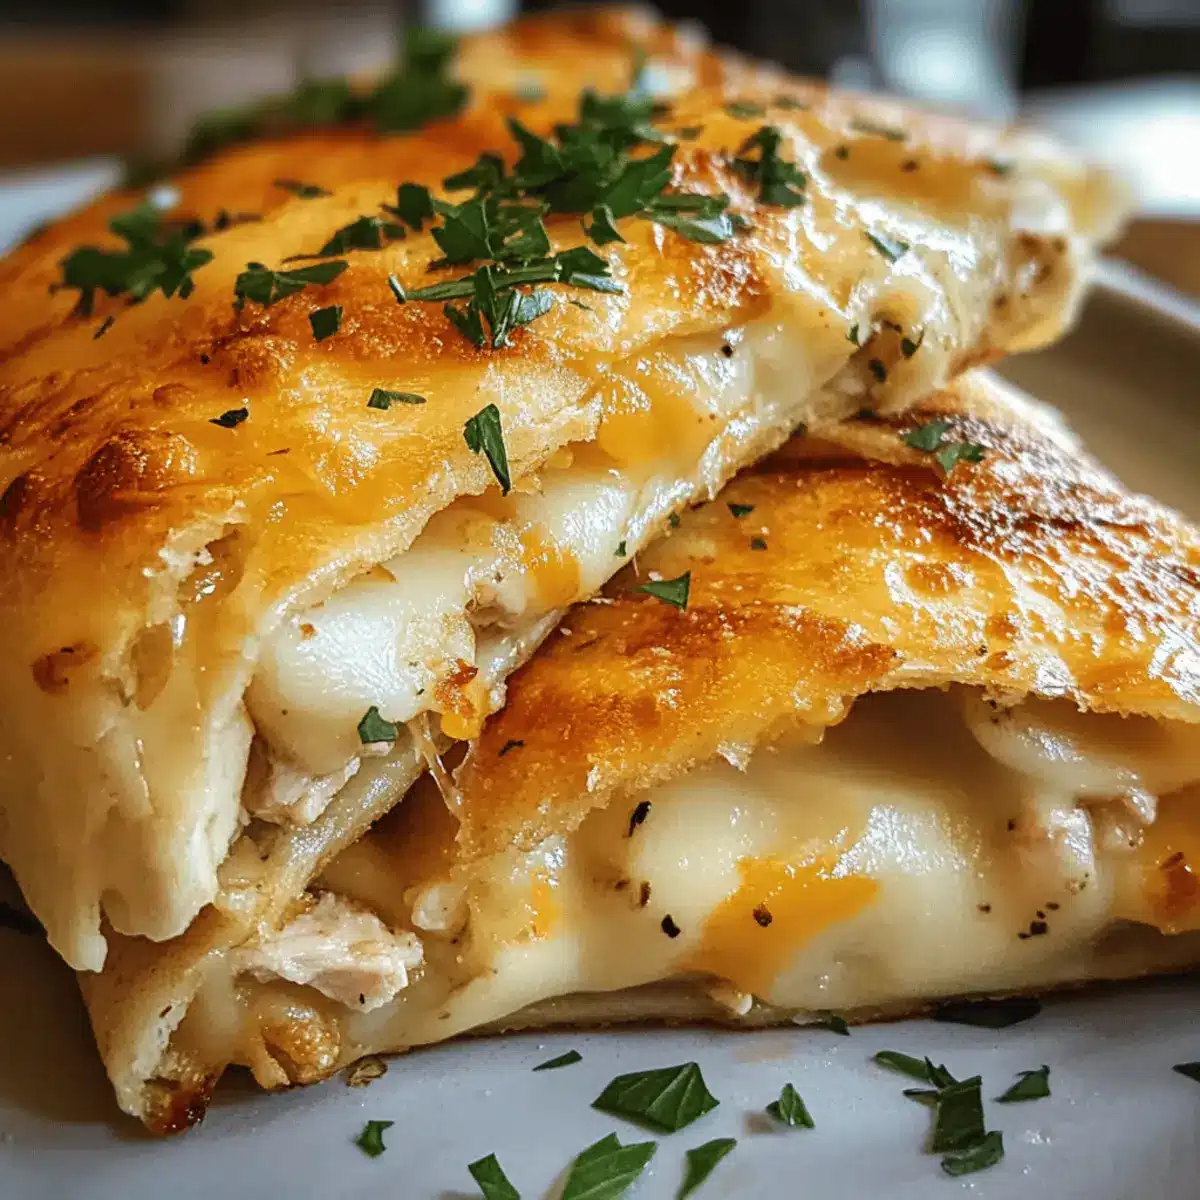
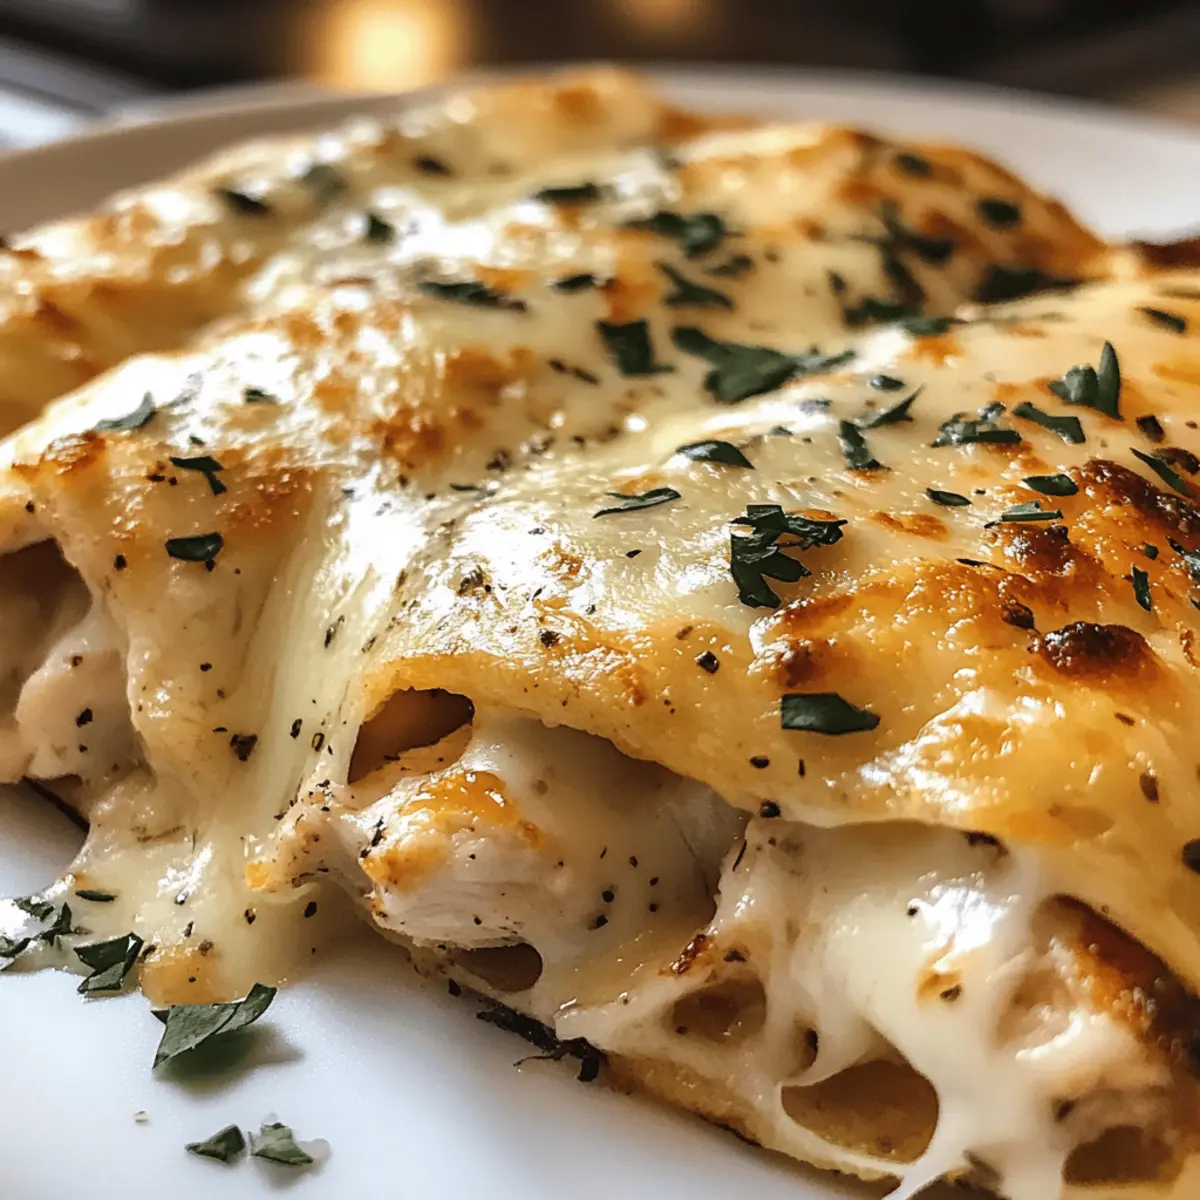
Heat a skillet over medium heat and add a tablespoon of butter, allowing it to melt and coat the pan. Place the wraps seam-side down in the pan and cook each side for 2–3 minutes, or until they’re beautifully golden brown and crispy. This step is crucial for achieving that satisfying crunch on the outside of your Ooey-Gooey Cheesy Garlic Chicken Wraps.
Step 6: Let Rest and Garnish
Once the wraps are cooked, transfer them to a cutting board and let them rest for 1–2 minutes to cool slightly. This resting time will help the cheese set a bit, making them easier to slice. Optionally, sprinkle some freshly chopped parsley over the wraps before slicing, adding a touch of color and freshness to your presentation.
Expert Tips for Ooey-Gooey Cheesy Garlic Chicken Wraps
-
Use Pre-Cooked Chicken: To save time, opt for rotisserie chicken. It cuts down on prep work while ensuring juicy flavor in your Ooey-Gooey Cheesy Garlic Chicken Wraps.
-
Mind the Fillings: Avoid overflowing your wraps! A small amount of filling goes a long way—too much can lead to messy spills during cooking.
-
Toast the Garlic Carefully: Sauté garlic until golden, not burnt. Burnt garlic can taste bitter and ruin the delicate flavor balance you’ve achieved in your lovely wraps.
-
Experiment with Cheeses: Feel free to mix up the cheese! Incorporating different varieties like gouda or pepper jack provides delicious twists to the overall flavor profile.
-
Brush with Garlic Butter: For an extra layer of flavor, brush the tortillas with a mix of melted butter and garlic before toasting, amplifying the delightful aroma and taste.
How to Store and Freeze Ooey-Gooey Cheesy Garlic Chicken Wraps
Fridge: Keep your wraps in an airtight container for up to 3 days. This helps retain their tenderness and prevents them from drying out.
Freezer: For longer storage, freeze the wraps individually. Wrap each one tightly in plastic wrap, then place them in a zip-top bag for up to 2 months.
Reheating: When you’re ready to enjoy, reheat in a skillet over low heat for about 5–7 minutes; this keeps them crispy. Avoid microwaving, as it can make them soggy.
Leftover Tips: If you have any leftover filling, store it separately in the fridge for quick snacking or to make fresh wraps later in the week.
Make Ahead Options
These Ooey-Gooey Cheesy Garlic Chicken Wraps are perfect for meal prep enthusiasts! You can prepare the filling—cooked chicken, sautéed garlic, and melted cheese—up to 3 days in advance. Just refrigerate it in an airtight container to maintain its delicious flavor. When you’re ready to serve, simply spoon the cold mixture onto the tortillas, roll them up, and crisp them in a hot skillet with butter. This way, you can enjoy restaurant-quality wraps with minimal effort on busier nights. Plus, allowing the filling to cool before wrapping will help keep the tortillas from getting soggy, ensuring they stay just as delightful as when freshly made!
Ooey-Gooey Cheesy Garlic Chicken Wraps Variations
Feel free to let your creativity shine and make these wraps uniquely yours!
-
Cheese Swap: Use gouda or pepper jack instead of mozzarella for a new flavor profile.
-
Veggie Boost: Add sautéed spinach, mushrooms, or onions to up the nutrition and flavor.
-
Spicy Kick: Toss in crushed red pepper or jalapeños for those who crave a bit of heat.
-
Low-Carb Option: Opt for whole wheat or low-carb tortillas to keep things lighter while staying delicious.
-
Protein Twist: Substitute chicken with shredded beef or turkey for a tasty variation.
-
Herb Infusion: Mix fresh herbs like basil or cilantro into the filling for an aromatic twist that brightens each bite.
-
Creamy Addition: Stir in a dollop of cream cheese or sour cream to make the filling even richer and creamier.
-
Sweet Treat: Swap garlic for a hint of sweetness by adding caramelized onions or some diced apple for a unique flavor experience.
Don’t forget to enjoy these alongside a hearty side, like Garlic Baby Potatoes or a comforting bowl of Tomato Soup to make the meal even more satisfying!
What to Serve with Ooey-Gooey Cheesy Garlic Chicken Wraps
Pair your wraps with delightful sides that elevate your meal and tantalize your taste buds.
- Fresh Garden Salad: A crisp salad with mixed greens and a light vinaigrette adds brightness and balances the richness of the wraps.
- Seasoned Potato Wedges: Crispy potato wedges, seasoned just right, make a comforting side that complements the cheesy flavors beautifully.
- Creamy Tomato Soup: Dip those cheesy wraps into a warm bowl of luscious tomato soup for an unbeatable comfort food experience.
- Sautéed Veggies: Colorful sautéed bell peppers and zucchini provide a nutritious crunch that enhances the overall flavor and texture.
- Spicy Pickles: A side of tangy, spicy pickles adds a zesty kick, perfectly offsetting the richness of the cheesy filling.
- Garlic Butter Breadsticks: These indulgent, soft breadsticks brushed with garlic butter are heavenly accompaniments to your cheesy wraps.
- Fruit Skewers: Refreshing fruit skewers are a sweet contrast, offering a light and fruity touch to round out the meal.
Whether you choose a hearty side or a light salad, these pairings will make your Ooey-Gooey Cheesy Garlic Chicken Wraps truly shine!
Ooey-Gooey Cheesy Garlic Chicken Wraps Recipe FAQs
What kind of chicken should I use for the wraps?
Absolutely! You can use rotisserie chicken for convenience, which is juicy and already cooked. Alternatively, fresh chicken breasts or thighs are great options that you can season and cook yourself. Aim for around 1 lb, cooking it until golden brown and thoroughly cooked, which typically takes about 6-8 minutes depending on thickness.
How should I store leftover cheesy garlic chicken wraps?
For the best storage, keep your wraps in an airtight container in the fridge for up to 3 days. This helps maintain their texture and flavor. If you find yourself with more wraps than you can eat within that timeframe, don’t worry!
Can I freeze these wraps?
Certainly! For freezing, wrap each Ooey-Gooey Cheesy Garlic Chicken Wrap tightly in plastic wrap and then place them in a zip-top freezer bag. They’ll stay good for up to 2 months. To reheat, simply thaw them overnight in the fridge and warm them in a skillet over low heat for about 5-7 minutes—this will keep them crispy.
What if my wraps are spilling open while cooking?
Very common! To prevent this, make sure not to overfill your tortillas; a generous amount is great, but too much can lead to spills. Additionally, ensure when rolling, you tuck in the sides while rolling tightly to hold everything in place. You can also secure them with toothpicks if you find that helpful.
Are there any allergy considerations for this recipe?
Yes! The recipe contains common allergens like dairy (cheese) and gluten (tortillas). For a gluten-free option, be sure to use gluten-free tortillas. If you’re dairy-free, consider using plant-based cheese alternatives, which melt differently but can still offer a nice finish to your wraps.
How can I enhance the garlic flavor in my wraps?
For a robust garlic kick, brush the outside of the tortillas with a mix of melted butter and minced garlic before toasting. This technique not only amplifies that garlicky aroma but also adds a delicious flavor to the crispy exterior, making your wraps even more irresistible!
Melt-in-Your-Mouth Ooey-Gooey Cheesy Garlic Chicken Wraps
Ingredients
Equipment
Method
- Begin by heating a skillet over medium heat and adding a splash of olive oil. Season your chicken with salt and pepper, then cook for about 6–8 minutes until golden-brown and fully cooked through. Once done, remove it from the heat, let it rest for a minute, and then dice the chicken into bite-sized pieces. Set it aside.
- In the same skillet, add another drizzle of olive oil and bring the heat to medium. Toss in the minced garlic and sauté for about 30 seconds until it turns golden and fragrant.
- Add the diced chicken back into the skillet with the sautéed garlic. Stir everything together to coat the chicken in the flavorful garlic oil. Remove the skillet from the heat and immediately add in your shredded mozzarella and cheddar cheeses, stirring until they melt into a creamy mixture.
- Take a tortilla and lay it flat on a clean surface. Spoon a generous amount of the cheesy chicken mixture into the center, fold the sides in, and roll tightly from the bottom to the top.
- Heat a skillet over medium heat and add a tablespoon of butter, allowing it to melt. Place the wraps seam-side down in the pan and cook each side for 2–3 minutes until golden brown and crispy.
- Once cooked, transfer the wraps to a cutting board and let them rest for 1–2 minutes. Optionally, sprinkle with freshly chopped parsley before slicing.
Leave a Reply