
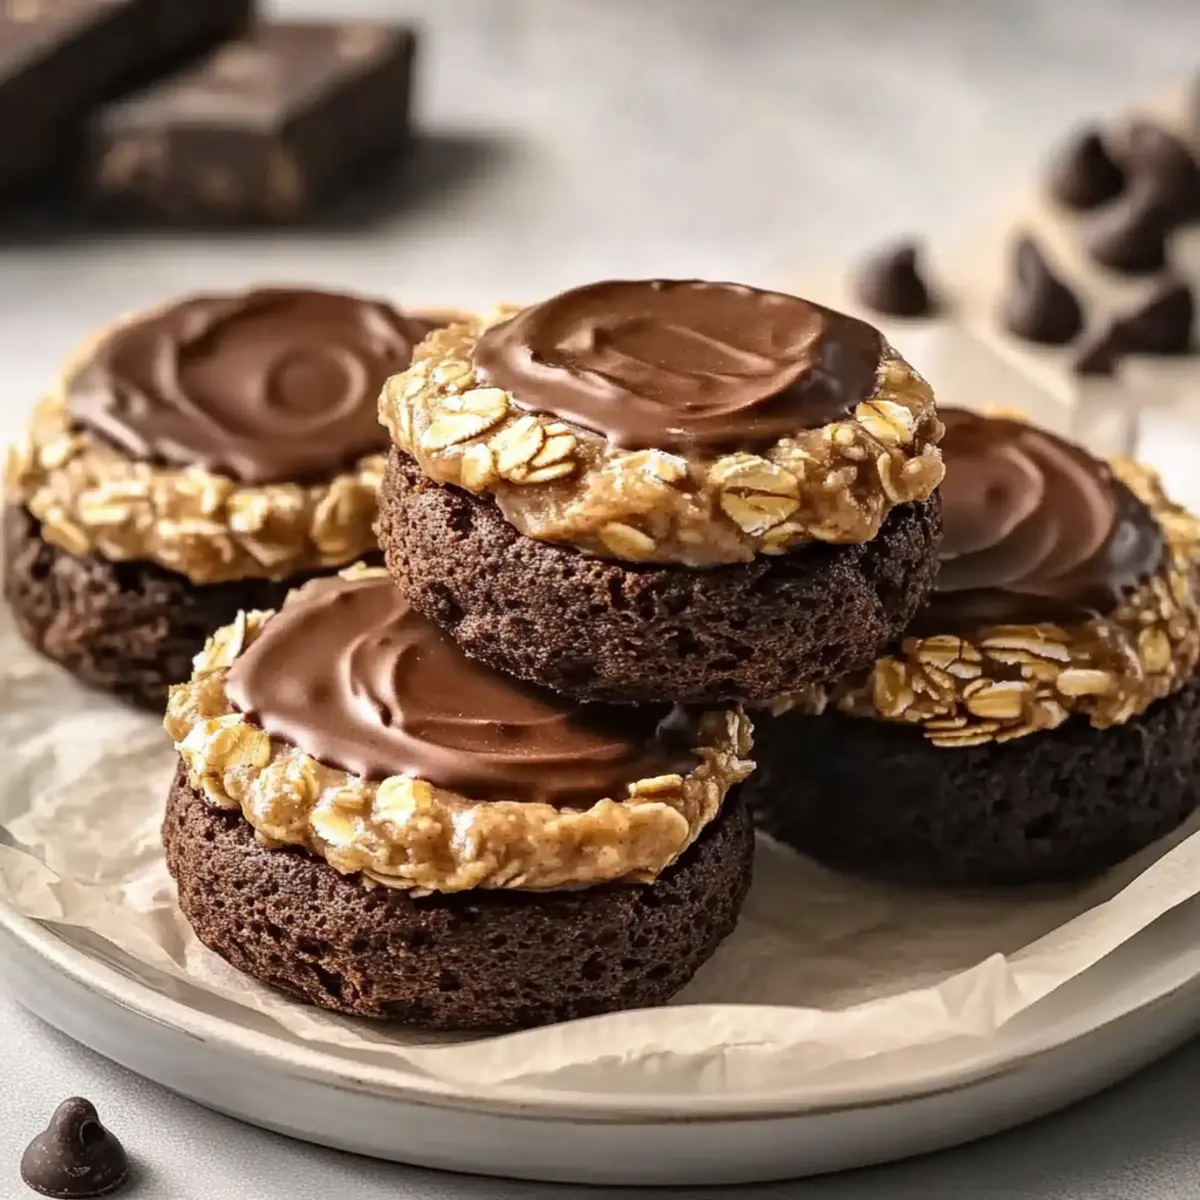
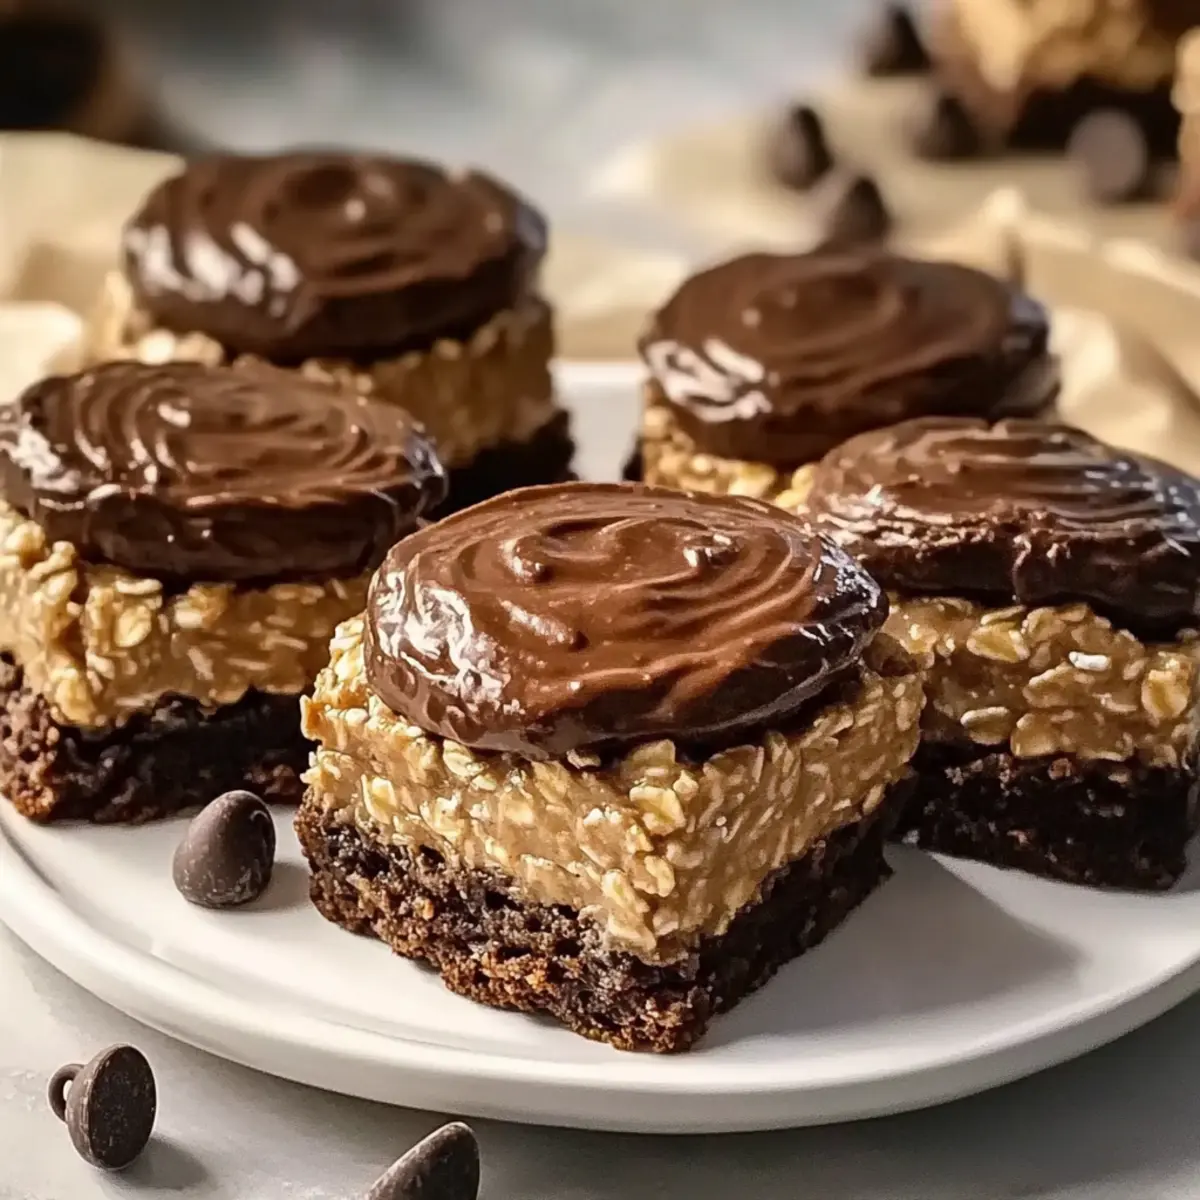
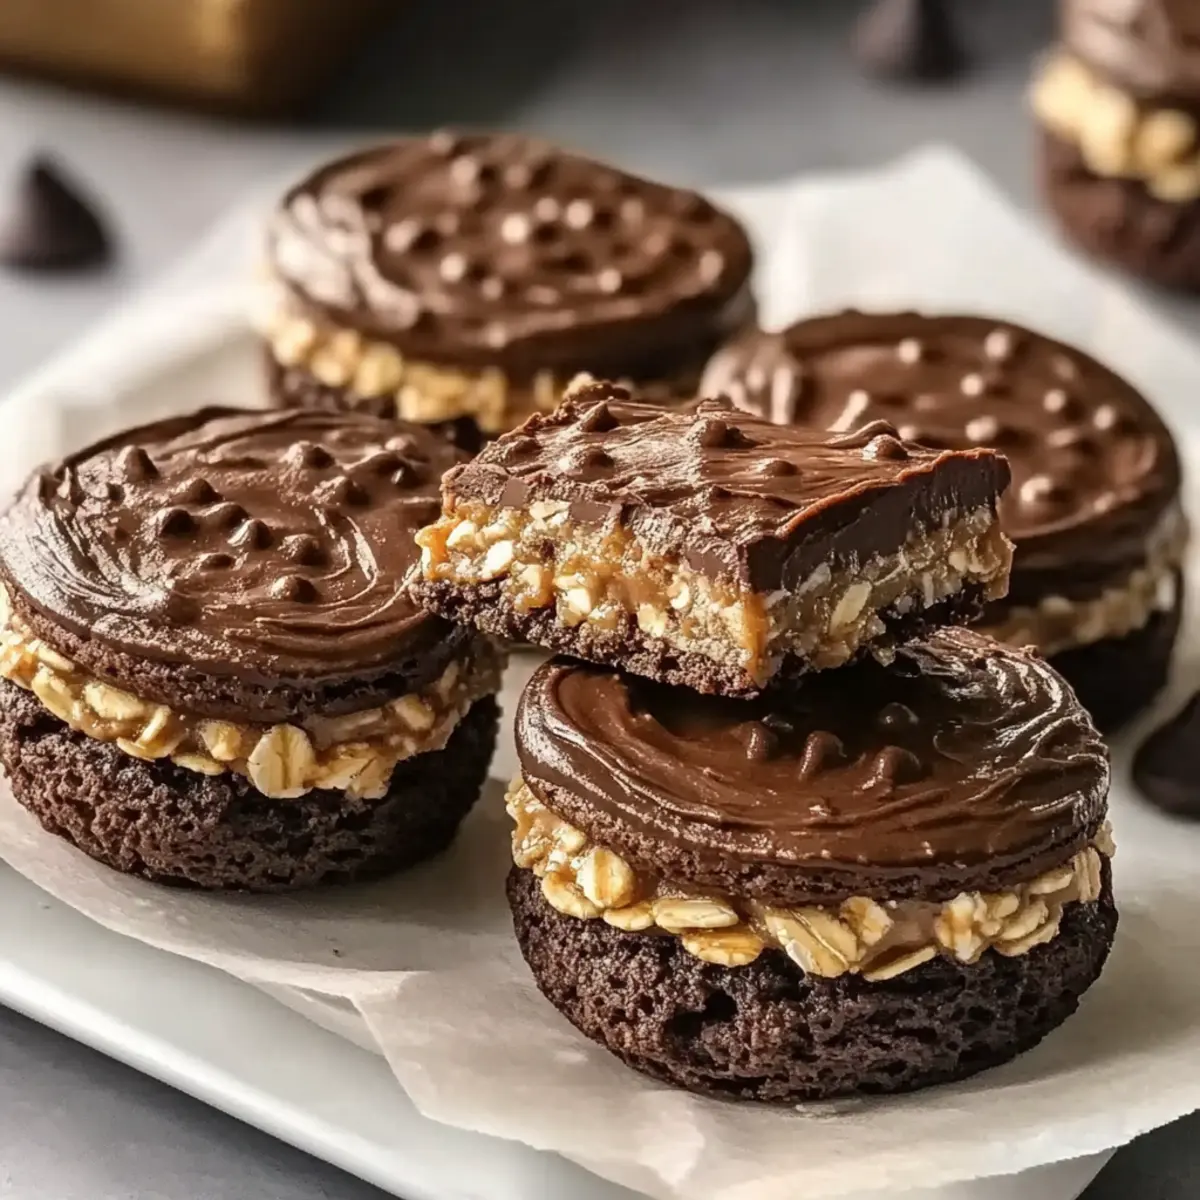
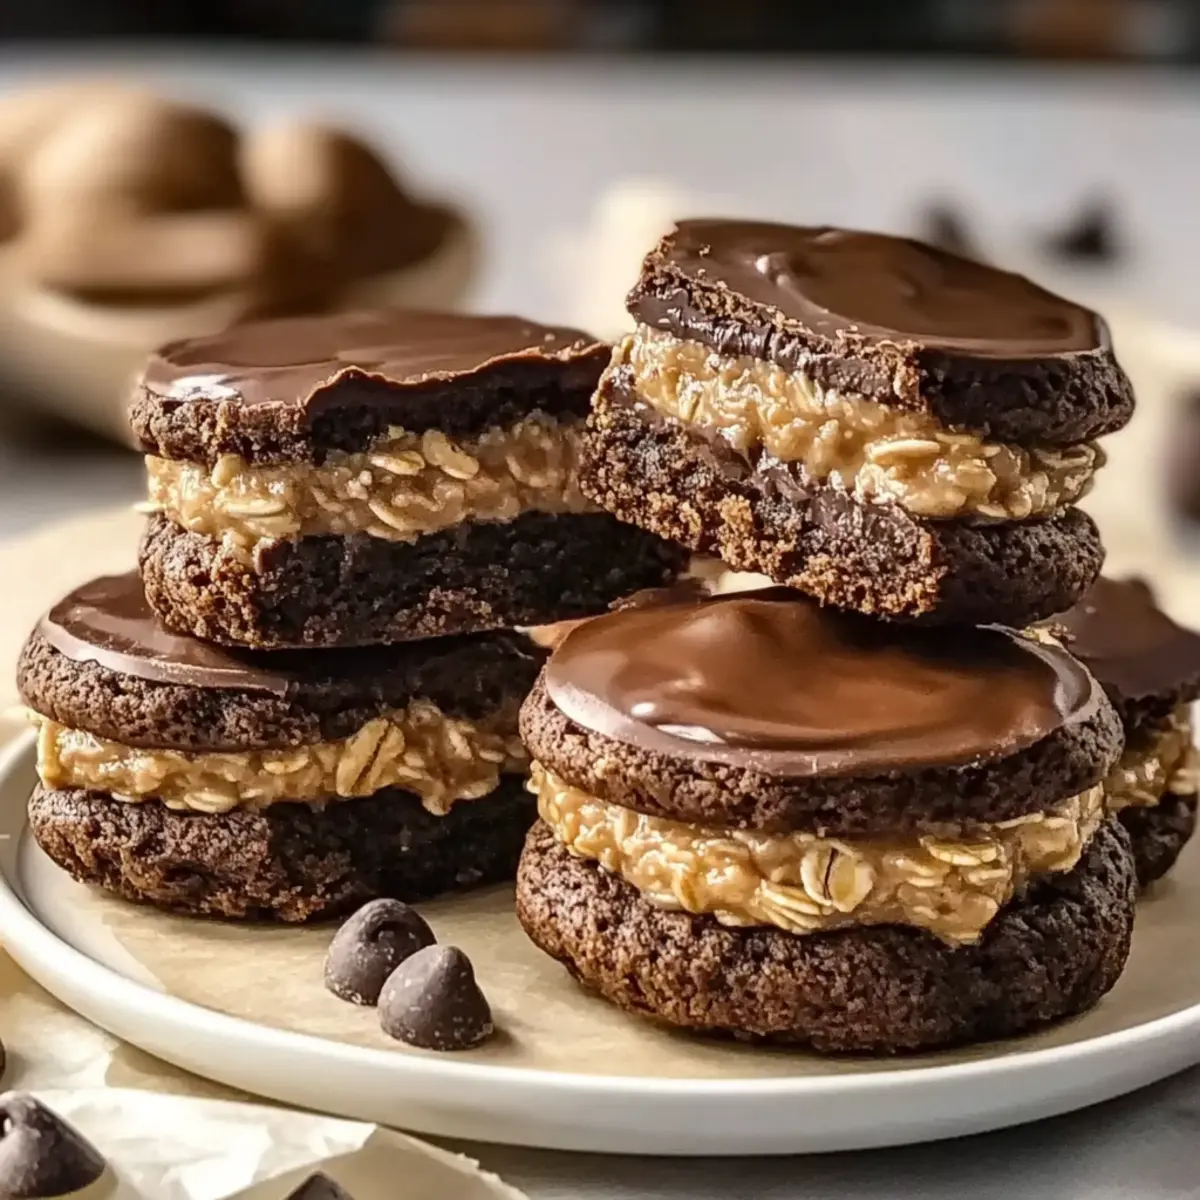
There’s a certain magic in the kitchen when you whisk together the simplest ingredients to create something truly delightful. That’s precisely what I felt when I first crafted these No-Bake Chocolate Peanut Butter Oat Bars. They are a delightful fusion of creamy nut butter, hearty oats, and a hint of chocolate, making them perfect for satisfying those sweet cravings without the fuss of the oven. What’s even better? These bars are quick to prepare and can easily be customized to accommodate various dietary preferences—ideal for busy weeknights or an after-school snack for the kids. Whether you’re fueling a hectic day or indulging in a tasty treat, these bars hit the spot. Curious about how to whip up this easy, delicious dessert? Let’s dive in!
Why Are No-Bake Bars So Loved?
Simplicity at its finest: Minimal ingredients mean you can whip these together without breaking a sweat. Nutritious indulgence: Packed with rolled oats and nut butter, these bars provide a healthy boost for busy days. Kid-approved: Their sweet, chocolaty flavor makes them a hit with children and adults alike. Customizable options: Switch to almond butter or add dried fruits to tailor them to your taste. Plus, check out our Frosted Coffee Brownies for another quick treat to enjoy! Whether for a snack or a quick breakfast, they’re perfect to keep on hand.
No-Bake Chocolate Peanut Butter Oat Bar Ingredients
• To make these delicious bars, gather the following ingredients!
For the Base
- Rolled Oats – These provide texture and structure; quick oats can be used for a smoother consistency.
- Peanut Butter – Adds creaminess and richness; substitute with almond butter for a nut-free option.
- Honey or Maple Syrup – Acts as a sweetener and binder; agave nectar serves as a vegan alternative.
For the Chocolate Flavor
- Cocoa Powder – Introduces a rich chocolate flavor; use unsweetened for better control over sweetness.
- Chocolate Chips – Adds a delightful melty texture; opt for dark chocolate for a more intense taste.
Feel free to mix and match these ingredients based on your dietary needs and preferences! Enjoy playing with flavors as you create your own version of these No-Bake Chocolate Peanut Butter Oat Bars.
Step‑by‑Step Instructions for No-Bake Chocolate Peanut Butter Oat Bars
Step 1: Combine Dry Ingredients
In a large mixing bowl, combine 2 cups of rolled oats, 1/2 cup of cocoa powder, and 1/2 cup of chocolate chips. Stir them together until well mixed, ensuring that the chocolate chips are evenly distributed among the oats and cocoa. This step takes about 2 minutes and sets a solid foundation for your No-Bake Chocolate Peanut Butter Oat Bars.
Step 2: Mix Wet Ingredients
In a separate bowl, combine 1 cup of peanut butter and 1/2 cup of honey or maple syrup. Using a whisk or spatula, mix until smooth and creamy, which should take around 3–4 minutes. The goal is to create a homogeneous mixture so that the sweetness of the syrup blends seamlessly with the richness of the peanut butter, preparing it for incorporation into your dry ingredients.
Step 3: Combine Mixtures
Pour the smooth peanut butter mixture into the bowl containing the oats and cocoa. With a sturdy spatula, stir everything together thoroughly, ensuring that every oat is coated with the mixture. This step may take about 3 minutes; the mixture will become thick and slightly sticky, indicating it’s well combined and ready for the next step in creating your delightful bars.
Step 4: Press into Baking Dish
Line an 8×8-inch baking dish with parchment paper, then transfer the mixture into the dish. Using your hands or the back of a measuring cup, firmly press the mixture down into an even layer, making sure it’s compact—this step is critical to help your bars hold together. It usually takes about 2–3 minutes to get a flat, cohesive surface.
Step 5: Chill to Set
Place the baking dish in the refrigerator and let it chill for at least 1 hour. This cooling period allows the mixture to firm up, making it easier to cut into bars once set. After an hour, check to see if the mixture feels firm to the touch—this indicates it’s ready to be transformed into your delicious No-Bake Chocolate Peanut Butter Oat Bars.
Step 6: Cut and Serve
Once the bars are fully chilled and set, remove them from the baking dish using the parchment paper. Place them on a cutting board and use a sharp knife to cut them into squares or rectangles, depending on your preference. Enjoy these bars immediately or store them in an airtight container in the fridge for up to a week; they make a fantastic snack or dessert!
Chocolate Peanut Butter Oat Bars Variations
Feel free to make these bars your own by experimenting with unique ingredients and flavors!
-
Nut-Free: Swap peanut butter for sunbutter or tahini for a completely nut-free treat that everyone can enjoy.
Nut-free options allow everyone to indulge safely. These alternatives introduce a delightful flavor similar to the original! -
Vegan Delight: Use agave nectar in place of honey or maple syrup for a vegan twist.
This makes the bars suitable for plant-based diets while still being deliciously sweet. -
Protein-Packed: Add a scoop of your favorite protein powder to the mixture for added health benefits.
A protein boost transforms this snack into a post-workout option, fueling your day with energy. -
Fruit & Nut Medley: Incorporate dried fruits like cranberries, raisins, or chopped nuts for extra texture and flavor.
This adds a chewy, fruity element that perfectly balances the rich chocolate flavor. -
Coconut Infusion: Mix in shredded coconut for a tropical twist that complements the chocolate nicely.
The coconut adds a nutty, chewy texture that elevates the overall taste of your bars. -
Flavor Boost: Stir in a teaspoon of espresso powder or instant coffee for an unexpected mocha flavor.
The coffee enhances the chocolate, offering a delightful pick-me-up for any time of the day! -
Spiced Up: Add a dash of cinnamon or a pinch of sea salt for added depth and warmth in flavor.
These spices enhance the taste profile, making your bars feel even more special.
Feel inspired? Why not pair these bars with delightful treats like our Frosted Coffee Brownies or bite into delicious Chocolate Chip Cookies? Your kitchen is a canvas just waiting to be filled with tasty goodness!
Expert Tips for No-Bake Chocolate Peanut Butter Oat Bars
• Press Firmly: Ensure that your mixture is pressed down tightly into the baking dish; this is crucial for the bars to hold together after chilling.
• Chill Adequately: Allow the bars to set in the refrigerator for at least 1 hour to ensure proper firmness. Cutting before this period may result in messy bars.
• Flavor Enhancements: For a gourmet touch, consider topping the bars with extra chocolate chips or a sprinkle of sea salt before refrigerating.
• Substitution Ideas: Don’t hesitate to swap peanut butter for alternatives like sunbutter or cashew butter to tailor the bars to your taste and dietary needs.
• Texture Considerations: If you prefer a smoother texture, use quick oats instead of rolled oats to create a softer base while still enjoying delicious flavor.
• Snack Versatility: These No-Bake Chocolate Peanut Butter Oat Bars make a great on-the-go snack, perfect for busy days or as a healthy treat for kids.
What to Serve with No-Bake Chocolate Peanut Butter Oat Bars
Looking to create a delightful spread that complements these delicious bars? Let’s explore some mouthwatering options that will elevate your snack time experience.
-
Fresh Fruit Platter: Bright, juicy fruits like strawberries and bananas can provide a refreshing contrast to the rich bars.
-
Creamy Yogurt Dipping Sauce: A dollop of vanilla yogurt adds a creamy element, balancing the sweetness with a tart touch.
-
Nutty Granola: Serve alongside nutty granola for a satisfying crunch that enhances the texture of the bars while doubling as a breakfast option.
-
Milk or Nut Milk: A cold glass of traditional milk or almond milk rounds off the flavors perfectly, making every bite a joyous experience.
-
Decadent Hot Chocolate: For an indulgent pairing, serve with hot chocolate; the chocolatey richness will charm any sweet tooth.
-
Coffee or Espresso: A warm cup of coffee intensifies the flavors of the bars, making it a perfect pick-me-up for any time of day.
-
Chocolate-Covered Strawberries: These iconic treats offer a flair of elegance that pairs beautifully with the peanut butter and oats, and adds an enjoyable, fruity bite.
-
Trail Mix: Whip up a simple trail mix with nuts and dried fruit for a crunchy and nutritious alternative that’s great for snacking at home or on the road.
How to Store and Freeze No-Bake Chocolate Peanut Butter Oat Bars
Fridge: Store these bars in an airtight container in the refrigerator for up to 1 week. This keeps them fresh and ready for quick snacking.
Freezer: For longer storage, wrap the bars individually in plastic wrap and place them in a freezer-safe container. They can be frozen for up to 3 months.
Thawing: To enjoy, simply remove from the freezer and allow them to thaw in the fridge for a few hours or at room temperature for about 30 minutes.
Portioning: Cut into squares before freezing to easily grab a quick snack or dessert. These No-Bake Chocolate Peanut Butter Oat Bars are perfect for on-the-go indulgence!
Make Ahead Options
These No-Bake Chocolate Peanut Butter Oat Bars are perfect for meal prep enthusiasts! You can prepare the oat mixture and press it into the baking dish up to 24 hours in advance, allowing you to save precious time on busy days. Simply combine the rolled oats, cocoa powder, and chocolate chips, mix in the peanut butter with honey, and pack it tightly into the dish. To maintain quality, refrigerate the mixture immediately so it sets nicely. When you’re ready to enjoy, cut into bars after chilling and serve. This way, you’ll experience the same deliciousness while having a quick snack or dessert ready at your fingertips!
No-Bake Chocolate Peanut Butter Oat Bars Recipe FAQs
What type of oats should I use for this recipe?
Absolutely! Rolled oats are perfect for these bars as they provide great texture and structure. If you prefer a smoother consistency, quick oats can be substituted—they blend well and create a softer bite.
How should I store my No-Bake Chocolate Peanut Butter Oat Bars?
Very simply! Store the bars in an airtight container in the refrigerator for up to one week. This keeps them moist and ready whenever those sweet cravings strike.
Can I freeze these bars for later?
Yes, you can! For freezing, wrap each bar in plastic wrap and place them in a freezer-safe container. They can be kept frozen for up to 3 months. When you’re ready to enjoy, just thaw by placing them in the fridge for a few hours or letting them sit at room temperature for about 30 minutes.
What can I do if my bars don’t hold together?
If your bars are crumbly or falling apart, they likely need to be pressed more firmly into the baking dish during preparation. After mixing, ensure you really compact the mixture before chilling. Also, if you didn’t let them chill long enough, that can be a factor too, so give them the full hour to set!
Are these bars suitable for those with nut allergies?
Great question! If you have a nut allergy, you can swap out peanut butter for sunbutter or another seed-based alternative. Using agave nectar instead of honey also keeps this recipe friendly for vegan diets and various allergies.
Can I add other ingredients to customize my bars?
Absolutely! Feel free to get creative! You can add dried fruits like cranberries, nuts for crunch, or even protein powder for a health boost. Customize them to suit your tastes or dietary preferences—enjoy the fun of tweaking recipes!
Decadent Chocolate Coffee Whoopie Pies That Will Delight You
Ingredients
Equipment
Method
- Combine dry ingredients: Mix rolled oats, cocoa powder, and chocolate chips in a bowl.
- Mix wet ingredients: Combine peanut butter and honey or maple syrup in a separate bowl until smooth.
- Combine mixtures: Pour peanut butter mixture into the dry ingredients and stir until well combined.
- Press into baking dish: Line an 8x8-inch dish with parchment and press the mixture evenly into it.
- Chill to set: Refrigerate for at least 1 hour to firm up the mixture.
- Cut and serve: Remove bars from the dish, cut into squares, and enjoy.
Leave a Reply