
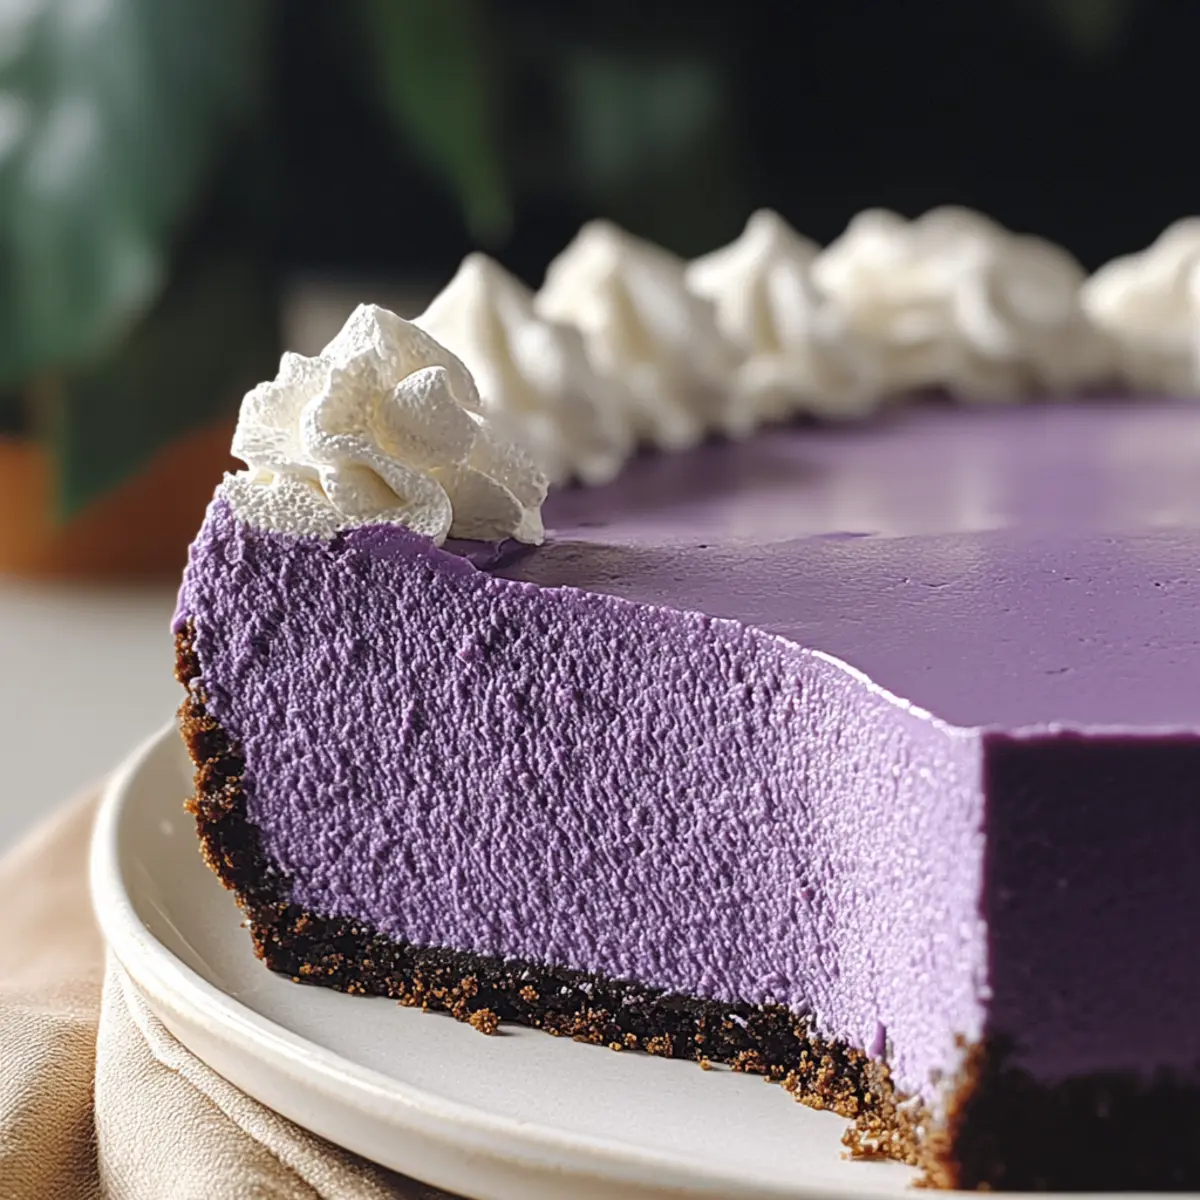
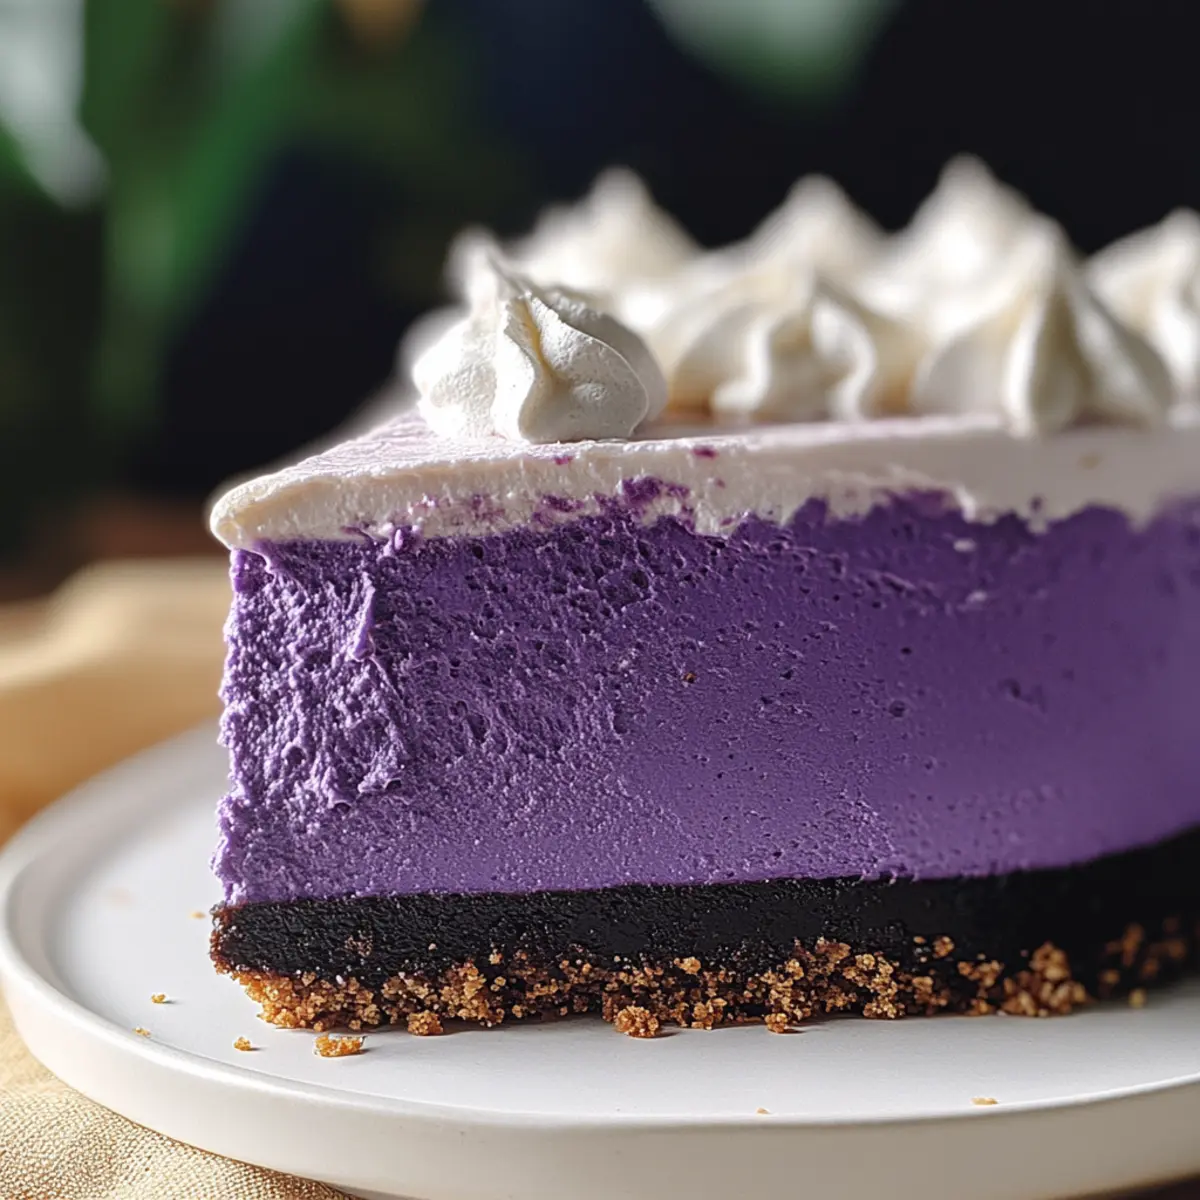
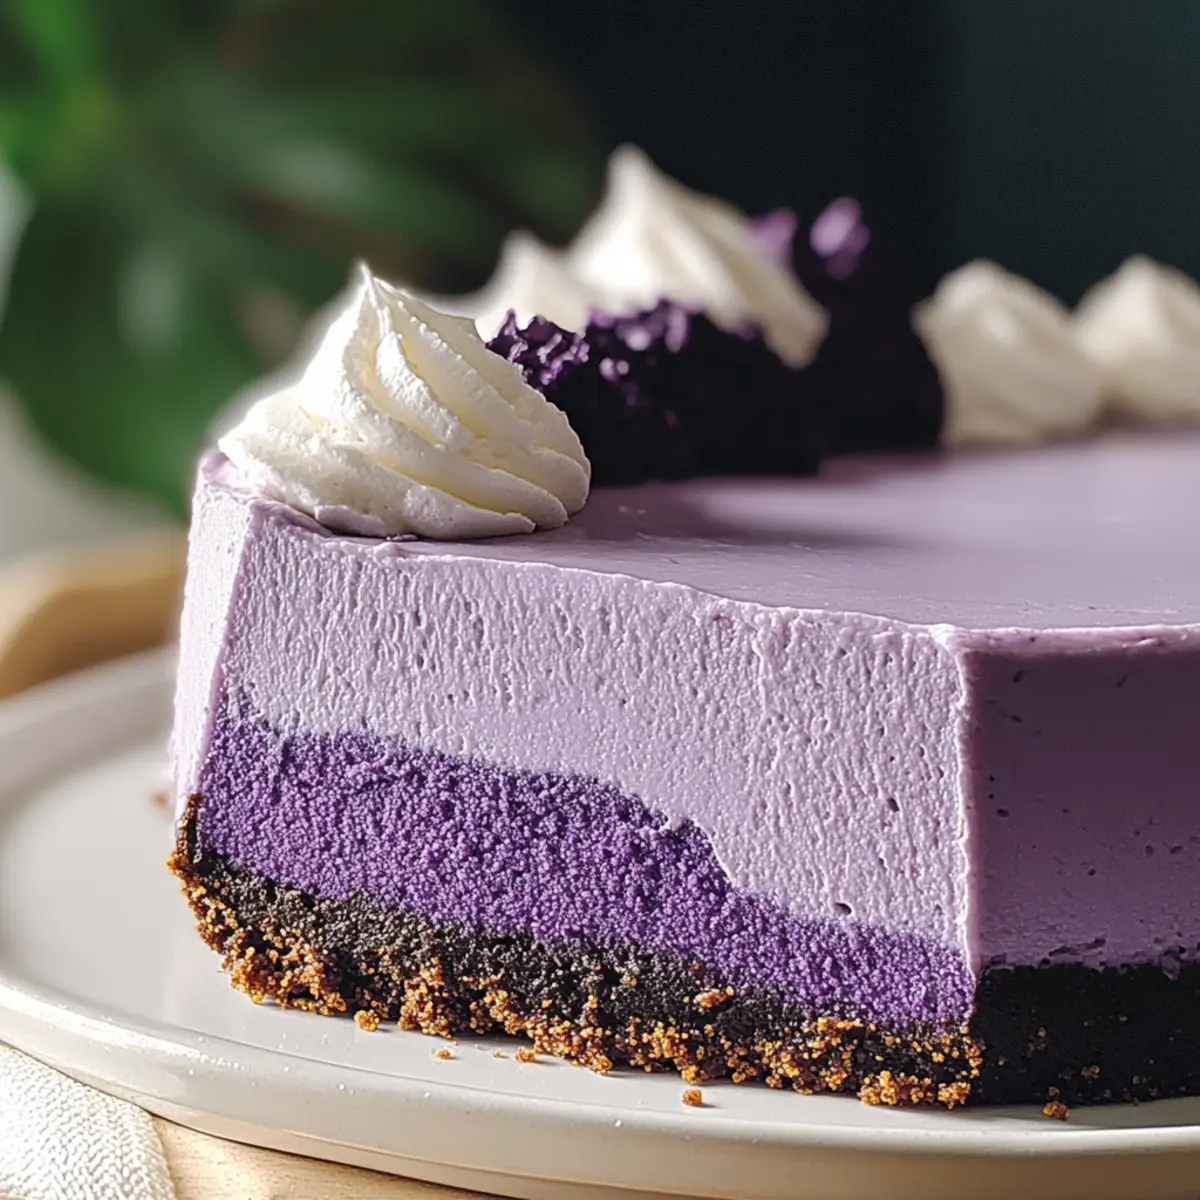
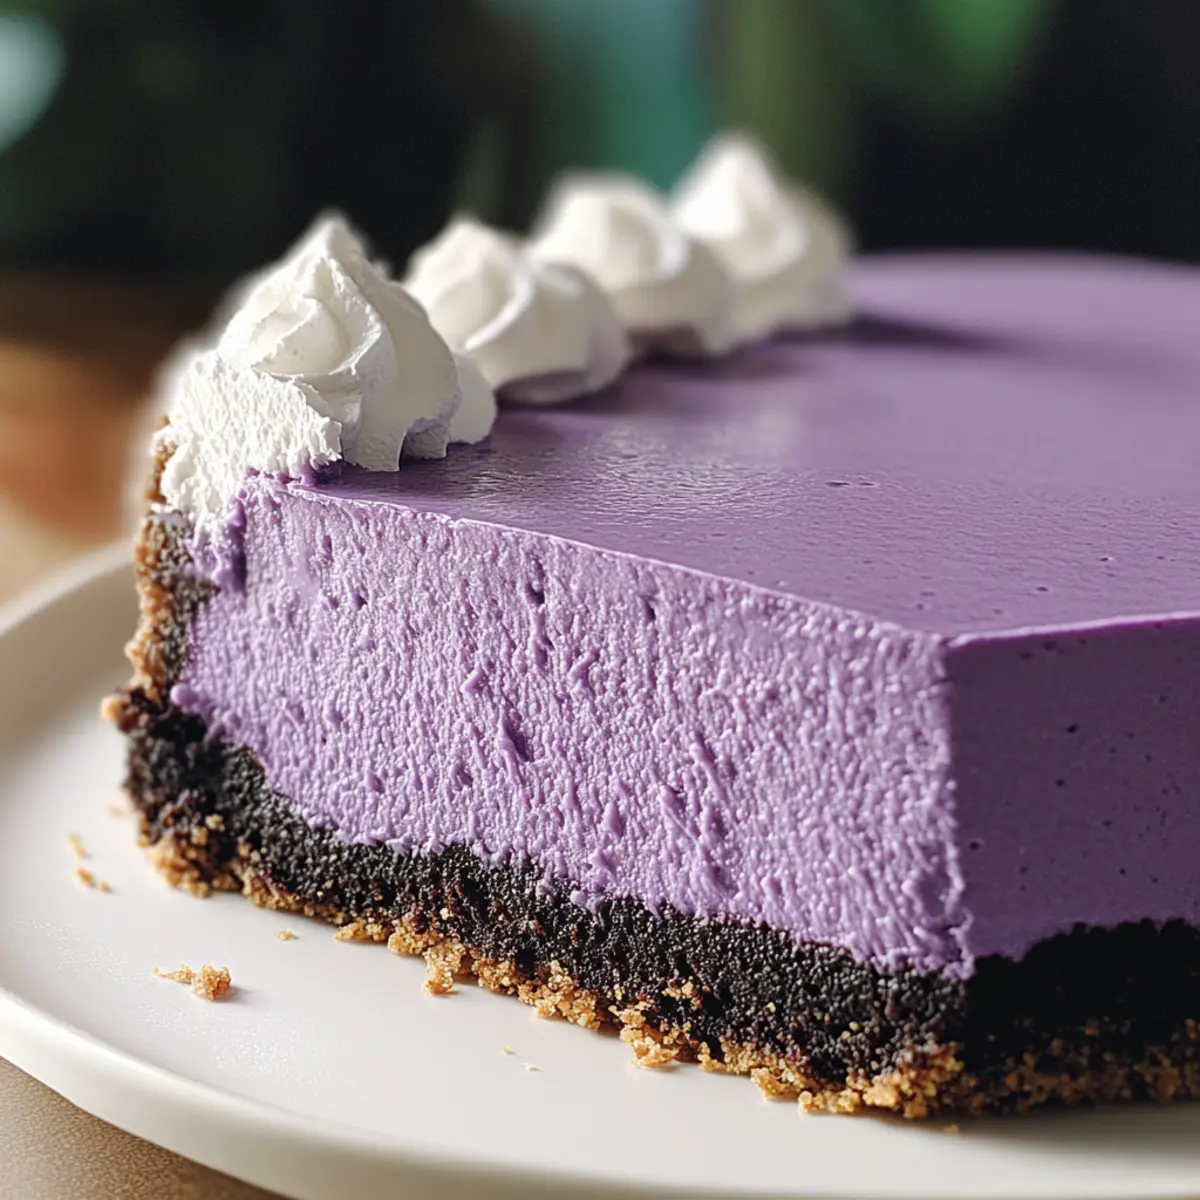
As I pulled the homemade ube cheesecake from the oven, the vibrant purple hue instantly brightened my kitchen. This delightful Filipino dessert is a true showstopper, combining the rich, creamy texture of cheesecake with the unique, earthy sweetness of ube. The best part? Not only is this ube cheesecake a feast for the eyes, but its smooth and silky consistency makes it a comforting indulgence that you can whip up for any occasion, or even just to treat yourself. Perfect for sharing with loved ones or simply savoring at home, this vegetarian-friendly dessert effortlessly elevates your baking skills. Curious about how to achieve this stunning masterpiece in your own kitchen? Let’s dive into the recipe!
Why Is Ube Cheesecake So Special?
Colorful, Eye-Catching Delight: The stunning violet hue will wow your guests and make any occasion special.
Unique Flavor Profile: Ube brings earthy sweetness that sets this cheesecake apart from traditional flavors.
Easy to Make: With simple steps, even novice bakers can create this elegant dessert with confidence.
Versatile Serving Options: Pair it with whipped cream, or try garnishing with tropical fruits for a refreshing twist.
Perfect for Any Occasion: Whether it’s a festive celebration or a cozy night in, this homemade ube cheesecake fits right in. Don’t forget to check out our Fried Strawberry Cheesecake for another delicious twist on desserts!
Homemade Ube Cheesecake Ingredients
For the Batter
- Cream Cheese – Provides the rich, creamy base for the cheesecake. Substitution: Neufchâtel for a lighter option.
- Ube Halaya (Purple Yam Jam) – Adds vibrant color and earthy sweetness. Substitution: Ube powder rehydrated with milk and sugar.
- Granulated Sugar – Balances the tanginess of cream cheese.
- Eggs – Binds the batter while adding silkiness.
- Sour Cream – Contributes tanginess and lightens texture. Substitution: Plain Greek yogurt works well.
- Heavy Cream – Creates a luxurious, soft finish. Substitution: Use evaporated milk for a lighter version.
- Vanilla Extract – Enhances and rounds out flavor.
For the Crust
- Graham Cracker Crumbs – Forms the traditional crunchy crust. Substitution: Crushed digestive biscuits or vanilla wafers.
- Unsalted Butter – Binds the crust together.
- Salt – Sharpens and balances flavors.
Step‑by‑Step Instructions for Homemade Ube Cheesecake
Step 1: Prepare the Oven
Preheat your oven to 325°F (160°C). While the oven warms up, take a 9-inch springform pan, line the bottom with parchment paper, and grease the sides to ensure easy release of the cheesecake later on.
Step 2: Make the Crust
In a mixing bowl, combine graham cracker crumbs, melted unsalted butter, and a pinch of salt until everything is well-coated. Press this mixture evenly into the bottom of the prepared pan. Bake the crust for 10 minutes or until lightly golden, then allow it to cool completely.
Step 3: Wrap the Pan
To prevent water from leaking into the springform pan, wrap the outside with aluminum foil, ensuring a tight seal. Place the wrapped pan on a baking tray to catch any potential drips while baking the cheesecake.
Step 4: Mix the Filling
In a large mixing bowl, beat the cream cheese until smooth and creamy, about 2 minutes. Gradually add granulated sugar, continuing to beat until the mixture is light and fluffy. Then, mix in the sour cream, heavy cream, and vanilla extract before gently folding in the ube halaya until fully incorporated.
Step 5: Add the Eggs
Add the eggs to the creamy mixture one at a time, mixing on low speed just until blended. This will help prevent overmixing, which could lead to cracks in your homemade ube cheesecake. Aim for a smooth, homogenous batter without overworking it.
Step 6: Bake the Cheesecake
Pour the filling over the cooled crust, tapping the pan gently to release any air bubbles. Bake the cheesecake for 50-60 minutes or until the center is slightly jiggly but set. Once the time is up, turn off the oven, crack the door open, and let it cool inside for 1 hour.
Step 7: Chill
After cooling, transfer the cheesecake to the refrigerator and chill for at least 4 hours or, ideally, overnight to allow the flavors to meld and the texture to firm up. Before taking off the springform pan, run a knife around the edges for a clean release.
Step 8: Serve
Once chilled, slice the homemade ube cheesecake using a warm knife for neat edges. Clean the knife between cuts for perfect slices. Serve chilled, optionally garnished with whipped cream or additional ube halaya for a delightful presentation.
How to Store and Freeze Homemade Ube Cheesecake
Fridge: Store the cheesecake in an airtight container or tightly wrapped in plastic wrap for up to 5 days to maintain its creamy texture and delicious flavor.
Freezer: Wrap individual slices or the whole cheesecake tightly in plastic wrap and then in aluminum foil for up to 2 months. Ensure the wrapping is secure to prevent freezer burn.
Thawing: To enjoy your frozen homemade ube cheesecake, thaw it in the fridge overnight. This gentle method preserves its richness and flavor while ensuring a smooth texture upon serving.
Reheating: While this dessert is best served chilled, if you prefer it slightly warmed, place slices in a microwave for 10-15 seconds—just enough to take off the chill without melting the creaminess.
What to Serve with Homemade Ube Cheesecake?
As you bask in the flavors of this gorgeous purple delight, consider some delectable accompaniments that elevate your dessert experience to new heights.
-
Whipped Cream:
Adding a dollop of freshly whipped cream enhances the dessert’s creamy texture while balancing the sweetness of the ube. -
Tropical Fruit Salad:
A refreshing tropical fruit salad featuring mango, pineapple, and kiwi introduces bright acidity that complements the rich cheesecake beautifully. -
Coconut Flakes:
Sprinkle toasted coconut flakes on top for a delightful crunch and an extra layer of flavor that harmonizes with ube’s earthy notes. -
Matcha Green Tea:
Pour a cup of matcha green tea alongside; its grassy bitterness creates a perfect contrast to the sweetness of the cheesecake. -
Boba Tea:
Offering a fun twist, serve a refreshing boba tea; the chewy tapioca pearls add an exciting texture while cooling off the palate. -
Pistachio Crust Cookies:
Pair with crisp pistachio cookies, which add crunchiness and a nutty flavor that beautifully complement the creamy cheesecake.
Incorporating these delightful accompaniments makes each bite feel special, transforming the homemade ube cheesecake into a true centerpiece of a memorable meal.
Make Ahead Options
These Homemade Ube Cheesecakes are perfect for meal prep! You can prepare the crust and filling up to 24 hours in advance, storing the crust in an airtight container at room temperature and the filling in the refrigerator. To maintain the cheesecake’s creamy texture, ensure all ingredients are at room temperature before mixing and avoid overmixing after adding the eggs. When you’re ready to bake, simply pour the filling over the cooled crust and follow the baking instructions. After cooling, chill the cheesecake for at least 4 hours or ideally overnight before serving, so you’ll have a delicious dessert ready to impress without the last-minute rush!
Expert Tips for Homemade Ube Cheesecake
-
Room Temperature Ingredients: Ensure all ingredients, especially cream cheese, are at room temperature for a smooth batter and to avoid lumps.
-
Mixing Eggs Gently: Add eggs one at a time and mix on low speed. This prevents overmixing, which can cause cracks in your homemade ube cheesecake.
-
Water Bath Technique: Using a water bath can help maintain moisture during baking, resulting in a creamier texture. Just make sure the springform pan is well-wrapped to keep water out.
-
Cooling Process: Allow the cheesecake to cool gradually in the oven after baking; this step minimizes the risk of cracking caused by sudden temperature changes.
-
Chill Overnight: For the best flavor and texture, refrigerate your cheesecake overnight. This resting period allows the delightful ube flavor to fully develop.
-
Perfect Slicing: Use a warm knife to slice the cheesecake, cleaning the knife between cuts for neat, beautiful slices that showcase the stunning layers.
Homemade Ube Cheesecake Variations
Invite your creativity to shine and explore these delightful twists on the classic recipe!
-
Gluten-Free: Swap graham cracker crumbs for gluten-free alternatives like almond flour or gluten-free cookies to enjoy this dessert without worry.
-
Vegan Version: Replace cream cheese with cashew cream and eggs with flaxseed or chia seed gel for a delicious plant-based delight.
-
Dairy-Free: Use coconut cream in place of heavy cream and plant-based yogurt instead of sour cream for a tropical flair that’s still creamy.
-
Flavor Infusion: Enhance the cheesecake by adding a swirl of ube halaya or a layer of caramel sauce atop the filling before baking.
-
Fragrant Twist: Incorporate a tablespoon of coconut extract, inviting a subtle tropical aroma that beautifully complements the ube flavor.
-
Texture Boost: Fold in finely chopped roasted cashews or almonds into the filling for a delightful crunch with every bite.
-
Added Heat: Sprinkle a pinch of cayenne pepper or chili powder into the batter for a surprising heat that contrasts with the sweet flavors.
-
Gourmet Topping: Serve with a drizzle of matcha sauce or pair it with a side of mango puree to elevate your dessert experience. For more delicious ideas, don’t miss my recipe for Apple Crumble Cheesecake that brings another fantastic flavor combo to the table!
Homemade Ube Cheesecake Recipe FAQs
What type of ube should I use for this recipe?
You can use ube halaya (purple yam jam) for the best flavor and color, as it adds a unique earthiness to the cheesecake. If you can’t find ube halaya, ube powder rehydrated with milk and sugar makes a suitable alternative, but ensure it’s mixed well for even flavor.
How do I store my leftover ube cheesecake?
To keep your homemade ube cheesecake fresh, store it in an airtight container or tightly wrap it in plastic wrap and refrigerate for up to 5 days. This will help maintain its creamy texture and delightful flavor.
Can I freeze homemade ube cheesecake?
Absolutely! To freeze, wrap the cheesecake tightly in plastic wrap, then in aluminum foil, ensuring no air pockets are present to avoid freezer burn. It can be frozen for up to 2 months. When you’re ready to enjoy, thaw it in the fridge overnight for the best results.
Why does my cheesecake have cracks?
Cracking can happen if the batter is overmixed after adding eggs or if the cheesecake experiences sudden temperature changes during cooling. To prevent this, mix the eggs in on low speed just until incorporated, and let it cool gradually in the oven with the door cracked open.
Is ube cheesecake safe for my pets?
Ube itself is not toxic to pets, but the sugar and other ingredients like cream cheese may not be suitable. It’s best to enjoy your homemade ube cheesecake as a treat for yourself and keep your furry friends away from it.
What toppings can I add to enhance my ube cheesecake?
Topping your cheesecake can add visual appeal and flavor! Consider adding whipped cream, fresh tropical fruits like mango or coconut flakes, or even a drizzle of additional ube halaya. This not only makes the dessert look stunning but also elevates its flavor profile.
Homemade Ube Cheesecake: Indulge in a Filipino Delight
Ingredients
Equipment
Method
- Preheat your oven to 325°F (160°C). Line the bottom of a 9-inch springform pan with parchment paper and grease the sides.
- In a mixing bowl, combine graham cracker crumbs, melted unsalted butter, and a pinch of salt. Press this mixture into the bottom of the prepared pan. Bake for 10 minutes or until lightly golden, then allow to cool.
- Wrap the outside of the pan with aluminum foil to prevent leaks. Place it on a baking tray.
- In a large bowl, beat the cream cheese until smooth. Gradually add sugar, beat until fluffy, then mix in sour cream, heavy cream, and vanilla. Gently fold in ube halaya.
- Add eggs one at a time, mixing on low speed until just blended.
- Pour the filling over the cooled crust, bake for 50-60 minutes until slightly jiggly but set. Turn off the oven, crack the door and let cool for 1 hour.
- Transfer the cheesecake to the refrigerator and chill for at least 4 hours or overnight.
- Slice using a warm knife and serve chilled, optionally garnished with whipped cream or additional ube halaya.
Leave a Reply