
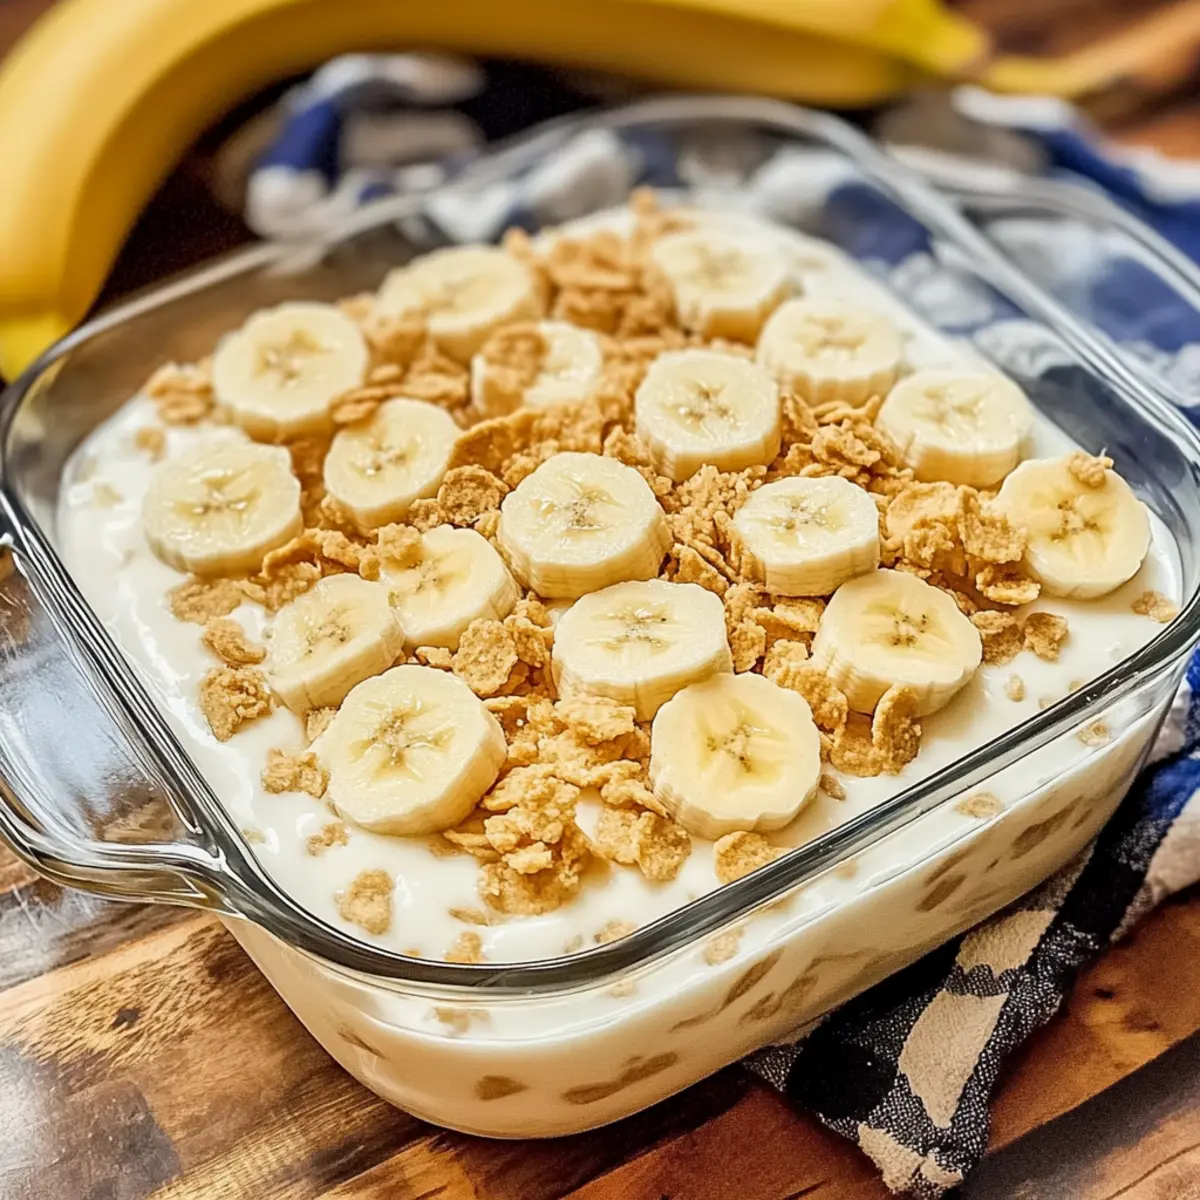
In a small, cozy kitchen infused with the delightful scent of simmering vanilla and sweet bananas, I found a recipe that truly captures the essence of home. This Classic Homemade Banana Pudding, a Southern comfort dessert, brings back memories of family gatherings where every spoonful feels like a warm hug. With its creamy layers of fresh bananas and crunchy vanilla wafers, this dessert is not only super easy to whip up but also makes for an unforgettable make-ahead option for any occasion. The beauty of this recipe lies in its simplicity—you won’t find any boxed mixes here, just pure, nostalgic bliss crafted from scratch. Ready to dive into creating your very own rendition? Let’s bring a slice of Southern charm to your table!
Why is Homemade Banana Pudding Special?
Homemade Banana pudding not only brings nostalgia, but it’s also a crowd-pleaser at any gathering. Made from scratch, this recipe showcases the rich flavors of fresh ingredients. Versatile variations allow for personalized twists, whether you opt for graham crackers or non-dairy alternatives. Plus, it’s a make-ahead dessert that saves you time on busy days. Just imagine the joy of sharing this delightful classic, reminiscent of family gatherings, and the warm smile it brings to everyone’s face! For more delightful twists, check out my Cinnamon Roll Banana and Chocolate Chip Cookies recipes!
Homemade Banana Pudding Ingredients
Let’s gather our essentials!
-
For the Pudding Base
-
Sugar – Adds sweetness to balance the creamy pudding; can substitute with brown sugar or honey for variation.
-
Flour – Thickens the pudding for a smooth texture; all-purpose flour works best for this recipe.
-
Salt – Enhances overall flavor without making it salty.
-
Milk – Provides creaminess and serves as the pudding base; any milk variety, including non-dairy options, works.
-
Eggs – Adds richness and is essential for thickening; whole eggs are recommended.
-
Vanilla Extract – Enhances flavor; opt for pure vanilla for the best taste.
-
For the Layers
-
Vanilla Wafers – Create structure and crunch; about 8 oz is ideal and can substitute with graham crackers or Biscoff cookies.
-
Bananas – Essential for flavor and texture; 4 fresh, ripe bananas (sliced) recommended, with no substitutes for this quantity.
Now that we have all the wonderful homemade banana pudding ingredients, you’re ready to create a delightful treat that will bring everyone together!
Step‑by‑Step Instructions for Homemade Banana Pudding
Step 1: Prepare Dry Ingredients
In a medium saucepan, whisk together 1 cup of sugar, 1/3 cup of flour, and a pinch of salt until well blended. This combination will form the foundation of your homemade banana pudding. Make sure there are no lumps to ensure a smooth pudding texture as you continue.
Step 2: Add Milk
Gradually pour in 4 cups of milk while whisking continuously over medium heat. This is crucial—keep stirring for about 10 minutes until the mixture thickens and starts bubbling gently. You’ll know it’s ready when it coats the back of a wooden spoon and looks creamy.
Step 3: Cook Mixture
Once thickened, reduce the heat to low and let the pudding gently bubble for an additional 2 minutes, stirring constantly. This helps to further enhance the flavors and richness of your pudding. Afterward, remove the saucepan from heat and allow the mixture to cool slightly, about 5 minutes.
Step 4: Temper Eggs
In a small bowl, whisk together 3 beaten eggs. Gradually stir in about one cup of the hot pudding mixture to temper the eggs; this prevents them from curdling. Whisk thoroughly until well combined before moving on to the next step to ensure a smooth consistency.
Step 5: Combine and Cook Again
Pour the tempered egg mixture back into the saucepan with the remaining pudding. Cook on low heat, stirring constantly. Allow it to thicken further until it reaches a gentle boil, which should take about 2 minutes. This step will create a rich and creamy custard base for your homemade banana pudding.
Step 6: Add Vanilla and Cool
Remove the saucepan from heat and stir in 1 tablespoon of pure vanilla extract, which adds delightful flavor. Let the pudding cool for approximately 15 minutes at room temperature, ensuring it thickens a bit more as it cools.
Step 7: Layer Ingredients
In an ungreased 8-inch square pan, begin layering by placing about 25 vanilla wafers at the bottom. Then, add half of the sliced bananas before pouring in half of the warm pudding mixture. Repeat these layers once more, finishing with the remaining pudding atop the last layer of bananas.
Step 8: Chill
Cover the pan closely with plastic wrap and refrigerate for at least 4 hours, preferably overnight. This chilling time allows the flavors to meld beautifully and gives the vanilla wafers time to soften while maintaining some crunch, making your homemade banana pudding even more delicious.
Step 9: Garnish and Serve
Before serving your delightful banana pudding, sprinkle crushed vanilla wafers on top for added crunch. Serve chilled and consider adding a dollop of whipped cream or fresh banana slices for an extra touch of sweetness. Enjoy every lovely bite of this comforting dessert!
Expert Tips for Homemade Banana Pudding
-
Cool Before Layering: Allow the pudding to cool slightly before layering it with the bananas and wafers to maintain that delightful crunch of the wafers.
-
Prevent Browning: Add fresh banana slices just before serving rather than layering them in advance. This keeps them vibrant and avoid any browning.
-
Check Thickness: If your pudding isn’t thick enough, make sure it’s cooked long enough. Whisk in a bit of additional flour mixed with cold milk while reheating if needed.
-
Flavor Options: Experiment with sugar substitutes like coconut sugar for a healthier twist, making this homemade banana pudding even more versatile for various diets.
-
Layering Alternative: For a fun variation, try using graham crackers or Biscoff cookies instead of vanilla wafers for a unique flavor while layering.
Homemade Banana Pudding Variations
Feel free to get creative and make this delicious homemade banana pudding your own!
-
Dairy-Free: Use almond, soy, or coconut milk for a creamy, non-dairy version that still delights.
A smooth, rich texture can be achieved with these alternatives, preserving the essence of this classic dessert. -
Gluten-Free: Substitute all-purpose flour with cornstarch or a gluten-free flour blend for a safe, celiac-friendly dessert.
The pudding will still turn out delightful and smooth, ensuring everyone can indulge without worry. -
Biscoff Twists: Replace vanilla wafers with Biscoff cookies for an unexpected, spiced flavor twist.
The aromatic notes of these cookies beautifully complement the bananas, creating an exciting new take on tradition. -
Banana Variations: Experiment with different bananas like plantains for a unique flavor profile that adds depth.
This can create an exotic touch to your pudding, invigorating your taste buds while keeping the comfort intact. -
Nutty Crunch: Add crushed walnuts or pecans between layers for extra texture and a delicious nutty crunch.
This addition will elevate the richness, adding warmth to each spoonful that takes you back to fond family moments. -
Chocolate Lovers: Drizzle melted chocolate or add chocolate chips between the layers for a dreamy chocolate banana pudding.
The combination of chocolate with vanilla enhances the pudding and adds an indulgent twist that’s hard to resist. -
Coconut Twist: Stir in shredded coconut into the pudding mixture for a delightful tropical flair that harmonizes with bananas.
This sweet, chewy element is sure to transport you to a sunny paradise with every bite. -
Make-Ahead Magic: Prepare the pudding and layer the wafers and bananas just before serving, ensuring crispy textures.
This is a fantastic way to save time while maintaining that perfect crunch everyone loves in banana pudding.
For even more inspiration, consider making my Bee Sting Cake or dive into a comforting batch of Chocolate Chip Cookies!
What to Serve with Classic Homemade Banana Pudding
Imagine gathering around the table, where the warm familiarity of homemade desserts embraces you with every bite, making any occasion feel special.
-
Whipped Cream: A dollop of freshly whipped cream adds airy lightness, beautifully complementing the creamy texture of the pudding.
-
Caramel Sauce: Drizzling warm caramel over the pudding introduces a sweet richness that elevates the dessert experience to new heights.
-
Fresh Berries: Strawberries or raspberries provide a refreshing tartness, cutting through the sweetness while adding a vibrant pop of color and flavor.
-
Ice Cream: Vanilla or banana-flavored ice cream creates a delightful pairing, enhancing the creamy indulgence and giving an extra chill to each spoonful.
-
Chocolate Shavings: For a touch of decadence, sprinkle dark chocolate shavings on top. The slight bitterness contrasts wonderfully with the sweet layers below.
-
Homemade Biscotti: A crunchy biscotti on the side adds a delightful texture; its nutty flavors blend wonderfully with the banana pudding’s softness.
-
Lemonade or Iced Tea: Pair with a glass of refreshing lemonade or sweet iced tea to provide a perfect balance against the creamy richness of the pudding.
-
Coconut Macaroons: Chewy coconut macaroons offer an additional layer of sweetness and a pleasing texture to complement the pudding’s velvety smoothness.
-
Banana Bread: Serve a slice of moist banana bread alongside for that extra banana goodness, creating a delightful double treat.
-
Coffee: Finally, a warm cup of coffee rounds off the meal beautifully, contrasting the sweetness of the pudding and enhancing the overall enjoyment.
Make Ahead Options
Homemade banana pudding is an excellent choice for meal prep! You can prepare the pudding base up to 24 hours in advance by cooking it and allowing it to cool completely before refrigerating. Simply layer the vanilla wafers and banana slices right before serving to maintain their texture and prevent browning. For optimal freshness, make sure to cover the dessert tightly with plastic wrap to prevent any refrigerator odors from seeping in. This allows the flavors to meld beautifully while saving you time on busy days. When ready to enjoy, just garnish with crushed wafers and serve chilled for that comforting, creamy delight you and your loved ones will adore!
How to Store and Freeze Homemade Banana Pudding
Fridge: Store your homemade banana pudding covered tightly with plastic wrap or in an airtight container for up to 4 days. This ensures freshness and maintains its delicious flavor.
Avoid Freezing: It’s best not to freeze this dessert, as the texture may change upon thawing, resulting in a grainy pudding that loses its creamy essence.
Reheating: If your pudding thickens more than preferred, gently reheat on low heat while stirring continuously. This helps restore its creamy consistency before serving.
Add Bananas Last: To keep banana slices from browning, it’s wise to add them just before serving, enhancing both the appearance and taste of your homemade banana pudding.
Classic Homemade Banana Pudding Recipe FAQs
How do I select the best bananas for my pudding?
Absolutely! Choose ripe bananas for the best flavor and sweetness. Look for bananas that are slightly speckled with brown spots; that’s a sign they’re ready to use. Avoid any that have dark spots all over as they might be too overripe.
What is the best way to store homemade banana pudding?
To keep your classic homemade banana pudding fresh, cover it tightly with plastic wrap or transfer it to an airtight container. It should be stored in the refrigerator and is best consumed within 4 days for optimal flavor and texture.
Can I freeze leftover banana pudding?
I wouldn’t recommend freezing banana pudding! Freezing can alter the creamy texture, making it grainy when defrosted. If you want to make ahead, prepare and refrigerate the pudding mixture without layering, then add vanilla wafers and bananas just before serving.
What do I do if my pudding doesn’t thicken properly?
If your pudding doesn’t thicken as expected, don’t worry! Make sure it cooked long enough—about 10 minutes initially, and 2 more minutes after adding the tempered eggs. If it still seems runny, you can whisk a bit of additional flour with cold milk and gently reheat the pudding on low heat while stirring until it thickens properly.
Are there any dietary considerations for this recipe?
Very! For those looking for gluten-free options, you can easily substitute all-purpose flour with a gluten-free flour blend. Additionally, opting for non-dairy milk alternatives like almond or oat milk not only caters to dairy sensitivities but also maintains the lovely creaminess of your homemade banana pudding.
How do I prevent banana slices from browning?
To keep your banana slices looking fresh and appealing, add them to your pudding just before serving rather than during assembly. This simple trick keeps them vibrant and delicious for that perfect presentation when it’s time to enjoy your dessert!
Delicious Homemade Banana Pudding: A Family Favorite Delight
Ingredients
Equipment
Method
- In a medium saucepan, whisk together 1 cup of sugar, 1/3 cup of flour, and a pinch of salt until well blended.
- Gradually pour in 4 cups of milk while whisking continuously over medium heat. Keep stirring for about 10 minutes until the mixture thickens.
- Once thickened, reduce the heat to low and let the pudding gently bubble for an additional 2 minutes, stirring constantly.
- In a small bowl, whisk together 3 beaten eggs. Gradually stir in about one cup of the hot pudding mixture to temper the eggs.
- Pour the tempered egg mixture back into the saucepan with the remaining pudding. Cook on low heat, stirring constantly until it thickens.
- Remove the saucepan from heat and stir in 1 tablespoon of pure vanilla extract. Let the pudding cool for approximately 15 minutes.
- In an ungreased 8-inch square pan, begin layering by placing about 25 vanilla wafers at the bottom.
- Add half of the sliced bananas before pouring in half of the warm pudding mixture. Repeat these layers once more.
- Cover the pan closely with plastic wrap and refrigerate for at least 4 hours, preferably overnight.
- Before serving, sprinkle crushed vanilla wafers on top for added crunch.
Leave a Reply