
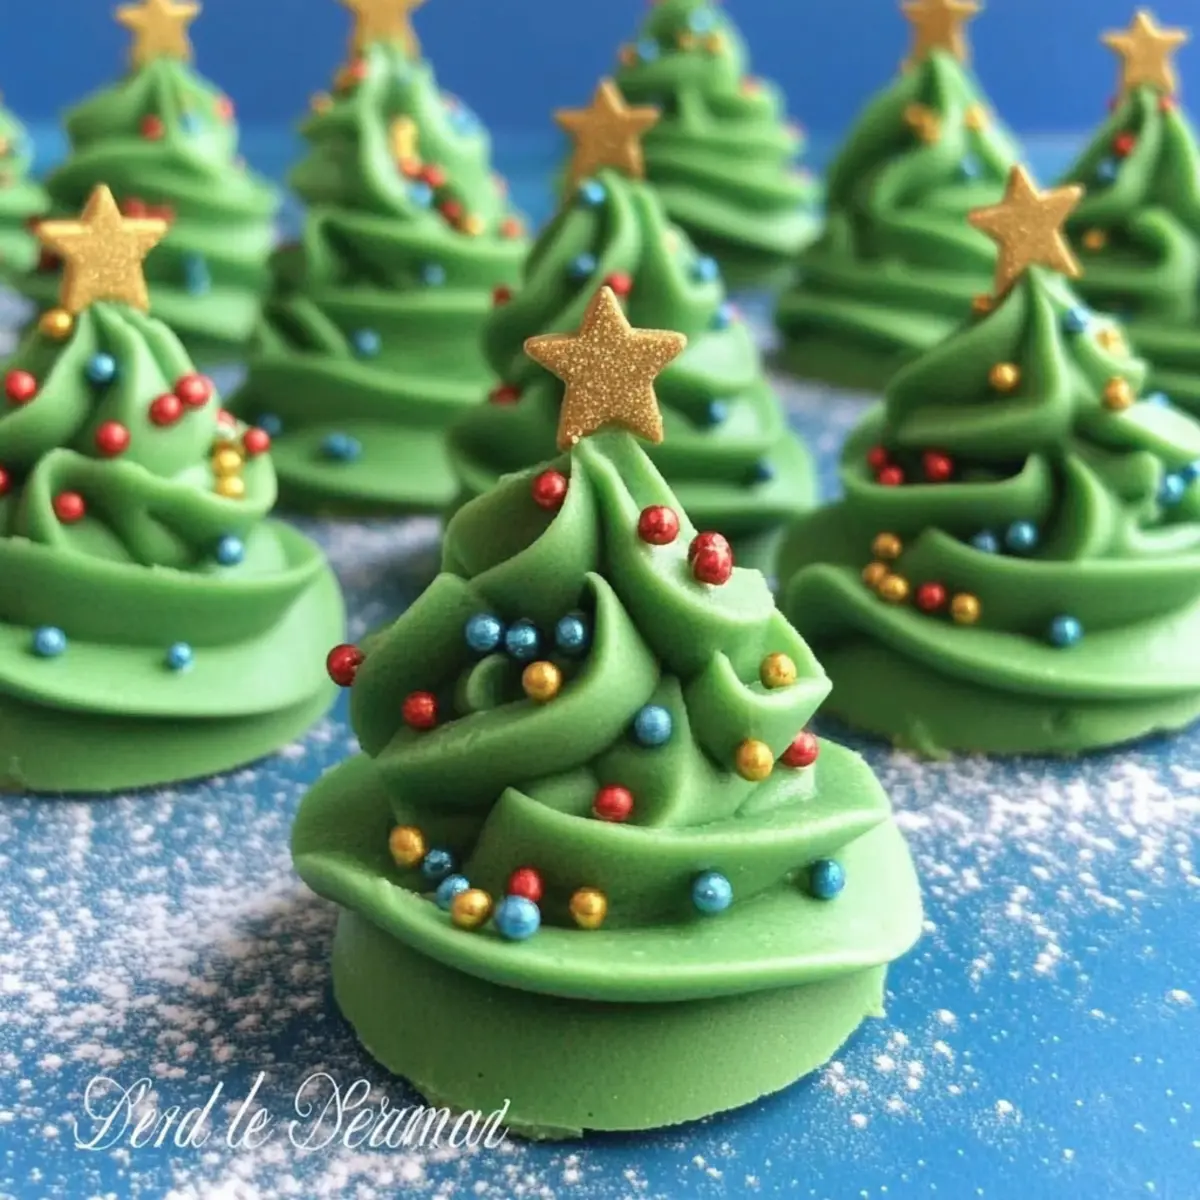
The smell of melting chocolate wafts through my kitchen as I gear up for the holiday season, and I can’t help but smile thinking about these adorable three-ingredient Fudge Christmas Trees. They’re a delightful twist on festive treats, combining the creamy sweetness of candy melts with a refreshing mint flavor, making them a true seasonal favorite. Not only are they incredibly quick to whip up—perfect for those last-minute gatherings—but their no-bake nature means you can avoid the oven altogether. Topped with colorful sprinkles and a golden star, these delectable trees will surely wow your family and friends at any holiday celebration. Ready to add a touch of whimsy to your dessert table? Let’s dive into making these sweet little masterpieces!

Why Are These Fudge Christmas Trees Special?
Irresistible Simplicity: These three-ingredient Fudge Christmas Trees are incredibly easy to make, making them perfect for any skill level.
Festive Presentation: With their colorful sprinkles and golden star topping, they bring a whimsical touch to your holiday dessert table that everyone will admire.
Refreshing Mint Flavor: The creamy candy melts paired with refreshing Creme de Menthe create a delightful minty twist that stands out among traditional sweets.
Perfect for Sharing: This recipe yields about 30 servings, making it an excellent choice for parties or gatherings—your friends and family will appreciate this festive treat!
No-Bake Convenience: Forget about turning on the oven! This no-bake recipe saves you time and effort, letting you focus on other holiday preparations.
Versatile Options: Want to mix things up? You can easily swap out colors of candy melts or play with different toppings to make each batch unique! If you’re looking for more fun holiday ideas, check out my post on holiday cookie decorations for even more festive fun!
Fudge Christmas Trees Ingredients
For the Trees
- Green Candy Melts – Essential for creating the vibrant color and sweet chocolate flavor of your fudge Christmas trees. Substitution: Feel free to use white chocolate with a few drops of green food coloring for a unique twist.
- Sweetened Condensed Milk – This creamy ingredient binds everything together and adds a delightful richness. Substitution: If you’re looking for a variation, try using evaporated milk, but keep in mind that sweetness will differ.
- Creme de Menthe Liquor or Syrup – This minty ingredient is vital for achieving that refreshing flavor in your fudge. Substitution: For a more intense minty kick, peppermint extract works beautifully as a substitute.
For the Decorations
- Rainbow Nonpareils – These sprinkles add a colorful flair and fun texture to your holiday trees. Note: Any type of sprinkles can be substituted based on what you have on hand.
- Gold Star Sprinkles – A whimsical finishing touch that gives your trees their festive sparkle. Note: Feel free to use any small, edible decorations that catch your eye for the perfect festive topper.
Ready to start creating these delightful fudge Christmas trees? Gather your ingredients, and let the holiday fun begin!
Step‑by‑Step Instructions for Fudge Christmas Trees
Step 1: Melt Candy Melts
In a large microwave-safe bowl, combine the green candy melts and heat them in your microwave on high for 1 minute. Remove and stir, then continue microwaving in 15-second intervals at 50% power, stirring after each interval until the melts are completely smooth and glossy, resembling melted chocolate. This sets the foundation for your delicious fudge Christmas trees.
Step 2: Combine Ingredients
Once the green candy melts are melted, carefully stir in the sweetened condensed milk and the Creme de Menthe until everything is smoothly blended together. The mixture should be thick but workable; it will have a vibrant minty color. This harmonious blend creates the creamy texture and rich flavor of your fudge Christmas trees.
Step 3: Cool Mixture
Cover the fudge mixture with plastic wrap and let it cool at room temperature for about 10-15 minutes, stirring every 5 minutes until it thickens to a frosting-like consistency. This enables better piping and helps maintain the structure of your trees. You want it to be spreadable yet firm enough to hold its shape.
Step 4: Pipe Trees
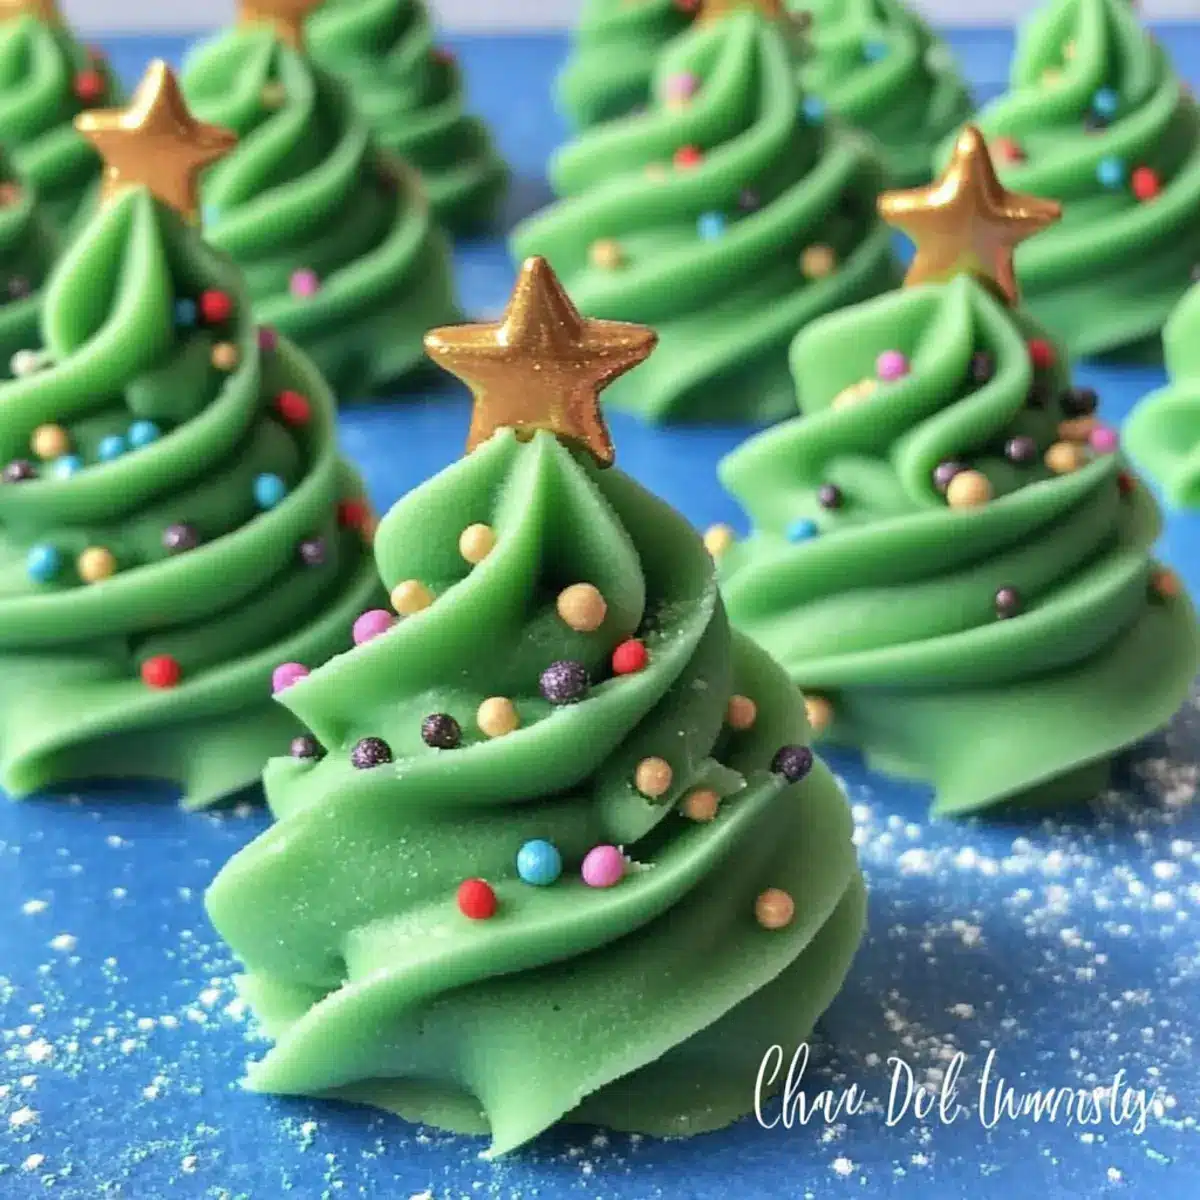
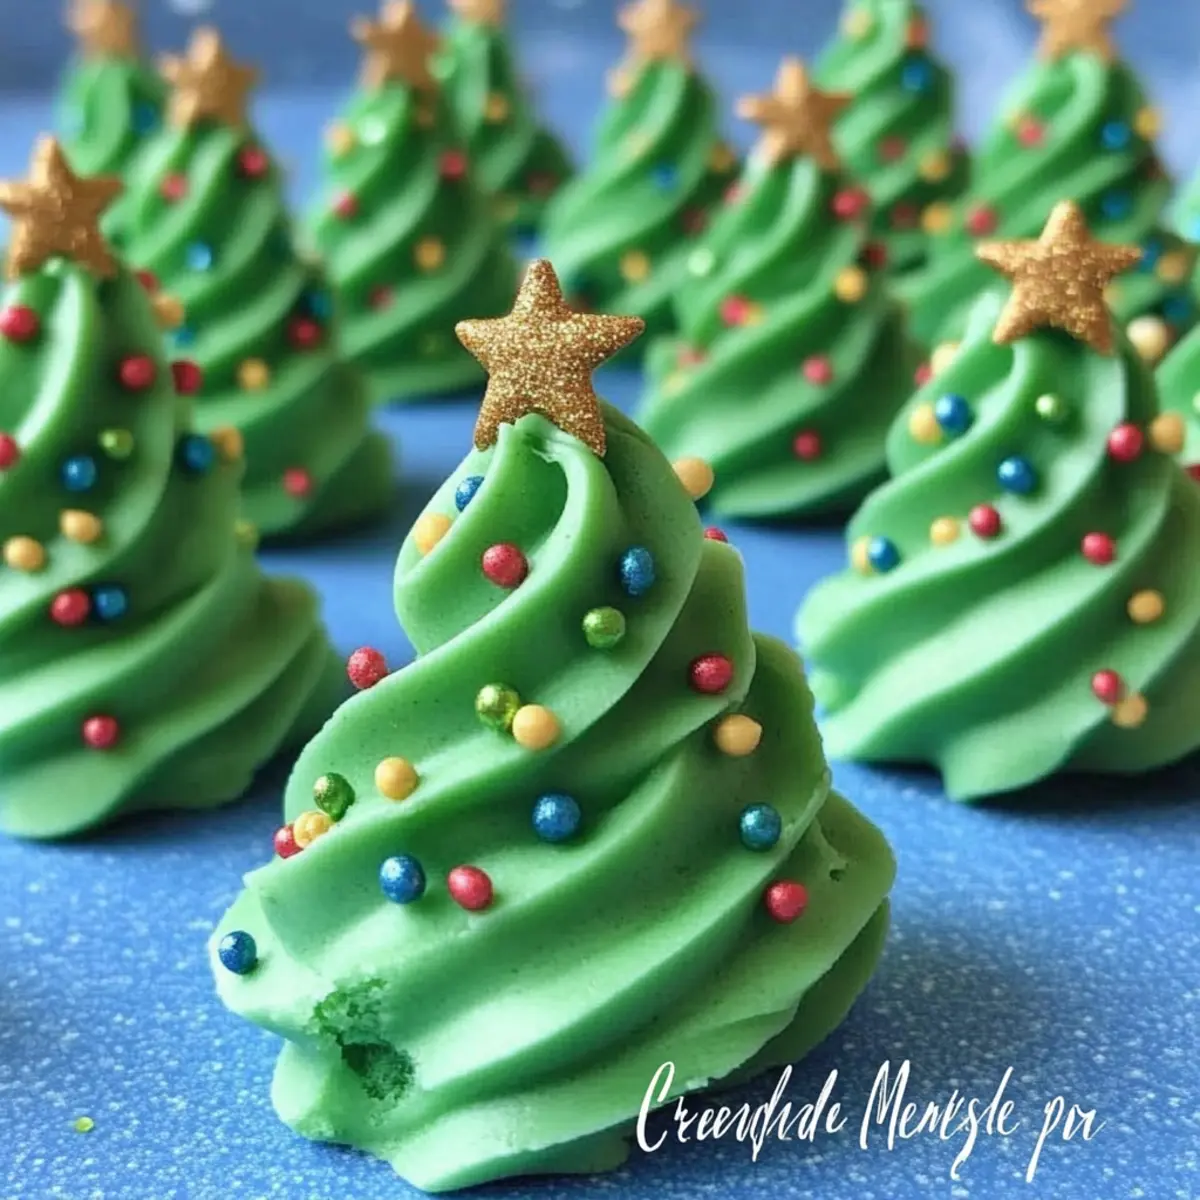
Prepare a piping bag fitted with a large star tip. Transfer the thickened fudge mixture into the piping bag, then pipe tree shapes directly onto a parchment-lined baking sheet. Start with a wider base and taper to a point at the top to mimic a tree shape. Each tree should have a delightful 3D appearance that will enchant your holiday guests.
Step 5: Add Decorations
While the fudge trees are still soft, gently press a gold star sprinkle at the top of each tree for a festive touch. Then, generously sprinkle the rainbow nonpareils over the fudge structures, allowing them to stick to the surface. This vibrant decoration not only adds color but also an enjoyable crunch to your delightful fudge Christmas trees.
How to Store and Freeze Fudge Christmas Trees
Room Temperature: Store your fudge Christmas trees in an airtight container at room temperature for up to 2 weeks. This keeps them fresh and ready to enjoy anytime!
Fridge: If you prefer a firmer texture, you can refrigerate the fudge trees, but consume within a week for the best flavor and texture.
Freezer: These treats can be frozen for up to 3 months. Wrap each tree individually with plastic wrap and place them in an airtight container. Thaw in the fridge before serving.
Reheating: There’s no need to reheat fudge Christmas trees, but if they soften too much, briefly refrigerate them to restore their firmness before serving.
What to Serve with Fudge Christmas Trees
As the holiday spirit fills the air, creating a joyful meal alongside these delightful sweets can make your festive gathering truly memorable.
- Festive Hot Chocolate: Rich and creamy, a cup of hot chocolate pairs perfectly with the minty fudge, enhancing the holiday warmth.
- Gingerbread Cookies: The bold spices in gingerbread cookies contrast beautifully with the sweet mint flavor for a delightful combination.
- Peppermint Bark: A chocolatey crunchy treat, peppermint bark echoes the minty notes without being overpowering, making for a cohesive dessert spread.
- Vanilla Ice Cream: Creamy vanilla ice cream adds a cool, smooth contrast against the fudge trees, balancing sweetness for a satisfying dessert experience.
- Nutty Biscotti: Crunchy, nutty biscotti provides a wonderful textural contrast while being the perfect companion to dunk into your hot beverage.
- Spiced Apple Cider: Warm spiced apple cider brings a comforting aroma and complementary flavors, enhancing the festive ambiance during your gathering.
- Minty Milkshake: A creamy mint milkshake not only mirrors the fudge trees’ flavor but also brings a fun, nostalgic twist to your celebration.
- Chewy Caramel Brownies: Fudgy brownies with chewy caramel add depth and richness to your dessert lineup, making every bite a delicious adventure.
- Sparkling Water with Lime: Refreshing and bubbly, this drink cleanses the palate between sweet treats, allowing each dessert’s flavor to shine through.
- Sugar Cookies: Classic sugar cookies topped with festive icing are a versatile option that will bring smiles to both kids and adults alike.
Expert Tips for Fudge Christmas Trees
-
Gentle Melting: Ensure you heat the candy melts slowly to prevent burning. Stir frequently for the best texture.
-
Correct Consistency: Monitor the cooling mixture closely. If it becomes too firm, reheating briefly can make it workable again.
-
Piping Techniques: Use a large star tip for piping. A steady hand helps create perfectly shaped trees; practice on parchment if needed.
-
Decorating Delight: Apply decorations while the fudge is still soft to ensure sprinkles adhere properly. This will elevate your Fudge Christmas Trees!
-
Storage Savvy: Keep your fudge trees in an airtight container at room temperature. They last up to two weeks, making them a great make-ahead treat for gatherings.
Fudge Christmas Trees: Customizable Treats
Feel free to let your creativity shine with these delightful fudge trees by making them your own!
- Chocolate Swaps: Use white or milk chocolate melts instead of green for a delicious twist and a different look.
- Drizzle Delight: Top with a drizzle of melted chocolate or sprinkle crushed peppermint for extra flair and flavor.
- Lactose-Free: Swap the sweetened condensed milk with coconut milk for a dairy-free, tropical twist that’s equally creamy.
- Mini Fudge Trees: Pipe smaller versions of the trees for bite-sized treats; perfect for sharing at holiday parties!
- Spicy Kick: Add a pinch of cayenne or chili powder to the fudge mixture for an unexpected heat that contrasts beautifully with the mint.
- Nutty Addition: Fold in finely chopped nuts like walnuts or pecans for a crunchy texture boost that complements the smooth fudge.
- Colorful Fun: Experiment with different seasonal-themed sprinkles to celebrate various holidays throughout the year; think heart shapes for Valentine’s or pastel colors for Easter.
- Vegan Version: Replace the sweetened condensed milk with a homemade cashew cream for a tasty vegan alternative that doesn’t compromise on flavor.
Let these variations inspire you to whip up your version of these festive fudge trees! If you’re looking for even more fun decorations to elevate your festivities, check out my post on holiday cookie decorations to keep your spirit bright!
Make Ahead Options
These Creme de Menthe Fudge Christmas Trees are perfect for busy home cooks who want to save time during the festive season! You can prepare the fudge mixture up to 24 hours in advance by melting the candy melts and combining them with sweetened condensed milk and creme de menthe. Once mixed, cover the bowl tightly and refrigerate to maintain its quality. When you’re ready to serve, simply allow the mixture to come to room temperature, then pipe the tree shapes onto a parchment-lined baking sheet. Finally, add the decorations right before serving for that fresh, vibrant look. This way, you can enjoy delightful, minty treats with minimal last-minute effort!
Fudge Christmas Trees Recipe FAQs
What type of candy melts should I use?
For this recipe, I recommend using green candy melts for that festive look and sweet chocolate flavor. However, if green is unavailable, white chocolate with a few drops of green food coloring works wonderfully, giving you the same vibrant appearance!
How should I store fudge Christmas trees?
Store your fudge Christmas trees in an airtight container at room temperature for up to 2 weeks. This way, they stay fresh and delightful, ready to share with family and friends. If you want them to last longer, consider refrigerating them for up to a week or freezing them for up to 3 months.
Can I freeze fudge Christmas trees?
Absolutely! To freeze your fudge Christmas trees, individually wrap each one with plastic wrap. Place the wrapped trees in an airtight container to protect them from freezer burn. When you’re ready to enjoy them, just thaw them in the fridge overnight for the best results.
What should I do if my fudge mixture is too runny?
If you find that your fudge mixture is too runny after cooling, don’t fret! You can gently reheat it in the microwave for just a few seconds to help bring back a thicker consistency. Be careful not to overheat, and mix in a little more candy melts if needed to achieve the right texture again.
Are these fudge Christmas trees suitable for my pets or those with allergies?
While these fudge Christmas trees are delightful for humans, they are not suitable for pets, especially dogs, due to the presence of chocolate and candy melts. Always be cautious with allergens; make sure your decorations and ingredients do not contain gluten or any other allergens that could affect your guests’ dietary needs.
Fudge Christmas Trees: Delightful No-Bake Treats for the Holidays
Ingredients
Equipment
Method
- In a large microwave-safe bowl, combine the green candy melts and heat them in your microwave on high for 1 minute. Stir and continue microwaving in 15-second intervals until smooth.
- Once the melts are smooth, stir in the sweetened condensed milk and the Creme de Menthe until fully blended together.
- Cover the mixture and let it cool at room temperature for about 10-15 minutes, stirring every 5 minutes until it thickens.
- Prepare a piping bag fitted with a large star tip and pipe tree shapes onto a parchment-lined baking sheet.
- Press a gold star sprinkle at the top of each tree and sprinkle the rainbow nonpareils over the fudge while still soft.
Leave a Reply