
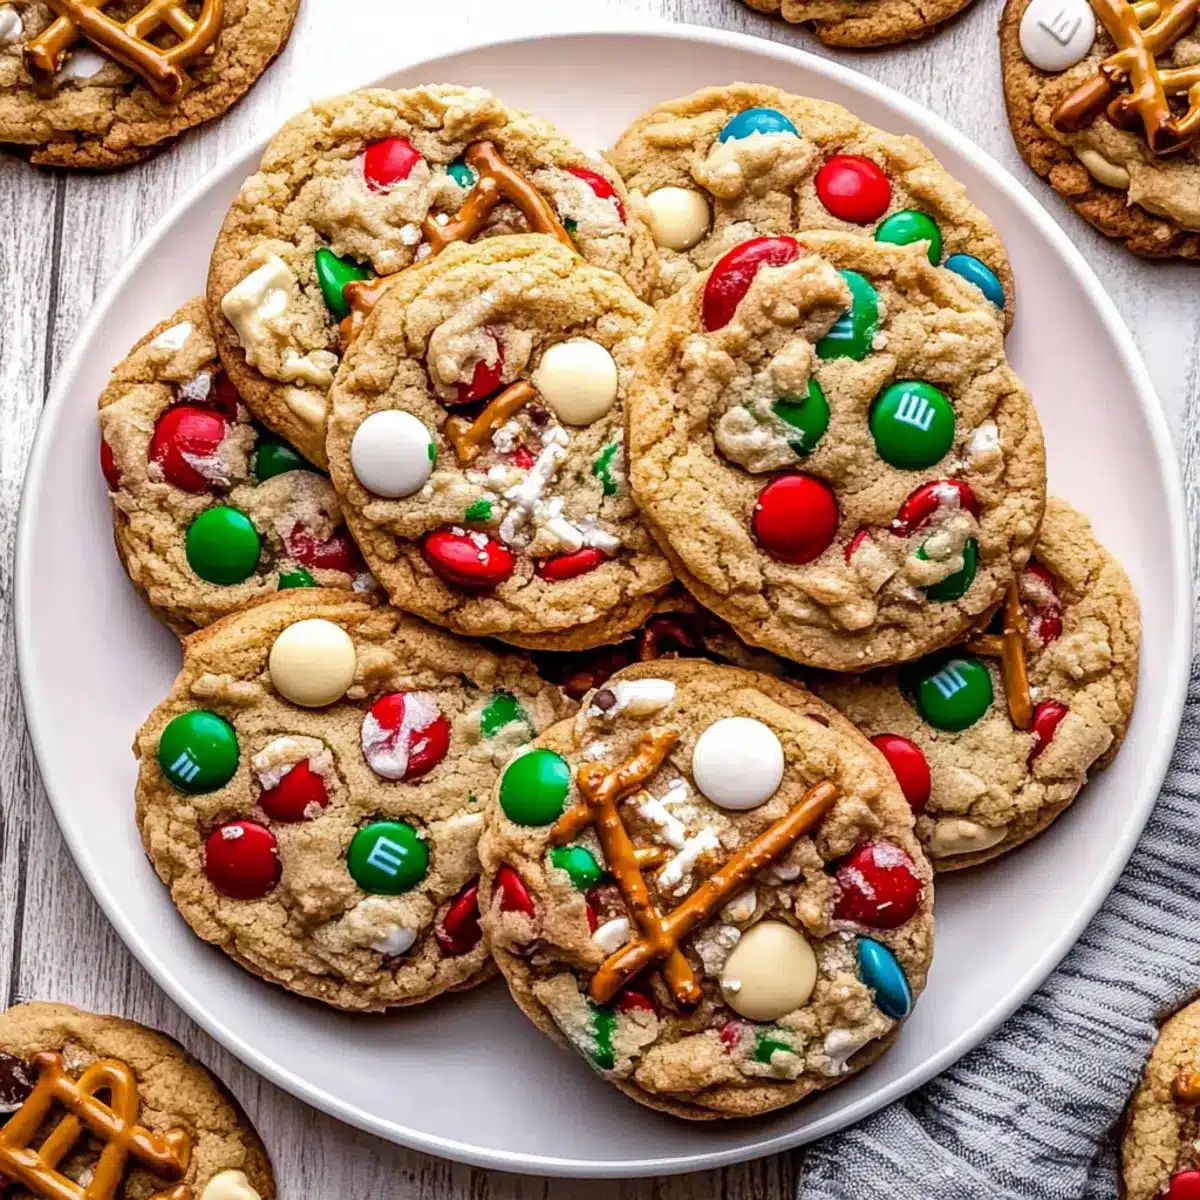
In a bustling kitchen filled with laughter and the sweet scent of holiday spices, I stumbled upon a delightful way to transform an ordinary cookie into a festive masterpiece. These Christmas Kitchen Sink Cookies come together in a snap, with no chill time required, making them the perfect solution for busy home chefs. Combining the irresistible crunch of pretzels and potato chips with vibrant M&Ms and creamy white chocolate, this recipe promises a delightful balance of sweet and salty flavors that everyone will adore. Not only are they easy to whip up in just 30 minutes, but they also invite creativity in every batch, making them a fantastic choice for including little helpers in the kitchen. Ready to discover the magic of these festive treats? Let’s dive into the recipe!
Why are these cookies a holiday favorite?
Convenience: Quick to make in just 30 minutes, these Christmas Kitchen Sink Cookies are a breeze for busy bakers.
Sweet & Salty Delight: Each bite combines crunchy pretzels and crispy potato chips with sweet chocolate, creating a taste explosion.
Customizable Fun: With the option to mix in your favorite candies or flavored pretzels, you can personalize every batch—perfect for involving kids in holiday baking!
Visually Appealing: Bright red and green sprinkles make these cookies not just delicious but festive enough for any holiday gathering.
Chewy Texture: They offer a wonderful mix of soft centers with crisp edges, ensuring they stay irresistible from the oven to the cookie jar.
Enjoy them fresh or with a glass of milk, and for more delightful treats, check out my Valentine Ganache Cookies for a special surprise!
Christmas Kitchen Sink Cookies Ingredients
Get ready to make the best Christmas Kitchen Sink Cookies with these delicious ingredients!
For the Dough
- Salted Butter – Adds richness and moisture; unsalted butter works too with a pinch of added salt.
- Light Brown Sugar – Sweetens the cookies while helping them stay chewy.
- Granulated White Sugar – Contributes to overall sweetness and creates crispy edges.
- Egg Yolks – Provides moisture and a rich flavor; remember, substitutes may change texture.
- Vanilla Bean Paste or Extract – Enhances the overall taste; vanilla extract can replace paste if needed.
- All-Purpose Flour – Essential for structure; make sure to spoon and level for accurate measurements.
- Baking Powder and Baking Soda – These leavening agents give the cookies a lovely rise.
- Salt – A vital component that balances sweetness and intensifies flavors.
For the Mix-Ins
- Red and Green M&Ms – Bring festive sweetness and colorful flair; swap for any preferred chocolate candies.
- White Chocolate Chips – Offer creamy sweetness that perfectly complements the mix.
- Pretzel Pieces – Deliver a crunchy, salty bite; flavored pretzels can make a unique twist!
- Potato Chip Pieces – Add a delicious salty crunch for a fun texture variation.
- Red and Green Jimmies – Perfect for making these cookies visually appealing during the holidays.
Get ready to bake these magical Christmas Kitchen Sink Cookies that burst with flavor!
Step‑by‑Step Instructions for Christmas Kitchen Sink Cookies
Step 1: Preheat the Oven
Start by preheating your oven to 350°F (175°C). While the oven heats, prepare your baking sheets by lining them with parchment paper. This will ensure that your Christmas Kitchen Sink Cookies don’t stick and come off the sheets easily when baked, making cleanup a breeze.
Step 2: Cream the Butters and Sugars
In a large mixing bowl, combine the softened salted butter, light brown sugar, and granulated sugar. Using an electric mixer on medium speed, beat the mixture for about 2 minutes until it becomes light and fluffy, showcasing a pale color and airy texture. This step is crucial as it helps incorporate air into the dough for delightful cookies.
Step 3: Add Egg Yolks and Vanilla
Next, drop in the egg yolks and your vanilla bean paste or extract. Blend everything together on medium speed for another 2 minutes until the mixture is smooth and fluffy, with a light, creamy consistency. This addition offers richness and enhances the flavor of your Christmas Kitchen Sink Cookies.
Step 4: Mix the Dry Ingredients
In a separate bowl, whisk together the all-purpose flour, baking powder, baking soda, and salt. Gradually add this dry mixture to the wet ingredients in your mixing bowl, stirring until just combined. Be careful not to overmix; you want a cohesive dough that is slightly thick and holds its shape.
Step 5: Fold in the Mix-Ins
With a spatula, gently fold in the red and green M&Ms, white chocolate chips, pretzel pieces, potato chip pieces, and festive sprinkles. This step is where your Christmas Kitchen Sink Cookies take on a delightful assortment of flavors and textures! Make sure the mix-ins are evenly distributed throughout the dough.
Step 6: Portion the Dough
Using a cookie scoop or spoon, portion out the dough into about 20 equal balls, and place them on your prepared baking sheets about 2 inches apart. For a fun finishing touch, press a few extra mix-ins on top of each dough ball. This will add to the festive look once baked.
Step 7: Bake the Cookies
Transfer the baking sheets to the preheated oven and bake for 10-12 minutes. For chewier centers, aim for 10 minutes, while 12 minutes will yield crisper edges. Keep an eye on the cookies; they should be lightly golden on the edges while still soft in the center when you take them out.
Step 8: Cool the Cookies
Once baked, allow the cookies to cool on the baking sheets for about 5 minutes. After that, carefully transfer them to a cooling rack to cool completely. This cooling process is essential to enhance their structure and flavor development, setting the stage for the festive enjoyment of your Christmas Kitchen Sink Cookies.

Make Ahead Options
These Christmas Kitchen Sink Cookies are perfect for busy home cooks looking to save time! You can prepare the dough up to 3 days in advance and refrigerate it in an airtight container. This helps maintain the cookies’ rich flavors and chewy texture. Just ensure to cover the bowl tightly to prevent dryness. When you’re ready to bake, simply scoop the dough onto lined baking sheets and bake for 10-12 minutes. If you want to plan even earlier, you can freeze the dough balls for up to 2 weeks; just pop them straight into the oven without thawing when the craving strikes. Enjoy the convenience of festive baking with minimal effort!
What to Serve with Christmas Kitchen Sink Cookies
Indulging in these delightful holiday treats creates a joyous atmosphere perfect for sharing with friends and family.
- Glass of Milk: A classic pairing that enhances the cookie’s sweetness and complements the salty crunch beautifully.
- Hot Cocoa: Rich and comforting, hot cocoa adds an extra layer of festive warmth—perfect for cozy gatherings!
- Vanilla Ice Cream: A scoop of creamy vanilla ice cream contrasts the chewy cookies, providing a delightful flavor balance.
- Caramel Sauce: Drizzle warm caramel over the cookies for an elegant touch that elevates each bite into a sweet celebration.
- Festive Fruit Tart: The bright freshness of a fruit tart contrasts the richness of the cookies, creating a lively dessert spread.
- Spiced Cider: A warm, spiced apple cider rounds out the flavors, filling the room with comforting aromas and festive cheer.
- Cheesecake Bites: Mini cheesecake bites offer a creamy, tangy contrast that pairs perfectly with the cookies’ sweet and salty notes.
- Nutty Fruit Trail Mix: This crunchy snack adds a healthy touch to your dessert table, balancing out the rich cookies with fresh textures.
- Holiday Punch: A fruity, sparkling punch will brighten up your party while complementing the festive flavors of the cookies.
- Gingerbread Cookies: For a delightful treat-sharing experience, serve with gingerbread cookies to reinforce the holiday spirit in every bite!
How to Store and Freeze Christmas Kitchen Sink Cookies
Room Temperature: Store your cookies in an airtight container at room temperature for up to 3 days to maintain their delightful texture and flavor.
Fridge: If you prefer them chilled, you can keep the cookies in the fridge for up to 5 days; however, they might lose a bit of their crunch.
Freezer: Freeze unbaked dough balls for up to 2 weeks. Simply portion the dough, wrap it tightly, and when you’re ready to bake, no need to thaw—just add a minute or two to the baking time!
Reheating: To enjoy your Christmas Kitchen Sink Cookies warm, pop them in the microwave for about 10-15 seconds or reheat in a preheated oven for a few minutes.
Christmas Kitchen Sink Cookies Variations
Get ready to unleash your creativity with these festive cookie variations!
- Nutty Addition: Swap out some of the mix-ins for chopped nuts like pecans or walnuts. They add a delightful crunch and depth of flavor.
- Flavorful Potato Chips: Experiment with different flavored potato chips such as barbecue or cheddar for an unexpected twist on taste. It’s a fun way to keep the cookie experience fresh!
- Butterscotch Swirl: Replace half of the chocolate chips with butterscotch chips. This adds a warm, buttery flavor that perfectly complements the sweetness.
- Coconut Dream: Fold in sweetened shredded coconut along with the other mix-ins for a tropical flair. The coconut gives a wonderful chewiness that will have everyone coming back for more.
- Spicy Kick: For those who love a little heat, toss in a few crushed red pepper flakes with the mix-ins. It’s a surprising but delightful contrast to the sweetness!
- Dairy-Free Delight: Use dairy-free butter and chocolate chips for an allergy-friendly treat that still brings the joy of holiday baking to your table.
- Chocolate Overload: Add in dark chocolate chunks along with the white chocolate chips. The combination delivers rich flavor and a gourmet touch to your cookies.
- Festive Colors: Incorporate seasonal candies like crushed candy canes or seasonal M&Ms for a colorful holiday twist! It’s an easy way to brighten up your cookie platter.
These variations make it easy to personalize each batch of Christmas Kitchen Sink Cookies! Be sure to check out my other delightful recipes like Chocolate Chip Cookies or Brown Sugar Pop Tart Cookies for more festive inspirations!
Expert Tips for Christmas Kitchen Sink Cookies
-
Precise Measurements: Always measure your flour accurately. Instead of scooping directly, spoon and level it to avoid excess flour in your cookies.
-
Customize Wisely: Feel free to get creative with mix-ins! While red and green M&Ms are festive, you can substitute with your favorite candies to make your Christmas Kitchen Sink Cookies uniquely yours.
-
Mix-Ins Distribution: When folding in the mix-ins, mix gently to prevent certain ingredients from sinking to the bottom. This ensures every bite has a delightful array of flavors.
-
Cooling Time Matters: Allow cookies to cool on the baking sheet first; this helps set their shape. If you transfer them too early, they may break apart.
-
Storage Tips: Keep your cookies fresh by storing them in an airtight container at room temperature. They’ll remain delicious for up to three days, perfect for sharing!

Christmas Kitchen Sink Cookies Recipe FAQs
How do I choose the right M&Ms for these cookies?
Absolutely! You can use red and green M&Ms to keep with the festive theme, but feel free to swap them out with any of your favorite chocolate candies. Just ensure they have a similar size so they bake evenly in your Christmas Kitchen Sink Cookies.
What’s the best way to store leftover cookies?
To keep your cookies fresh and delicious, store them in an airtight container at room temperature for up to 3 days. If you want them to last longer, you can refrigerate them for up to 5 days, but be aware they might lose a bit of their delightful crunch.
Can I freeze the cookie dough?
Yes, you can! To freeze the unbaked dough, scoop it into balls and arrange them on a baking sheet to flash freeze for about 30 minutes. Once they’re firm, transfer them to a freezer-safe container or bag for up to 2 weeks. When you’re ready to bake, just pop them directly into the oven without thawing; add a minute or two to the baking time.
What if my cookies come out flat?
If your Christmas Kitchen Sink Cookies turn out flat, it might be due to overmixing the dough or using too little flour. To avoid this, remember to measure your flour correctly by spooning and leveling it. Also, ensure your butter is truly softened, not melted, as this can impact the structure.
Are there any allergen considerations for these cookies?
Very! This recipe contains common allergens like eggs and gluten (from flour), and the M&Ms may contain nuts. If you are baking for someone with allergies, consider using egg substitutes like flax or chia seeds and gluten-free flour options. Always check labels on your mix-ins to avoid cross-contamination.

Irresistible Christmas Kitchen Sink Cookies You’ll Love
Ingredients
Equipment
Method
- Preheat your oven to 350°F (175°C) and line baking sheets with parchment paper.
- In a large mixing bowl, combine the softened salted butter, light brown sugar, and granulated sugar. Beat for about 2 minutes until light and fluffy.
- Drop in the egg yolks and vanilla bean paste or extract. Blend on medium speed for another 2 minutes until smooth.
- In a separate bowl, whisk together flour, baking powder, baking soda, and salt. Gradually add to the wet ingredients, stirring until just combined.
- Gently fold in M&Ms, white chocolate chips, pretzel pieces, potato chip pieces, and sprinkles until evenly distributed.
- Portion out the dough into about 20 equal balls on prepared baking sheets, spaced 2 inches apart.
- Bake for 10-12 minutes until lightly golden on the edges but soft in the center.
- Allow cookies to cool on sheets for 5 minutes, then transfer to a cooling rack.
Leave a Reply