
As I rummaged through my pantry, a playful idea sparked: why not transform everyday ingredients into whimsical delights? Enter the world of Chocolate-Covered Pretzel Nests—an enchanting treat that brings a splash of joy to any spring gathering. This no-bake recipe is not only easy to whip up, but it’s also a customizable canvas for your creativity. Picture the delighted faces of your loved ones as they nibble on sweet and salty bites that echo the charm of miniature nests. Plus, with minimal mess and quick preparation, it’s an ideal activity to involve the kids, making it a perfect family project this Easter. What flavors will you choose to elevate your nests?
Why Make Chocolate-Covered Pretzel Nests?
Irresistible Fun: These Chocolate-Covered Pretzel Nests are a delightful blend of salty and sweet that will make everyone smile at your gatherings.
Quick and No-Bake: With no baking required, you can whip up these treats in no time, perfect for busy families!
Customizable Treats: Feel free to swap out chocolates or toppings to suit your taste or theme—add a splash of color with seasonal candy options.
Kid-Friendly Project: Engage your little ones in the kitchen! Making these nests is a fun and educational way for kids to get involved in cooking.
Appealing Presentation: Their charming appearance adds a festive touch to any table, making them an eye-catching centerpiece for your spring celebrations.
Chocolate-Covered Pretzel Nests Ingredients
For the Nests
• Pretzel Sticks – Provides the structural base and crunch. No substitutes known.
• Milk Chocolate Chips – Adds sweetness and creamy texture; can be swapped with dark or white chocolate based on preference.
• Mini Candy Eggs – Adds color and festive decoration; alternatives include jellybeans or other seasonal candies.
Optional Enhancements
• Shredded Coconut – Enhances the nest effect visually and texture-wise; omit for a simpler presentation.
• Sprinkles – For extra decoration and fun; use any color or shape to match the occasion in your Chocolate-Covered Pretzel Nests.
Step‑by‑Step Instructions for Chocolate-Covered Pretzel Nests
Step 1: Melt Chocolate
Begin by melting your chocolate chips in a heatproof bowl. Place the bowl in the microwave and heat in 20-second intervals, stirring in between each session, until the chocolate is smooth and glossy, which should take about 1-2 minutes total. Alternatively, use a double boiler to melt the chocolate gently over simmering water, ensuring it doesn’t burn.
Step 2: Coat Pretzels
Once the chocolate is fully melted, add the pretzel sticks to the bowl. Using a spatula or spoon, gently toss the pretzels in the warm chocolate so they are completely coated. This step should be done quickly to prevent the chocolate from cooling and hardening prematurely—take roughly 2-3 minutes to ensure an even coating.
Step 3: Form Nests
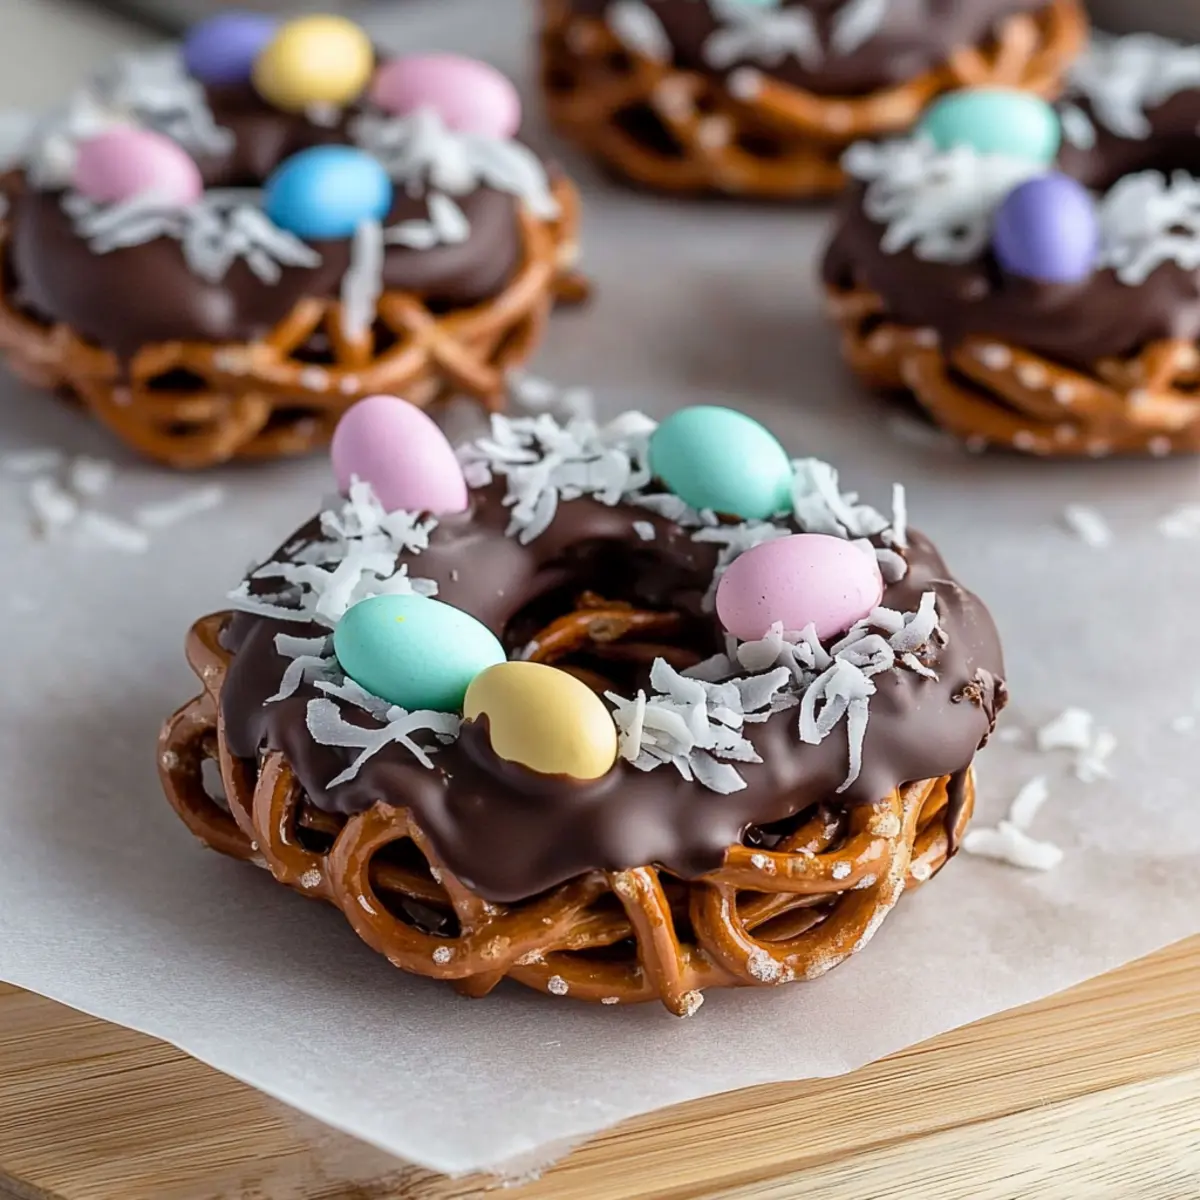
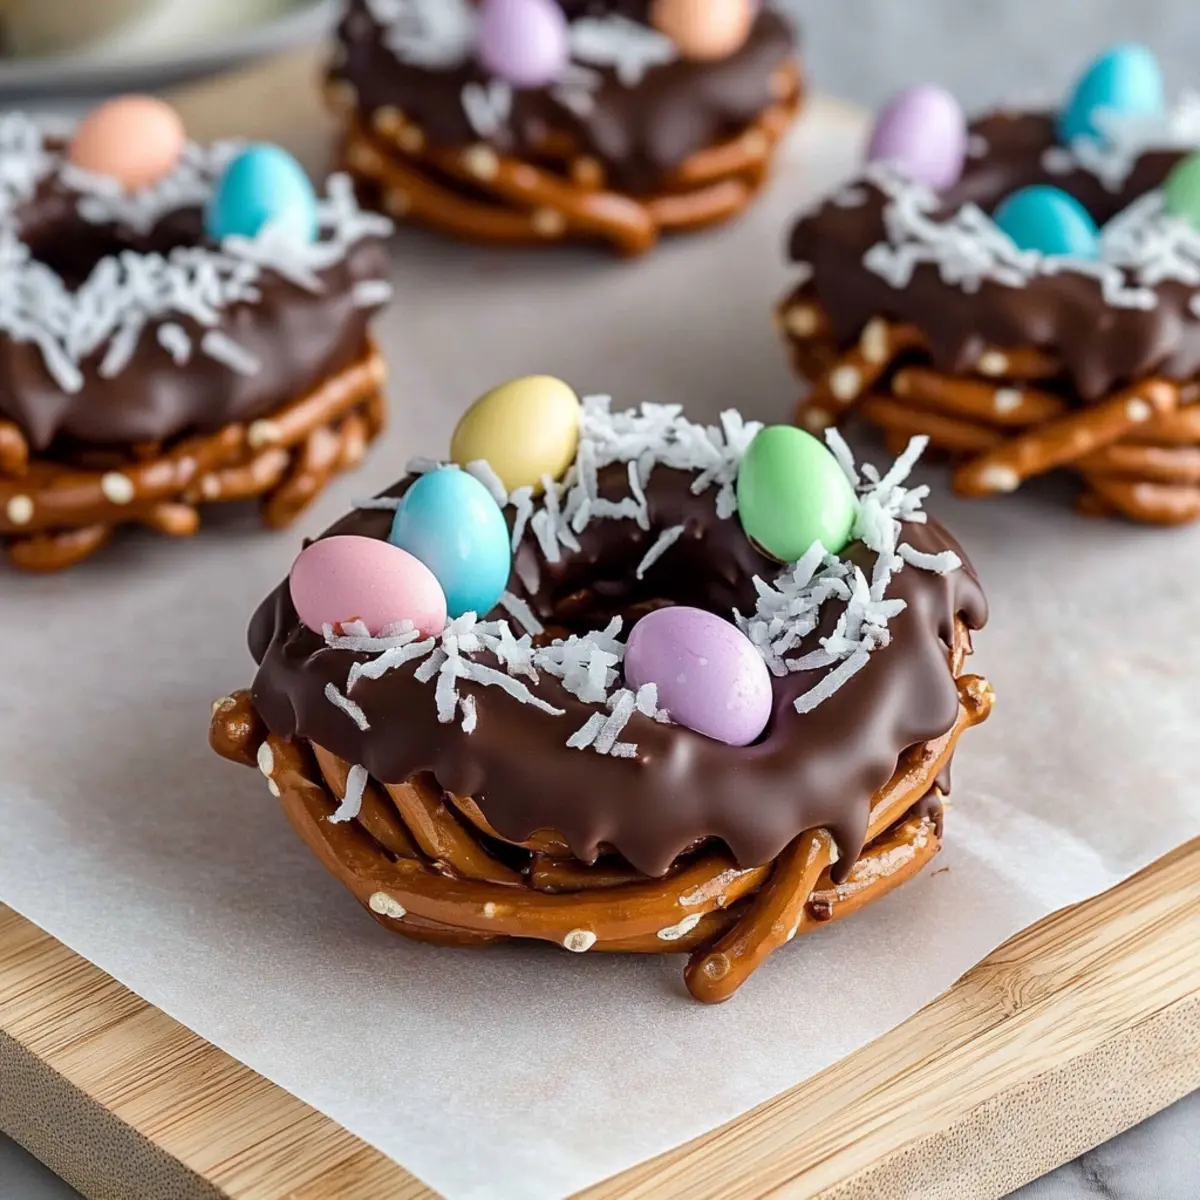
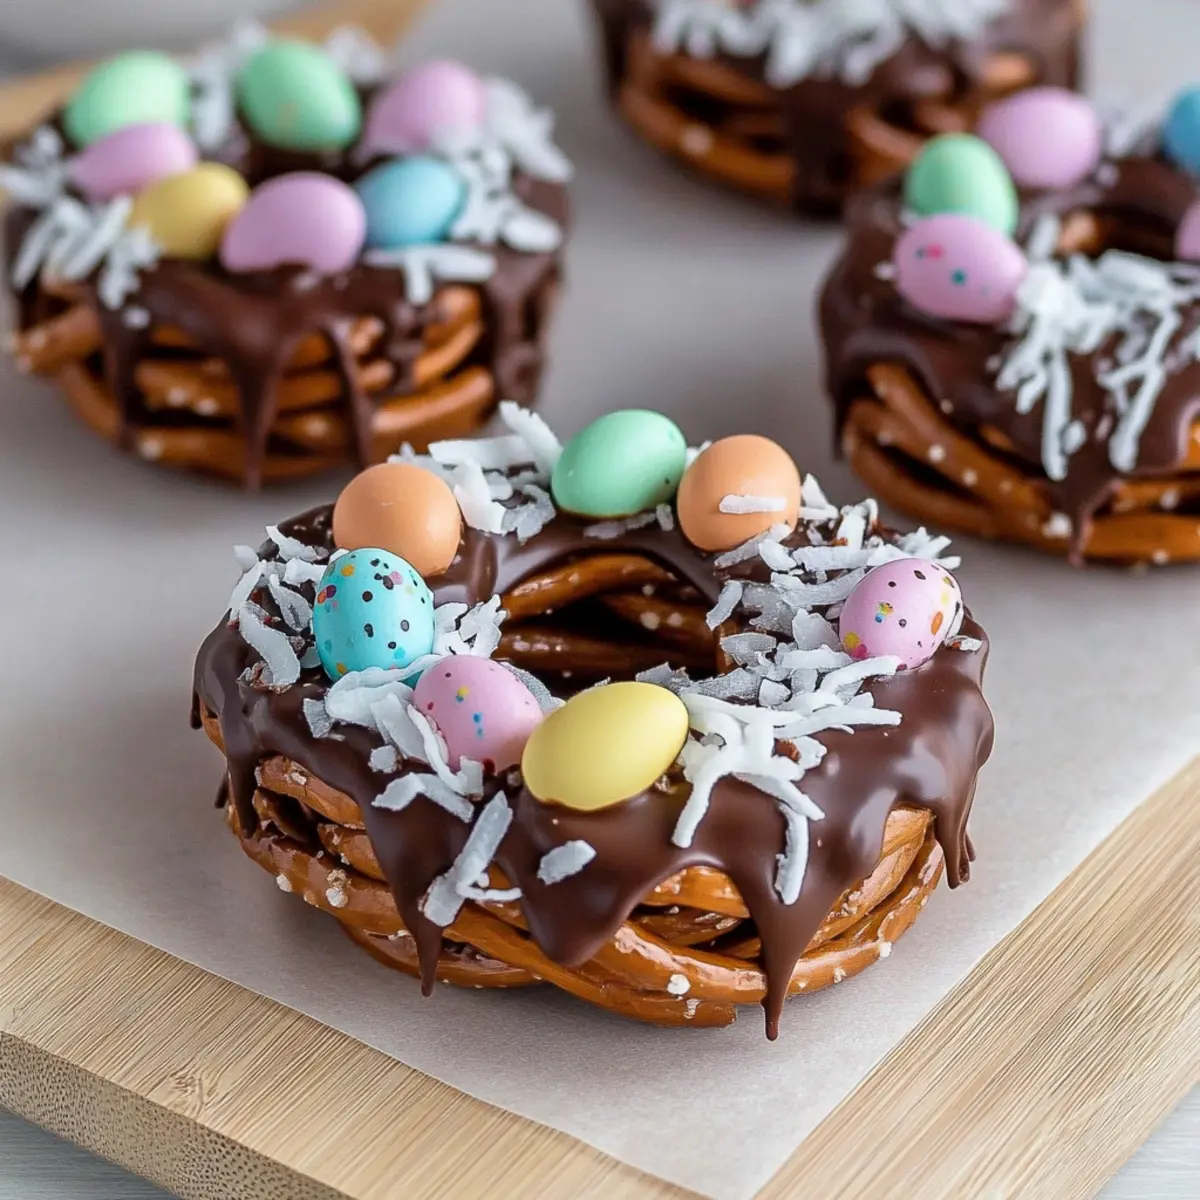
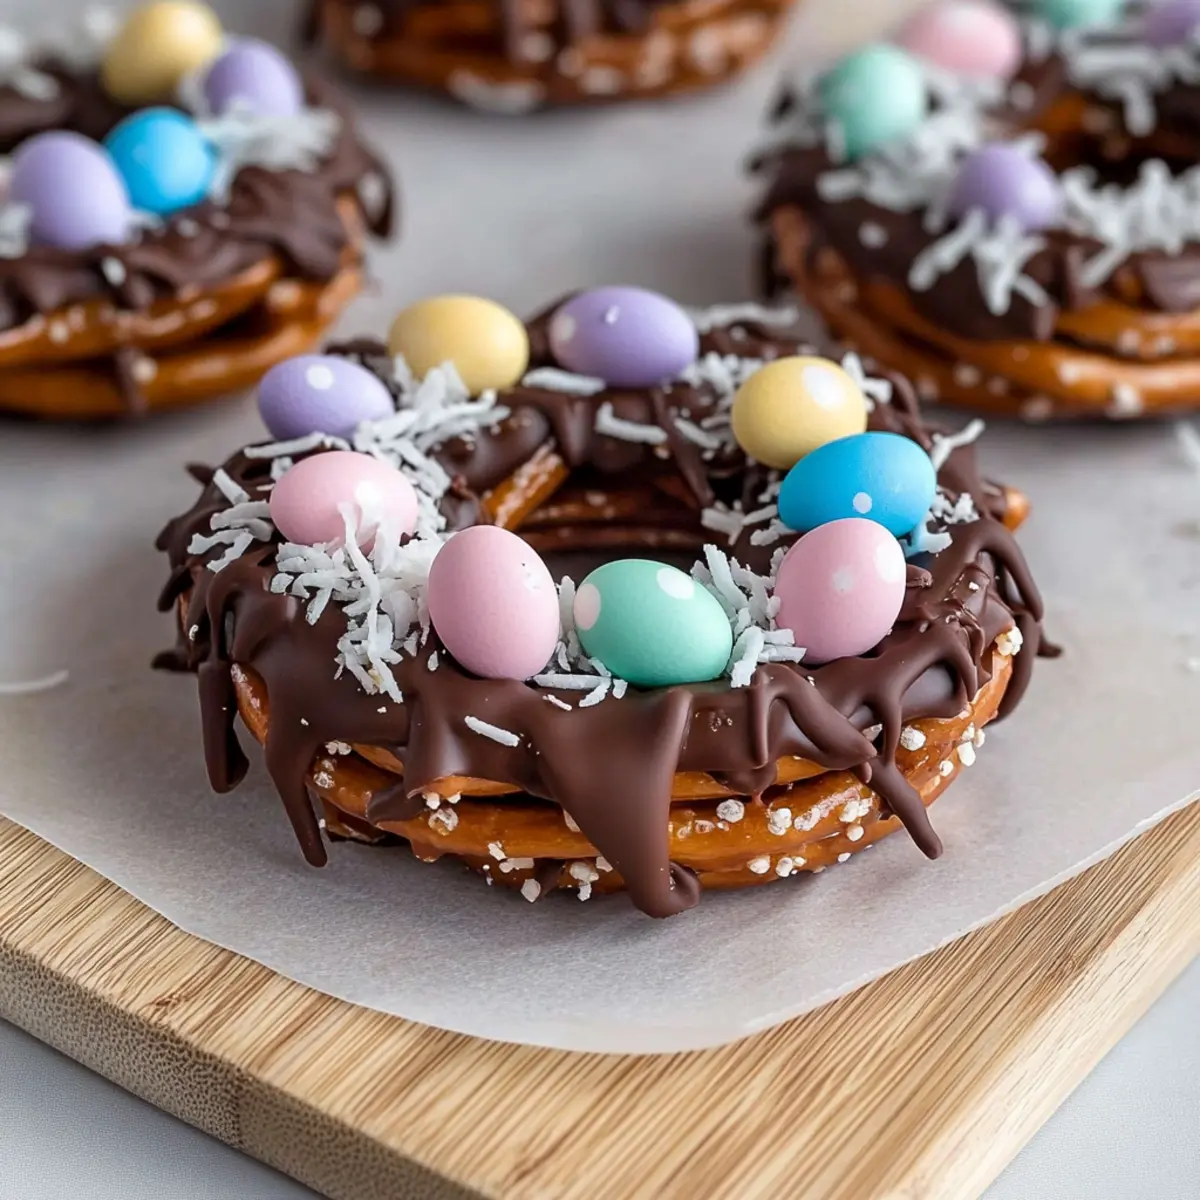
Prepare a lined baking sheet with parchment paper. Remove the chocolate-coated pretzels from the bowl, allowing any excess chocolate to drip off, and then place them on the baking sheet. Using your fingers, shape the pretzels into small nest formations, making a slight indentation in the center of each for the toppings to sit later. Aim to create 6-12 nests depending on your desired size.
Step 4: Add Decorations
Now, it’s time to make your Chocolate-Covered Pretzel Nests festive! Place mini candy eggs or your choice of decorations into the center indentation of each nest. If you’re using shredded coconut or sprinkles, sprinkle them over and around the nests for an extra touch of color and texture. This creative step can take around 5 minutes.
Step 5: Set Nests
To allow the chocolate to set and harden, place the baking sheet in the refrigerator. Chill the nests for about 20-30 minutes, or until the chocolate is firm to the touch. This cooling process ensures the nests hold their shape and are ready for enjoying, so keep an eye on them as they cool!
Chocolate-Covered Pretzel Nests Variations
Customize your Chocolate-Covered Pretzel Nests with these fun and tasty ideas that will delight your senses and spark your creativity!
-
Dairy-Free: Substitute with dairy-free chocolate chips for a delicious vegan treat that everyone can enjoy.
-
Nutty Crunch: Add crushed nuts or nut butter inside the nests for a flavorful crunch and nutty twist. Almonds or peanuts work wonderfully!
-
Caramel Delight: Drizzle melted caramel over the chocolate before it sets for an indulgent sweet touch. The combination of chocolate and caramel will send your taste buds into bliss.
-
Tropical Flavor: Introduce dried fruits like banana chips or pineapple bits alongside the coconut for a tropical nest experience. Picture yourself on a warm beach with each delightful bite!
-
Spicy Sweet: Mix in a pinch of cayenne or chili powder to the melted chocolate for a surprising heat that contrasts beautifully with the sweetness. Spice can add an exciting new layer to these classic treats.
-
Flavored Chocolate: Use peppermint or orange-flavored chocolate for a seasonal twist that brings new life to your nests. Imagine the enchanting scent wafting through your kitchen!
-
Layered Nests: For added texture, combine pretzel nuggets with the original pretzel sticks. Layering creates a unique texture while maintaining the delightful visual appeal.
-
Mini Nests: Make smaller versions using mini pretzels for adorable bite-sized treats perfect for parties—little guests will love them!
Explore these variations to make your Chocolate-Covered Pretzel Nests uniquely yours. You could even mix and match to create an assortment that satisfies every palate! If you’re looking for a delightful little dessert that captivates while being fun to make, don’t forget to check out kid-friendly recipes or add some seasonal toppings to elevate your creation!
What to Serve with Chocolate-Covered Pretzel Nests?
Elevate your spring gatherings with delightful sides and sweets that perfectly complement the whimsical charm of chocolate-covered pretzel nests!
-
Fresh Fruit Salad: A vibrant mix of seasonal fruits adds a refreshing contrast and a burst of natural sweetness to balance the rich treats.
-
Creamy Vanilla Ice Cream: The velvety texture and cool temperature offer a rich contrast that enhances the flavors of the nests with a refreshing touch.
-
Mini Carrot Cake Muffins: These soft, spiced muffins echo the festive theme, providing a comforting, sweet flavor that pairs beautifully with the indulgence of the nests.
-
Lemonade or Iced Tea: A bright, zesty lemonade or a refreshing iced tea will cleanse the palate between bites, making each chocolate-covered nest even more enjoyable.
-
Chocolate Dipped Strawberries: For an extra touch of decadence, the pairing of fresh strawberries coated in chocolate offers a sweet and fruity contrast suitable for spring celebrations.
-
Nutty Brownie Bites: Rich and fudgy, these bite-sized brownies provide depth and an extra layer of chocolate bliss that echoes the sweetness of the nests.
-
S’mores Dip: This gooey, chocolatey dip accompanied by graham crackers brings a fun element, perfect for dipping and sharing alongside your nests.
Each of these suggestions adds variety and excitement, ensuring your spring festivities are full of sweet memories!
Expert Tips for Chocolate-Covered Pretzel Nests
- Melt Chocolate Properly: Ensure your chocolate is fully melted and smooth for easy coating; lumpy chocolate makes for uneven pretzels.
- Work Quickly: When forming the nests, do it swiftly before the chocolate starts to set; this ensures the nests maintain their shape.
- Storage Solutions: Keep leftover Chocolate-Covered Pretzel Nests in an airtight container at room temperature; refrigerate if it’s warm to maintain freshness.
- Decorative Options: Feel free to get creative with your toppings—use pastel candies or edible flowers to enhance visual appeal and flavor.
- Avoid Overheating: When melting chocolate, be cautious not to overheat, which can result in a burnt taste; better less time and stir frequently.
How to Store and Freeze Chocolate-Covered Pretzel Nests
Airtight Container: Store your Chocolate-Covered Pretzel Nests in an airtight container at room temperature for up to 1 week to maintain freshness.
Refrigeration: If the weather is warm, it’s best to refrigerate the nests to avoid melting; they can last for up to 2 weeks when chilled.
Freezing: For longer storage, you can freeze the nests for up to 3 months. Place them in a freezer-safe container or bag, separated by parchment paper to prevent sticking.
Thawing: When ready to enjoy, remove from the freezer and let them thaw in the fridge for about 1 hour before serving.
Make Ahead Options
These Chocolate-Covered Pretzel Nests are a fabulous choice for meal prep, allowing you to save time and delight your family with a sweet treat! You can prepare the chocolate-coated pretzels up to 24 hours in advance—simply coat the pretzels and shape them into nests, then leave them on the baking sheet in the refrigerator until ready to decorate. Just before serving, add the mini candy eggs and any desired toppings, allowing you to maintain freshness and presentation. To keep the nests crispy and delicious, store them in an airtight container at room temperature, but if you’re in a warm environment, refrigerate them until it’s time to enjoy these charming delights!
Chocolate-Covered Pretzel Nests Recipe FAQs
How do I choose the right pretzel sticks for my nests?
Absolutely! Look for pretzel sticks that are sturdy and intact, free from any breakage. Check the packaging for freshness. Avoid any with dark spots or odd textures, as these could indicate staleness.
How should I store leftover Chocolate-Covered Pretzel Nests?
To maintain their crispy texture, keep your leftover Chocolate-Covered Pretzel Nests in an airtight container at room temperature for up to 1 week. If it’s particularly warm, it’s wise to refrigerate them, where they can last for up to 2 weeks.
Can I freeze Chocolate-Covered Pretzel Nests?
Yes, you can! To freeze, place your nests in a freezer-safe container separated by parchment paper to avoid sticking. They will stay fresh for up to 3 months. When ready to enjoy, simply remove them from the freezer and allow them to thaw in the fridge for about 1 hour.
What should I do if my chocolate is too thick to coat the pretzels?
No worries! If your chocolate feels too thick, it might need a splash of vegetable oil or coconut oil to thin it out. Just add a teaspoon at a time until you reach the desired consistency. Be sure to mix well for an even texture!
Are there any allergy considerations with this recipe?
Absolutely! If serving to guests, be mindful of common allergens. The recipe contains chocolate, which can have dairy and nut components depending on the brand. If you have guests with allergies, consider dark or dairy-free chocolate options for a safer alternative.
Delicious Chocolate-Covered Pretzel Nests for Spring Fun
Ingredients
Equipment
Method
- Melt the chocolate chips in a heatproof bowl in the microwave in 20-second intervals, stirring in between until smooth, about 1-2 minutes total.
- Add the pretzel sticks to the bowl of melted chocolate and gently toss to coat them completely.
- On a lined baking sheet, form the chocolate-coated pretzels into nest shapes, making a slight indentation in each.
- Place mini candy eggs or decorations into the center of each nest and sprinkle optional coconut or sprinkles as desired.
- Chill the nests in the refrigerator for 20-30 minutes or until the chocolate is firm.
Leave a Reply