
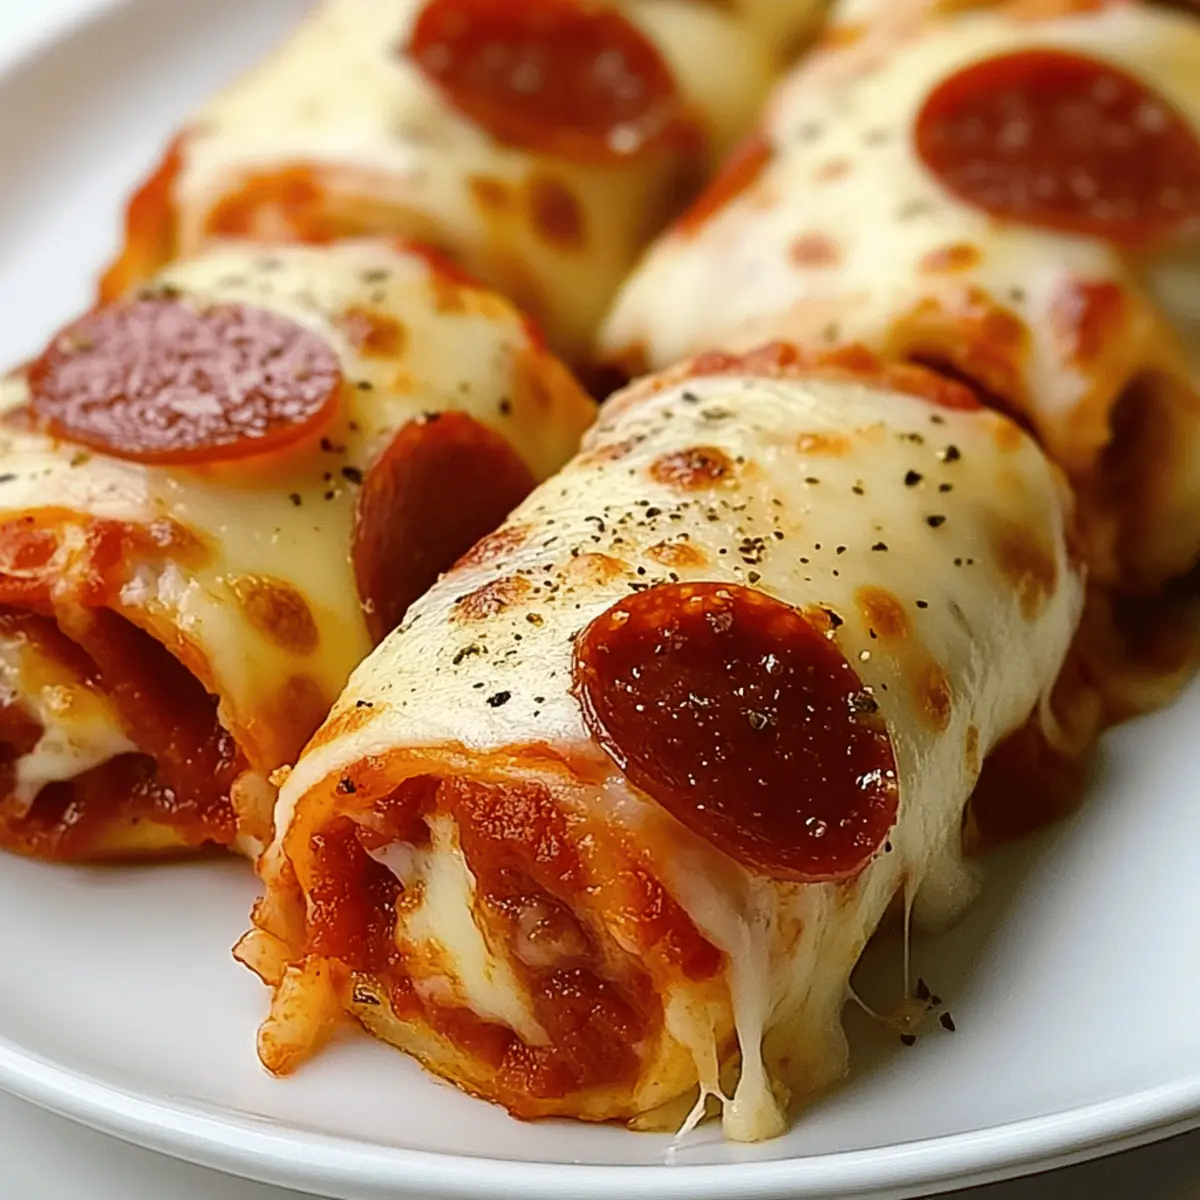
The aroma of baked pizza fills the air as anticipation grows in the kitchen. There’s something magical about the combination of melted cheese and savory pepperoni, especially when it’s wrapped up in a warm, low-carb tortilla. My Cheesy Pepperoni Pizza Roll-Ups are not only a fun twist on a beloved classic, but they also make a fantastic, guilt-free snack or appetizer that everyone will love. Perfect for those busy weeknights or when unexpected guests arrive, these delightful bites come together in a flash and will have your taste buds dancing with joy. Plus, they’re easily customizable, allowing you to get creative with ingredients! Ready to roll with me and discover just how delicious and simple these low-carb treats can be?
Why Are These Roll-Ups So Irresistible?
Deliciously Cheesy: Each bite is packed with gooey mozzarella that melts to perfection, making them the ultimate cheesy experience.
Savory Pepperoni: The addition of spicy, flavorful pepperoni elevates these roll-ups, giving a satisfying bite that echoes classic pizza vibes.
Quick and Easy: With just a few simple steps, you can whip up these low-carb delights in under 30 minutes, perfect for busy weeknights!
Customize Your Way: Feel free to swap in your favorite ingredients—think tasty cooked sausage or vibrant bell peppers; the possibilities are endless.
Crowd-Pleasing: Whether for a game night snack or a party appetizer, they’re guaranteed to disappear fast, making you the star of the evening!
For more exciting twists on classic flavors, check out my Cheesy Pepperoni Pizza or indulge in these Ooey Gooey Cheesy Garlic Chicken Wraps.
Cheesy Pepperoni Pizza Roll-Ups Ingredients
Get ready to roll with these delicious ingredients!
For the Roll-Ups
- Low-Carb Tortillas or Wraps – Look for pliable ones that can easily bend without breaking.
- Shredded Mozzarella Cheese – This creamy cheese is key for the gooey texture; feel free to mix in cheddar for an extra kick.
- Pepperoni Slices – Choose your favorite brand for the ultimate savory goodness; sausage or bacon can be tasty substitutes too!
- Tomato Sauce – This adds moisture and flavor—don’t shy away from trying pesto or barbecue sauce for a fun twist.
For Flavoring
- Italian Seasoning – This blend of herbs elevates the taste; feel free to use dried oregano or basil as alternatives.
- Garlic Powder – Gives a comforting aroma; fresh minced garlic can add a potent flavor punch.
Optional Add-ins
- Parmesan Cheese – A sprinkle can enhance the cheesy goodness!
- Olives – Add a briny touch that complements the flavors beautifully.
- Bell Peppers – For a pop of color and added crunch, these are a fantastic choice.
These Cheesy Pepperoni Pizza Roll-Ups are sure to become a go-to in your kitchen! Happy cooking!
Step‑by‑Step Instructions for Cheesy Pepperoni Pizza Roll‑Ups
Step 1: Preheat the Oven
Begin by preheating your oven to 375°F (190°C) while preparing to make the Cheesy Pepperoni Pizza Roll-Ups. Take a baking sheet and line it with parchment paper to ensure the roll-ups don’t stick. This step sets the stage for a perfectly baked, crispy exterior.
Step 2: Prepare the Tortilla
Spread a generous layer of tomato sauce on a low-carb tortilla, leaving about a half-inch border around the edges. This will create a flavorful base while ensuring the filling stays intact. Make sure the sauce is evenly distributed for maximum taste and moisture in each Cheesy Pepperoni Pizza Roll-Up.
Step 3: Add Cheese and Toppings
Sprinkle a hearty amount of shredded mozzarella cheese over the sauce, allowing it to melt beautifully during baking. Follow this with a layer of pepperoni slices, arranging them evenly across the cheese. This combination of toppings is what makes these roll-ups so irresistible and reminiscent of classic pizza.
Step 4: Season the Filling
To elevate the flavors in your Cheesy Pepperoni Pizza Roll-Ups, season the filling with Italian seasoning and garlic powder. These spices will enrich the taste, making each bite bursting with savory goodness. Ensure a nice even layer over the cheese and pepperoni for a well-rounded flavor profile.
Step 5: Roll It Up
Begin from one end of the tortilla and tightly roll it up to form a compact cylinder. As you roll, make sure to keep the filling inside to prevent spillage. This tight roll is essential for achieving the perfect texture in your finished Cheesy Pepperoni Pizza Roll-Ups.
Step 6: Place on Baking Sheet
Once rolled, place the seam side down on the prepared baking sheet. This positioning will help secure the roll during baking and keep it from unraveling. Repeat the rolling process with any remaining tortillas and filling to maximize your delicious snack.
Step 7: Bake until Golden
Slide the baking sheet into your preheated oven and bake the roll-ups for 12-15 minutes. Keep an eye on them as they cook, looking for a golden-brown color and a bubbly cheese appearance. This indicates your Cheesy Pepperoni Pizza Roll-Ups are perfectly done and ready to be savored.
Step 8: Cool and Slice
After removing the roll-ups from the oven, let them cool slightly on the baking sheet. Once they are manageable, slice each roll into bite-sized pieces. This makes it easy to serve and enjoy your delicious Cheesy Pepperoni Pizza Roll-Ups, perfect for sharing or snacking.
Step 9: Serve Warm
Serve your Cheesy Pepperoni Pizza Roll-Ups warm, paired with your favorite dipping sauces such as marinara or ranch. The gooey cheese and savory pepperoni wrapped in a crispy tortilla will surely make these an instant hit, whether for a snack or appetizer at any gathering.
Expert Tips for Cheesy Pepperoni Pizza Roll-Ups
• Use Quality Tortillas: Choose pliable low-carb tortillas to prevent cracking while rolling. Sturdy options allow for easy handling without tearing.
• Brush for Crispiness: Brush the outside of the roll-ups with olive oil before baking. This step enhances the crisp texture, making each bite delightful.
• Even Filling Distribution: Ensure cheese and pepperoni are evenly spread throughout each roll-up. This avoids bites with just tortilla and guarantees balanced flavor in every piece.
• Make Ahead Tips: Assemble the roll-ups in advance and refrigerate them until ready to bake. This saves time when hosting and allows flavors to meld.
• Try Flavor Variations: Experiment with adding chopped veggies or different sauces to cater to your family’s tastes. It’s easy to customize the Cheesy Pepperoni Pizza Roll-Ups for variety!
Cheesy Pepperoni Pizza Roll-Ups Variations
Feel free to play with these delightful roll-ups and customize them to your taste!
-
Meatless Option: Substitute pepperoni with sliced mushrooms or zucchini for a delicious vegetarian twist.
Think garden-fresh flavors that bring a delightful crunch. -
Spice It Up: Add jalapeños or crushed red pepper flakes for a fiery kick!
It’s an easy way to elevate the flavor and satisfy your heat cravings. -
Cheesy Blend: Mix in different cheeses like cheddar or pepper jack for a unique flavor profile.
Each cheese brings its character, creating a melty extravaganza in every bite. -
Veggie Lover’s Delight: Add in chopped bell peppers, spinach, or black olives for extra nutrition and texture.
These little bursts of flavor create a rainbow of colors and tastes. -
Unique Sauce Swap: Instead of tomato sauce, try using pesto or a smoky barbecue sauce for a flavor twist.
These swaps can bring an unexpected richness that everyone will love. -
Bacon Bliss: Crumble cooked bacon into the filling for an added smoky goodness.
Imagine the blend of flavors with every savory bite! -
Gluten-Free Adaptation: Use gluten-free low-carb tortillas to cater to gluten-sensitive friends.
Everyone deserves to enjoy this deliciousness without worry! -
Mini Bite-Sized Roll-Ups: Cut the tortillas into smaller pieces for a fun appetizer at parties.
Perfect for dipping and sharing, these mini rolls will be a hit at any gathering.
Ready for a whole new world of flavors? For a classic taste, check out my Cheesy Pepperoni Pizza or try these Crescent Roll Taco Pizza for more delicious ideas!
What to Serve with Cheesy Pepperoni Pizza Roll-Ups
There’s nothing quite like pairing your warm, cheesy delights with complementary sides to create a memorable meal experience.
- Crispy Garlic Bread: The crunch and garlicky flavor are perfect for dipping into marinara, enhancing that Italian vibe.
- Garden Salad: A fresh mix of greens, tomatoes, and cucumbers adds a refreshing crunch to balance out the richness of the roll-ups.
Add a zesty vinaigrette for a splash of flavor that wakes up your palate!
- Marinara Sauce: Serve a warm bowl of marinara alongside your pizza roll-ups for dipping. The tangy sauce amplifies the flavors beautifully.
- Cheesy Cauliflower Bake: This creamy, cheesy side complements the roll-ups while keeping the meal low-carb and indulgent.
With a golden crust and soft center, it echoes the comfort of pizza in every bite!
- Antipasto Platter: Include olives, mozzarella balls, and salami for a vibrant spread that invites everyone to snack at their leisure.
The mix of textures and flavors will make your gathering even more inviting.
- Italian Soda: A bubbly citrus drink refreshes the palate and adds a fun twist to your meal. Choose lemon or raspberry for the perfect pairing.
Storage Tips for Cheesy Pepperoni Pizza Roll-Ups
Fridge: Store baked roll-ups in an airtight container in the fridge for up to 3 days. This keeps them fresh and ready for snacking later.
Freezer: For longer storage, freeze the roll-ups in a single layer on a baking sheet, then transfer them to a freezer-safe container for up to 3 months.
Reheating: To enjoy leftover Cheesy Pepperoni Pizza Roll-Ups, reheat in a preheated oven at 350°F (175°C) for about 10-15 minutes, or until heated through. Avoid microwaving to maintain crispness.
Make-Ahead: You can assemble the roll-ups ahead of time, wrap them tightly, and refrigerate or freeze until you’re ready to bake. This makes meal prep a breeze!
Make Ahead Options
These Cheesy Pepperoni Pizza Roll-Ups are perfect for meal prep, allowing you to save time on busy days! You can prepare the roll-ups up to 24 hours in advance by assembling them and placing them on a baking sheet, then covering them tightly with plastic wrap or aluminum foil to keep them fresh. Alternatively, you can refrigerate the assembled roll-ups for up to 3 days before baking. Just remember to remove the cover about 20 minutes before baking to ensure they crisp up nicely. When you’re ready to enjoy, simply preheat your oven and bake as directed, and you’ll have deliciously cheesy, homemade roll-ups ready in no time!
Cheesy Pepperoni Pizza Roll-Ups Recipe FAQs
What kind of tortillas or wraps should I use for the roll-ups?
I recommend using pliable low-carb tortillas or wraps to ensure they roll easily without cracking. Look for brands that specifically advertise low-carb options, and make sure they are soft to facilitate easy rolling and prevent tearing.
How should I store leftover Cheesy Pepperoni Pizza Roll-Ups?
Store baked roll-ups in an airtight container in the refrigerator for up to 3 days. This helps keep them fresh and ready for snacking later. If you want to keep them for a longer period, you can freeze them (see below for freezing instructions).
Can I freeze Cheesy Pepperoni Pizza Roll-Ups?
Absolutely! To freeze, place the roll-ups in a single layer on a baking sheet to prevent them from sticking together. Once frozen, transfer them to a freezer-safe container or a zip-top bag. They can be kept in the freezer for up to 3 months. When you’re ready to enjoy them, reheat from frozen in the oven at 350°F (175°C) for 15-20 minutes, or until heated through.
What should I do if my cheese doesn’t melt properly?
If your cheese is not melting well, it’s likely due to the type of cheese used. Make sure you’re using high-quality shredded mozzarella, as lower moisture content cheeses can sometimes prevent melting. Also, ensure that the roll-ups are baked long enough for the cheese to fully melt and become gooey, typically around 12-15 minutes at 375°F (190°C).
Can I make these roll-ups ahead of time?
Yes, making them ahead is quite convenient! You can assemble the roll-ups, wrap them tightly in plastic wrap or foil, and refrigerate them for up to 24 hours. This way, when you’re ready to bake, they’ll be prepped and waiting for you. Just follow baking instructions directly from the fridge, but you may need a minute or two extra in the oven for optimal warming.
Are there any dietary considerations for pets or allergies?
Great question! Keep in mind that while these roll-ups are delicious for us, they may not be safe for pets due to ingredients like cheese and seasoning. Additionally, if anyone in your household has allergies, be cautious about cross-contamination with common allergens like dairy or gluten found in certain tortillas. Always check labels and consider alternatives that suit dietary needs!
Cheesy Pepperoni Pizza Roll-Ups: Low-Carb Delight Awaits
Ingredients
Equipment
Method
- Begin by preheating your oven to 375°F (190°C) while preparing to make the Cheesy Pepperoni Pizza Roll-Ups.
- Spread a generous layer of tomato sauce on a low-carb tortilla, leaving about a half-inch border around the edges.
- Sprinkle a hearty amount of shredded mozzarella cheese over the sauce, followed by a layer of pepperoni slices.
- Season the filling with Italian seasoning and garlic powder for elevated flavors.
- Begin from one end of the tortilla and tightly roll it up to form a compact cylinder.
- Place the rolled-up tortilla seam side down on the prepared baking sheet.
- Slide the baking sheet into your preheated oven and bake for 12-15 minutes.
- After removing from the oven, let them cool slightly and slice into bite-sized pieces.
- Serve your Cheesy Pepperoni Pizza Roll-Ups warm with your favorite dipping sauces.
Leave a Reply