
Amid the bustling sights and sounds of autumn, a rich warmth beckons us to the kitchen where comforting aromas mingle to create delicious memories. Today, I’m excited to share my recipe for a creamy Apple Cider Cheesecake that captures the essence of fall in every sumptuous bite. Not only is this dessert a delightful conversation starter at any gathering, but its preparation is also surprisingly quick, allowing you to savor the experience without the hassle. With its luxuriously creamy texture from the blend of cream cheese and sour cream, this cheesecake offers the perfect balance of lightness and indulgence. Whether you’re preparing for a festive feast or simply treating yourself to a slice of seasonal bliss, you won’t want to miss out on this delectable creation. Ready to discover the magic of apple cider in your next dessert? Let’s dive into the details!
Why is this cheesecake a must-try?
Seasonal Delight: Embrace the essence of fall with this luscious cheesecake made from fresh apple cider.
Creamy Texture: The unique combination of cream cheese and sour cream ensures a light yet decadent feel in each bite.
Endless Variations: Switch up the crust with digestive cookies or gluten-free options, and experiment with spices to find your perfect flavor profile.
Quick Preparation: Ideal for busy bakers, this recipe is straightforward, allowing you to focus on the joy of creating rather than complicated steps.
Crowd-Pleasing: Perfect for gatherings, this Apple Cider Cheesecake is sure to impress family and friends, making it a sought-after dessert!
Experience the bliss of fall flavors with this delightful dish that pairs beautifully with a drizzle of caramel—just like my Apple Crumble Cheesecake or the irresistible Creamy No-Bake Nutella Cheesecake.
Apple Cider Cheesecake Ingredients
• Curiosity Note: Get ready to gather the essential ingredients that make this creamy Apple Cider Cheesecake a true seasonal delight!
For the Crust
- Digestive Cookies or Graham Crackers – Perfect for a rich, buttery base; try gluten-free cookies for a gluten-free option.
- Butter – Unsalted is best; it binds the crust and enhances flavor without extra saltiness.
- Salt – Just a pinch enhances the overall flavor; this step is a must!
- Powdered Sugar – Adds sweetness to the crust; in a pinch, granulated sugar will work, too.
For the Filling
- Fresh Apple Cider – The star of the show, offering that quintessential autumn flavor; Honeycrisp cider adds a pleasant tartness.
- Mulling Spices (optional) – Infuse warmth and depth; consider cloves or allspice to elevate your flavors.
- Cream Cheese – Essential for a creamy texture; ensure it’s at room temperature for easy blending.
- Brown Sugar – Sweetens the filling and adds a rich note; both light and dark sugars work well.
- Sour Cream – Creates a lighter texture; don’t skimp on the full-fat version for the best results.
- Reduced Apple Cider – Concentrated flavor to bring a punch to your filling; make this by boiling fresh cider.
- Cinnamon – A warm spice that perfectly complements the apple cider.
- Large Eggs – Provides structure to your cheesecake; ensure they are at room temperature for optimal incorporation.
- All-Purpose Flour – Helps stabilize the cheesecake; crucial for achieving that perfect set.
Optional Toppings
- Whipped Cream – A dollop on top adds a delightful creaminess to each slice.
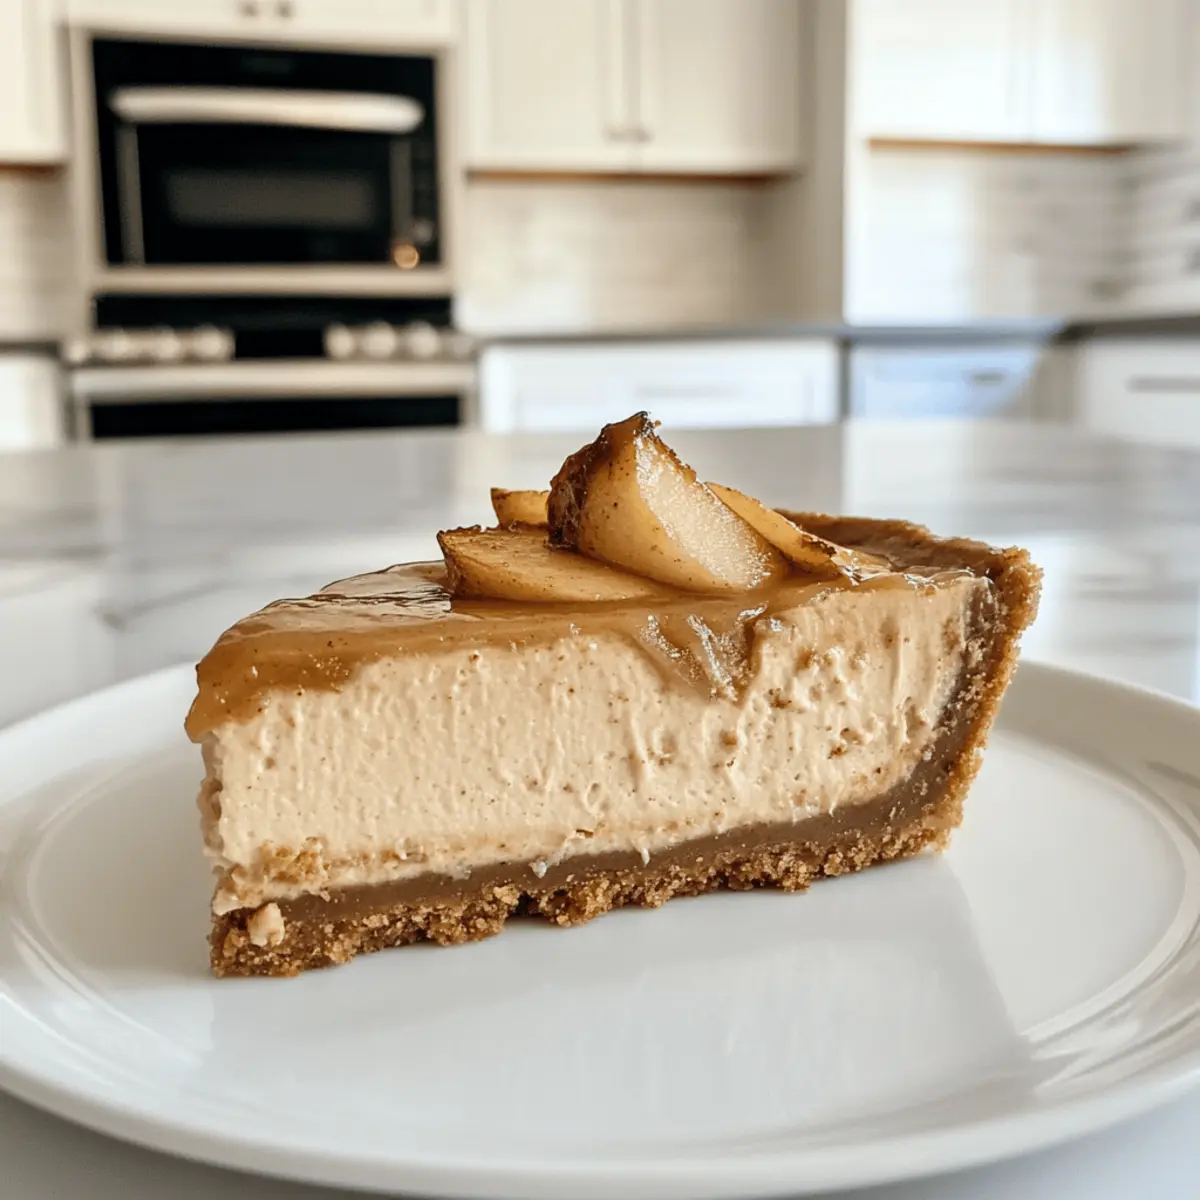
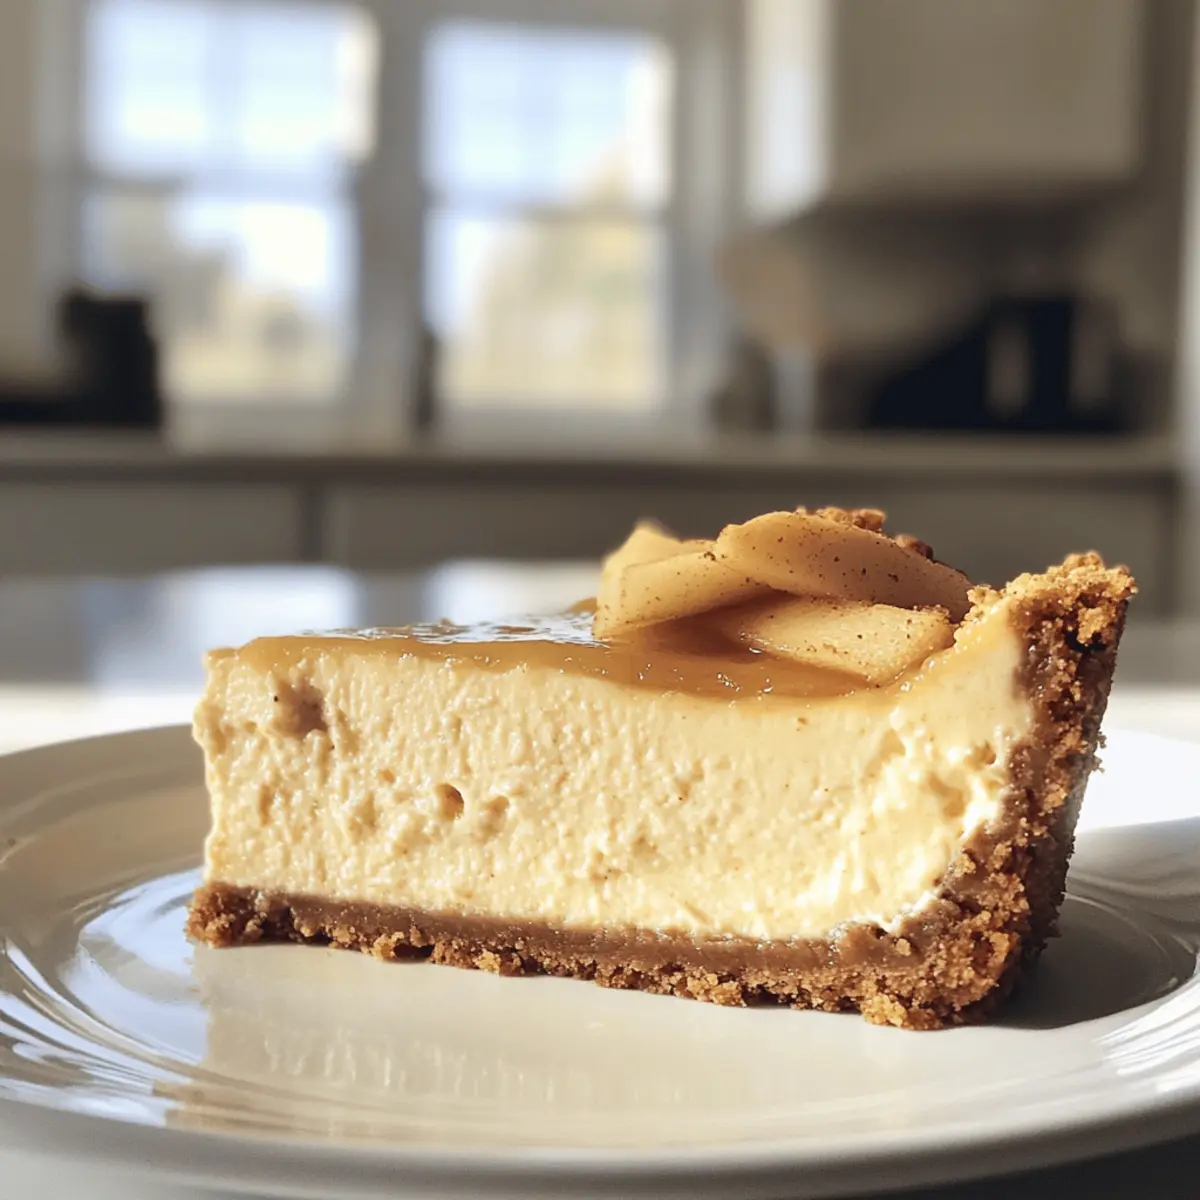
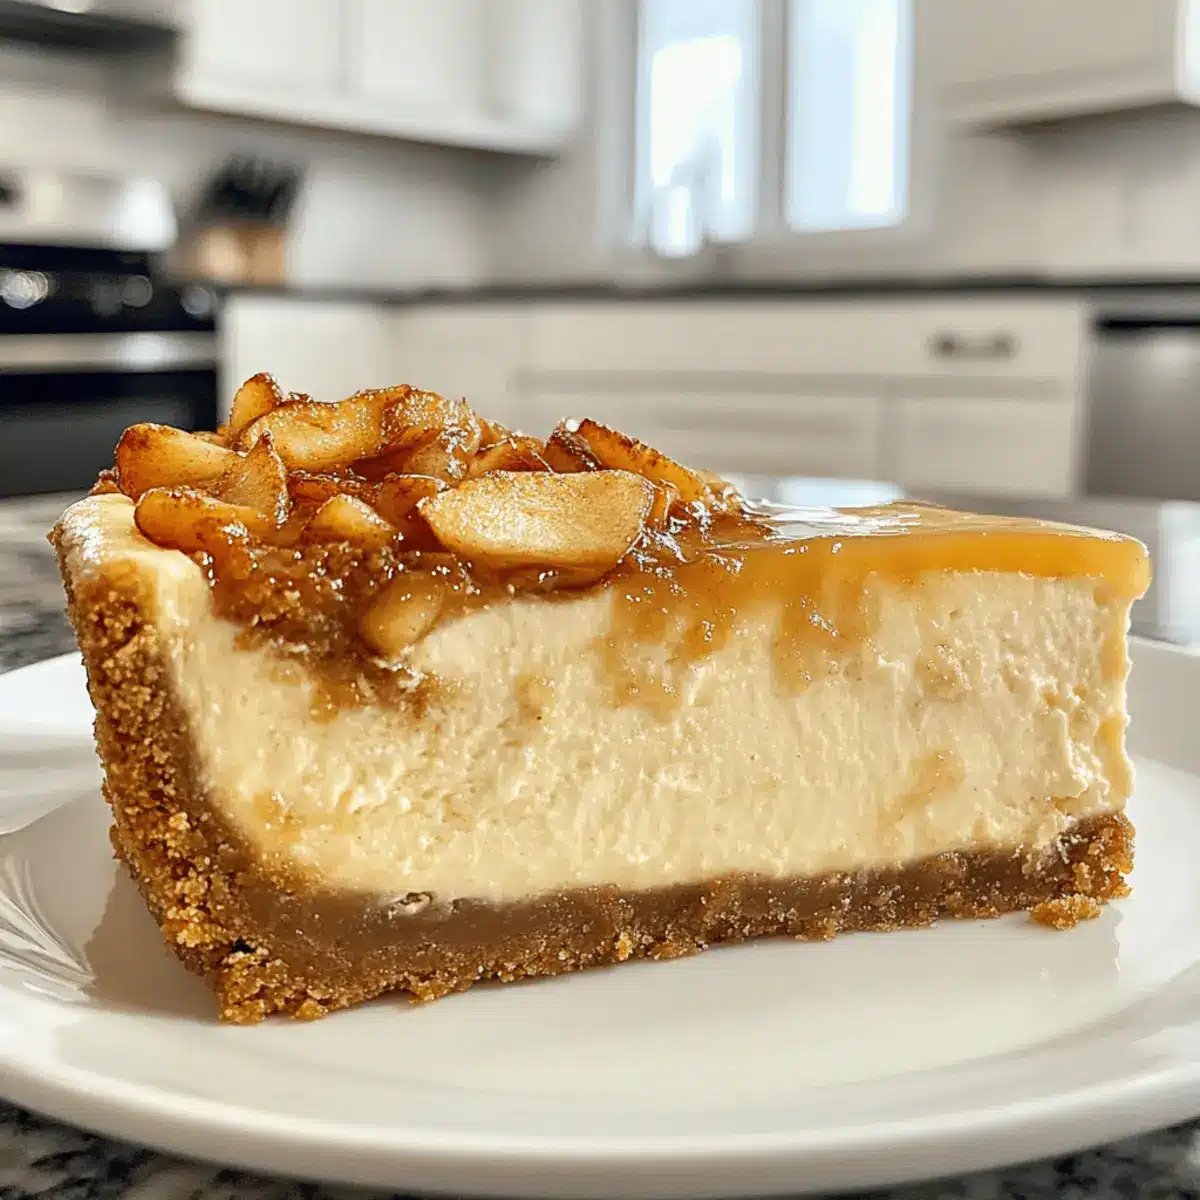
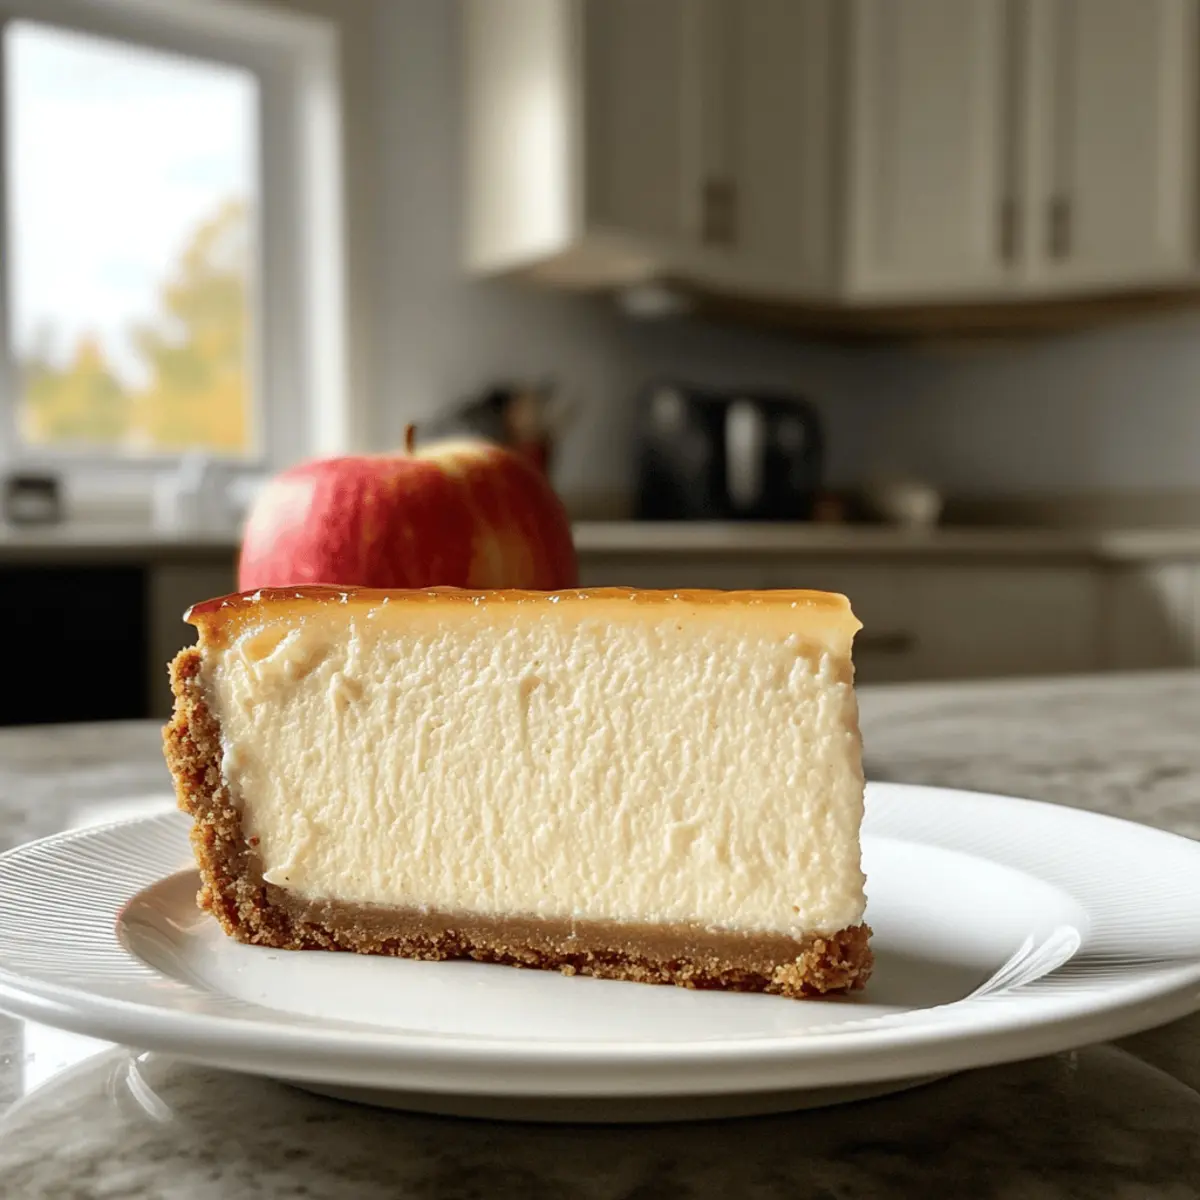
- Apple Cider Caramel – Drizzle this for an extra touch of elegance and flavor.
- Fresh Apple Slices – Use them for garnish or as a crunchy topping to contrast the creamy texture.
Gather these ingredients to create a truly memorable Apple Cider Cheesecake that embodies the flavors of the season! Happy baking!
Step‑by‑Step Instructions for Apple Cider Cheesecake
Step 1: Reduce the Cider
Start by pouring 3 cups of fresh apple cider into a saucepan. Bring the cider to a boil over medium-high heat, adding optional mulling spices like cloves or allspice for extra flavor. Reduce the heat and let it simmer for 30-45 minutes, or until thickened and syrupy. Once done, remove from heat and allow the cider reduction to cool completely.
Step 2: Preheat Oven
Preheat your oven to 350°F (175°C). This step is crucial, as a properly heated oven will ensure even baking for your creamy Apple Cider Cheesecake. While the oven warms up, you can move on to preparing the crust.
Step 3: Prepare Crust
In a food processor, crush 1 ½ cups of digestive cookies or graham crackers into fine crumbs. Mix these crumbs with ½ cup of melted unsalted butter and a pinch of salt in a bowl until combined. Press this mixture firmly into the bottom of an 8-inch round springform pan. Bake the crust for 10 minutes, then set it aside to cool completely.
Step 4: Mix Filling
In a large mixing bowl or stand mixer, blend 16 oz of room-temperature cream cheese with ¾ cup of brown sugar until smooth and creamy. Gradually incorporate ½ cup of sour cream and 1 teaspoon of cinnamon, mixing until well combined. Finally, add in the cooled, reduced apple cider and mix thoroughly, achieving a smooth filling for your Apple Cider Cheesecake.
Step 5: Incorporate Eggs
Crack 3 large eggs into the mixture one at a time, mixing at the lowest speed just until combined after each addition. This minimizes air bubbles to prevent cracks in your cheesecake. Once the eggs are integrated, stir in 2 tablespoons of all-purpose flour until smooth, ensuring the mixture is well blended yet not overbeaten.
Step 6: Bake
Pour the cheesecake filling over the cooled crust in the springform pan. Place the pan in a larger roasting pan filled with hot water to create a water bath, which helps the cheesecake bake evenly. Bake for approximately 90 minutes or until the edges are set but the center slightly jiggles when shaken.
Step 7: Cool Slowly
After baking, turn off the oven and crack the door open. Let the cheesecake cool in the oven for about 30 minutes. This gradual cooling helps prevent cracks. Once it’s at room temperature, transfer the cheesecake to the counter before refrigerating for at least 8 hours, preferably overnight, to set beautifully.
Step 8: Serve
After chilling, carefully remove the sides of the springform pan. Slice your Apple Cider Cheesecake, serving each piece with a dollop of whipped cream or a drizzle of apple cider caramel for an extra touch. Enjoy the creamy, autumn-inspired flavors with family and friends!
Make Ahead Options
These Apple Cider Cheesecakes are perfect for busy home cooks looking to save time! You can prepare the crust (1 ½ cups of digestive cookies crushed with ½ cup of melted butter) and store it in the refrigerator for up to 3 days. The filling can also be mixed ahead of time and kept in an airtight container for up to 24 hours. To prevent the cheesecake from losing its rich creaminess, refrigerate it carefully and cover it to maintain moisture. When ready to bake, simply pour the filling over the pre-prepared crust, bake as directed, and then refrigerate the cheesecake overnight to achieve the perfect set. Enjoy effortless, restaurant-quality results!
Apple Cider Cheesecake Variations
Feel free to play around with these suggestions to make this scrumptious dessert your very own!
- Gluten-Free Crust: Use gluten-free cookies instead of digestive cookies for a delightful alternative. You’ll still achieve a satisfying crust without the gluten!
- Flavorful Spice Swap: Incorporate nutmeg or ginger for a unique aromatic touch. These spices can provide a delightful twist to the usual flavor profile!
- Fruit Topping: Top with warm apple cider caramel or fresh apple slices for added sweetness and visual appeal. This little extra can create a lovely focal point!
- Rich Cream Cheese Option: For a more luxurious filling, consider using mascarpone cheese instead of cream cheese. This will enhance the creaminess and richness of your cheesecake!
- Chocolate Layer: Add a layer of chocolate ganache on top for a decadent twist. The chocolate pairs beautifully with the autumn flavors of apple cider!
- Dairy-Free Alternative: Swap cream cheese for a plant-based cream cheese, paired with coconut cream for the filling. A delicious option for those avoiding dairy!
- Experiment with Nuts: Sprinkle some chopped pecans or walnuts over the crust for a delightful crunch. It’ll elevate the texture and enhance the nutty flavors of the cheesecake!
- Caramel Swirl: Drizzle caramel sauce into the cheesecake filling before baking for a sweet surprise in every bite. It can create a beautiful marbled effect that’s visually inviting!
Each variation offers a different experience, allowing you to customize your Apple Cider Cheesecake to suit your taste. If you enjoyed these ideas, check out my Apple Brownies Chewy for another delightful fall treat!
What to Serve with Creamy Apple Cider Cheesecake
Prepare to elevate your dessert experience with delightful accompaniments that celebrate the season’s flavors and enhance your cheesecake!
-
Whipped Cream:
A dollop of fluffy whipped cream adds lightness, balancing the rich, creamy texture of the cheesecake beautifully. -
Caramel Sauce:
Drizzle warm apple cider caramel over the cheesecake for a luscious, sweet touch that enhances the apple flavor. -
Spiced Apple Compote:
Warm spiced apple compote not only adds a touch of freshness but also deepens the fall vibe, creating a warm, cozy experience. -
Fresh Apple Slices:
Crisp apple slices offer a crunchy contrast, making each bite of this creamy cheesecake even more satisfying and refreshing. -
Vanilla Ice Cream:
Serve with a scoop of creamy vanilla ice cream; its smooth texture complements the cheesecake while providing a delightful temperature contrast. -
Chai Tea or Hot Cider:
Pairing your cheesecake with a warm cup of chai tea or spiced apple cider creates a comforting, homely atmosphere, perfect for sharing with loved ones.
Imagine gathering around the table with friends and family, savoring slice after slice, each paired with a luxuriously whipped topping or a touch of spiced warmth—truly a celebration of fall flavors!
Expert Tips for Apple Cider Cheesecake
-
Room Temperature Ingredients: Ensure all dairy ingredients are at room temperature for a smooth, creamy texture. This helps avoid lumps in your Apple Cider Cheesecake.
-
Water Bath Importance: Use a water bath during baking to retain moisture. This prevents cracking and guarantees a silky finish on your cheesecake.
-
Avoid Overbaking: Check for doneness when the edges are set and the center still jiggles slightly. Overbaking can ruin the creamy texture you’re aiming for.
-
Chill Before Serving: Let the cheesecake chill in the refrigerator for at least 8 hours, or overnight if possible. This allows flavors to meld and the texture to set perfectly.
-
Flavor Variations: Don’t hesitate to experiment with spices like nutmeg or ginger! They can elevate the Apple Cider Cheesecake to new flavor heights.
Storage Tips for Apple Cider Cheesecake
Fridge: Keep your cheesecake covered in the refrigerator to maintain its creaminess; it lasts up to 3-4 days.
Freezer: Wrap individual slices in plastic wrap, then foil, to store in the freezer for up to 2 months. Thaw overnight in the refrigerator for best results.
Reheating: For a fresh-out-of-the-oven taste, consider gently warming slices in the microwave for 10-15 seconds before serving. Enjoy the creamy goodness of your Apple Cider Cheesecake!
Serving Temperature: Serve chilled for the best texture; allow it to sit at room temperature for about 15-20 minutes before serving for a softened bite.
Apple Cider Cheesecake Recipe FAQs
What type of apple cider should I use?
Absolutely! For the best flavor, I recommend using fresh apple cider, ideally Honeycrisp for its nice balance of sweetness and tartness. Look for cider that is unfiltered and contains no additives for a more authentic flavor.
How should I store the apple cider cheesecake?
Very easy! After preparing, cover your cheesecake with plastic wrap or place it in an airtight container. It will stay fresh in the refrigerator for about 3-4 days. For longer storage, place slices in the freezer for up to 2 months, wrapped tightly in plastic and foil.
How do I freeze apple cider cheesecake properly?
Of course! To freeze your cheesecake, follow these steps:
- Allow it to chill in the refrigerator for at least 8 hours or overnight.
- Once chilled, slice the cheesecake into individual portions for easier thawing.
- Wrap each slice tightly in plastic wrap, then in aluminum foil.
- Place the wrapped slices in a zip-top freezer bag, removing as much air as possible.
When you’re ready to enjoy, thaw a slice in the refrigerator overnight. Voila!
What should I do if my cheesecake cracks while baking?
If your cheesecake cracks, don’t worry—this can happen! Make sure to avoid overbaking; you want the edges set while the center jiggles slightly. If cracks occur, simply cover the surface with whipped cream or a drizzle of caramel sauce to hide them. It’ll still taste delicious!
Can I use low-fat substitutes for this recipe?
It’s certainly possible, but know that using low-fat substitutes may alter the creamy texture slightly. For a lighter cheesecake, consider using reduced-fat cream cheese and sour cream instead. However, full-fat versions yield the best flavor and texture, so I often stick with them for this delicious apple cider cheesecake!
Is this cheesecake safe for people with nut allergies?
Yes! This apple cider cheesecake recipe contains no nuts, so it should be safe for those with nut allergies. However, always double-check the ingredients of any cookie options used for the crust, as some may have traces of nuts. Enjoy this seasonal treat worry-free!
Irresistibly Creamy Apple Cider Cheesecake You'll Love
Ingredients
Equipment
Method
- Start by pouring 3 cups of fresh apple cider into a saucepan. Bring the cider to a boil over medium-high heat, adding optional mulling spices for extra flavor. Reduce the heat and let it simmer for 30-45 minutes until thickened and syrupy. Remove from heat and allow to cool completely.
- Preheat your oven to 350°F (175°C) for even baking of the cheesecake.
- In a food processor, crush 1 ½ cups of digestive cookies or graham crackers into fine crumbs. Mix with ½ cup of melted unsalted butter and a pinch of salt. Press firmly into the bottom of an 8-inch springform pan and bake for 10 minutes.
- In a mixing bowl, blend 16 oz of cream cheese with ¾ cup of brown sugar until smooth. Gradually mix in ½ cup of sour cream and 1 teaspoon of cinnamon. Add the cooled, reduced apple cider and mix until smooth.
- Incorporate 3 large eggs one at a time at the lowest speed. Stir in 2 tablespoons of flour until just combined.
- Pour the filling into the cooled crust. Place in a larger roasting pan with hot water for a water bath. Bake for about 90 minutes until the edges are set and the center slightly jiggles.
- Turn off the oven and crack the door open. Let the cheesecake cool in the oven for about 30 minutes, then refrigerate for at least 8 hours or overnight.
- Carefully remove the springform pan sides. Serve slices with whipped cream or apple cider caramel.
Leave a Reply