
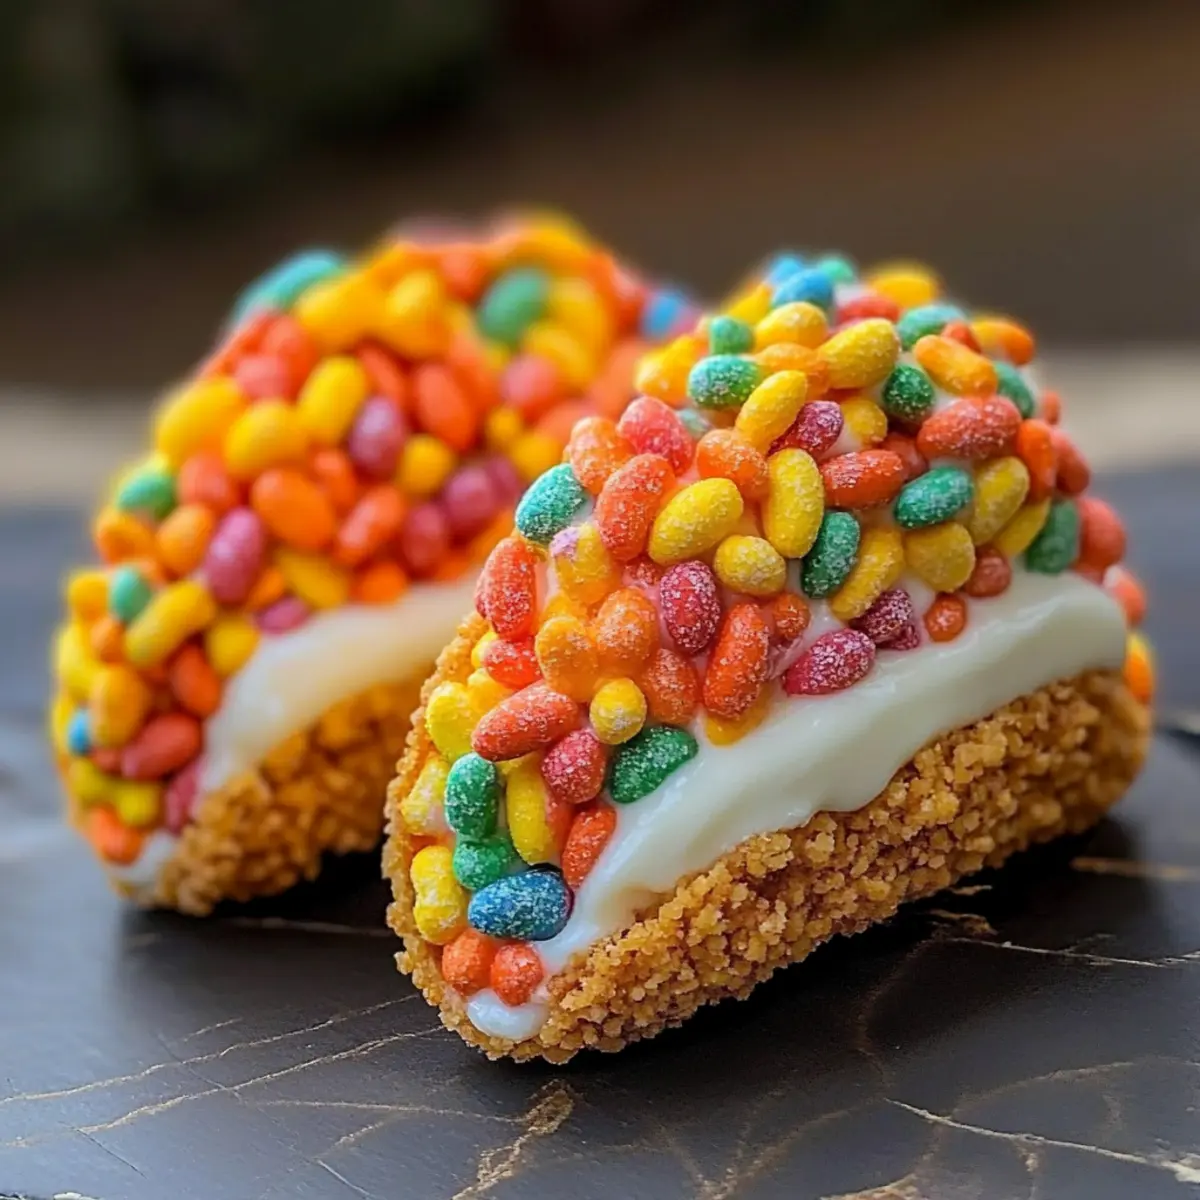
As I rummaged through my pantry one afternoon, nostalgia washed over me while staring at the colorful box of Fruity Pebbles. That moment sparked a delightful idea: what if I transformed my childhood favorite into a playful dessert? Enter Fruity Pebbles Cheesecake Tacos, a fun twist on traditional tacos that offers both a crunchy shell and a luscious cheesecake filling. Perfect for gatherings or a family baking adventure, these vibrant tacos promise to awaken the inner child in everyone, while still delivering sophisticated flavor and presentation. You’ll love how quickly these come together, making them an ideal sweet treat for any occasion. Ready to bring some joy to your kitchen? Let’s dive into this colorful creation!
Why Are These Tacos So Unique?
Colorful Presentation: These Fruity Pebbles Cheesecake Tacos are a feast for the eyes, instantly brightening any gathering with their vibrant colors.
Nostalgic Twist: Combining familiar childhood flavors with a sophisticated cheesecake filling, they bridge the gap between nostalgia and gourmet cuisine.
Easy to Make: You’ll love how simple it is to whip up these playful treats, even as a fun activity with kids!
Versatile Flavor: Swap out the Fruity Pebbles for Cocoa Pebbles or Cinnamon Toast Crunch for a delightful twist that caters to different tastes.
Crowd-Pleasing Fun: Perfect for parties, these tacos spark joy and conversation, making them a hit for both kids and adults!
Enjoy these delightful treats after a flavorful main like One Pan Tacos or as a complement to a rich dessert like Brownie Cheesecake Bars.
Fruity Pebbles Cheesecake Tacos Ingredients
• Get ready for a colorful adventure in your kitchen!
For the Taco Shells
- Fruity Cereal – Provides a crunchy base that adds sweetness and nostalgic flavor; feel free to mix brands!
- Unsalted Butter – Binds the cereal together for firm taco shells; make sure to melt it before mixing.
For the Cheesecake Filling
- Cream Cheese – The creamy filling’s star player, offering richness and a tangy bite; soften it for easier mixing.
- Powdered Sugar – Sweetens the cheesecake filling to your liking and ensures a smooth texture; sift to prevent lumps.
- Pure Vanilla Extract – Enhances the flavor profile of the filling; opt for pure for the best results.
- Whipped Cream – Lightens up the filling, providing that signature fluffy texture; fold gently to maintain airiness.
For Garnishing
- Additional Fruity Cereal – Used to sprinkle on top for added crunch and to boost visual appeal; a playful detail that compliments the tacos!
Dive into these Fruity Pebbles Cheesecake Tacos that not only delight the taste buds but also bring a splash of color and fun to your dessert table!
Step‑by‑Step Instructions for Fruity Pebbles Cheesecake Tacos
Step 1: Prepare the Taco Shells
In a mixing bowl, combine the colorful Fruity Pebbles with melted unsalted butter, stirring until each piece is evenly coated. This mixture should be slightly sticky. Using a spoon or your hands, firmly press the cereal mixture into the bottom and sides of small taco-shaped molds or muffin tins. Chill in the refrigerator for at least 30 minutes to set the taco shells, ensuring they’re firm and ready to hold the creamy filling.
Step 2: Make the Cheesecake Filling
While the taco shells chill, beat the softened cream cheese in a separate bowl with a hand mixer until light and fluffy, roughly 2-3 minutes. Gradually add in powdered sugar and pure vanilla extract, mixing until the filling becomes smooth and creamy. The mixture should have a silky texture and a delightful sweetness that pairs perfectly with the Fruity Pebbles Cheesecake Tacos.
Step 3: Fold in the Whipped Cream
Next, gently fold in the whipped cream with a spatula into the cream cheese mixture. Use a light hand to maintain the airiness of the whipped cream, creating a fluffy texture in the cheesecake filling. This step is crucial, as it ensures your filling is both rich and light, making each bite of these Fruity Pebbles Cheesecake Tacos a delightful experience.
Step 4: Fill the Taco Shells
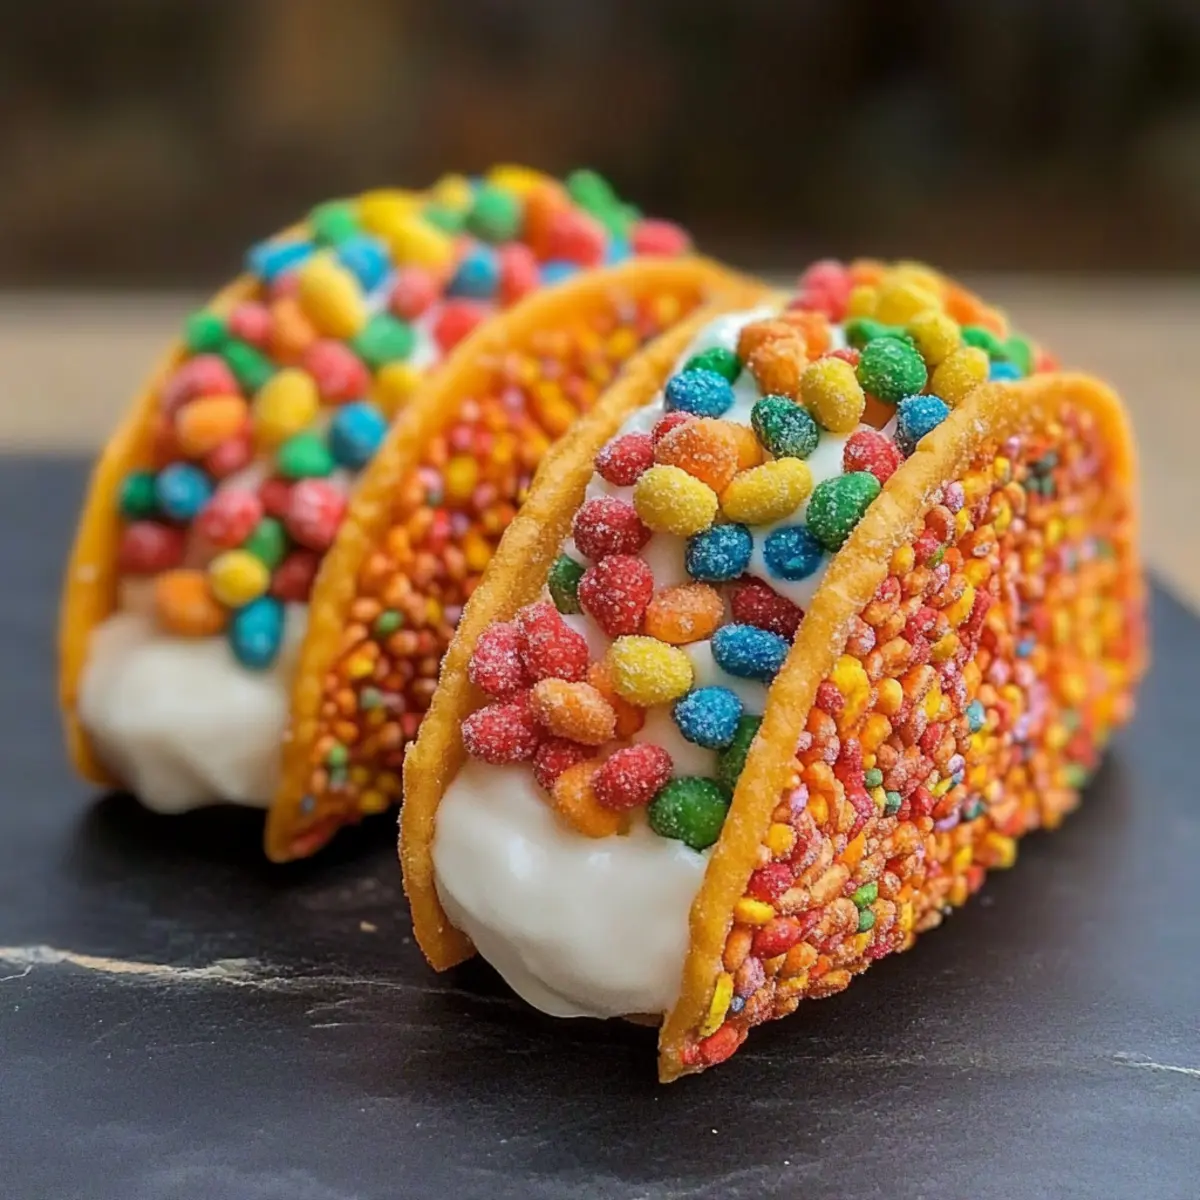
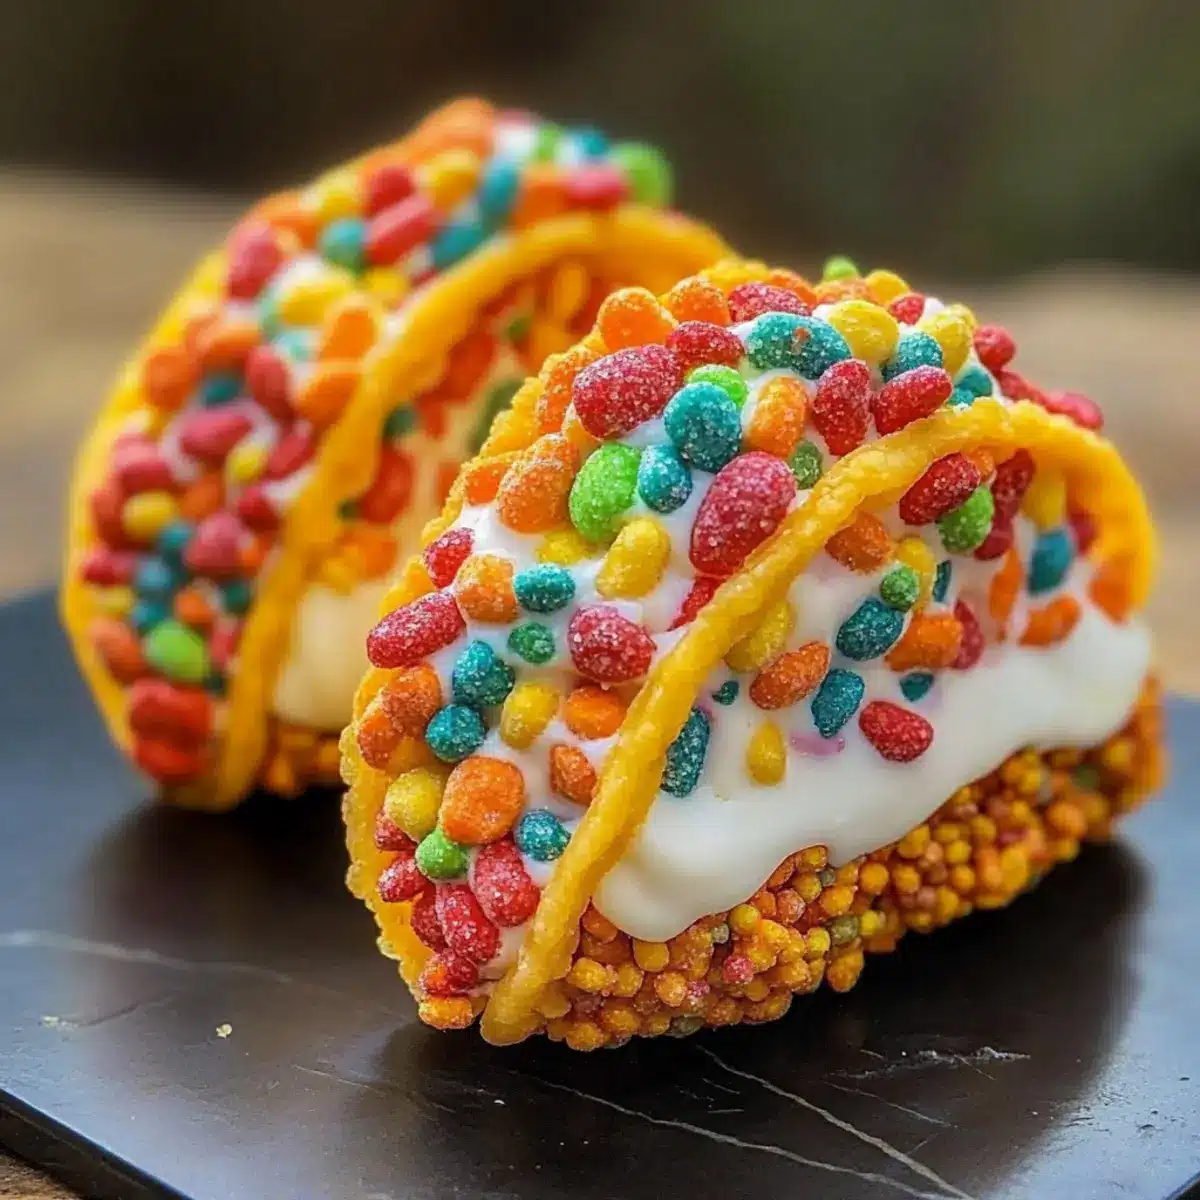
Once the taco shells have fully set, carefully remove them from the molds. Generously spoon the creamy cheesecake filling into each crunchy taco shell, filling them to the top for a beautiful presentation. You want to see just a little of the filling peeking over the edges of the shell, inviting everyone to take a delicious bite of these vibrant Fruity Pebbles Cheesecake Tacos.
Step 5: Add Final Touches
For an extra burst of flavor and crunch, garnish each filled taco with additional Fruity Pebbles, sprinkling them on top. This not only enhances their visual appeal but also intensifies the delightful cereal taste. At this point, your Fruity Pebbles Cheesecake Tacos are ready to be served! You can enjoy them immediately for a fun, crunchy texture or refrigerate for a firmer result before serving.
Step 6: Serve and Enjoy
Arrange your colorful Fruity Pebbles Cheesecake Tacos on a lovely platter to showcase their vibrant colors. These playful tacos are perfect for parties or casual gatherings, promising to spark joy and nostalgia. Enjoy them fresh, celebrating the delightful mix of childhood flavors and dessert sophistication that make these tacos such a unique treat!
Expert Tips for Fruity Pebbles Cheesecake Tacos
- Assemble Freshly: Enjoy optimal texture by assembling the tacos no more than four hours before serving to avoid soggy shells.
- Temperature Matters: For softer taco shells, serve immediately rather than letting them chill for too long, which can harden them.
- Gentle Mixing: Be cautious while folding in the whipped cream; overmixing can deflate it, affecting the lightness of your Fruity Pebbles Cheesecake Tacos.
- Garnish Wisely: Add more fruity cereal just before serving for maximum crunch and visual appeal—a delightful finishing touch!
What to Serve with Fruity Pebbles Cheesecake Tacos
Indulge in a vibrant culinary experience that perfectly complements your playful dessert!
- Creamy Vanilla Ice Cream: The smoothness of vanilla ice cream adds a delicious contrast to the crunchy taco shells, enhancing each delightful bite.
- Fresh Berry Salad: A medley of strawberries, blueberries, and raspberries brings a refreshing tartness that balances the sweetness of the cheesecake tacos.
- Chocolate Drizzle: A rich, warm chocolate sauce drizzled over the tacos adds a decadent touch that irresistible for chocolate lovers.
- Sparkling Lemonade: This bubbly and zesty drink offers a bright, refreshing sip that cleanses the palate between bites.
- Coconut Whipped Cream: Light, airy coconut cream adds a tropical twist that pairs beautifully with the fruity cereal flavor, making your dessert even more delightful.
- Fruit Skewers: Colorful skewers of mixed fruits like pineapple and kiwi not only enhance the visual appeal but also add freshness that complements the creamy filling.
- Gummy Candy: Add a fun element with assorted gummy candies on the side, appealing to both kids and adults while enhancing the playful theme of the dessert.
Make Ahead Options
These Fruity Pebbles Cheesecake Tacos are a fantastic choice for meal prep, saving you time when hosting gatherings or busy weeknights! You can prepare the taco shells up to 2 days in advance, storing them in an airtight container to maintain their crunch. The cheesecake filling can be made up to 24 hours beforehand; simply refrigerate it in a sealed container to keep it fresh and fluffy. When you’re ready to serve, fill the shells with the cheesecake mixture and garnish with extra Fruity Pebbles for a vibrant finish. This method ensures your dessert stays as delicious as ever while providing a delightful make ahead option!
Storage Tips for Fruity Pebbles Cheesecake Tacos
Room Temperature: These fruity tacos are best enjoyed fresh, so do not leave them out for more than 2 hours to maintain optimal taste and texture.
Fridge: Store any leftover cheesecakes in an airtight container in the refrigerator for up to 24 hours. This keeps the cheesecake filling fresh, but note that the shells may soften over time.
Freezer: For long-term storage, freeze the taco shells for up to 2 weeks in an airtight container. The cheesecake filling is not recommended for freezing, as the texture may change.
Reheating: If you’ve frozen the shells, simply thaw them at room temperature for about an hour before serving. Fill with freshly whipped cheesecake for best results!
Fruity Pebbles Cheesecake Tacos Variations
Feel free to get creative and customize these delightful tacos with your own flavors and dietary preferences!
- Chocolate Delight: Swap the Fruity Pebbles for Cocoa Pebbles for a rich, chocolatey twist that satisfies any chocolate lover. Each bite becomes a dreamy, fudgy adventure!
- Seasonal Crunch: Use festive cereals like red and green for Christmas or pastel colors for Easter to celebrate the season in style. It’s a playful way to mark special occasions with vibrant flavors!
- Cinnamon Zing: Add a dash of cinnamon or nutmeg to the cheesecake filling for a warm and cozy flavor. This extra spice can provide a lovely aromatic touch, perfect for autumn gatherings.
- Citrus Burst: Enhance the filling with a bit of orange or lemon zest for a refreshing brightness. This twist can brighten the flavor while adding a lovely zing that cuts through the sweetness!
- Nutty Goodness: Mix in some finely chopped nuts like pecans or walnuts into the filling for added texture and a nutty flavor that complements the creamy cheesecake beautifully. Just be sure to warn any nut-allergy friends!
- Berry Swirl: Fold in some pureed berries, like strawberries or raspberries, to create a fruity cheesecake filling. This adds both color and a fresh, fruity taste that beautifully complements the sweetness of the cereal!
- Extra Crunch: Top off your tacos with a sprinkle of crushed graham crackers or a drizzle of chocolate syrup for a decadent finishing touch that brings both texture and flavor to the party.
- Spicy Kick: For those who enjoy a little heat, consider adding a pinch of chili powder to the filling. It creates an unexpected yet delightful combination of sweetness and spice, surprising your taste buds in the best way!
These fun variations will surely keep your dessert game exciting! After enjoying your tacos, continue the sweetness with vibrant options like Apple Crumble Cheesecake or indulge in the smooth richness of Creamy No-Bake Nutella Cheesecake. Happy cooking!

Fruity Pebbles Cheesecake Tacos Recipe FAQs
How do I choose the right fruity cereal for the taco shells?
Absolutely! When selecting your fruity cereal, look for colorful options that have a good crunch. The fresher the cereal, the better the texture will be in your taco shells. Avoid boxes that show signs of being stale, such as soft or broken pieces, as these won’t hold up well when combined with the butter.
How should I store the Fruity Pebbles Cheesecake Tacos?
To keep the freshness of your delightful tacos, store any leftovers in an airtight container in the refrigerator for up to 24 hours. However, to maintain the crunchy texture of the taco shells, it’s best to assemble and serve them within 4 hours of making. If only the shells remain, keep them in a cool, dry place for up to 2 days.
Can I freeze the taco shells?
Absolutely! To freeze your Fruity Pebbles taco shells, let them cool completely after pressing them into shape. Place them in an airtight container or zip-top bag, separating layers with parchment paper. They can be frozen for up to 2 weeks. When you’re ready to serve, just thaw them at room temperature for about an hour. Only fill them with the cheesecake mixture when you’re ready to enjoy!
What if my taco shells turn out soft?
Very! If you find your taco shells aren’t as sturdy as you’d like, it may be due to insufficient chilling. Ensure you’re pressing the cereal mixture firmly into the molds and chilling them for a full 30 minutes. If they’re still soft, you could try reshaping and rebaking them in an oven set to 350°F for 5-7 minutes until they crisp up.
Are there any dietary considerations for this recipe?
Certainly! These Fruity Pebbles Cheesecake Tacos are vegetarian but do include dairy, so keep that in mind if anyone has lactose sensitivities or allergies. For those looking for alternatives, you can substitute cream cheese with a dairy-free version and use a plant-based whipped cream to make these tacos dairy-free.
How long can I keep the cheesecake filling in the fridge?
The cheesecake filling can be stored in the refrigerator for up to 24 hours in an airtight container. Just remember to give it a gentle stir before using it to ensure it stays creamy. Because of its perishable ingredients, be sure to use it within this timeframe to maintain the best flavor and texture!
Fruity Pebbles Cheesecake Tacos: A Colorful Sweet Adventure
Ingredients
Equipment
Method
- In a mixing bowl, combine the colorful Fruity Pebbles with melted unsalted butter, stirring until each piece is evenly coated. Firmly press the cereal mixture into the bottom and sides of small taco-shaped molds or muffin tins. Chill in the refrigerator for at least 30 minutes.
- While the taco shells chill, beat the softened cream cheese until light and fluffy. Gradually add in powdered sugar and pure vanilla extract, mixing until smooth and creamy.
- Gently fold in the whipped cream into the cream cheese mixture to maintain airiness.
- Remove the taco shells from the molds and spoon the cheesecake filling into each shell, filling them to the top.
- Garnish each filled taco with additional Fruity Pebbles for flavor and visual appeal.
- Arrange the tacos on a platter and enjoy!
Leave a Reply