
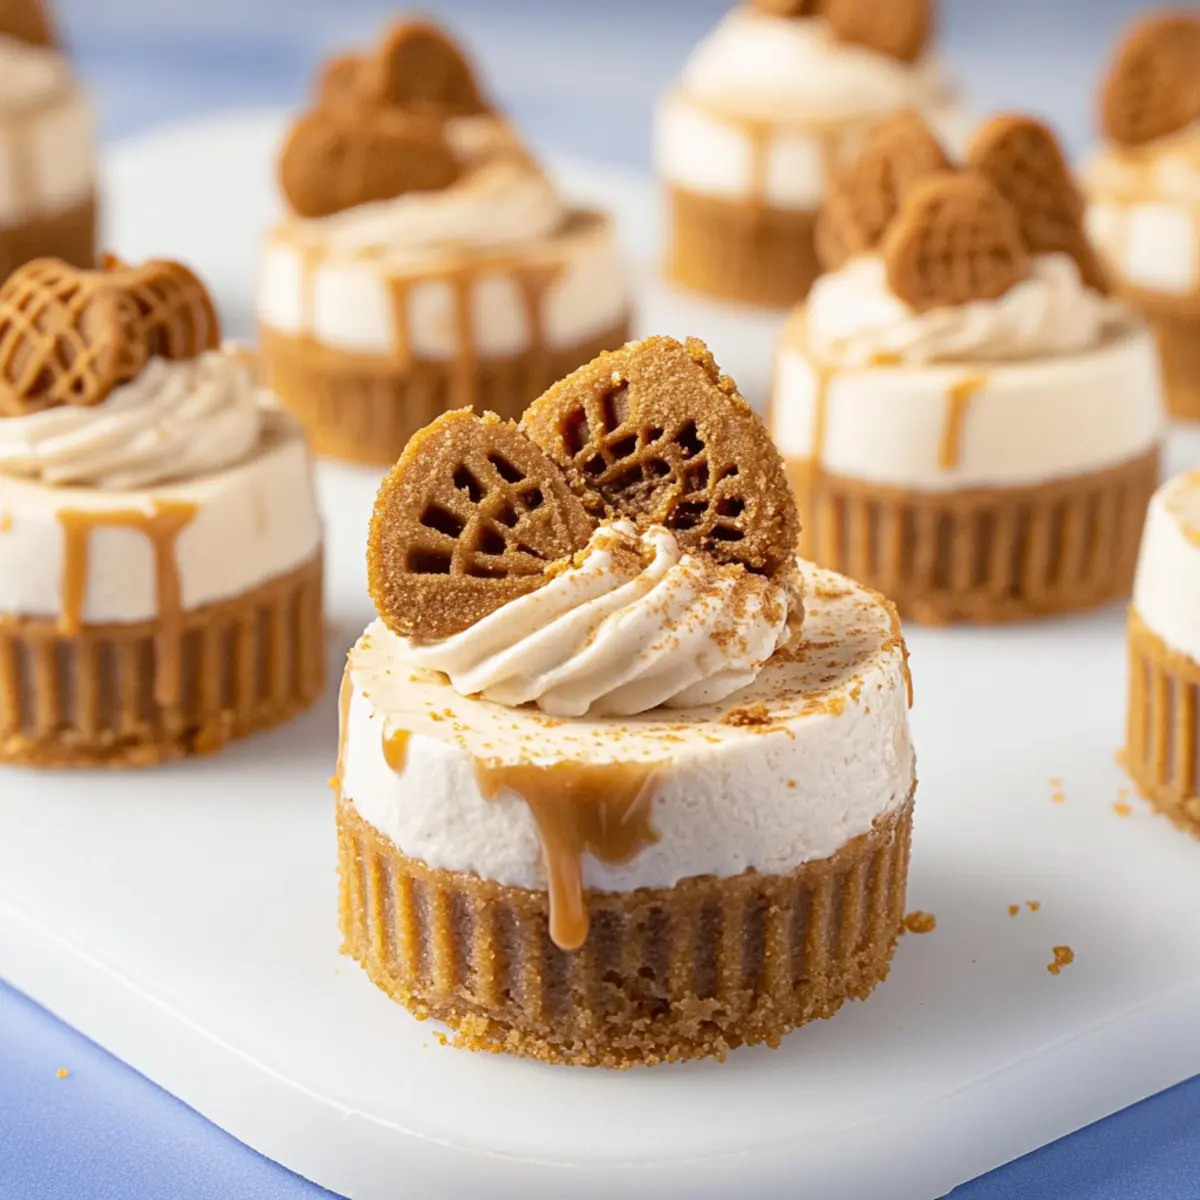
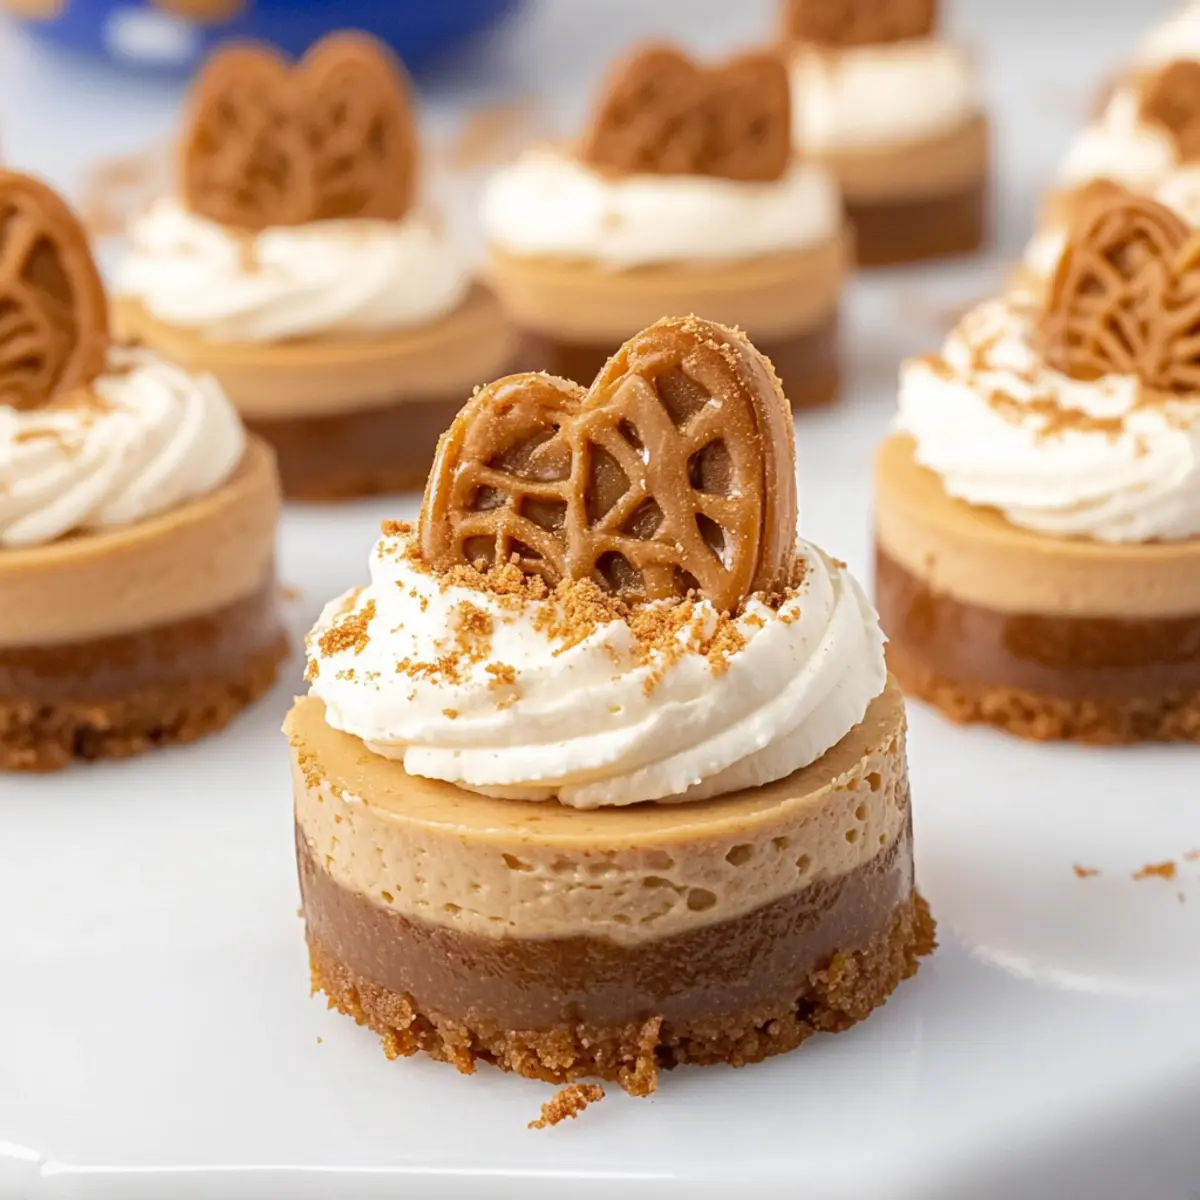
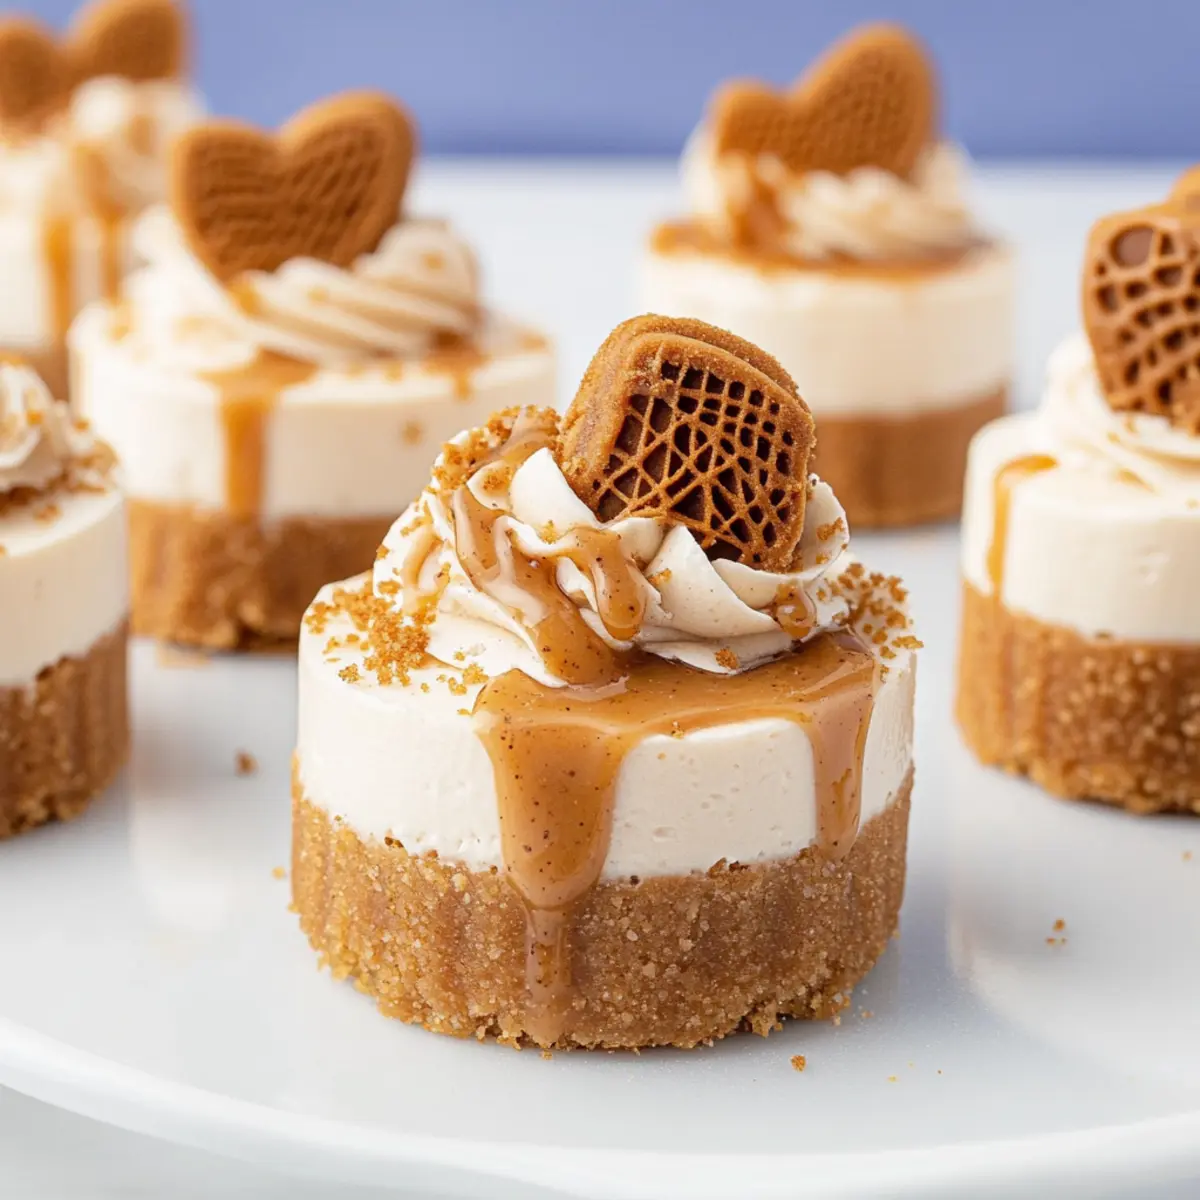
What happens when your love for cheesecake meets your obsession with cookie butter? You get the delightful creation known as Mini Biscoff Cheesecakes! These no-bake gems not only boast a crunchy Biscoff cookie crust but also feature a creamy, dreamy filling that comes together in no time—perfect for those moments when you crave something sweet yet easy. Imagine impressing guests at your next gathering with these adorable mini desserts, topped with a rich cookie butter drizzle. Not only are they a super simple indulgence to whip up, but they’re also a guaranteed hit with anyone who loves dessert! Ready to dive into this deliciousness? Let’s make magic happen in your kitchen with these tempting treats!
Why are these cheesecakes so delightful?
Simplicity at Its Finest: The no-bake technique means you can enjoy these Mini Biscoff Cheesecakes without spending hours in the kitchen.
Irresistible Creamy Filling: Each bite offers a heavenly blend of cream cheese and cookie butter, creating a rich and smooth texture that melts in your mouth.
Crowd-Pleaser: Perfect for gatherings, these mini desserts look stunning and taste like a treat from a gourmet bakery—guaranteed to impress!
Versatile Flavor: Feel free to mix things up by adding your favorite flavored spreads, like Nutella, or serving them alongside fresh berries for an extra burst of flavor.
Make-Ahead Magic: Prepare them in advance to ensure stress-free hosting—just chill and serve when the time comes!
Whether you’re planning a special occasion or just want to indulge, these Mini Biscoff Cheesecakes will deliver satisfaction with every bite. Don’t forget to check out my recipe for Biscoff Cookie Butter for even more cookie butter goodness!
Mini Biscoff Cheesecakes Ingredients
• Discover the magic behind these dreamy delights!
For the Crust
- Biscoff Cookie Crumbs – The sweet and crunchy base that gives these cheesecakes their signature flavor; you can use graham cracker crumbs for a fun twist.
- Granulated Sugar – This adds just the right amount of sweetness to the crust; no substitutes recommended for optimal taste.
- Salted Butter (melted) – Binds everything together while adding richness; if you prefer, unsalted butter with a pinch of salt works too.
For the Cheesecake Filling
- Cream Cheese (room temperature) – The key ingredient for a creamy texture; make sure it’s softened for a smooth mix.
- Powdered Sugar – Sweetens the filling and helps achieve that silky-smooth consistency.
- Biscoff Spread (cookie butter) – The star flavor component, adding depth; no substitutes recommended for that authentic richness.
- Vanilla Extract – Enhances the overall flavor; you can swap it for almond extract if you’re feeling adventurous.
- Heavy Cream – Whipped to create a light and fluffy texture; using cold cream ensures the best results.
Toppings
- Additional Biscoff Spread – A delightful drizzle that adds an extra layer of sweetness on top.
- Biscoff Cookie Halves – Perfect for garnish, offering a beautiful visual element and delightful crunch; optional, depending on your presentation desire.
With this carefully curated selection of ingredients, your Mini Biscoff Cheesecakes will be a hit, showcasing the decadent relationship between cheesy goodness and cookie butter. Let the deliciousness begin!
Step‑by‑Step Instructions for Mini Biscoff Cheesecakes
Step 1: Prepare the Crust
In a medium bowl, combine Biscoff cookie crumbs, granulated sugar, and melted salted butter, stirring until all crumbs are coated. Using a measuring cup, press the mixture firmly into each compartment of your mini cheesecake pan, creating an even layer. The crust should be compact and hold its shape. Place the pan in the refrigerator to set while you prepare the cheesecake filling.
Step 2: Make the Cheesecake Filling
In a large mixing bowl, beat the softened cream cheese with an electric mixer until smooth and creamy. Gradually add powdered sugar, Biscoff spread, and vanilla extract, mixing until fully combined. Once the mixture is uniform, drizzle in cold heavy cream and continue to whip until the filling thickens and reaches a fluffy consistency, about 2–3 minutes.
Step 3: Assemble Cheesecakes
Remove the crust from the refrigerator and carefully pipe or spoon the cheesecake filling into each mini crust, slightly overfilling the edges for a delightful look. Smooth the tops with a spatula, ensuring even surfaces. Once filled, cover the mini cheesecakes with plastic wrap and chill them in the refrigerator for at least 12 hours, or overnight for best results.
Step 4: Prepare Whipped Cream
In a clean bowl, use an electric mixer to beat cold heavy cream, powdered sugar, and vanilla extract until medium-stiff peaks form, approximately 4–5 minutes. The whipped cream should be light and fluffy. Once ready, transfer it to a piping bag fitted with a star tip, making it ready for the final decorative touch on your Mini Biscoff Cheesecakes.
Step 5: Final Assembly
Carefully remove the cheesecakes from the mini pan and place them on a serving platter. Gently heat the remaining Biscoff spread in the microwave for about 10 seconds, just until it’s pourable. Drizzle this warm cookie butter generously over each cheesecake, then pipe swirls of whipped cream on top. Garnish with Biscoff cookie halves for an appealing, crunchy finish.

Storage Tips for Mini Biscoff Cheesecakes
Fridge: Store your Mini Biscoff Cheesecakes in an airtight container in the refrigerator for up to 3 days. This helps maintain their creamy texture and flavors.
Freezer: If you need to keep them longer, freeze the cheesecakes for up to 2 months. Wrap them tightly in plastic wrap, then place in a freezer-safe container to prevent freezer burn.
Thawing: To enjoy frozen Mini Biscoff Cheesecakes, thaw them in the fridge overnight before serving. This will ensure they regain their creamy delight without becoming too soft or watery.
Reheating: There’s no need to reheat these no-bake treats; simply garnish them fresh with whipped cream and additional Biscoff spread before serving!
Expert Tips for Mini Biscoff Cheesecakes
-
Room Temperature Cream Cheese: Ensure your cream cheese is at room temperature for a smooth filling, avoiding any lumps that could impact the texture.
-
Chill Time Matters: Allowing the cheesecakes to chill overnight enhances the flavor and texture, resulting in more enjoyable Mini Biscoff Cheesecakes.
-
Proper Crust Packing: Press the crust mixture firmly into the pan; a well-packed crust prevents crumbling when you serve your mini desserts.
-
Whipped Cream Peaks: When preparing the whipped cream, stop mixing as soon as medium-stiff peaks form. Overwhipping can lead to a grainy texture.
-
Drizzle Intelligently: Heat the Biscoff spread just enough to make it pourable for that perfect drizzle—be careful not to overheat and burn it!
What to Serve with Mini Biscoff Cheesecakes
Indulging in these creamy delights invites the perfect opportunity to craft a blissful dessert spread that all will love.
-
Fresh Berries: Add a burst of freshness and a pop of color to contrast the richness of the cheesecakes. A medley of strawberries, blueberries, and raspberries creates a lovely presentation and bright flavor profile.
-
Chocolate Drizzle: A rich, warm chocolate drizzle complements the cookie butter beautifully. The combination of flavors elevates the dessert experience, adding depth and sweetness that chocolate lovers will adore.
-
Whipped Cream: A dollop of fluffy whipped cream on top brings a light touch to the rich cheesecake. Its airy texture perfectly balances the creamy filling, making every bite irresistible.
-
Coffee or Espresso: Serve your Mini Biscoff Cheesecakes alongside a cup of freshly brewed coffee or a shot of espresso. The robust flavors enhance the cookie butter notes, making for a delightful pairing.
-
Chocolate-Covered Pretzels: For a sweet and salty crunch, offer some chocolate-covered pretzels on the side. They provide a fun texture contrast that complements the smooth cheesecakes perfectly.
-
Caramel Sauce: Drizzling caramel sauce over the cheesecakes creates a gooey richness reminiscent of a decadent dessert experience. It’s sure to take your Mini Biscoff Cheesecakes to the next level!
Combining these elements will not only impress your guests but also create a well-rounded dessert table that celebrates the indulgence of mini cheesecakes in style!
Mini Biscoff Cheesecakes Variations & Substitutions
Feel free to let your creativity shine by customizing these delightful Mini Biscoff Cheesecakes to suit your taste and dietary preferences!
-
Gluten-Free Crust: Substitute Biscoff cookies with gluten-free cookies or almond flour for a gluten-free option that still packs a flavorful punch.
-
Dairy-Free Option: Use dairy-free cream cheese and coconut cream for the filling to make these cheesecakes suitable for a dairy-free diet without compromising taste.
-
Flavor Boost: Add a splash of espresso or coffee extract to the filling for a mocha twist that marries beautifully with the Biscoff flavor.
-
Nutty Crunch: Stir in chopped hazelnuts or almonds into the cheesecake filling for a delightful texture and additional crunch. The nutty flavor complements the sweetness wonderfully.
-
Fruit Infusion: Swirl in a layer of fruit puree, like raspberry or strawberry, into the cheesecake mixture before chilling for a bright and fruity addition.
-
Chocolate Drizzle: Top with melted dark chocolate in place of or alongside the Biscoff drizzle for a decadent chocolate-biscuit experience. It’s a match made in dessert heaven!
-
Mini Dessert Cups: Instead of using a mini cheesecake pan, create these cheesecakes in small cups for an adorable presentation. Just layer the crust, filling, and toppings—perfect for parties!
-
Warm Cinnamon Spice: Add a teaspoon of ground cinnamon to the cheesecake filling for a warm, aromatic touch that balances well with the flavors of the cookie butter.
For more inspiration, don’t forget to visit my recipe for Apple Crumble Cheesecake, which shows a delightful twist on traditional flavors that you can easily incorporate! Enjoy customizing your perfect Mini Biscoff Cheesecakes!
Make Ahead Options
These Mini Biscoff Cheesecakes are perfect for meal prep enthusiasts looking to save time! You can prepare the crust and cheesecake filling up to 24 hours in advance, ensuring a stress-free dessert experience. Simply follow the steps to make the crust and filling, then assemble them in the mini cheesecake pans. Cover and refrigerate for optimal chilling. To maintain their delicious quality, avoid adding the whipped cream and Biscoff drizzle until just before serving. When ready to impress your guests, simply whip the cream fresh and top each cheesecake with the drizzle, ensuring they taste just as delightful as if made the same day.
Mini Biscoff Cheesecakes Recipe FAQs
How do I choose the best Biscoff cookies?
Absolutely! Look for Biscoff cookies that are crisp and have no dark spots all over. Fresh cookies will ensure that your crust has that delightful snap and rich flavor. If you’re looking for a gluten-free option, you can also select gluten-free cookies, but keep in mind that the taste may vary slightly.
What’s the best way to store leftovers?
Store your Mini Biscoff Cheesecakes in an airtight container in the refrigerator for up to 3 days. This method helps retain the rich, creamy texture and delicious flavors. Make sure not to leave them uncovered, as they can absorb other odors from the fridge.
Can I freeze these cheesecakes for later?
Yes, you can definitely freeze them! To freeze your Mini Biscoff Cheesecakes, wrap each cheesecake individually in plastic wrap and then place them in a freezer-safe container. They can be kept in the freezer for up to 2 months. When you’re ready to enjoy them, simply thaw them overnight in the refrigerator for optimal texture.
What should I do if my cheesecake filling is lumpy?
If your filling turns out lumpy, don’t worry! This can happen if the cream cheese isn’t softened properly. Next time, ensure your cream cheese reaches room temperature before mixing—this creates that smooth, creamy filling we love. If you find lumps after mixing, give it another good whip using an electric mixer until smooth.
Are there any allergens I should be aware of?
Definitely! The main ingredients in Mini Biscoff Cheesecakes include dairy and gluten, so they’re not suitable for individuals with lactose intolerance or gluten allergies. If you’d like to make a pet-safe variation, avoid any chocolate or Biscoff products for pets as they may not be safe for them. Enjoy responsibly!
Irresistible Mini Biscoff Cheesecakes You Can’t Resist
Ingredients
Equipment
Method
- In a medium bowl, combine Biscoff cookie crumbs, granulated sugar, and melted salted butter, stirring until all crumbs are coated. Press firmly into each compartment of your mini cheesecake pan and refrigerate to set.
- In a large mixing bowl, beat the cream cheese with an electric mixer until smooth. Gradually add powdered sugar, Biscoff spread, and vanilla extract, mixing until combined. Drizzle in cold heavy cream and whip until thickened.
- Remove the crust from the refrigerator and pipe or spoon the cheesecake filling into each mini crust, overfilling slightly. Smooth the tops with a spatula and chill covered for at least 12 hours.
- Beat cold heavy cream, powdered sugar, and vanilla until medium-stiff peaks form. Transfer to a piping bag with a star tip.
- Remove the cheesecakes from the pan and drizzle warm Biscoff spread over each. Pipe whipped cream on top and garnish with cookie halves.
Leave a Reply