
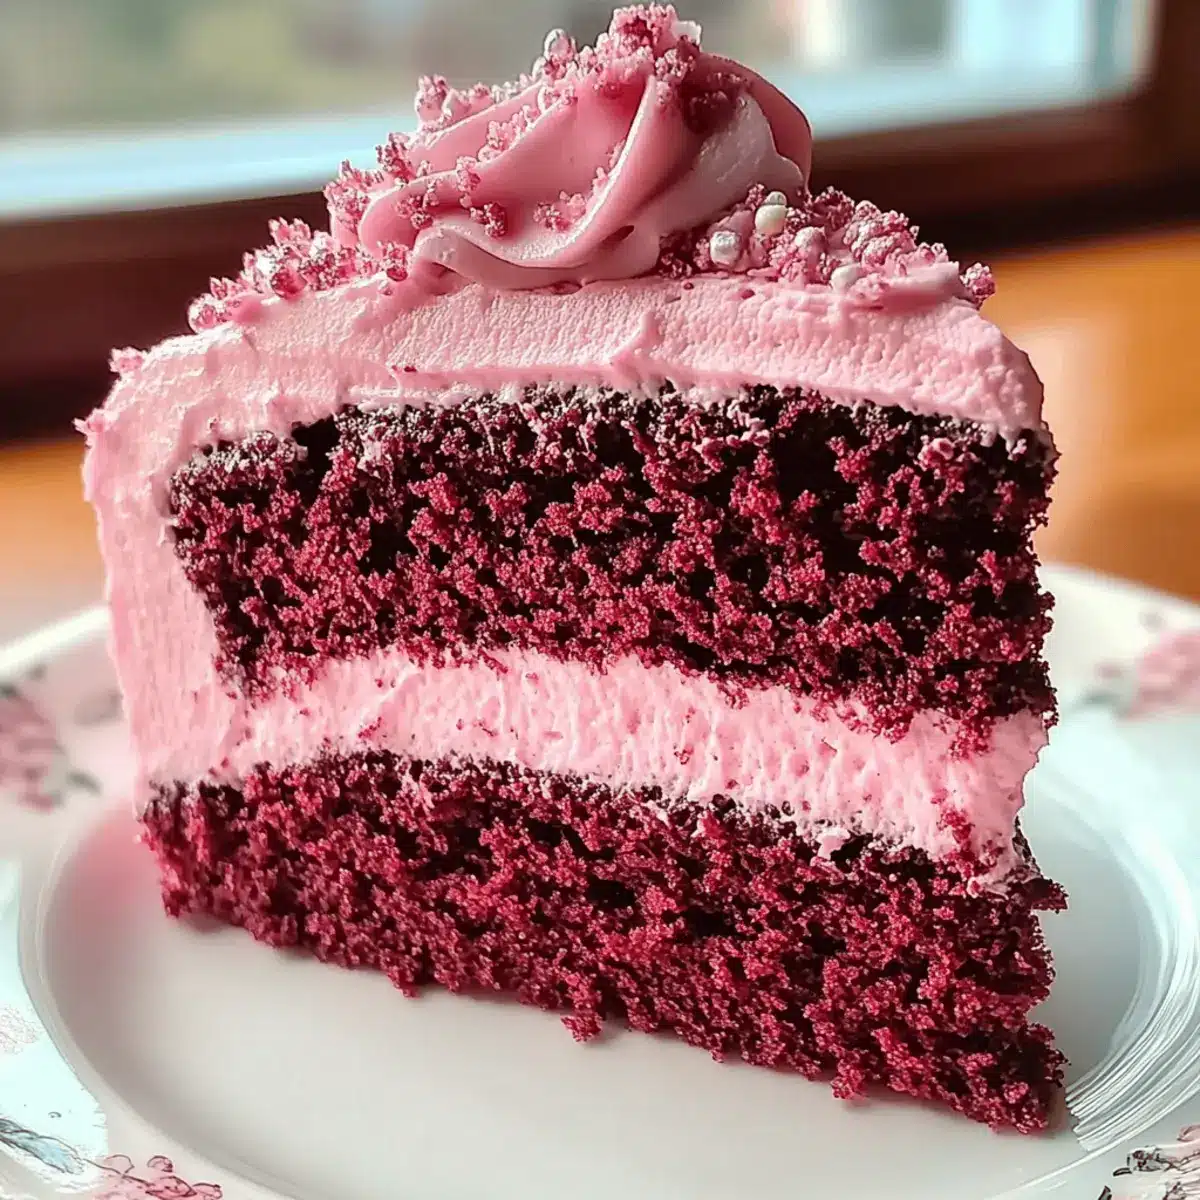
As I sift through the flour and cocoa, the vibrant colors and mouthwatering aromas begin to stir old memories of celebrations filled with laughter and love. Welcome to my kitchen, where I’m excited to share the recipe for a show-stopping Mother’s Day Pink Velvet Cake. This stunning dessert, perfect for any gathering, combines soft layers that melt in your mouth with a creamy frosting that brings it all together. Not only is this cake a feast for the eyes, but it also boasts the irresistible benefit of being straightforward to make, allowing you to create a scrumptious centerpiece without stress. Whether you’re honoring mom or simply indulging in something sweet, this cake invites everyone to join in on a moment of joy. Who’s ready to sprinkle some love into the kitchen?
Why is Pink Velvet Cake special?
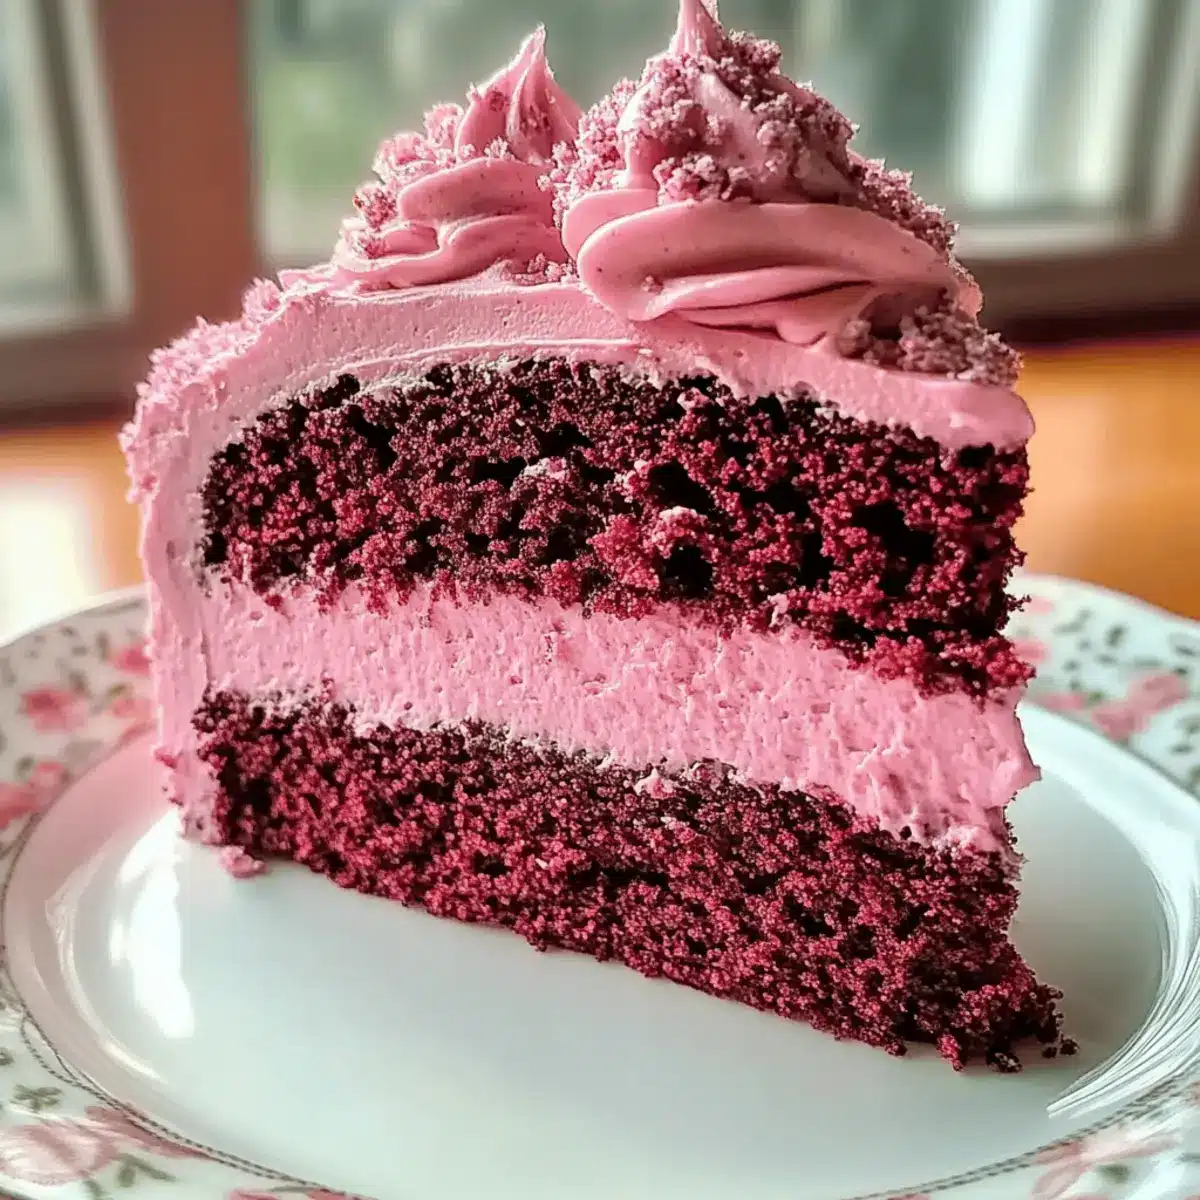
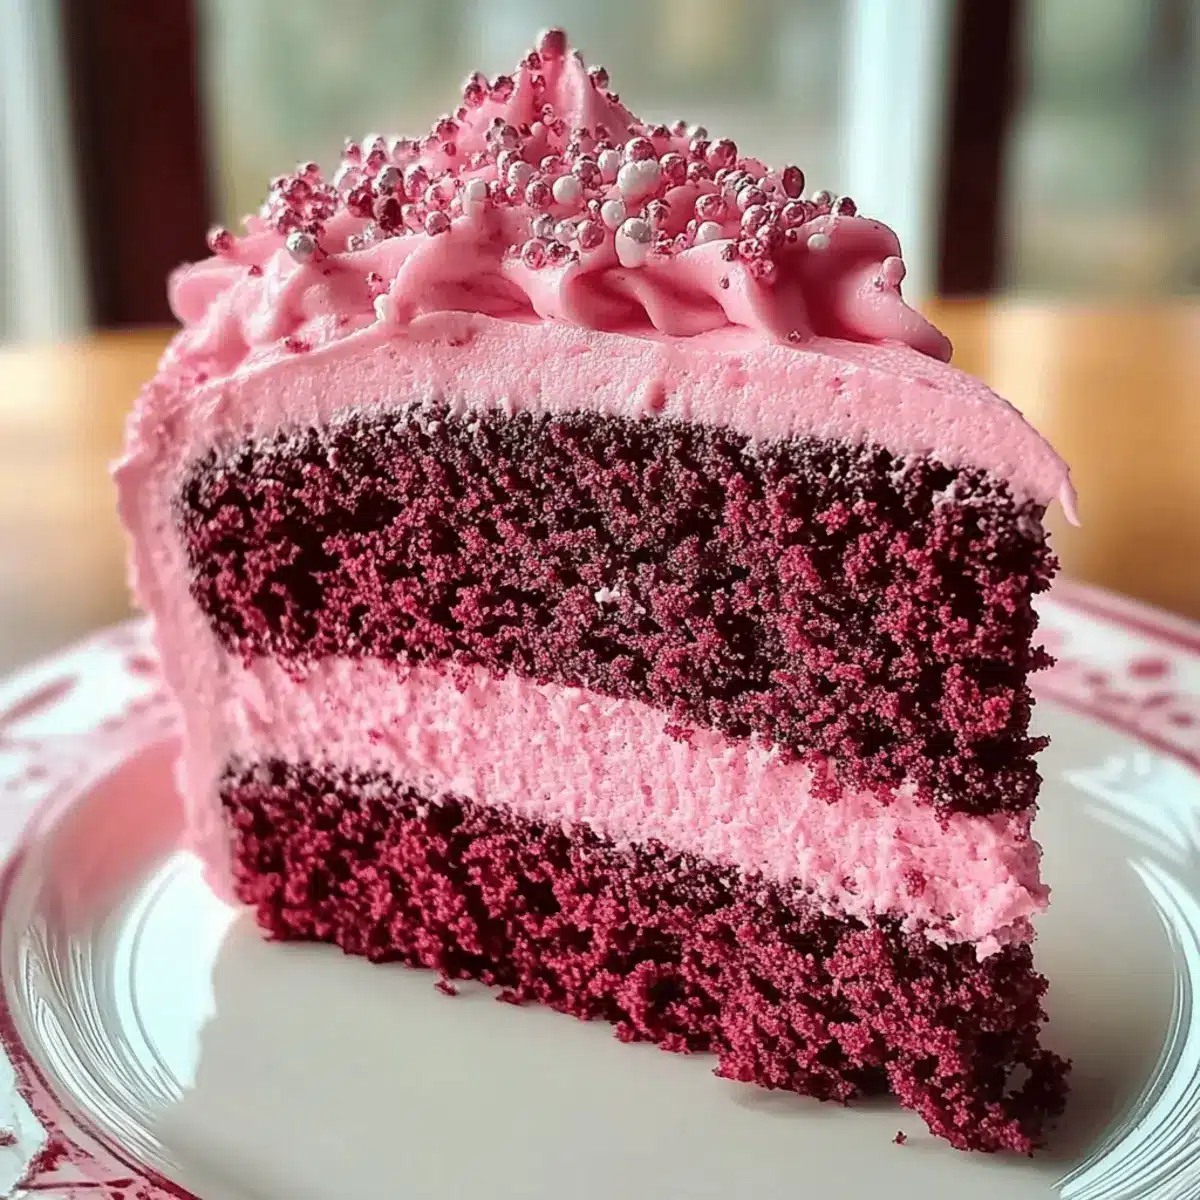
Visual Delight: The Mother’s Day Pink Velvet Cake isn’t just delicious; it’s a stunning centerpiece that brings joy to any table.
Easy Preparation: With simple steps, you can impress your loved ones without spending all day in the kitchen.
Moist and Fluffy: Each slice offers a soft, airy texture paired with a rich cocoa undertone, making it irresistible.
Versatile Appeal: Whether paired with fresh berries or a scoop of vanilla ice cream, this cake is adaptable to any occasion.
Memory Maker: Perfect for celebrations, it invites laughter and connection, creating sweet moments you’ll cherish. For more delightful cakes, check out my Carrot Cream Cake and the luscious Dubai Chocolate Cake.
Mother’s Day Pink Velvet Cake Ingredients
For the Cake
- Cake Flour – Provides structure and tenderness; for gluten-free, consider almond flour or a gluten-free blend.
- Unsweetened Cocoa Powder – Adds rich chocolate flavor; can substitute with Dutch-processed cocoa for a milder taste.
- Baking Powder – Leavening agent that helps the cake rise; ensure it’s fresh for optimal results.
- Salt – Enhances flavor; can be omitted but is recommended for a balanced taste.
- Unsalted Butter – Adds moisture and richness; for a dairy-free option, use vegan butter or margarine.
- Granulated Sugar – Sweetens the cake; can use brown sugar for a moister texture.
- Eggs – Provides structure and moisture; for egg-free, substitute with flax eggs (1 tbsp ground flaxseed + 3 tbsp water per egg).
- Buttermilk – Adds moisture and slight tang; can be replaced with milk mixed with vinegar (1 cup milk + 1 tbsp vinegar).
- Vanilla Extract – Enhances flavor complexity; substitute with vanilla bean paste for a more intense flavor.
- Red Food Coloring – Gives the signature pink hue; optional substitutes include natural alternatives like beet juice.
For the Frosting
- Cream Cheese – Provides a creamy texture and tang; make sure it’s softened for easy mixing.
- Powdered Sugar – Adds sweetness for the frosting; sift it for a smoother consistency.
- Vanilla Extract – Enhances the frosting flavor; consider adding a pinch of salt to balance the sweetness.
Embrace baking this delightful Mother’s Day Pink Velvet Cake, and let your kitchen fill with love and laughter!
Step‑by‑Step Instructions for Mother’s Day Pink Velvet Cake
Step 1: Preheat and Prepare Pans
Begin by preheating your oven to 350°F (175°C). While it warms up, take two 9-inch round cake pans and generously grease them with unsalted butter, then dust with flour to prevent sticking. This preparation ensures your Mother’s Day Pink Velvet Cake comes out effortlessly smooth and beautifully shaped.
Step 2: Combine Dry Ingredients
In a medium-sized mixing bowl, whisk together 2 cups of cake flour, 1 tablespoon of unsweetened cocoa powder, 1 teaspoon of baking powder, and ½ teaspoon of salt. This mixture creates a balanced blend of dry ingredients. Set it aside while you work on the wet ingredients, allowing the flavors to meld together in essence.
Step 3: Cream Butter and Sugar
In a large mixing bowl, beat 1 cup of softened unsalted butter and 1.5 cups of granulated sugar with a hand mixer on medium speed for about 3 minutes. The result will be a light and fluffy mixture. This step is crucial for incorporating air, which helps your Mother’s Day Pink Velvet Cake achieve a soft, tender texture.
Step 4: Add Eggs
Next, add 3 large eggs to the creamed butter and sugar, one at a time. Beat well after each addition until fully incorporated. This method ensures each egg emulsifies into the batter, maintaining moisture and achieving the ideal crumb. You’ll notice the mixture will become even lighter and creamier with each egg.
Step 5: Mix in Wet Ingredients
Pour in 1 cup of buttermilk, 1 tablespoon of vanilla extract, and 1 tablespoon of red food coloring into the butter mixture. Mix on low speed until fully combined, creating a smooth batter with a vibrant hue. This combination helps elevate the flavor and gives your cake its signature pink color for that festive touch.
Step 6: Combine Dry and Wet Mixtures
Gradually fold the dry ingredients into the wet mixture using a spatula or wooden spoon. Mix until just combined, ensuring not to overmix, which is vital for the light, airy texture you desire in your Mother’s Day Pink Velvet Cake. The batter should be smooth with no visible flour streaks.
Step 7: Bake the Cake
Divide the batter evenly between the prepared cake pans, smoothing the tops with a spatula. Place them in the preheated oven and bake for 25-30 minutes, or until a toothpick inserted into the center comes out clean. The cakes should rise beautifully and pull slightly away from the edges of the pans when done.
Step 8: Cool the Cakes
Once baked, remove the pans from the oven and let them cool for about 10 minutes on a wire rack. Afterward, carefully turn the cakes out of the pans and let them cool completely on the wire racks. This step is essential to ensure your frosting adheres perfectly to the Mother’s Day Pink Velvet Cake without melting or slipping.
Step 9: Frost the Cake
Once the cake layers are completely cool, prepare your cream cheese frosting. Spread a layer of frosting between the cake layers, then apply a generous layer on top and around the sides of the cake. The creamy frosting adds a rich contrast to the soft pink layers, creating an irresistible finish for your Mother’s Day Pink Velvet Cake.

Storage Tips for Mother’s Day Pink Velvet Cake
Fridge: Store the cake in an airtight container in the refrigerator for up to 5 days to maintain its moisture and flavor.
Freezer: For longer storage, wrap slices or whole layers tightly in plastic wrap and then in aluminum foil. It can be frozen for up to 3 months.
Reheating: Thaw frozen slices in the refrigerator overnight, then serve at room temperature or pop in the microwave for 10-15 seconds for a fresh, warm taste.
Airtight Storage: Always ensure the cake is completely cooled before wrapping or storing; this prevents moisture buildup and keeps your Mother’s Day Pink Velvet Cake as delightful as when it was freshly baked.
Make Ahead Options
These Mother’s Day Pink Velvet Cake layers are perfect for meal prep, allowing you to enjoy your special occasion stress-free! You can bake the cake layers up to 3 days in advance. Once cooled, wrap them tightly in plastic wrap and refrigerate to maintain their moisture. For optimal flavor, consider freezing the layers if you’re prepping further ahead (up to 3 months). On the day of serving, simply thaw them overnight in the fridge, then frost with your cream cheese frosting. This way, you’ll have a delectable cake ready to impress, just as delightful as if it were freshly made!
What to Serve with Mother’s Day Pink Velvet Cake
As you gather around the table, let this delightful cake inspire a spread that enhances every moment of joy and celebration.
-
Fresh Berries: Juicy strawberries, blueberries, or raspberries add a pop of color and a tangy contrast to the sweetness of the cake.
-
Vanilla Ice Cream: A scoop of creamy vanilla ice cream brings a luscious coldness that beautifully complements the rich flavors of this dessert. Imagine the cake slowly melting into the ice cream—pure bliss!
-
Whipped Cream: Light and airy whipped cream adds a dollop of decadence and balances the cake’s richness, making each bite feel indulgent.
-
Lemonade Spritzer: A refreshing lemonade spritzer can cut through the sweetness, making it the perfect drink to enjoy alongside the cake’s fluffy bites.
-
Chocolate Ganache: Drizzling warm chocolate ganache over each slice offers an extra touch of luxury, enhancing the cake’s flavor and creating a beautiful presentation.
-
Mint Leaves: Fresh mint leaves brighten the plate and provide a burst of freshness, making each forkful feel light and delightful.
-
Caramel Sauce: A swirl of caramel sauce can add depth and a gentle sweetness that pairs wonderfully with the pink layers. It’s a delightful twist that everyone will cherish!
Mother’s Day Pink Velvet Cake Variations
Feel inspired to make this delightful cake your own with easy adjustments that will leave everyone wanting more!
-
Dairy-Free: Substitute unsalted butter with vegan butter and use a dairy-free cream cheese for the frosting. It’ll still be luscious and creamy!
-
Gluten-Free: Replace cake flour with almond flour or a gluten-free flour blend for a cake that everyone can enjoy. The texture might be slightly different but still delightful.
-
Flavor Boost: Add a splash of almond extract to the batter for a delicious nutty undertone. It complements the vanilla beautifully and elevates the flavor profile!
-
Berry Infusion: Fold in a cup of fresh berries, like raspberries or strawberries, into the batter for a refreshing twist. They’ll not only add flavor but burst with color, too!
-
Scoop of Ice Cream: Serve slices with a side of vanilla or strawberry ice cream to create a delightful contrast between warm cake and cold creaminess. A match made in heaven!
-
Coconut Twist: Mix in shredded coconut to the batter for an exotic touch. This will add texture and a hint of sweetness that pairs perfectly with the cake’s rich flavors.
-
Delectable Frosting Swap: Utilize whipped cream or chocolate ganache instead of cream cheese frosting for a lighter option. It’s an easy switch that provides a different, yet equally delicious experience.
-
Heat Level: For those who enjoy a spicy kick, add a pinch of cayenne pepper or chili powder to the batter. It’ll amplify the flavor complexity while keeping it intriguing!
Feel free to explore these variations and find the combination that speaks to your heart. And for even more cake delights, don’t forget to check out my Bee Sting Cake or the tantalizing Caramel Crunch Cake for the next special occasion!
Expert Tips for Mother’s Day Pink Velvet Cake
-
Room Temperature Ingredients: Ensure your butter, eggs, and buttermilk are at room temperature for smoother mixing and better texture in your Mother’s Day Pink Velvet Cake.
-
Mixing Technique: Avoid overmixing the batter after adding the dry ingredients; this can lead to a dense cake instead of the light, fluffy texture you’re aiming for.
-
Color Gradation: Start with a small amount of red food coloring and gradually add more until you achieve the desired pink hue; this prevents an overly bright cake.
-
Oven Check: Always check for doneness 5 minutes before the timer goes off; ovens can vary, and you want to prevent dryness.
-
Cooling Time: Allow the cake layers to cool completely before frosting; warm layers can cause your frosting to melt and slide off.
-
Frosting Consistency: For the best spreadable consistency, make sure your cream cheese is very soft; if it’s too firm, it can be difficult to achieve a smooth frost.
Mother’s Day Pink Velvet Cake Recipe FAQs
How do I select the best ingredients for my cake?
Absolutely! For your Mother’s Day Pink Velvet Cake, it’s crucial to choose high-quality cake flour for optimal tenderness. When selecting unsweetened cocoa powder, look for a brand with a rich, deep color, as this ensures a more robust chocolate flavor. Always check the freshness of your baking powder, as expired powder won’t provide the lift you need for that delightful fluffiness.
What’s the best way to store my cake after baking?
To preserve the delectable taste of your Mother’s Day Pink Velvet Cake, store it in an airtight container in the refrigerator for up to 5 days. If you want to keep it longer, wrap the cake in plastic wrap and then in aluminum foil before placing it in the freezer. This way, it can be stored for up to 3 months while retaining its lovely flavors.
Can I freeze the cake, and if so, how?
Certainly! To freeze your Mother’s Day Pink Velvet Cake, first ensure it’s completely cooled. Then, wrap each layer or slice tightly in plastic wrap, followed by aluminum foil to prevent freezer burn. For best results, enjoy the frozen cake within 3 months. When you’re ready to indulge, simply thaw it overnight in the refrigerator and then serve!
What if my cake doesn’t rise as expected?
Very often, a cake may not rise due to stale baking powder or insufficient mixing. Make sure you use fresh baking powder—check the expiration date! While mixing, ensure you’re incorporating enough air by thoroughly creaming butter and sugar. If everything seems fine and it still doesn’t rise, your oven temperature may be off; it’s worthwhile to use an oven thermometer to verify it’s accurate.
Are there any dietary considerations I should keep in mind?
Absolutely! If you’re making the Mother’s Day Pink Velvet Cake for someone with dietary restrictions, you can easily make a few substitutions. For a gluten-free version, substitute the cake flour with a gluten-free flour blend. To make it dairy-free, use vegan butter and plant-based milk combined with vinegar instead of buttermilk. Lastly, if eggs are a concern, flax eggs (1 tbsp ground flaxseed mixed with 3 tbsp water) work beautifully as a binder.
How do I know if my cake is done baking?
To check for doneness, insert a toothpick into the center of the cake. If it comes out clean or with a few moist crumbs, your Mother’s Day Pink Velvet Cake is ready! Be sure to check the cake about 5 minutes before the recommended baking time, as oven temperatures can vary. This way, you can avoid overbaking and keep it wonderfully moist.
Mother’s Day Pink Velvet Cake for Sweet, Memorable Moments
Ingredients
Equipment
Method
- Preheat your oven to 350°F (175°C) and grease two 9-inch round cake pans with butter, dusting with flour to prevent sticking.
- Whisk together 2 cups of cake flour, 1 tbsp of cocoa powder, 1 tsp of baking powder, and ½ tsp of salt in a mixing bowl.
- In a large bowl, beat 1 cup of softened butter and 1.5 cups of sugar for about 3 minutes until light and fluffy.
- Add 3 eggs one at a time to the mixture, beating well after each addition.
- Mix in 1 cup of buttermilk, 1 tbsp of vanilla extract, and 1 tbsp of red food coloring until combined.
- Gradually fold in the dry ingredients, mixing until just combined.
- Divide and smooth the batter into the prepared pans and bake for 25-30 minutes.
- Once baked, cool in pans for 10 minutes, then turn out onto wire racks to cool completely.
- Frost the cooled layers with cream cheese frosting, spreading between layers and on top.
Leave a Reply