
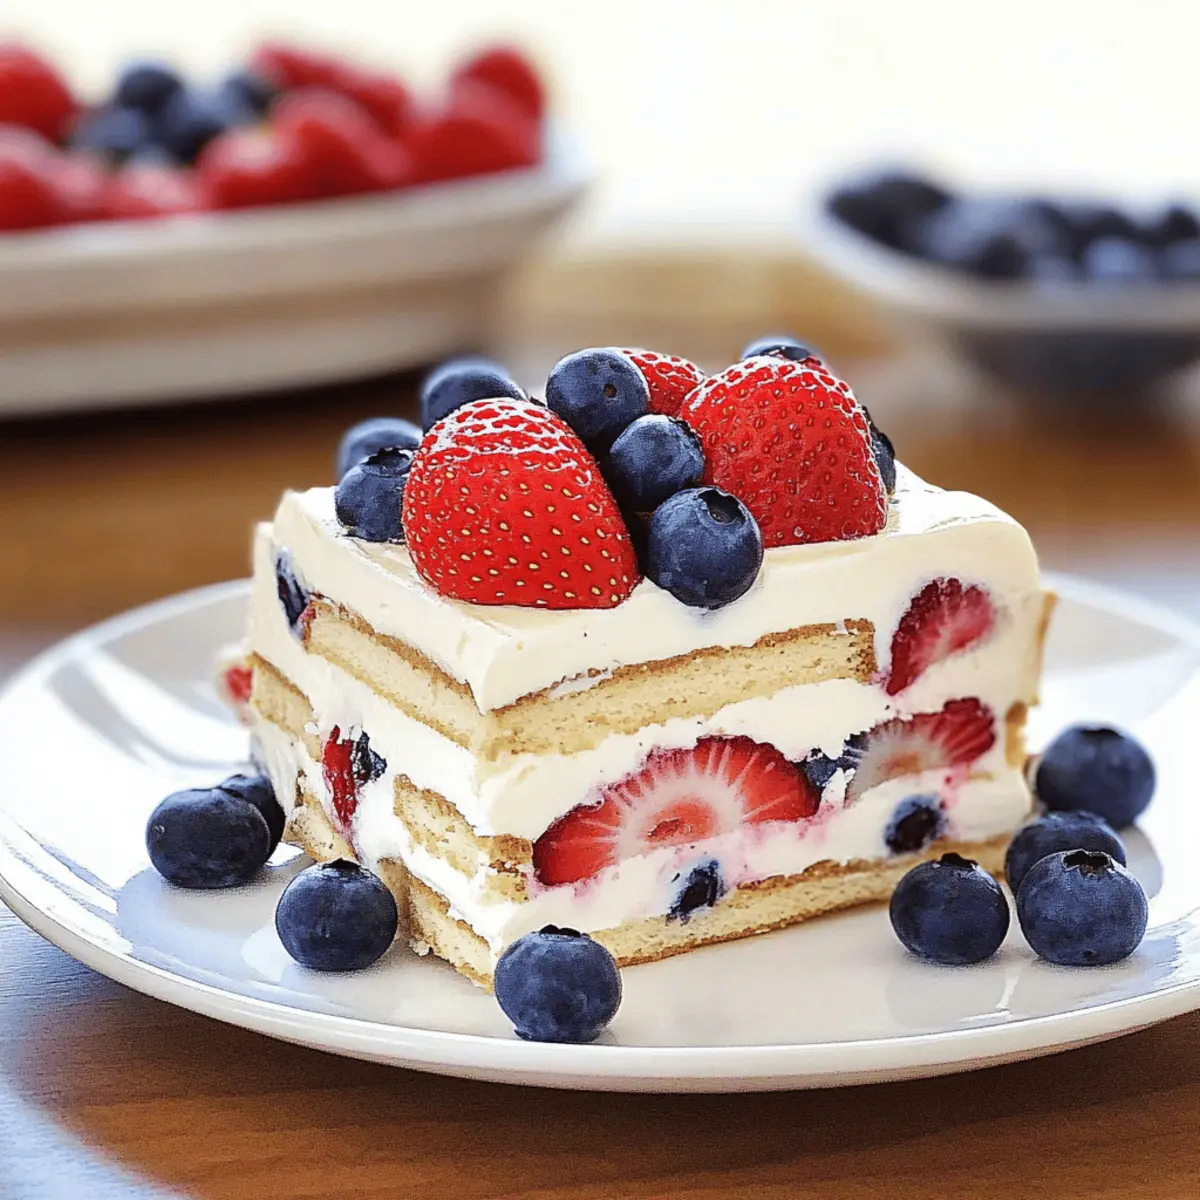
As the sun blazes and temperatures rise, a wave of nostalgia washes over me, reminding me of family picnics and breezy summer afternoons filled with laughter. That’s when I first tasted what has now become an essential staple in my summer repertoire: the No Bake Summer Berry Icebox Cake. This vibrant, light dessert features luscious layers of creamy vanilla pudding and freshly picked strawberries and blueberries, providing a delightful antidote to the heat. Not only is it an effortless treat that comes together in mere minutes, but it requires no baking at all, making it an absolute lifesaver for busy days. Satisfy your sweet tooth without the stress of turning on the oven, and let the refreshing flavors of summer transport you to a sunny day in the park. Curious how to create this easy, show-stopping dessert that can be dressed up, or down, for any occasion? Let’s dive in!
Why is Summer Berry Icebox Cake a must-try?
Effortless Preparation: With no baking required, this dessert comes together in just minutes, making it a perfect choice for bustling summer days.
Refreshing Taste: The combination of sweet strawberries and blueberries creates a burst of fruity goodness that’s the epitome of summer.
Versatile Layers: You can mix and match fruits, or try a twist with a drizzle of homemade whipped cream, similar to my Fried Strawberry Cheesecake for added flair!
Crowd-pleaser: Ideal for gatherings, barbecues, or lazy afternoons, this cake stands out as a delectable treat everyone will love.
Make Ahead Magic: Prepare it a day in advance to ensure the flavors meld beautifully, just like the delightful Coffee Cake Cozy for stress-free entertaining.
Summer Berry Icebox Cake Ingredients
• Perfect for your next summer gathering!
For the Cake Layers
• Graham Crackers – Provide the structure for the delicious cake; feel free to swap with vanilla wafers for a new twist!
• Fresh Strawberries (3 cups, sliced) – Adds fruity flavor and freshness; consider raspberries for a different zing.
• Fresh Blueberries (1-1/2 cups) – Offers a sweet burst in every bite; blackberries can also be used for a tasty alternative.
For the Creamy Filling
• Cream Cheese (8 oz, softened) – Adds richness to the filling; use dairy-free cream cheese for a vegan option.
• Vanilla Instant Pudding (2 packages, 3.4 oz each) – Ensures a smooth and sweet layer; swapping with cheesecake-flavored pudding provides an exciting change of pace.
• Cold Milk (2-1/2 cups) – Hydrates the pudding; any milk alternative works well for those avoiding dairy.
• Cool Whip (12 oz) or homemade whipped cream – Offers lightness and volume; choose whipped coconut cream for a delightful dairy-free alternative.
For the Topping
• White Chocolate Chips (2 oz) – Adds a sweet drizzle that elevates the dessert; feel free to substitute with dark chocolate for a richer flavor.
Gather these ingredients for your Summer Berry Icebox Cake, and you’re all set for a refreshing, no-bake delight that celebrates summer in every bite!
Step‑by‑Step Instructions for No Bake Summer Berry Icebox Cake
Step 1: Prepare the Cream Mixture
In a large mixing bowl, combine 8 oz of softened cream cheese with 2 packages of vanilla instant pudding. Beat using an electric mixer on medium speed for about 2-3 minutes until the mixture is creamy and free of lumps. The cream cheese should be at room temperature for optimal blending, giving you a smooth consistency to start your Summer Berry Icebox Cake.
Step 2: Add the Milk
Gradually pour in 2-1/2 cups of cold milk while continuing to mix. Keep blending for an additional 2-3 minutes until the mixture is smooth and thickens slightly. This step is crucial for achieving that velvety filling that will create the delightful layers in your icebox cake.
Step 3: Fold in the Cool Whip
Gently fold in 12 oz of Cool Whip or homemade whipped cream into the pudding mixture using a spatula. Make sure to reserve about ½ cup of Cool Whip for later topping. The goal is to maintain the lightness of the whipped cream while fully integrating it with the creamy pudding blend essential for your Summer Berry Icebox Cake.
Step 4: Prepare the Base
Spread a thin layer of the prepared pudding mixture at the bottom of a 9×13 inch pan, using a spatula to create an even layer. This layer will help keep the graham crackers stable and is important for a sturdy foundation. The coolness of the pudding will set the stage for the layers to follow.
Step 5: Layer the Graham Crackers
Next, arrange graham crackers in a single layer over the pudding base, filling in the edges as needed. Press them down gently to create a firm surface. The graham crackers form the structural backbone of your Summer Berry Icebox Cake and will soften beautifully as they absorb the delicious filling.
Step 6: Add Berries and Pudding
Spoon half of the remaining pudding mixture over the graham crackers and smooth it out evenly. Then, sprinkle a layer of sliced strawberries and blueberries, generously distributing them across the pudding for beautiful color and flavor. This layering is all about creating that stunning visual impact that your guests will admire!
Step 7: Repeat the Layers
Repeat the layering process by adding another layer of graham crackers followed by the remaining pudding mixture. Once again, top with a fresh layer of strawberries and blueberries, ensuring that the luscious fruits are prominently displayed on top for an enticing finish. Each layer contributes to the overall flavor profile of your Summer Berry Icebox Cake.
Step 8: Chill the Cake
Cover the pan with plastic wrap and refrigerate for at least 4 hours, or ideally overnight. This step allows the flavors to meld together and the graham crackers to soften, transforming the layers into a soft, cake-like texture. It creates a refreshing treat that is perfect for those hot summer days.
Step 9: Drizzle with Chocolate
Just before serving, melt 2 oz of white chocolate chips in a microwave-safe bowl at 30-second intervals, stirring in between, until smooth. Drizzle the melted chocolate over the chilled icebox cake for an elegant touch. This delightful addition not only enhances presentation but also offers a sweet contrast to the berries in your Summer Berry Icebox Cake.
Make Ahead Options
These No Bake Summer Berry Icebox Cakes are a lifesaver for busy cooks looking to save time! You can prepare the entire cake up to 24 hours in advance, allowing the flavors to meld beautifully. Start by making the creamy filling and layering it with the graham crackers and berries, then cover it tightly with plastic wrap and refrigerate. This ensures that the graham crackers soften to perfection while keeping the dessert fresh. Just before serving, drizzle with melted white chocolate to give it a delightful finish. Trust me, this summer dessert will still taste just as delicious, making your gatherings effortlessly sweet!
What to Serve with No Bake Summer Berry Icebox Cake
As you prepare to serve this delightful dessert, think about the accompanying dishes that can elevate your summer gathering into a memorable feast.
-
Fresh Fruit Salad: A vibrant mix of seasonal fruits complements the icebox cake perfectly; the bright flavors will harmonize beautifully. A touch of mint can add a refreshing pop!
-
Classic Lemonade: The zesty sweetness of lemonade refreshes the palate after a bite of creamy cake, making it an ideal beverage choice for hot days.
-
Grilled Chicken Salad: Pair the coolness of the icebox cake with a light, protein-packed chicken salad. The flavors of zesty dressings will balance the dessert’s sweetness.
-
No-Bake Chocolate Tart: For those who adore chocolate, this decadent treat adds a rich contrast to the lighter berry flavors of the icebox cake.
-
Vanilla Ice Cream: A scoop of creamy vanilla ice cream alongside the cake will take the dessert experience to new heights, melting into each delicious layer.
-
Sparkling Wine: For an elegant touch, serve a chilled sparkling wine; its bubbles will enhance the celebratory vibe of your summer gathering.
-
Chocolate-Dipped Strawberries: These sweet, juicy berries mirror the flavors in the cake and add a delightful dessert option that’s easy to indulge in.
-
Herbed Couscous Salad: A light, fluffy salad with fresh herbs and veggies complements the satisfying texture of the icebox cake while adding a nutritious element to the meal.
Consider these delicious pairings to create a summer feast that’s refreshing, exciting, and bursting with flavor!
How to Store and Freeze Summer Berry Icebox Cake
Fridge: Store your Summer Berry Icebox Cake covered in the refrigerator for up to 3-4 days. This keeps it fresh and maintains that creamy texture.
Freezer: For longer storage, place individual slices in airtight containers or wrap them well in plastic wrap and foil. It can be frozen for up to 2 months.
Thawing: To enjoy frozen slices, transfer them to the fridge a few hours before serving. This allows them to thaw gently while preserving the creamy filling.
Reheating: There’s no need to reheat this dessert; it’s meant to be enjoyed chilled, allowing those refreshing berry flavors to shine!
Summer Berry Icebox Cake Variations
Get ready to elevate your dessert game with these easy twists that will make your cake even more delightful!
-
Berries Galore: Substitute strawberries and blueberries with raspberries or chopped peaches for a vibrant fruit medley. Each fruit brings its unique flavor, making this icebox cake a versatile option for everyone!
-
Gluten-Free Delight: Use gluten-free graham crackers to make this dessert accessible for those avoiding gluten. Enjoy the same soft texture and delectable taste without compromising dietary needs.
-
Vegan Option: Substitute cream cheese with dairy-free cream cheese and replace Cool Whip with whipped coconut cream for a vegan twist without losing creaminess. It’s a wonderful way to ensure everyone can enjoy this refreshing treat!
-
Flavor Infusion: Add a splash of lemon zest or a teaspoon of almond extract to the pudding mixture for a zesty or nutty flavor boost. These little changes can truly transform your cake into a gourmet delight!
-
Nutty Crunch: Crushed nuts like almonds or pecans sprinkled between the layers add a delightful crunch. This texture contrast enhances the overall experience of your Summer Berry Icebox Cake!
-
Chocolate Lovers: Swap out white chocolate chips for dark chocolate for an indulgent touch of richness. The deep flavor will complement the sweetness of the berries beautifully.
-
Layer with Greek Yogurt: Use Greek yogurt mixed with a touch of honey instead of Cool Whip to create a creamier filling with added protein. It’s a deliciously healthy option that still feels like a treat!
-
Mini Icebox Cakes: Serve individual portions in small glasses for an elegant presentation at gatherings. Layering in glass showcases the beautiful colors of the berries, just like in my Strawberry Shortcake Puppy recipe!
With these variations, you can explore new flavors and styles of your Summer Berry Icebox Cake, ensuring there’s something delightful for every palate!
Expert Tips for Summer Berry Icebox Cake
-
Room Temperature Cheese: Ensure the cream cheese is softened properly for easy mixing. Cut it into smaller chunks to help it blend smoothly with the pudding.
-
Layer Wisely: Use fresh, dry berries for the best texture and flavor in your Summer Berry Icebox Cake. Wash and slice them evenly for beautiful layers.
-
Chill Time Matters: Allow your cake to chill for at least 4 hours, or overnight if possible. This helps the flavors meld and softens the graham crackers for a delightful texture.
-
Avoid Sogginess: Don’t leave the cake out at room temperature for too long, as this may lead to it becoming too soggy. Keep it chilled until you’re ready to serve.
-
Garnish with Care: When drizzling chocolate, wait until just before serving for a beautiful presentation. Melt it in short intervals to prevent burning.
Summer Berry Icebox Cake Recipe FAQs
What kind of strawberries should I use?
Absolutely! Look for strawberries that are bright red, firm, and plump. Avoid any with dark spots or signs of mold. The sweeter the berries, the better your Summer Berry Icebox Cake will taste.
How long can I store the icebox cake?
Very! The cake can be stored in the refrigerator for up to 3-4 days when covered tightly. It’s best to enjoy it fresh, as the graham crackers will gradually absorb moisture and soften.
Can I freeze the Summer Berry Icebox Cake?
Yes, indeed! To freeze, slice the cake and wrap each piece tightly in plastic wrap, then in foil to prevent freezer burn. It can be frozen for up to 2 months. When you are ready to enjoy, just transfer the slices to the fridge to thaw for a few hours.
What if my cake becomes soggy?
Don’t worry! This can happen if the cake is left out for too long or if there’s too much moisture from the berries. To avoid this, make sure your graham crackers are layered properly and don’t leave the cake out at room temperature for extended periods. Use only fresh, dry fruit and consider serving it chilled right from the fridge!
Is this cake suitable for people with allergies?
Absolutely! For a gluten-free option, you can use gluten-free graham crackers. If you’re concerned about dairy, swap regular cream cheese and Cool Whip with dairy-free alternatives. Always check packaging for allergens if you’re cooking for someone with specific dietary needs.
How can I add extra flavor to my cake?
Wonderful question! For an extra zing, you can add a splash of lemon zest or a teaspoon of almond extract to the pudding mixture; this will elevate the flavor profile of your Summer Berry Icebox Cake beyond delicious!
Delightful Summer Berry Icebox Cake for Effortless Chilling
Ingredients
Equipment
Method
- In a large mixing bowl, combine 8 oz of softened cream cheese with 2 packages of vanilla instant pudding. Beat using an electric mixer on medium speed for 2-3 minutes until creamy.
- Gradually pour in 2-1/2 cups of cold milk while continuing to mix. Blend for another 2-3 minutes until smooth.
- Gently fold in 12 oz of Cool Whip into the pudding mixture. Reserve about ½ cup of Cool Whip for later topping.
- Spread a thin layer of the pudding mixture at the bottom of a 9x13 inch pan.
- Arrange graham crackers in a single layer over the pudding base, pressing gently.
- Spoon half of the remaining pudding mixture over the graham crackers. Sprinkle with sliced strawberries and blueberries.
- Repeat by adding another layer of graham crackers followed by the remaining pudding and topping with berries.
- Cover the pan with plastic wrap and refrigerate for at least 4 hours, or overnight.
- Melt 2 oz of white chocolate chips and drizzle over the chilled cake before serving.
Leave a Reply