
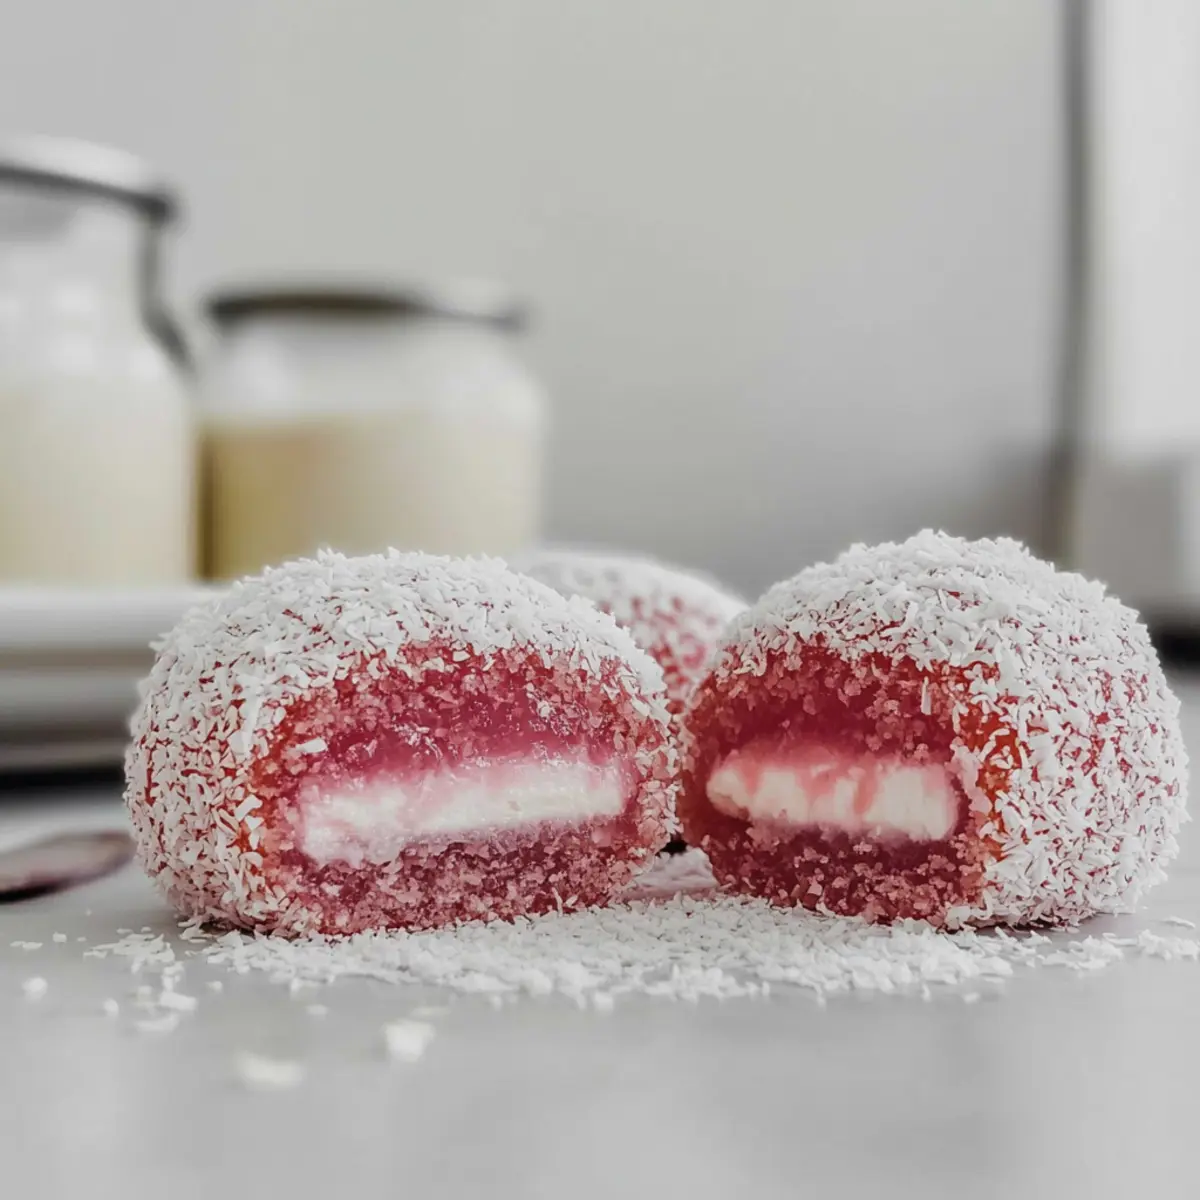
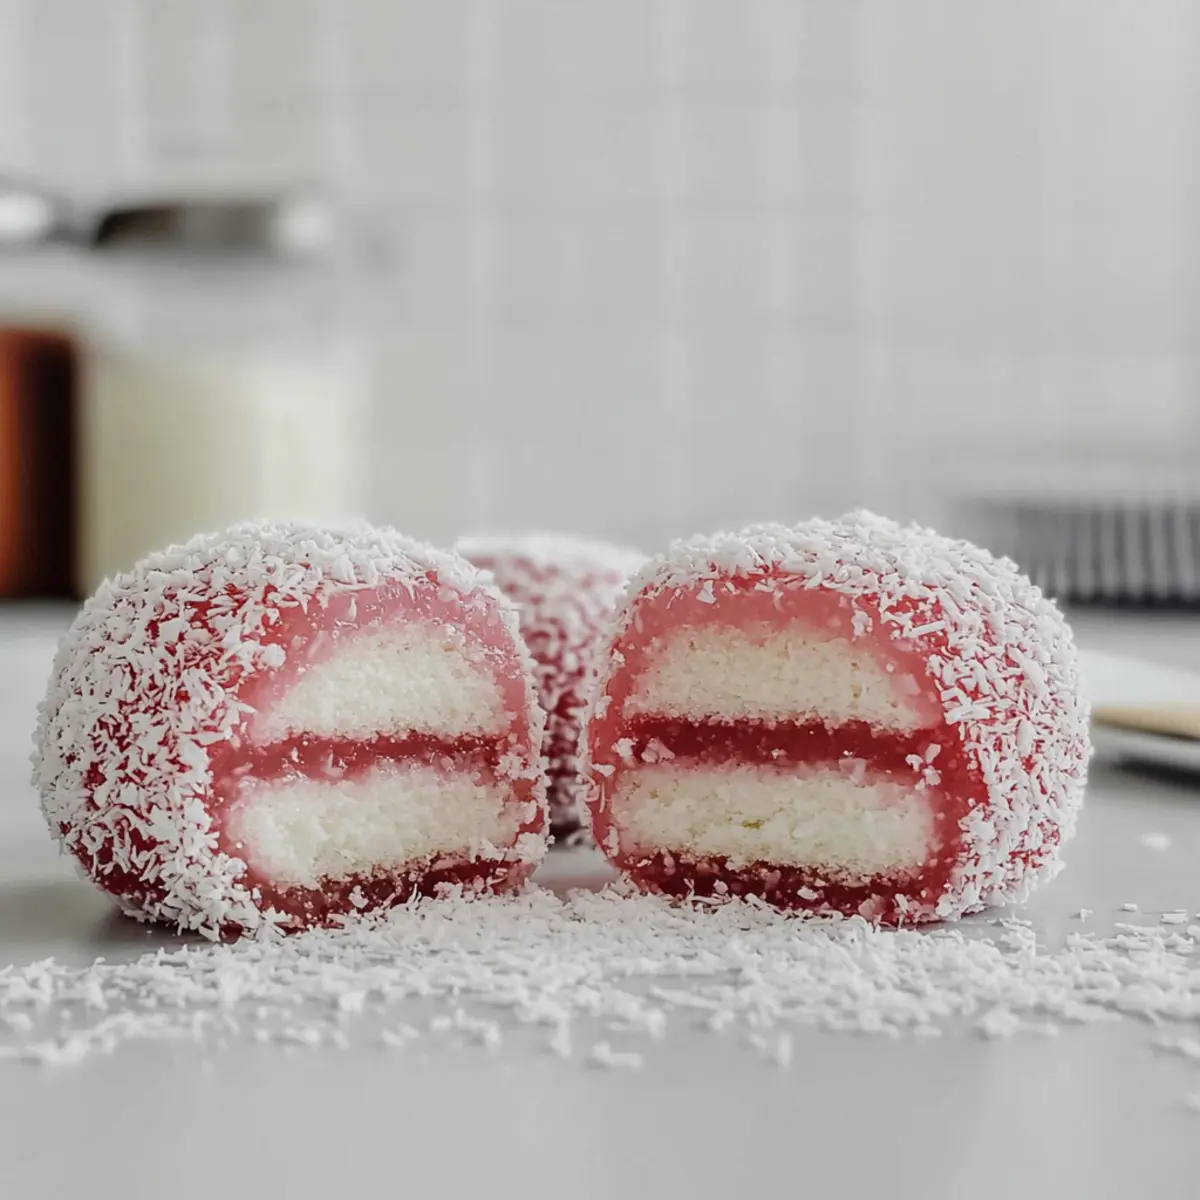
As I poured boiling water over the vibrant raspberry jelly crystals, the sweet scent wafted through my kitchen, instantly transporting me back to sunny afternoons spent at my grandmother’s house. Classic Australian Jelly Cakes have a way of evoking nostalgia, with their delicate pink sponge layers and the creamy chantilly center that brings a smile to everyone’s face. These cakes are not only a whimsical addition to your dessert table; they’re a crowd-pleaser that’s perfect for parties or afternoon tea with friends. Made with simple ingredients, they’re a breeze to whip up, allowing you to savor homemade goodness rather than relying on fast food. Are you ready to impress your loved ones with a delightful touch of Australia?
Why are Jelly Cakes a must-try?
Nostalgic, Nothing beats the charm of classic Jelly Cakes, reminiscent of joyful childhood memories. Easy to make, this recipe requires simple ingredients and is perfect for baking novices and experienced chefs alike. Festive flair: Their bright pink color and creamy filling make them a showstopper for any gathering. Versatile flavors allow you to switch the jelly, creating unique combinations like strawberry or orange. Pair these delightful treats with a pot of tea or check out our Espresso Cupcakes Espresso for a full dessert spread!
Jelly Cakes Ingredients
• To create these delightful Jelly Cakes, you’ll need simple yet essential ingredients that come together for a nostalgic treat.
For the Cakes
- Butter (½ cup, 126 g) – Adds richness and moisture to the cake; substitute with margarine for a dairy-free version.
- Caster Sugar (½ cup, 100 g) – Provides sweetness and helps create a light texture; can replace with granulated sugar but it may slightly alter the texture.
- Eggs (2, lightly beaten) – Essential for binding and structure; flax eggs (1 tablespoon flaxseed meal + 2.5 tablespoons water per egg) can be used as a vegan substitute.
- Vanilla Extract (1 teaspoon) – Enhances flavor; swap for almond extract for a different taste experience.
- Self-Raising Flour (1½ cups, 200 g) – Gives structure and lift; replace with all-purpose flour plus baking powder (1 cup flour + 1½ tsp baking powder).
- Milk (½ cup, 125 ml, room temperature) – Adds moisture; almond milk or any non-dairy milk can be used as a substitute.
For the Jelly Coating
- Raspberry Jelly Crystals (85 g, 1 packet) – Imparts flavor and color; use other fruit-flavored jelly crystals if desired.
- Boiling Water (1 cup) – Necessary for dissolving the jelly crystals.
- Cold Water (1 cup) – Used to cool down the jelly mixture.
For the Filling
- Chantilly Cream (1 cup or whipped cream) – Combines thickened cream, sugar, and vanilla; try whipped coconut cream for a dairy-free option.
- Thickened Cream (¾ cup) – Serves as the base for chantilly cream; substitute with heavy whipping cream for best results.
- Caster Sugar (2 teaspoons) & Vanilla Extract (¼ teaspoon) – For flavoring the chantilly cream.
For Coating
- Desiccated Coconut (1½ cups, 120 g) – Adds texture to the coating; unsweetened coconut is preferred for less sweetness.
These classic Jelly Cakes are sure to become a cherished recipe in your household, perfect for any occasion when you want to enjoy something sweet and delightful!
Step‑by‑Step Instructions for Jelly Cakes
Step 1: Prepare the Jelly
Start by bringing 1 cup of water to a boil. Carefully dissolve the raspberry jelly crystals in the boiling water, stirring until fully mixed. Once dissolved, add 1 cup of cold water to the mixture and stir gently. Transfer the jelly mixture into a suitable container and refrigerate for 1-2 hours, or until it thickens to a jelly-like consistency.
Step 2: Make the Cakes
Preheat your oven to 350°F (180°C) and grease your patty pan tins with butter or non-stick spray. In a large mixing bowl, cream together ½ cup of softened butter and ½ cup of caster sugar until the mixture becomes light and fluffy, about 3-5 minutes. Gradually incorporate 2 lightly beaten eggs and 1 teaspoon of vanilla extract, mixing well after each addition before moving on.
Step 3: Combine Dry Ingredients
In another bowl, whisk together 1½ cups of self-raising flour and a pinch of salt to ensure they are well combined. Alternately fold the flour mixture and ½ cup of milk into the creamed butter mixture. Begin with flour, adding it in three parts, while mixing gently with a spatula until just combined. The batter should be smooth and slightly thick.
Step 4: Bake the Cakes
Spoon the cake batter into the prepped patty pans, filling each cup about three-quarters full. Bake in the preheated oven for about 15 minutes, or until the cakes are golden and a toothpick inserted into the center comes out clean. Once done, allow the cakes to cool in the pans for 5-10 minutes, then transfer them to a wire rack to cool completely.
Step 5: Level the Cakes
Once fully cooled, take a sharp knife and carefully trim off any domed tops of the cakes to create an even surface. This step is crucial for ensuring that they sandwich together nicely when you assemble the Jelly Cakes.
Step 6: Prepare the Chantilly Cream
In a mixing bowl, combine ¾ cup of thickened cream, 2 teaspoons of caster sugar, and ¼ teaspoon of vanilla extract. Using an electric mixer, beat the mixture on high speed until stiff peaks form, which should take about 3-4 minutes. The chantilly cream should be light and airy, ready to fill the cakes.
Step 7: Assemble the Cakes
Take one cake and pipe a generous swirl of the chantilly cream onto the flat side. Place another cake on top, pressing down gently to create a sandwich. Repeat this process with all the cakes, ensuring each has a layer of cream between the sponges.
Step 8: Coat the Cakes
Dip each assembled Jelly Cake into the thickened raspberry jelly, allowing the excess to drip off. Immediately roll the jelly-coated cakes in the desiccated coconut, ensuring they are evenly covered. Set aside on a plate or tray to let the jelly set slightly.
Step 9: Chill and Serve
Place your finished Jelly Cakes in the refrigerator for at least 30 minutes to allow the jelly coating to firm up. After chilling, they are ready to be served. These delightful Jelly Cakes are perfect for sharing at tea parties or festive gatherings, bringing a touch of nostalgia to any occasion.
Make Ahead Options
These classic Australian Jelly Cakes are perfect for busy home cooks looking to streamline their meal planning! You can prepare the sponge cakes up to 24 hours in advance. Simply bake and cool them completely, then store the cakes in an airtight container at room temperature to maintain their softness. The jelly can also be made ahead; refrigerate it until set for up to 3 days before assembly. When you’re ready to serve, simply whip the cream, assemble the cakes with chantilly filling, dip them in jelly, roll in coconut, and chill briefly for that fresh touch. This way, you can enjoy a nostalgic dessert with minimal effort and maximum delight!
Jelly Cakes Variations & Substitutions
Customize your Jelly Cakes with these delightful variations that will add a twist to this classic treat!
- Flavored Jelly: Substitute raspberry jelly with strawberry or orange jelly for a fruity flavor explosion. Each jelly brings its own unique sweetness.
- Vegan Option: Swap eggs for flax eggs (1 tablespoon flaxseed meal + 2.5 tablespoons water per egg) and use almond milk to make the entire recipe plant-based. Your family will love these just as much!
- Coconut Cream: For a dairy-free filling, use whipped coconut cream instead of traditional chantilly cream. This adds a tropical flavor that enhances the overall experience.
- Herbal Kick: Infuse the whipped cream with a hint of mint or basil for an unexpected aromatic twist. Just a dash can elevate the flavor profile beautifully.
- Chocolate Surprise: Fold in cocoa powder into the chantilly cream for a rich chocolate-like experience. For an even bolder treat, try pairing it with a raspberry jelly.
- Textural Elements: Add crushed nuts or crispy rice cereal to the batter for a delightful crunch. This adds a fun twist that contrasts with the softness of the cake.
- Mini Versions: Create bite-sized jelly cakes using a mini muffin pan, perfect for parties or casual get-togethers. These little delights are sure to impress!
- Spice it Up: Sprinkle a dash of cinnamon or nutmeg into the batter for warmth and depth, giving a comforting feel to your Jelly Cakes.
Explore these delicious adaptations that let your creativity shine! And if you’re up for pairing these sweet treats with another delightful dessert, check out our Espresso Cupcakes Espresso for a truly indulgent spread.
What to Serve with Classic Australian Jelly Cakes
There’s something magical about serving delightful treats that spark nostalgia and joy for everyone at the table.
-
Tea or Earl Grey: A warm cup of tea enhances the delicate flavors of Jelly Cakes, creating a comforting pairing that invites relaxation.
-
Fresh Berries: A medley of raspberries, strawberries, and blueberries provides a fresh, tart contrast that complements the sweetness of the cakes beautifully.
-
Light Fruit Salad: A refreshing fruit salad with seasonal fruits balances the sweetness and adds a burst of color to your dessert spread. The mix of textures and flavors is a delightful choice for gatherings.
-
Sparkling Juice: Serve Jelly Cakes with a glass of sparkling fruit juice for a festive touch. The fizz adds a celebratory feel, making any occasion feel special.
-
Vanilla Ice Cream: A scoop of creamy vanilla ice cream alongside warm Jelly Cakes creates a luxurious dessert experience, perfect for satisfying any sweet tooth.
-
Homemade Lemonade: The tangy freshness of lemonade contrasts perfectly with the creamy chantilly, making each bite refreshing and light.
-
Chocolate Dipped Strawberries: Dipped strawberries add an elegant touch that pairs indulgently with the jelly and cream, offering a decadent flavor profile that is simply irresistible.
How to Store and Freeze Jelly Cakes
Fridge: Store Jelly Cakes in an airtight container for up to 2 days to maintain freshness and prevent them from drying out.
Freezer: For longer storage, freeze Jelly Cakes individually wrapped in plastic wrap for up to 3 months. Thaw in the fridge before consumption to preserve texture.
Reheating: If desired, let the cakes sit at room temperature for about 10-15 minutes after thawing before enjoying. Enjoy them chilled or at room temperature for the best flavor!
Expert Tips for Making Jelly Cakes
-
Chill Cream Properly: Ensure your heavy cream is very cold to achieve peak volume and lightness when whipping. A warm cream won’t whip up to its full potential.
-
Trim Carefully: Cut off any domed tops from the cakes to create a flat surface for easy sandwiching. This will give your Jelly Cakes a neat and professional look.
-
Don’t Rush the Jelly: Allow the jelly to set completely before shaping your cakes. If the jelly is too soft, it won’t hold the cake’s shape well.
-
Experiment with Flavors: Feel free to switch out raspberry jelly for other flavors like strawberry or orange for unique Jelly Cakes that suit your taste preferences.
-
Serve Fresh: Enjoy your Jelly Cakes right after chilling for the best texture. They can be stored in the fridge for up to two days, but they are best when fresh!
Classic Australian Jelly Cakes Recipe FAQs
How do I know if my ingredients are at the right ripeness for this recipe?
Absolutely! For the best flavor and texture in your Jelly Cakes, ensure your butter is at room temperature for easy creaming. Eggs should also be at room temperature; soak them in warm water for about 10 minutes if needed. When it comes to your milk, using it at room temperature helps to create a smoother batter, so leave it out before you start baking!
What is the best storage method for Jelly Cakes, and how long can they last?
Jelly Cakes are best stored in an airtight container in the refrigerator for up to 2 days. This keeps them fresh and moist. I recommend placing a piece of parchment paper between the cakes to prevent them from sticking together. If you find you have leftover cakes, you can also keep them in the fridge for a day; they won’t be quite as perfect but will still be delicious!
Can Jelly Cakes be frozen, and how should I do that?
Yes, you can freeze Jelly Cakes! Wrap each individual cake tightly in plastic wrap or aluminum foil, then place them in a freezer-safe container or bag. They can be stored in the freezer for up to 3 months. When you’re ready to enjoy them, simply remove the desired amount from the freezer and let them thaw in the refrigerator for a few hours or overnight. Allow them to sit at room temperature for about 10-15 minutes before serving for the best flavor and texture.
What should I do if my jelly didn’t set properly?
Very! If your jelly is too runny, it may not have dissolved correctly or cooled for long enough. To troubleshoot, you can gently heat it again on the stove, adding a bit more jelly crystals (about 1 teaspoon at a time) until it thickens. Allow it to cool before using. Ensuring your mixture is stirred thoroughly when initially prepared is key, and refrigerating it for at least 1-2 hours will help achieve a proper set.
Are there any dietary considerations for Jelly Cakes, such as allergies or pet safety?
Absolutely! If you’re catering to dietary restrictions, you can make these Jelly Cakes vegan by using flax eggs and dairy-free alternatives like almond milk and whipped coconut cream. Always check the jelly crystals for gelatin as it may not be suitable for vegetarians. Keep in mind, while the cake itself is safe for pets, the sugar and jelly are not ideal for them; therefore, it’s best to keep these sweet treats away from your furry friends.
Can I adjust the flavor of my Jelly Cakes?
Very! One of the great things about this recipe is its versatility. Feel free to switch the raspberry jelly for strawberry, orange, or even tropical flavors like passion fruit for a unique twist. Additionally, you can infuse your chantilly cream with flavors like lemon zest or cocoa powder to customize it even further. The magic is in making it your own!
Delicious Jelly Cakes: A Sweet Taste of Nostalgia
Ingredients
Equipment
Method
- Boil 1 cup of water. Dissolve raspberry jelly crystals in boiling water. Add 1 cup of cold water and refrigerate for 1-2 hours.
- Preheat oven to 350°F (180°C). Grease patty pan tins. Cream together ½ cup softened butter and ½ cup caster sugar until fluffy. Incorporate eggs and vanilla extract.
- In another bowl, whisk 1½ cups of self-raising flour and a pinch of salt. Alternately fold the flour mixture and ½ cup of milk into the creamed mixture until combined.
- Spoon batter into patty pans, filling three-quarters full. Bake for about 15 minutes until golden and a toothpick comes out clean. Cool cakes for 5-10 minutes and then on a wire rack.
- Trim any domed tops of the cakes with a sharp knife to create an even surface.
- Combine ¾ cup thickened cream, 2 teaspoons caster sugar, and ¼ teaspoon vanilla extract, then beat until stiff peaks form.
- Pipe a swirl of chantilly cream onto the flat side of one cake, then sandwich with another cake.
- Dip each sandwich into the jelly, allowing excess to drip off. Roll in desiccated coconut and set aside to let jelly set.
- Refrigerate for at least 30 minutes before serving.
Leave a Reply