
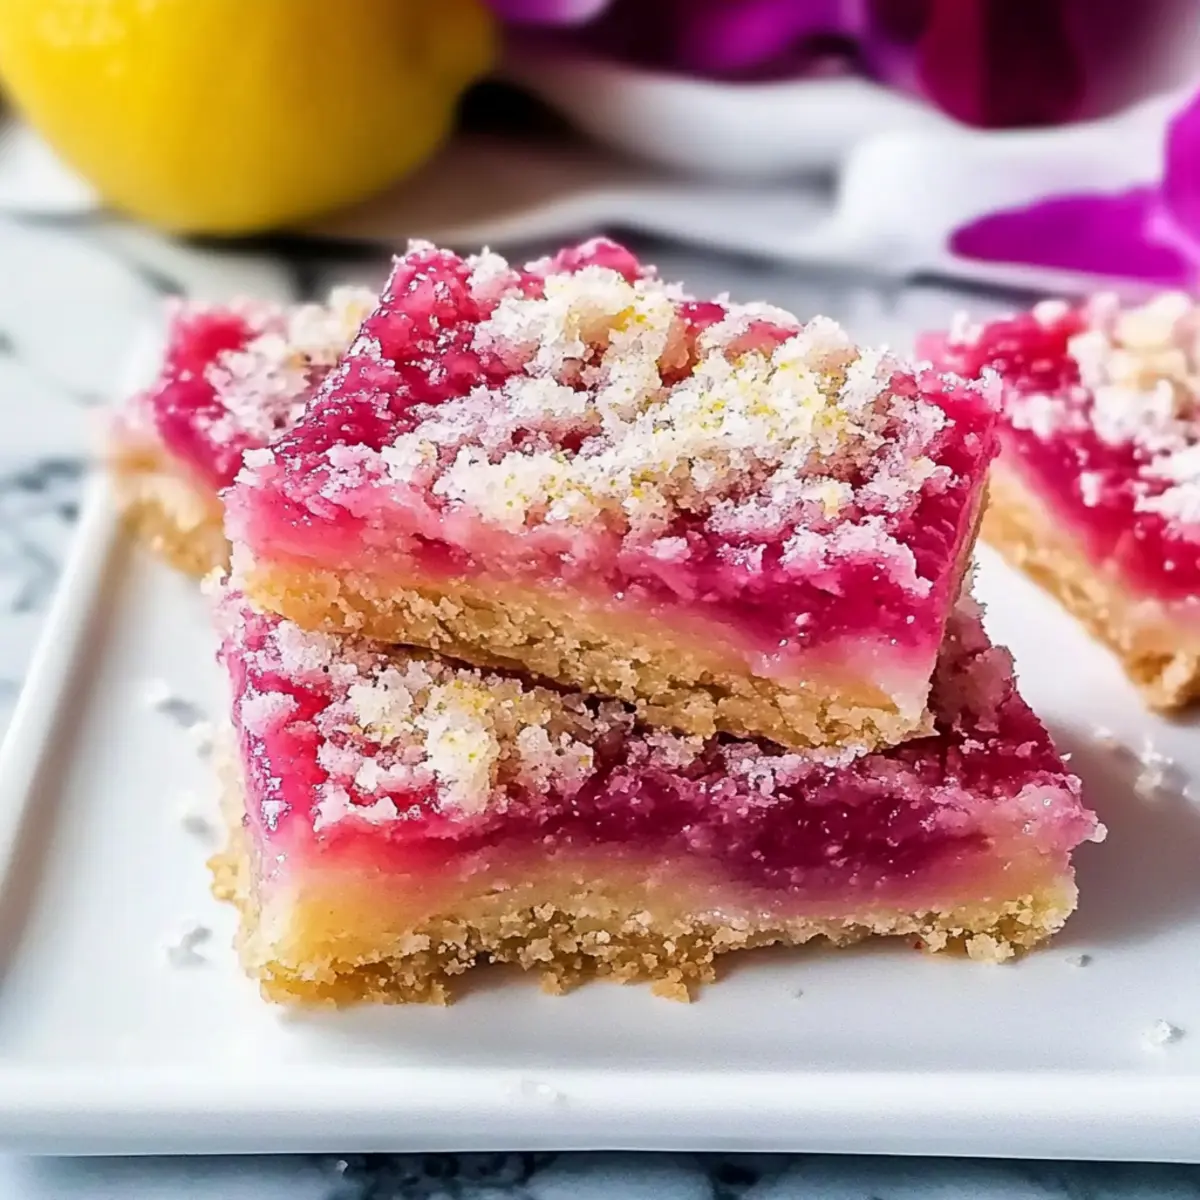
Lemon bars are a classic dessert, but have you ever considered a vibrant twist? Enter Hibiscus Lemon Bars, where zesty lemon meets floral hibiscus for an irresistibly refreshing treat. This recipe offers the allure of a gourmet dessert with surprisingly easy prep, transforming your kitchen into a haven of delightful aromas without hours of fuss. Perfect for gatherings or a simple afternoon indulgence, these bars can be paired effortlessly with your favorite tea or a scoop of vanilla ice cream. And the best part? They’re vegetarian and can easily be adapted to fit various dietary needs! Are you ready to dive into a world of flavor that will tantalize your taste buds?
Why Try Hibiscus Lemon Bars?
Unique Flavor Fusion: Hibiscus and lemon come together for a dessert that’s not only delightful but also visually stunning.
Quick and Easy: With simple ingredients and straightforward steps, you’ll have these bars ready in no time!
Versatile Treat: Whether served chilled on a hot day or warm with ice cream, they adapt perfectly to any occasion.
Diet-Friendly: These bars are vegetarian and can be easily modified for gluten-free diets – just swap the flour for a gluten-free blend!
Always a Hit: Their vibrant flavor and eye-catching color ensure they’ll be a showstopper at any gathering, much like my delightful Brownie Cheesecake Bars.
Indulge in the sweet and tart experience of Hibiscus Lemon Bars, and elevate your dessert game effortlessly!
Hibiscus Lemon Bars Ingredients
For the Crust
• Butter – Adds richness and serves as the base for the crust. You can replace it with vegan butter for a dairy-free option.
• Granulated Sugar – Sweetens the crust and balances flavors; feel free to substitute with coconut sugar for a hint of caramel.
• All-Purpose Flour – Provides structure; for a gluten-free version, use almond flour or a gluten-free flour blend.
For the Filling
• Hibiscus Flowers (dried) – Imparts floral notes and a unique tartness; ensure they are culinary grade for safety.
• Lemons – Essential for freshness and tang; using fresh lemons yields the best flavor.
• Eggs – Binds the filling and contributes to creaminess; a flax egg can be used as a vegan alternative (1 tablespoon ground flaxseed + 2.5 tablespoons water).
• Powdered Sugar (for dusting) – Adds a sweet finishing touch and visual appeal when serving.
These ingredients blend beautifully to create the irresistible Hibiscus Lemon Bars that everyone will love!
Step‑by‑Step Instructions for Hibiscus Lemon Bars
Step 1: Prepare the Crust
Begin by preheating your oven to 350°F (175°C). In a medium bowl, combine melted butter and granulated sugar, mixing until well blended. Gradually add all-purpose flour, stirring until the mixture forms a crumbly dough. Press this mixture evenly into the bottom of a greased 9×9-inch baking pan to create a solid crust that will support the delicious filling.
Step 2: Pre-bake
Once your crust is formed, place it in the preheated oven and bake for 15 minutes, or until it turns lightly golden. This step is crucial as it helps the crust set and provides a sturdy base for the creamy filling. Keep an eye on it to ensure it doesn’t overbake, developing a delightful aroma that fills your kitchen.
Step 3: Make the Filling
While the crust bakes, prepare the filling for your Hibiscus Lemon Bars. In a large mixing bowl, whisk together the eggs, granulated sugar, fresh lemon juice, lemon zest, and finely chopped dried hibiscus flowers until fully combined. The mixture should be smooth and creamy, ready to pour over the pre-baked crust without any lumps.
Step 4: Bake Again
With the filling prepared, carefully pour it over the crust in the baking pan, ensuring an even distribution. Return the pan to the oven and bake for an additional 30 minutes, or until the filling is set and no longer jiggles when gently shaken. The top should have a slight sheen, indicating that it’s perfectly cooked.
Step 5: Cool
After baking, remove the pan from the oven and allow the Hibiscus Lemon Bars to cool in the pan on a wire rack. This step is essential for achieving the right texture, so be patient! Once cooled to room temperature, transfer them to the refrigerator for at least two hours to firm up before cutting into bars.
Step 6: Serve
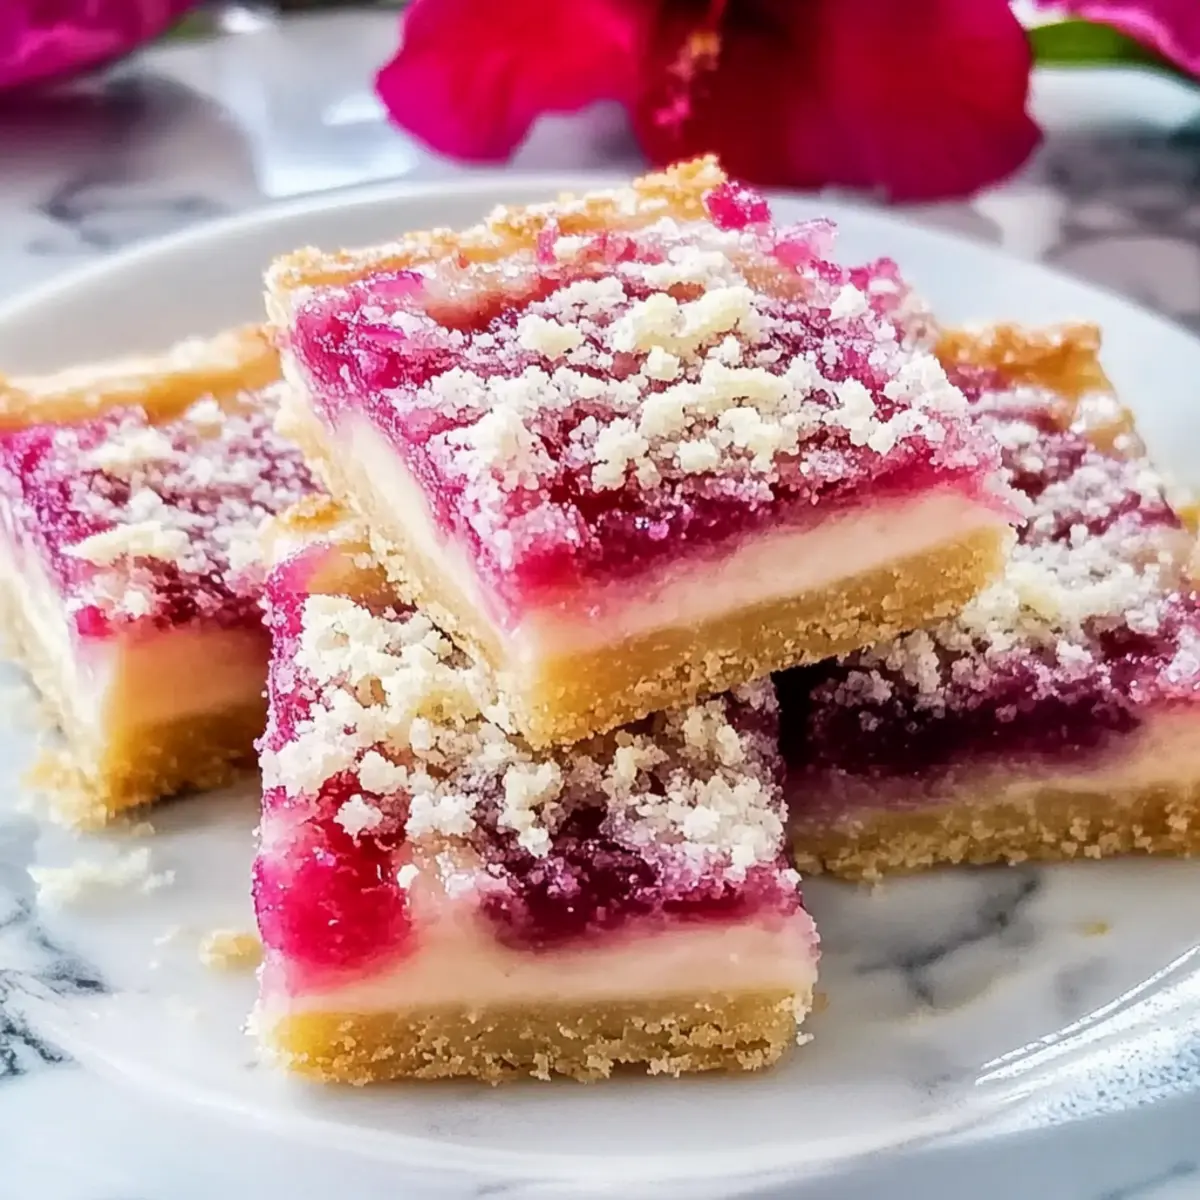
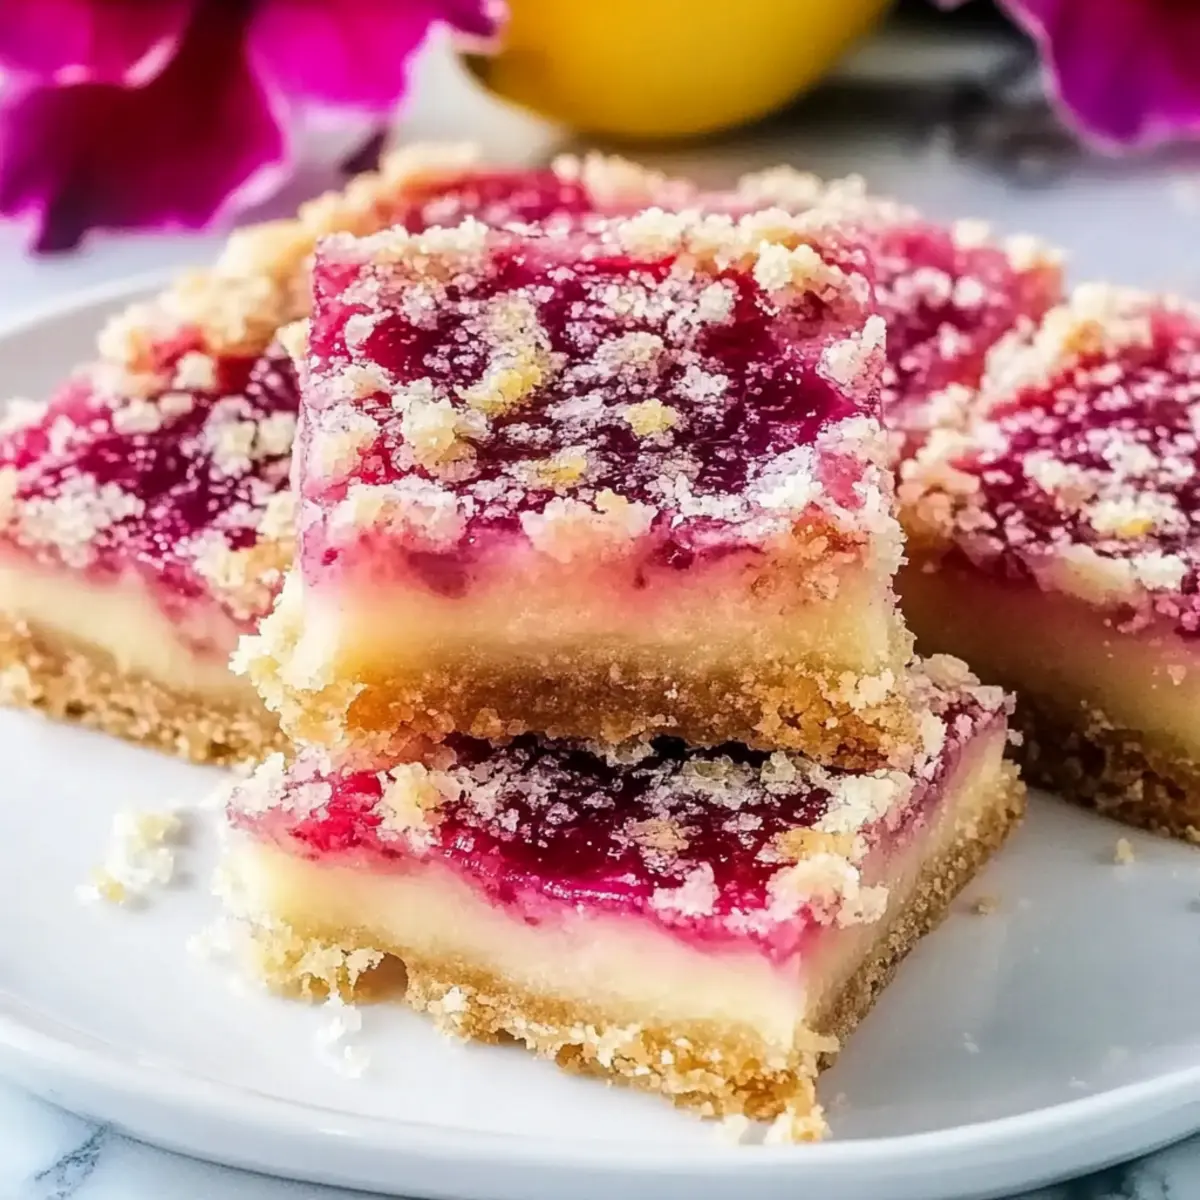
When you’re ready to serve, take the chilled Hibiscus Lemon Bars out of the refrigerator. Dust the top with powdered sugar for a beautiful presentation, and slice them into squares. These bars are a stunning treat that combines vibrant colors and flavors, perfect for any gathering or a sweet afternoon indulgence.
Expert Tips for Hibiscus Lemon Bars
- Fresh Ingredients: Use fresh lemons for the best flavor; they enhance the tartness and aroma of the filling.
- Perfect Crust: Avoid over-mixing the crust to keep it crumbly. A well-pressed, not overworked, base creates the best structure for your Hibiscus Lemon Bars.
- Cool Completely: Let the bars cool in the pan, then refrigerate for at least 2 hours. This step firms them up for easy slicing and enhances flavor.
- Chop Hibiscus Finely: If using dried hibiscus flowers, chop them finely or soak in a little water to help them blend into the filling better.
- Adjust Sweetness: Taste your mixture before baking to see if it needs more sugar; this gives you control over the tartness of the filling.
Make Ahead Options
These Hibiscus Lemon Bars are perfect for meal prep and will save you valuable time during busy weeks! You can prepare the crust up to 24 hours in advance; simply mix the melted butter, sugar, and flour, press it into the pan, and refrigerate it until you’re ready to bake. The filling can also be mixed up to 3 days ahead; store it in an airtight container in the refrigerator to maintain freshness. When you’re ready to serve your Hibiscus Lemon Bars, bake the prepped crust, pour in the chilled filling, and bake as instructed. This way, you’ll enjoy a delightful dessert with minimal effort!
Hibiscus Lemon Bars: Fun Variations
Feel free to unleash your creativity with these Hibiscus Lemon Bars, tailoring each bite to your taste buds!
- Citrus Twist: Swap lemon for lime or orange juice to give the bars a refreshing new flavor that’s just as vibrant.
- Herbal Infusion: Add a hint of fresh mint or basil into the filling for a surprising herbal note that complements the floral notes beautifully.
- Berry Burst: Pour a layer of berry preserve, like raspberry or blueberry, on the crust before adding the hibiscus filling for an extra fruity explosion.
- Gluten-Free Joy: Just use almond flour or a gluten-free flour mix instead of all-purpose flour to make these bars suitable for gluten-sensitive folks.
- Sugar Alternatives: Try using honey or maple syrup in place of granulated sugar, adjusting the quantity for a naturally sweetened version.
- Extra Creamy: For an even creamier filling, add a splash of coconut cream or a tablespoon of sour cream to the mix before baking.
- Spice it Up: Add a pinch of cayenne pepper or freshly grated ginger for a subtle kick that’s sure to surprise your taste buds.
- Garnish Elegance: Top with candied hibiscus flowers or edible flowers for a stunning finish that makes these bars perfect for special occasions, making them as beautiful as they are delicious.
Dive into these variations like you would with my inviting Gluten Free Cookies, enhancing your Hibiscus Lemon Bars experience!
What to Serve with Hibiscus Lemon Bars?
Elevate your dessert experience by crafting a balanced meal that harmonizes beautifully with these tart and floral treats.
- Creamy Vanilla Ice Cream: The smooth, rich flavor of vanilla ice cream balances the tartness perfectly, creating a delightful contrast.
- Herbal Tea: A fragrant cup of herbal tea, such as chamomile or mint, enhances the floral notes while providing a soothing beverage option.
- Fresh Berries: Mixed berries add a pop of freshness and natural sweetness, complementing the zing of the hibiscus and lemon.
These vibrant flavors not only uplift the lemon bars but also make the meal more inviting and cheerful.
- Coconut Whipped Cream: This light and airy topping adds tropical flair and creaminess that pairs beautifully with the citrus notes.
- Meringue Cookies: These airy, sweet snacks add a crunchy texture, making each bite a delightful exploration of flavor. Enjoy them alongside the bars for a contrasting experience.
- Mint Sprigs for Garnish: A simple garnish of fresh mint not only adds a visual pop but also a refreshing aroma that enhances the overall experience.
Complete your Hibiscus Lemon Bars with these delightful accompaniments to create a memorable dessert spread!
How to Store and Freeze Hibiscus Lemon Bars
Fridge: Store Hibiscus Lemon Bars in an airtight container in the fridge for up to a week. This helps maintain their fresh flavors and texture.
Freezer: For longer storage, wrap individual bars tightly in plastic wrap and then place them in a freezer-friendly container. They can be frozen for up to 3 months.
Thawing: To enjoy frozen Hibiscus Lemon Bars, transfer them to the fridge and let them thaw overnight before serving. This keeps them deliciously creamy and vibrant.
Reheating: If you love them warm, briefly microwave each bar for 15-20 seconds to regain their delightful softness.

Hibiscus Lemon Bars Recipe FAQs
What type of hibiscus flowers should I use?
Absolutely! Always opt for culinary-grade dried hibiscus flowers to ensure safety and flavor. They should be vibrant and aromatic. Avoid decorative hibiscus meant for crafts, as they may not be safe for consumption.
How should I store Hibiscus Lemon Bars?
To keep your Hibiscus Lemon Bars fresh, store them in an airtight container in the refrigerator for up to a week. This method helps preserve their flavors and texture, making them perfect for a quick treat anytime!
Can I freeze Hibiscus Lemon Bars?
Yes, you can! Wrap each bar tightly in plastic wrap and store them in a freezer-safe container. They will stay fresh for up to 3 months. For a quick thaw, simply transfer the bars to the fridge overnight before enjoying.
My bars are too soft after baking; what went wrong?
If your Hibiscus Lemon Bars didn’t set properly, it could be due to a few reasons. Ensure you bake them long enough; the filling should be set and not jiggle when shaken. If they appear undercooked, give them an extra few minutes in the oven, checking them regularly. Additionally, make sure you’ve whisked the egg mixture well to prevent separation during baking.
What can I substitute for eggs in this recipe?
For a vegan alternative, you can use a flax egg. Simply mix 1 tablespoon of ground flaxseed with 2.5 tablespoons of water and let it sit for about 5 minutes until it becomes gelatinous. This mixture will help bind your filling just like eggs would!
Can I make these bars gluten-free?
Very! To make Hibiscus Lemon Bars gluten-free, simply substitute the all-purpose flour with a gluten-free flour blend or almond flour. This keeps the delicious flavor while accommodating gluten-sensitive guests. Enjoy baking!
Hibiscus Lemon Bars: A Refreshing Twist on a Classic Treat
Ingredients
Equipment
Method
- Preheat your oven to 350°F (175°C). In a medium bowl, combine melted butter and granulated sugar, mixing until well blended. Gradually add all-purpose flour, stirring until the mixture forms a crumbly dough. Press this mixture evenly into the bottom of a greased 9x9-inch baking pan to create a solid crust.
- Once your crust is formed, place it in the preheated oven and bake for 15 minutes, or until it turns lightly golden.
- In a large mixing bowl, whisk together the eggs, granulated sugar, fresh lemon juice, lemon zest, and finely chopped dried hibiscus flowers until fully combined.
- Carefully pour the filling over the crust in the baking pan, ensuring an even distribution. Return the pan to the oven and bake for an additional 30 minutes, or until the filling is set and no longer jiggles.
- Remove the pan from the oven and allow the Hibiscus Lemon Bars to cool in the pan on a wire rack. Once cooled to room temperature, transfer them to the refrigerator for at least two hours to firm up before cutting into bars.
- Take the chilled Hibiscus Lemon Bars out of the refrigerator. Dust the top with powdered sugar and slice them into squares.
Leave a Reply